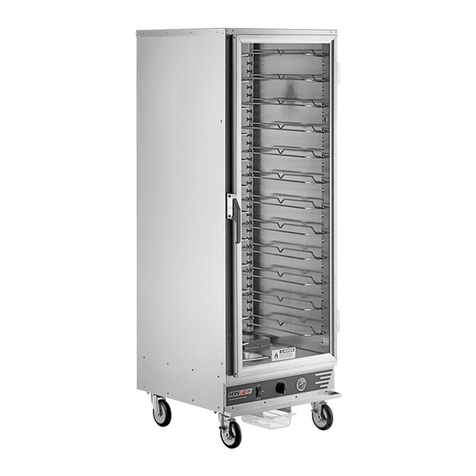
SERVIT 423CC1UFNCF User manual

NON-INSULATED HEATING HOLDING
AND PROOFING CABINETS
SERVIT HEATED CABINETS ARE FOR HOT FOOD HOLDING APPLICATIONS ONLY.
THIS MANUAL COVERS CABINETS WITH ELECTRICAL RATINGS OF: 120V 60HZ 2000W
04/2021
www.servitproducts.com
Models: 423CC1UFNCF, 423CC2UFNCF, 423CH1UFNCF, 423CH2UFNCF

NON-INSULATED HEATED HOLDING & PROOFING CABINETS - INSTRUCTIONS FOR USE
Safety Information & Symbols .................................................3
Identifying your Cabinet.............................................................3
Installation and Setup .................................................................4
Holding & Proofing Cabinets Operating Instructions.............5
Care and Maintenance ...............................................................5
Basic Troubleshooting ................................................................6
Holding Cabinets Operating Instructions ..............................7
Care and Maintenance ..............................................................7
Basic Troubleshooting ...............................................................8
Reversing the Door ....................................................................9
Holding & Proofing Cabinets
Service and Replacement Parts ....................................10
Service and Replacement Parts (Circuits) ...................11
Wiring Diagram Parts ........................................................12
Holding Cabinets
Service and Replacement Parts ....................................13
Service and Replacement Parts (Circuits) ...................14
Wiring Diagram Parts ........................................................15
SERVIT NON-INSULATED HEATED
HOLDING & PROOFING CABINETS
TABLE OF CON TENTS
Servit Cabinets are designed to keep foods at optimum serving temperatures without affecting quality. They are built for
tough kitchen duty with rugged metal construction, heavy-duty hardware, fully adjustable universal slides and
easy-to-use controls. Combination module cabinets have additional functionality to proof breads, pastries and more,
giving you dual flexibility all in a single unit.
Holding and Proofing Cabinets are intended to hold food pans or trays of hot, already cooked food at proper serving
temperature or to proof products. This unit is not designed or intended to cook raw food or reheat prepared food.
Use of this unit other than intended use will void warranty.
This manual provides the installation, safety and operating instructions for Holding and Proofing Cabinets. ServIt
recommends all installation, operating, and safety instructions appearing in this manual be read prior to installation or
operation of the unit.
DESCRIPTION
This manual covers cabinets with electrical ratings of: 120V 60HZ 2000W
2
www.servitproducts.com
L01-672
REV 04/21

NON-INSULATED HEATED HOLDING & PROOFING CABINETS - INSTRUCTIONS FOR USE
3
www.servitproducts.com
L01-672
REV 04/21
SAFETY INFORMATION
WARNING: Follow all food safety guidelines. Pre-heat the cabinet to the desired temperature before placing
cooked, hot food into the cabinet. This is not a re-thermalizing cabinet. Food must be at the appropriate
temperature before being placed into this cabinet. Use a food probe to check internal food
temperature — the cabinet temperature is not necessarily the internal food temperature.
WARNING: Only factory-approved service agents should attempt to service, repair or replace electrical components,
wiring or power cord.
WARNING: Unplug the cabinet before cleaning or servicing. Do not wash the cabinet with a water jet or high pressure
water.
WARNING: This cabinet is for hot food holding applications only.
CAUTION: Stainless steel water pan must be installed over moisture element inside cabinet during operation.
Plastic drip pan can not be used inside cabinet and shall be installed outside the cabinet below the drip
trough.
CAUTION: Do not spray or pour water into the module. To clean the cabinet, wipe with a damp cloth and dry with a
towel. Use only cleaning agents approved for Aluminum.
CAUTION: Water dripping onto the floor from open doors can be a slip hazard.
For future reference, note the serial and model number found on the data plate of the cabinet here:
Serial number ________________________________
IDENTIFYING YOUR CABINET
* Save this document for future application, load rating and/or safety reference.

NON-INSULATED HEATED HOLDING & PROOFING CABINETS - INSTRUCTIONS FOR USE
4
www.servitproducts.com
L01-672
REV 04/21
Figure 2: Wall receptacles
NEMA 5-20P
20 Amp Outlet For 120V Cabinet
INSTALLATION AND SETUP
1. Check the packaging and cabinet for shipping damage after unloading the unit, and after removing all the packaging.
2. The receiver of this product is responsible for filing freight damage claims. This equipment must be opened
immediately for inspection. All visible damage must be reported to the freight company within 48 hours and must be
noted on freight bill at the time of delivery.
3. Concealed damage is your responsibility — you must advise the carrier of any loss or damage within 15 days after
receipt of the cabinet. If there is damage, retain the original packaging for inspectors.
4. Any protective covers (plastic or paper sheet) must also be removed before turning the cabinet on.
5. In case of Heated Holding & Proofing Cabinets, Make sure the stainless steel water pan is installed inside the cabinet in
the floor opening on top of the proofing element.
6. In case of Heated Holding & Proofing Cabinets, Install the plastic drip pan under the drip trough at the base of the
cabinet.
7. Install the universal slides into the notches that are built into the walls as shown. The notches are spaced at 1.5”
intervals, each cabinet is supplied with 12 sets of slides, if additional slides are desired please order part number
423PCUSLDPR (which is 1 additional set of slides).
8. Refer to the data plate located near the power cord for the electrical specifications of the cabinet as shown on Page 3.
• With the POWER switch OFF, plug the cord into the appropriate rated, grounded receptacle.
• Cabinets rated at 120 V must be plugged into a 20 amp 125 VAC receptacle.
Metal Pan
Plastic Pan
WARNING: Do not allow combustible materials to be stored or accumulate on, under or next to the cabinet. Do not
block any ventilation louvers or slots.

NON-INSULATED HEATED HOLDING & PROOFING CABINETS - INSTRUCTIONS FOR USE
5
www.servitproducts.com
L01-672
REV 04/21
OPERATING INSTRUCTIONS (HEATED HOLDING & PROOFING CABINETS)
C05-1286 C
Miljoco Industries
F
140
120
50
60 70 80
90
100
105
160
150 170
180
190
200
210
220
100
80
60
30
10
HOLDING & PROOFING CABINET
HOLD
PROOF
OFF
Power / Selector Switch Thermostat Thermometer
1. Fill the stainless pan with water if proofing, or if you desire a small amount of passive humidity while in heated holding
mode.
2. Your cabinet has a 3 way power / selector switch that powers the cabinet on and off and also allows dual
functionality. For heated holding mode set the switch to “hold” (up); for proofing mode set it to “proof” (down); to
power the unit down set to “off” (middle).
3. Heated holding mode (selector switch set to “hold”)
• Set thermostat at desired setting, number 7 is approximately 150°F (66°C), 10 is approximately 190°F (88°C).
• Monitor temperature read-out on thermometer and adjust thermostat to fine tune as necessary.
4. Proofing mode (selector switch set to “proof”)
• Set thermostat at desired setting, approximate temperature yields are below, each yields a pre-determined
humidity level.
-Number 1 is approximately 85°F (30°C)
-Number 2 is approximately 95°F (35°C)
-Number 3 is approximately 105°F (41°C)
• Monitor temperature read-out on thermometer and adjust thermostat to fine tune as necessary.
Note: When the switch is set to hold or proof, the fan is always energized. In order to power off the fan and the unit, set
the switch to “off” (middle).
CARE AND MAINTENANCE
Before proceeding with any maintenance activity strictly follow “Safety Information” on
page 3 of this manual.
Cleaning The Cabinet
WARNING: Unplug the cabinet before cleaning or servicing. Do not wash the cabinet with a water jet or high pressure
water.
CAUTION: Do not spray or pour water into the control enclosure. To clean the cabinet, wipe with a damp cloth and dry
with a towel. Use only cleaning agents approved for Aluminum.
CAUTION: Do not use cleaners with chlorides or phosphates as they may cause damage to Stainless Steel & Aluminum.
1. Make certain that the cabinet has cooled down before cleaning. Use cleaners in proper concentrations. Follow the
manufacturer’s directions for the cleaning product used. After using any cleaning products, thoroughly rinse all
surfaces to remove residue.
2. Use a damp cloth or sponge. Mild soap suitable for Aluminum is acceptable. Dry with a clean towel. Wipe up spills as
soon as possible and regularly clean the cabinet to avoid staining and difficult to clean conditions.

NON-INSULATED HEATED HOLDING & PROOFING CABINETS - INSTRUCTIONS FOR USE
6
www.servitproducts.com
L01-672
REV 04/21
Cabinet Maintenance — All Models
Regularly inspect the casters. Tighten loose fasteners and replace worn or damaged
parts with new SERVIT approved parts. Replace worn or damaged casters immediately.
Additionally, periodic tightening of door latch and hinge screws may be required.
BASIC TROUBLESHOOTING
WARNING: Only factory approved service agents must attempt to service, repair or replace electrical components,
wiring or power cord.
1. Controls do not work (no heat being generated or fan does not run):
• Check that the cabinet is plugged-in.
• Check that the outlet has power.
• Check that the power switch is in the “On” position.
• Check the cabinet wiring from the power cord to the power switch and to the thermostat.
• For holding, make sure in HOLD mode. For proofing, make sure in PROOF mode.
2. Temperature too hot:
a. During initial pre-heat, cabinet may overshoot set point.
b. If displayed temperature exceeds 220°F (104°C):
• Blower wiring is faulty or disconnected. Blower needs replacing.
• The thermostat may have failed and the thermal cut-out device is controlling the temperature.
• Thermal cut-out device may have failed.
3. Temperature too low:
a. The cabinet may still be in pre-heat or recovering from the door being opened.
b. Door is not closed or sealing properly.
c. Worn out door gasket. Replace gasket.
d. Blower is not circulating air:
• Blower wiring is faulty or disconnected.
4. No heat generated
When power is on and in HOLD mode, amp draw for 120V units should be approximately 16 amps and In PROOF
mode, 120V amp draw should be approximately 6.0 amps.
• Air heater element may be faulty.
• The wiring to the air heater element may be faulty or disconnected.
• Thermostat may be faulty.
• The thermal cut out may be open or have a disconnected wire coming to it or going from it to the element.

NON-INSULATED HEATED HOLDING & PROOFING CABINETS - INSTRUCTIONS FOR USE
7
www.servitproducts.com
L01-672
REV 04/21
OPERATING INSTRUCTIONS (HEATED HOLDING CABINETS)
ON
OFF
C05-1287 C
Miljoco Industries
F
140
120
50
60 70 80
90
100
105
160
150 170
180
190
200
210
220
100
80
60
30
10
HEATED HOLDING CABINET
Power Switch Thermostat Thermometer
1. Your cabinet has a power switch that powers the cabinet on and off. For heated holding mode set the switch to “ON”
(up)
2. Heated holding mode (selector switch set to “ON”)
• Set thermostat at desired setting, number 7 is approximately 150°F (66°C), 10 is approximately 190°F (88°C).
• Monitor temperature read-out on thermometer and adjust thermostat to fine tune as necessary.
Note: When the switch is set to ON the fan is always energized. In order to power off the fan and the unit, set the switch
to “off” (down).
CARE AND MAINTENANCE
Before proceeding with any maintenance activity strictly follow “Safety Information” on
page 3 of this manual.
Cleaning The Cabinet
WARNING: Unplug the cabinet before cleaning or servicing. Do not wash the cabinet with a water jet or high pressure
water.
CAUTION: Do not spray or pour water into the control enclosure. To clean the cabinet, wipe with a damp cloth and dry
with a towel. Use only cleaning agents approved for Aluminum.
CAUTION: Do not use cleaners with chlorides or phosphates as they may cause damage to Stainless Steel & Aluminum.
1. Make certain that the cabinet has cooled down before cleaning. Use cleaners in proper concentrations. Follow the
manufacturer’s directions for the cleaning product used. After using any cleaning products, thoroughly rinse all
surfaces to remove residue.
2. Use a damp cloth or sponge. Mild soap suitable for Aluminum is acceptable. Dry with a clean towel. Wipe up spills as
soon as possible and regularly clean the cabinet to avoid staining and difficult to clean conditions.
Cabinet Maintenance — All Models
Keeping the casters free of dirt build-up will go a long way in prolonging their life. Additionally, periodic tightening of door
latch and hinge screws may be required.
Regularly inspect the casters. Tighten loose fasteners and replace worn or damaged
parts with new SERVIT approved parts. Replace worn or damaged casters immediately.
Additionally, periodic tightening of door latch and hinge screws may be required.

NON-INSULATED HEATED HOLDING & PROOFING CABINETS - INSTRUCTIONS FOR USE
8
www.servitproducts.com
L01-672
REV 04/21
BASIC TROUBLESHOOTING
WARNING: Only factory approved service agents must attempt to service, repair or replace electrical components,
wiring or power cord.
1. Controls do not work (no heat being generated or fan does not run):
1. Check that the cabinet is plugged-in.
2. Check that the outlet has power.
3. Check that the power switch is in the “On” position.
4. Check the cabinet wiring from the power cord to the power switch and to the thermostat.
5. For holding, make sure in ON mode.
2. Temperature too hot:
a. During initial pre-heat, cabinet may overshoot set point.
b. If displayed temperature exceeds 220°F (104°C):
3. Blower wiring is faulty or disconnected. Blower needs replacing.
4. The thermostat may have failed and the thermal cut-out device is controlling the temperature.
5. Thermal cut-out device may have failed.
3. Temperature too low:
a. The cabinet may still be in pre-heat or recovering from the door being opened.
b. Door is not closed or sealing properly.
c. Worn out door gasket. Replace gasket.
d. Blower is not circulating air:
5. Blower wiring is faulty or disconnected.
4. No heat generated
When power is on i.e. in HOLD mode, amp draw for 120V units should be approximately 16 amps.
• Air heater element may be faulty.
• The wiring to the air heater element may be faulty or disconnected.
• Thermostat may be faulty.
• The thermal cut out may be open or have a disconnected wire coming to it or going from it to the element.

NON-INSULATED HEATED HOLDING & PROOFING CABINETS - INSTRUCTIONS FOR USE
9
www.servitproducts.com
L01-672
REV 04/21
REVERSING THE DOOR
The door on your cabinet can be reversed to accommodate a right- or left-hand opening. The cabinet has been shipped
with the hinges mounted on the right-hand side. To reverse, follow the instructions listed below:
1. With the door in the closed position, remove the hinge pin by driving it out using a hammer and a drive pin or small
diameter screwdriver.
2. Once the pins are removed grasp the door firmly and pull the latch lever, this will release the door. Set the door aside
being careful not to damage the gasket.
3. Remove the screws from the left side of the cabinet and set aside. Then remove the cabinet mounted part of the hinge
and remount to the left side of the cabinet. Put the screws removed from the left side of the cabinet into the remaining
holes on the right side of the cabinet. Tighten all screws before proceeding.
4. Relocate the latch plate(s) from the left side to the right by removing the two mounting screws. Tighten all screws
before proceeding.
5. Rotate the door 180 degrees and align the door mounted hinge part with the cabinet mounted hinge part and tap the
hinge pin into place so the top of the pin is flush with top of the cabinet mounted hinge part. Invert the door latch by
removing the black plastic screw covers and remove the screws holding the latch in place.
Cabinet
Mounted
Hinge
Door
Mounted
Hinge
Door Handle
Cabinet
Mounted
Hinge
Door
Mounted
Hinge
Clear / Solid Door
Door Handle
Rotate the
door 180° about
horizontal axis
and note the
position
of fasteners.

NON-INSULATED HEATED HOLDING & PROOFING CABINETS - INSTRUCTIONS FOR USE
10
www.servitproducts.com
L01-672
REV 04/21
HEATED HOLDING & PROOFING CABINETS REPLACEMENT
PARTS DIAGRAM
21
12
5
7
2
9
6
8
10
14 13
4
3
1
16
11
22
23
20
19
25
26
24
27
18
28
17
15
Heat Module (under side)
Heat Module (top side)

NON-INSULATED HEATED HOLDING & PROOFING CABINETS - INSTRUCTIONS FOR USE
11
www.servitproducts.com
L01-672
REV 04/21
SERVICE AND REPLACEMENT PARTS OF HEATED HOLDING &
PROOFING CABINET
WARNING: Only factory approved service agents must attempt to service, repair or replace electrical components,
wiring or power cord.
Module CABINET BODY
Item# Replacement Part No. Description Item# Replacement Part No. Description
1 423PC131338 Power - Selector switch 16 423PC120PC Power cord (120V)
2423PC13721 Thermostat 17 423PCGRMT Rubber grommet
3423PC06913 Thermostat Knob 18 423PCSTRNRLF Strain Relief
4423PC13218 Thermometer 19 423PCUSLDPR Universal wire slides (1 pair)
5423PC13096 Terminal Block 20 423PCDRIPPAN Plastic Drip Pan
6 423PC202103 Fan 120V 21 423PCDRIPTRH Drip Trough (includes screws)
7 423PC13365 1950Watt Heating Element 120V 22 423PCSCNB 5" swivel Caster
8 423PC13367 675 Watt Heating Element 120V 23 423PCSCWD 5" Brake Caster
9 423PC11191 Fan intake Collar 24 423PC14119 Door Hinge (qty 1)
10 423PC11185 Stainless Steel Water Pan 25 423PC14118 Door Handle
11 423PCSCLP Sensor and bulb Clamp Kit
26
423PCCFDR Clear Full Height Door (does not include hardware or
gasket)
12 423PC13198 Thermal Cut-out 423PCCDDR Clear Dutch Door (does not include hardware or gasket)
13 423PCINTCVR Air Intake Cover 423PCSDDR Solid Dutch Door (does not include hardware or gasket)
14 423PCEXHCVR Air Exhaust cover 423PCSFDR Solid Full Height Door (does not include hardware or
gasket)
15 423PCCMA Combination Module 27 423PCSHELF Accessory shelf
28
423PCCFDRGKT Door Gasket Full Height
423PCCDDRGKT Door Gasket - Clear Dutch Door
423PCSDDRGKT Door Gasket - Solid Dutch Door
423PCSFDRGKT Door Gasket - Solid Full Height

NON-INSULATED HEATED HOLDING & PROOFING CABINETS - INSTRUCTIONS FOR USE
12
www.servitproducts.com
L01-672
REV 04/21
HEATED HOLDING & PROOFING CABINETS WIRING
DIAGRAM 120V
3
3
1
1
13
13
3
3
8
8
10
10
11
11
13
13
18
18
1
1
1
1
13
13
3
3
18 AWG GREEN/YELLOW 30" SPADE END
18 AWG GREEN/YELLOW 30" SPADE END
3
3
1
1
3
3
19
19

NON-INSULATED HEATED HOLDING & PROOFING CABINETS - INSTRUCTIONS FOR USE
13
www.servitproducts.com
L01-672
REV 04/21
HEATED HOLDING CABINETS REPLACEMENT PARTS DIAGRAM
10
52
8
6
7
12 11
4
3
1
14
9
18
19
21
22 20
23
16
24
15
17
13
Heat Module (under side)
Heat Module (top side)

NON-INSULATED HEATED HOLDING & PROOFING CABINETS - INSTRUCTIONS FOR USE
14
www.servitproducts.com
L01-672
REV 04/21
SERVICE AND REPLACEMENT PARTS OF HEATED
HOLDING CABINETS
WARNING: Only factory approved service agents must attempt to service, repair or replace electrical components,
wiring or power cord.
Module CABINET BODY
Item# Replacement Part No. Description Item# Replacement Part No. Description
1 423PC1313381 Power - Selector switch (Holding Module) 14 423PC120PC Power cord (120V)
2 423PC13721 Thermostat 15 423PCGRMT Rubber grommet
3 423PC06913 Thermostat Knob 16 423PCSTRNRLF Strain Relief
4 423PC13218 Thermometer 17 423PCUSLDPR Universal wire slides (1 pair)
5 423PC13096 Terminal Block 18 423PCSCNB 5" swivel Caster
6 423PC202103 Fan 120V 19 423PCSCWD 5" Brake Caster
7 423PC13365 1950Watt Heating Element 120V 20 423PC14119 Door Hinge (qty 1)
8 423PC11191 Fan intake Collar 21 423PC14118 Door Handle
9 423PCSCLP Sensor and bulb Clamp Kit
22
423PCCFDR Clear Full Height Door (does not include hardware or
gasket)
10 423PC13198 Thermal Cut-out 423PCCDDR Clear Dutch Door (does not include hardware or gasket)
11 423PCINTCVR Air Intake Cover 423PCSDDR Solid Dutch Door (does not include hardware or gasket)
12 423PCEXHCVR Air Exhaust cover 423PCSFDR Solid Full Height Door (does not include hardware or
gasket)
13 423PCHMA Holding Module 23 423PCSHELF Accessory shelf
24
423PCCFDRGKT Door Gasket Full Height
423PCCDDRGKT Door Gasket - Clear Dutch Door
423PCSDDRGKT Door Gasket - Solid Dutch Door
423PCSFDRGKT Door Gasket - Solid Full Height

NON-INSULATED HEATED HOLDING & PROOFING CABINETS - INSTRUCTIONS FOR USE
15
www.servitproducts.com
L01-672
REV 04/21
HEATED HOLDING CABINETS WIRING DIAGRAM 120V
3
3
1
1
13
13
3
3
8
8
10
10
11
11
13
13
18
18
1
1
1
1
13
13
3
3
18 AWG GREEN/YELLOW 30" SPADE END
18 AWG GREEN/YELLOW 30" SPADE END
1
1
3
3
ON
ON
19
19

EQUIPMENT LIMITED WARRANTY
ServIt warrants its equipment to be free from defects in material and workmanship for a period of 1 year when purchased
from an authorized dealer. This is the sole and exclusive warranty made by ServIt covering your ServIt brand equipment.
A claim under this warranty must be made within 1 year from the date of delivery of the equipment.
Only the equipment’s original purchaser may make a claim under this warranty. ServIt reserves the right to approve or
deny the repair or replacement of any part or repair request. The warranty is not transferable.
Covered Models:
This warranty covers these ServIt Steam Table models only:
423CC1UFNCF, 423CC2UFNCF, 423CH1UFNCF & 423CH2UFNCF
To Make a Warranty Claim:
This warranty is only valid on equipment purchased from an authorized dealer. To make a claim, please contact Ready
Kitchen Warranty.
This Limited Warranty does not cover:
• Equipment sold or used outside the Continental United States.
• Use of unfiltered water (if applicable)
• ServIt has the sole discretion on wearable parts not covered under warranty.
• Equipment not purchased directly from an authorized dealer.
• Equipment used for residential or other non-commercial purposes.
• Equipment that has been altered, modified, or repaired by anyone other than an authorized service agency.
• Equipment where the serial number plate has been removed or altered.
• Damage or failure due to improper installation, improper utility connection or supply, and issues resulting from
improper ventilation or airflow
• Defects and damage due to improper maintenance, wear and tear, misuse, abuse, vandalism, or Act of God.
• Use of sealed well unit without water or maintaining proper water level.
• Use of open well unit in wet operation without spillage pan.
Any action for breach of this warranty must be commenced within 1 year of the date on which the breach occurred.
No modification of this warranty, or waiver of its terms, shall be effective unless approved in a writing signed by the
parties. The law of the Commonwealth of Pennsylvania shall govern this warranty and the parties’ rights and duties under
it. ServIt shall not under any circumstances be liable for incidental or consequential damages of any kind, including but
not limited to loss of profits.
Residential, Food Truck, and Non-Commercial Warranty
Valid only in the Contiguous United States ServIt warrants new equipment sold to residential, food truck, and other
non-commercial customers to be operational upon delivery and proper installation, not to exceed a period of 30 days
from the date of delivery. Contact your authorized place of purchase for assistance.
© 2021 ServIt, Lancaster, PA 17602
L01-672 REV 04/21
• Phone: 717-381-4844
Please include your name, model number, serial number, proof of purchase, proof of installation ready before
calling.
• Email: Help@ReadyKitchenWarranty.com
Please include your name, model number, serial number, proof of purchase, proof of installation, and a brief
description of the issue in your email. Including clear pictures of the issue will help expedite the process. Failure to
include one or more of these things will extend processing time.
Other manuals for 423CC1UFNCF
1
This manual suits for next models
3
Table of contents
Other SERVIT Commercial Food Equipment manuals
Popular Commercial Food Equipment manuals by other brands
Gastrodomus
Gastrodomus CL Instructions for use and maintenance
Falcon
Falcon E350/32 Installation and servicing instructions
Amitek
Amitek AX215RG Installation, operating and service instructions
JAC
JAC HF Translation of original user instructions
Jackson
Jackson NXP-HTU Installation quick guide
Electrolux
Electrolux SkyLine ChillS 202 user manual
