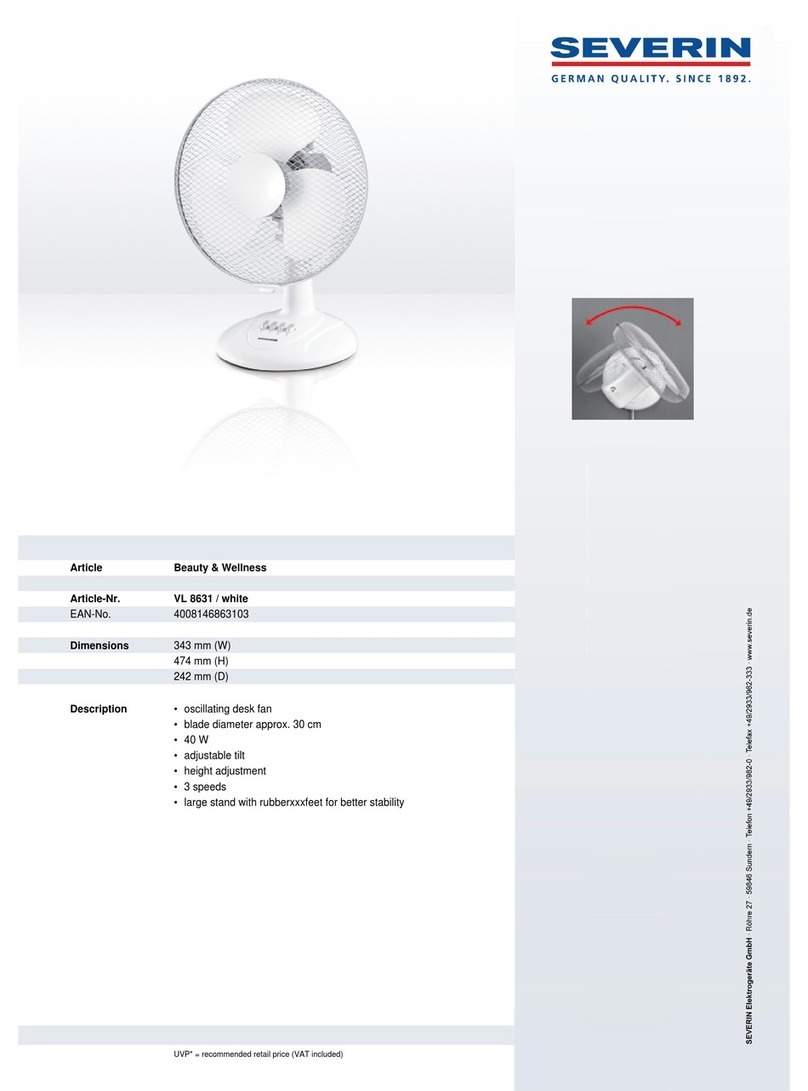
SEVERIN VL 8631 User manual

3
10
11
12
13
14
1
2
3
4
5
6
7
8
9
2

Liebe Kundin, lieber Kunde,
jeder Benutzer sollte vor dem Gebrauch die
Bedienungsanleitung aufmerksam
durchlesen.
Anschluss
Die Netzspannung muss der auf dem
Typenschild des Gerätes angegebenen
Spannung entsprechen. Das Gerät
entspricht den Richtlinien, die für die CE-
Kennzeichnung verbindlich sind.
Aufbau
1. Vorderes Schutzgitter
2. Propeller
3. Befestigungsring
4. 4 Schalter
5. Standfuß
6. Ringmutter für Schutzgitter
7. Führungsstift
8. Motorwelle
9. Propellerbefestigungsmutter
10. Hinteres Schutzgitter
11. Tragebügel
12. Oszillationswahlknopf
13. Motorgehäuse
14. Netzanschlussleitung
Sicherheitshinweise
●Den Ventilator nur in Betrieb nehmen,
wenn das Gerät komplett montiert und
das Schutzgitter einwandfrei geschlossen
und das Schutzgitter einwandfrei mit
dem Befestigungsring montiert ist.
●Lassen Sie das Gerät während dem
Betrieb niemals unbeaufsichtigt.
●Vor der Inbetriebnahme das komplette
Gerät incl. eventueller Zubehörteile auf
Mängel überprüfen, welche die
Funktionssicherheit des Gerätes
beeinträchtigen könnten. Falls das Gerät
z.B. zu Boden gefallen ist, können von
außen nicht erkennbare Schäden
vorliegen. Auch in diesem Fall das Gerät
nicht in Betrieb nehmen.
●Überprüfen Sie die Anschlussleitung
regelmäßig auf Beschädigungen. Im
Falle einer Beschädigung darf das Gerät
nicht benutzt werden.
●Benutzen Sie den Ventilator nicht in der
Nähe von Badewannen, Duschen,
Waschbecken, Schwimmbecken oder
anderen Gefäßen, welche Wasser
enthalten.
●Benutzen Sie den Tragebügel nur zum
Tragen des Gerätes und nicht zum
Aufhängen!
●Berühren Sie keine in Bewegung
befindliche Teile. Achten Sie darauf, dass
das Schutzgitter keine Gegenstände
während dem Betrieb berührt.
●Den Ventilator nicht im Freien
betreiben.
●Das Gerät auf eine trockene, ebene
Fläche stellen und von heißen
Oberflächen, offenen Flammen oder
entzündbaren Dämpfen fernhalten.
●Keine Gegenstände in das Schutzgitter
halten.
●Den Netzstecker ziehen,
-nach jedem Gebrauch,
-bei Störungen während des Betriebes,
-vor jeder Reinigung.
●Den Netzstecker nicht an der
Anschlussleitung aus der Steckdose
ziehen; fassen Sie den Netzstecker an.
●Personen (einschließlich Kinder), die
aufgrund ihrer physischen, sensorischen
oder geistigen Fähigkeiten oder ihrer
Unerfahrenheit oder Unkenntnis nicht in
der Lage sind, das Gerät sicher zu
benutzen, sollten dieses Gerät nicht ohne
Aufsicht oder Anweisung durch eine
verantwortliche Person benutzen.
●Kinder sollten beaufsichtigt werden, um
sicherzustellen, dass sie nicht mit dem
Gerät spielen.
●Wird das Gerät falsch bedient, oder
zweckentfremdet verwendet, kann keine
Haftung für evtl. auftretende Schäden
übernommen werden.
●Das Gerät ist zur Verwendung im
4
Ventilator

Haushalt bestimmt, nicht für den
gewerblichen Einsatz.
●Reparaturen an Elektrogeräten müssen
von Fachkräften durchgeführt werden,
da Sicherheitsbestimmungen zu
beachten sind und um Gefährdungen zu
vermeiden. Dies gilt auch für den
Austausch der Anschlussleitung.
Schicken Sie daher im Reparaturfall das
Gerät zu unserem Kundendienst. Die
Anschrift finden Sie im Anhang der
Anleitung.
Vor der ersten Inbetriebnahme
Entfernen Sie vor der ersten
Inbetriebnahme die Verpackungsreste
vollständig vom Gerät.
Montage
-
Anschlussleitung durch das Loch im
Standfuß stecken. Anschließend die
Anschlussleitung durch die Öffnung im
Rand des Standfußes stecken.
-
Den Grundkörper des Gerätes zuerst
hinten leicht in das Loch des Standfußes
setzen. Anschließend den vorderen Teil
des Grundkörpers in den Standfuß
drücken und einrasten.
-
Den Standfuß mit den beigefügten
Schrauben von unten am Grundkörper
befestigen.
-
Ringmutter für Schutzgitter entgegen
dem Uhrzeigersinn vom Motorgehäuse
drehen.
-
Das hintere Schutzgitter aufsetzen. Die
zwei Stifte am Motorgehäuse dabei
durch die entsprechenden Öffnungen
des hinteren Schutzgitters einführen.
-
Die Ringmutter für Schutzgitter
aufsetzen und im Uhrzeigersinn
festdrehen.
-
Propeller auf die Motorwelle schieben.
Der Führungsstift an der Motorwelle
muss dabei in der Nut der
Propelleraufnahme sitzen.
-
Propellerbefestigungsmutter aufsetzen
und entgegen den Uhrzeigersinn
festdrehen.
-
Den Befestigungsring auf den Rand des
hinteren Schutzgitters setzen. Lösen Sie
ggf. etwas die Schraube am
Befestigungsring.
-
Das vordere Schutzgitter vor das hintere
Schutzgitter in den Befestigungsring
einsetzen und die Schraube am
Befestigungsring anziehen. Kontrollieren
Sie, dass die Ränder der beiden
Schutzgitter ordnungsgemäß jeweils in
einer Rille des Befestigungsringes sitzen.
Bedienung
-
Netzstecker in eine Steckdose stecken.
-
Um die Neigung des Ventilatorkopfes zu
ändern, das Schutzgitter einfach nach
oben oder unten drücken. Der
Ventilator rastet dann in verschiedenen
Positionen ein.
-
Die Oszillatorfunktion kann durch
Eindrücken des Oszillationswahlknopfes
zugeschaltet werden.
-
Mit den vier verschiedenen Schaltern
den Ventilator auf die gewünschte Stufe
einschalten. Der Schalter „0“ schaltet das
Gerät aus.
Reinigung und Pflege
●Vor der Reinigung den Netzstecker
ziehen.
●Das Gerät darf aus Gründen der
elektrischen Sicherheit nicht mit
Flüssigkeiten behandelt oder gar darin
eingetaucht werden.
●Keine scharfen oder scheuernden
Reinigungsmittel verwenden.
-
Falls erforderlich, wischen Sie den
Ventilator nur mit einem trockenen,
fusselfreien Tuch ab.
Ersatzteile und Zubehör
Falls Sie Ersatzteile oder Zubehör zu Ihrem
Gerät benötigen, können Sie diese auch
bequem über unseren Internet-Bestellshop
bestellen. Sie finden unseren Bestellshop auf
unserer Homepage http://www.severin.de
unter dem Unterpunkt „Ersatzteilshop“.
5

Entsorgung
Unbrauchbar gewordene Geräte
sind in den dafür vorgesehenen
öffentlichen Entsorgungsstellen zu
entsorgen.
Garantie
Severin gewährt Ihnen eine
Herstellergarantie von zwei Jahren ab
Kaufdatum. In diesem Zeitraum beseitigen
wir kostenlos alle Mängel, die nachweislich
auf Material- oder Fertigungsfehlern
beruhen und die Funktion wesentlich
beeinträchtigen. Weitere Ansprüche sind
ausgeschlossen. Von der Garantie
ausgenommen sind: Schäden, die auf
Nichtbeachtung der Gebrauchsanweisung,
unsachgemäße Behandlung oder normalen
Verschleiß zurückzuführen sind, ebenso
leicht zerbrechliche Teile wie z. B. Glas,
Kunststoff oder Glühlampen. Die Garantie
erlischt bei Eingriff nicht von uns
autorisierter Stellen. Sollte eine Reparatur
erforderlich werden, senden Sie bitte das
Gerät ohne Zubehörteile, gut verpackt, mit
Fehlererklärung und Kaufbeleg versehen,
direkt an den Severin-Service. Die
gesetzlichen Gewährleistungsrechte
gegenüber dem Verkäufer und eventuelle
Verkäufergarantien bleiben unberührt.
6

Dear Customer,
Before using the appliance, the user should
read the following instructions carefully.
Connection to the mains supply
Make sure that the supply voltage
corresponds with the voltage marked on the
rating label. This product complies with all
binding CE labelling directives.
Familiarisation
1. Front grille
2. Fan-blade unit
3. Retaining ring
4. 4-switch panel
5. Base
6. Central grille locking ring
7. Shaft pin
8. Drive shaft
9. Fan-blade mounting nut
10. Rear grille
11. Carrying handle
12. Oscillation control knob
13. Motor housing
14. Power cord with plug
Important safety instructions
●Do not operate the fan if the appliance is
not completely assembled or if the
protection grille is not correctly installed,
closed and secured with the retaining
ring.
●Do not leave the appliance unattended
while in use.
●Before the appliance is used, the main
body as well as any fitted attachment
should be checked thoroughly for any
defects. If the appliance, for instance, has
been dropped onto a hard surface, it
must no longer be used: even invisible
damage may have adverse effects on the
operational safety of the appliance.
●The power cord should be regularly
examined for any signs of damage. In the
event of such damage being found, the
appliance must no longer be used.
●Do not operate the fan near bathtubs,
showers, wash basins, swimming pools or
any other water source.
●Do not use the carrying handle to hang
the fan up: it is only designed for
carrying the appliance.
●Do not touch any moving parts during
operation. Ensure that the protective
grille does not touch any other object
during use.
●Do not operate the fan outdoors.
●Operate the fan on a dry and level
surface. Do not position it on or near hot
surfaces, open flames or inflammable
vapours.
●Do not insert any objects through the
grille.
●Always remove the plug from the wall
socket
-after use,
-in case of any malfunction, and also
-before cleaning the appliance.
●When removing the plug from the wall
socket, never pull on the power cord;
always grip the plug itself.
●This appliance is not intended for use by
any person (including children) with
reduced physical, sensory or mental
capabilities, or lacking experience and
knowledge, unless they have been given
supervision or instruction concerning the
use of the appliance by a person
responsible for their safety.
●Children should be supervised to ensure
that they do not play with the appliance.
●No responsibility will be accepted if
damage results from improper use, or if
these instructions are not complied with.
●This appliance is only intended for
domestic use and not for commercial
applications.
●In order to comply with safety
regulations and to avoid hazards, repairs
of electrical appliances must be carried
out by qualified personnel, including the
replacement of the power cord. If repairs
7
Fan

are needed, please send the appliance to
one of our customer service departments.
The address can be found in the
appendix to this manual.
Before using the appliance for the first time
Remove all packaging completely before the
appliance is used for the first time.
Assembly
-
First lead the power cord through the
opening in the base, and then through
the small opening at the rear of the base.
-
Place the rear of the unit gently into the
opening of the base, then push the front
part down into the base until it locks into
place.
-
Secure the base to the main unit from
below using the screws provided.
-
Remove the central grille locking ring
from the motor housing by turning it
anti-clockwise.
-
Put the rear grille in position. The two
alignment pins on the motor housing
must fit into the corresponding slots in
the grille.
-
Fit the central grille locking ring and turn
it clockwise to tighten it.
-
Push the fan-blade unit onto the drive
shaft; ensure that the pin on the shaft is
properly engaged in the corresponding
recess on the unit.
-
Fit the fan-blade mounting nut and turn
it anti-clockwise to tighten it.
-
Place the retaining ring onto the rim of
the rear grille. (The retaining ring locking
screw may have to be loosened).
-
Place the front grille in front of the rear
grille into the retaining ring and tighten
the retaining ring screw. Ensure that both
grille rims are correctly positioned in
each of the corresponding recesses inside
the retaining ring.
Operation
-
Insert the plug into a suitable wall socket.
-
To adjust the tilt angle of the fan head,
simply push the grille upwards or
downwards. The fan head assembly
automatically locks into its various
positions.
-
In addition, the oscillation function can
be engaged by pushing the control knob
in.
-
The fan speed is adjustable by means of
the four switches. At the ‘0’ setting, the
fan is switched off.
General Care and Cleaning
●Remove the plug from the wall socket
before cleaning.
●To avoid the risk of electric shock, do not
clean the appliance with water and do
not immerse it in water.
●Do not use abrasives or harsh cleaning
solutions.
-
If it becomes necessary, clean the fan
with a dry lint-free cloth only.
Disposal Do not dispose of old or defective
appliances in domestic garbage;
this should only be done through
public collection points.
Guarantee
This product is guaranteed against defects in
materials and workmanship for a period of
two years from the date of purchase. Under
this guarantee the manufacturer undertakes
to repair or replace any parts found to be
defective, providing the product is returned
to one of our authorised service centres. This
guarantee is only valid if the appliance has
been used in accordance with the
instructions, and provided that it has not
been modified, repaired or interfered with
by any unauthorised person, or damaged
through misuse.
This guarantee naturally does not cover
wear and tear, nor breakables such as glass
and ceramic items, bulbs etc. If the product
fails to operate and needs to be returned,
pack it carefully, enclosing your name and
address and the reason for return. If within
the guarantee period, please also provide the
8

guarantee card and proof of purchase.
9

Chère Cliente, Cher Client,
Avant d’utiliser cet appareil, veuillez lire
attentivement les instructions suivantes.
Branchement au secteur
Assurez-vous que la tension d’alimentation
correspond à la tension indiquée sur la
plaque signalétique de l’appareil. Ce produit
est conforme à toutes les directives relatives
au marquage “CE”.
Familiarisez-vous avec votre appareil
1. Grille frontale
2. Pales
3. Collier de fixation
4. Tableau de commande à 4 boutons
5. Socle
6. Bague de verrouillage centrale
7. Goujon
8. Arbre de transmission
9. Écrou de serrage des pales
10. Grille arrière
11. Poignée de transport
12. Bouton de commande de l'oscillation
13. Bloc moteur
14. Cordon d'alimentation avec fiche
Importantes consignes de sécurité
●Ne pas faire fonctionner le ventilateur
sans l'avoir complètement assemblé au
préalable ou si la grille de protection n'est
pas correctement installée, fermée et
fixée à l'aide du collier de fixation.
●Ne jamais faire fonctionner l'appareil
sans surveillance.
●Avant d'utiliser cet appareil, vérifiez-le
soigneusement ainsi que tous ses
composants et accessoires pour tout signe
de dommages. Ne jamais utiliser
l'appareil si celui-ci est tombé par terre,
car les dommages subis, mêmes non
visibles, peuvent avoir des effets néfastes
sur la sécurité de fonctionnement de
l'appareil.
●Examinez régulièrement le cordon pour
vous assurer de son parfait état. N’utilisez
pas l’appareil si le cordon est
endommagé.
●Ne pas utiliser le ventilateur à proximité
de baignoires, douches, lavabos, piscines
ou autres sources d’eau.
●Ne pas accrocher le ventilateur par sa
poignée de transport; celle-ci est destinée
uniquement au transport de l'appareil.
●Ne toucher aucune partie en
mouvement. Vérifiez que la grille de
protection ne touche aucune autre pièce
pendant le fonctionnement.
●Ne pas utiliser le ventilateur à l’extérieur.
●Placez le ventilateur sur une surface
sèche et stable. Ne pas le placer sur, ou à
proximité, d’une surface chaude, d’une
flamme ou de gaz inflammables.
●Ne pas introduire un objet quelconque à
travers la grille.
●Débranchez toujours la fiche de la prise
-après utilisation,
-en cas de fonctionnement défectueux,
-avant de nettoyer l’appareil.
●Ne pas débrancher l’appareil en tirant sur
le cordon ; tirez toujours sur la fiche.
●Cet appareil ne doit pas être utilisé par
une personne (y compris un enfant)
souffrant d'une déficience physique,
sensorielle ou mentale, ou manquant
d'expérience ou de connaissances, sauf si
cette personne a été formée à l'utilisation
de l'appareil par une personne
responsable de sa sécurité, ou est
surveillée par celle-ci.
●Les enfants doivent être surveillés afin
qu'ils ne jouent pas avec l'appareil.
●Nous déclinons toute responsabilité dans
le cas d'une utilisation incorrecte de
l'appareil ou du non-respect de ce mode
d'emploi.
●Cet appareil est destiné à un usage
domestique uniquement et non pas à un
usage professionnel.
●Afin de se conformer aux normes de
sécurité en vigueur et d’éviter tout risque,
la réparation d’appareils électriques, y
Ventilateur
10

compris le remplacement d'un cordon
d'alimentation, doit être effectuée par un
agent qualifié. En cas de panne, envoyez
votre appareil à un de nos centres de
service après-vente agréés dont vous
trouverez la liste en annexe de ce mode
d’emploi.
Avant la première utilisation
Retirez tous les emballages avant d’utiliser
l’appareil pour la première fois.
Assemblage
-
Faites tout d'abord passer le cordon
d'alimentation par l'ouverture dans la
tige du socle puis faites-le ressortir par
l'encoche à l'arrière du socle.
-
Placez le bloc moteur de l'appareil sur la
tige du socle, puis appuyez jusqu'à qu'il
soit correctement installé et coïncide avec
les trous laissés pour les vis de fixation.
-
Fixez le bloc moteur sur le socle à l'aide
des vis fournies.
-
Retirez la bague de verrouillage centrale
du bloc moteur en la tournant dans le
sens contraire des aiguilles d'une montre.
-
Mettez en place la grille arrière. Les deux
ergots du bloc moteur doivent
s'enclencher dans les trous
correspondants de la grille arrière.
-
Remettez la bague de verrouillage
centrale, puis serrez-la en la tournant
dans le sens des aiguilles d'une montre.
-
Enfoncez l'hélice sur l'arbre
d'entraînement en vérifiant que le goujon
sur l'arbre se place dans l'encoche prévue
sur l'hélice.
-
Mettez l'écrou de serrage de l'hélice, puis
serrez-le en le tournant dans le sens
inverse des aiguilles d'une montre.
-
Placez le collier de fixation autour de la
grille arrière. (Dévissez la vis de serrage si
nécessaire).
-
Placez la grille avant dans le collier de
fixation, contre la grille arrière, puis
serrez la vis de serrage du collier. Vérifiez
le bon enclenchement des grilles dans les
rainures correspondantes sur le collier de
fixation.
Fonctionnement
-
Branchez la fiche sur une prise murale
appropriée.
-
Pour régler l'inclinaison du ventilateur,
déplacez tout simplement la grille vers le
haut ou vers le bas. La tête du ventilateur
se verrouille automatiquement suivant
l'inclinaison souhaitée.
-
La fonction oscillation peut être activée
en appuyant sur le bouton de
commande.
-
Réglez la vitesse du ventilateur à l'aide
des quatre boutons situés sur le tableau
de commande. La position '0' représente
la position arrêt.
Entretien et nettoyage en général
●Avant le nettoyage, débranchez
l’appareil.
●Pour éviter tout risque de choc
électrique, ne pas nettoyer l’appareil à
l’eau et ne pas l’immerger dans l’eau.
●N’utiliser aucun produit de nettoyage
abrasif ou concentré.
-
En cas de besoin, nettoyez le ventilateur
à l’aide d’un chiffon sec non pelucheux
uniquement.
Mise au rebut
Ne jetez pas vos appareils
ménagers vétustes ou défectueux
avec vos ordures ménagères;
apportez-les à un centre de collecte
sélective des déchets électriques et
électroniques.
Garantie
Cet appareil est garanti par le fabricant
pendant une durée de deux ans à partir de la
date d’achat, contre tous défauts de matière
et vices de fabrication. Au cours de cette
période, toute pièce défectueuse sera
remplacée gratuitement. Cette garantie ne
couvre pas l’usure normale de l’appareil, les
pièces cassables telles que du verre, des
ampoules, etc., ni les détériorations
11

provoquées par une mauvaise utilisation et
le non-respect du mode d’emploi. Aucune
garantie ne sera due si l’appareil a fait l’objet
d’une intervention à titre de réparation ou
d’entretien par des personnes non-agréées
par nous-mêmes. Si votre appareil ne
fonctionne plus normalement, veuillez
l’adresser, sous emballage solide, à une de
nos stations de service après-vente agréées,
muni de votre nom et adresse. Si vous
retournez votre appareil pendant la période
de garantie, n’oubliez pas de joindre à votre
envoi la preuve de garantie (ticket de caisse,
facture etc.) certifiée par le vendeur.
12
Other manuals for VL 8631
1
Table of contents
Languages:
Other SEVERIN Fan manuals