manuals.online logo
Brands
  1. Home
  2. •
  3. Brands
  4. •
  5. SEVERIN
  6. •
  7. Kitchen Appliance
  8. •
  9. SEVERIN Sous-vide User manual

SEVERIN Sous-vide User manual

104 x 142 mm
3
13
1
12
2
3
4
5
9
8
7
6
10
11
104 x 142 mm
13
Sous-vide vacuum cooker
Dear Customer,
Before using the appliance, read the
following instructions carefully and keep
this manual for future reference. The
appliance must only be used by persons
familiar with these instructions.
Connection to the mains supply
The appliance should only be connected to
an earthed socket installed in accordance
with the regulations. Make sure that the
supply voltage corresponds with the
voltage marked on the rating label of the
appliance. This product complies with all
relevant CE-labelling directives.
Familiarisation
1. Display
2. On/Off switch
3. Settings button
4. +/- buttons
5. Main indicator light
6. Stainless-steel jacket with fan
protection cap
7. MIN ll level mark
8. MAX ll level mark
9. Fan
10. Heating element
11. Main unit
12. Clamp
13. Power cord with plug
Important safety instructions
∙In order to avoid hazards,
repairs to this electrical
appliance or its power cord
must be carried out by our
customer service. If repairs
are needed, please contact
our customer service
department by phone or
email (see appendix).
∙Every time the appliance
is used, the main body
including the power cord
as well as any attachment
tted should be checked
thoroughly for any defects.
Should the appliance,
for instance, have been
dropped onto a hard
surface, or if excessive
force has been used to
pull the power cord, it must
no longer be used: even
invisible damage may have
adverse effects on the
operational safety of the
GB
14
104 x 142 mm
appliance.
∙The appliance must only be
used in a suitable cooking
pot with a minimum depth
of 15.5 cm.
∙Disconnect the appliance
from the mains before
removing it from the pot.
∙The appliance is not
intended to be operated by
means of an external timer
or separate remote-control
system.
∙Before cleaning the
appliance, ensure it is
disconnected from the
power supply and has
cooled down completely.
For detailed information
on cleaning the appliance,
please refer to the section
Cleaning and care.
∙To avoid the risk of electric
shock, do not clean the top
section with water and do
not immerse it in water.
∙Should the top section
be dropped in water,
disconnect it from the
mains immediately, take out
the whole appliance and let
it dry. It may be used again
once completely dry.
∙Caution: Any misuse can
cause severe personal
injury.
∙The accessible exterior
surfaces, and especially
the heating element,
become hot during use and
will remain so for some
time afterwards. Caution:
There is a danger of
scalding. Touch only the
top section, and ensure the
appliance is put down only
on a heat-resistant and
non-inammable surface.
∙This appliance is intended
for domestic or similar
applications, such as in
- staff kitchens in shops,
104 x 142 mm
15
ofces and other similar
working environments,
- agricultural working
environments,
- by customers in hotels,
motels etc. and similar
accommodation,
- in bed-and breakfast type
environments.
∙This appliance may be
used by children (at least
8 years of age) and by
persons with reduced
physical, sensory or mental
capabilities, or lacking
experience and knowledge,
provided they have been
given supervision or
instruction concerning the
use of the appliance and
fully understand all dangers
and safety precautions
involved.
∙Children must not be
permitted to play with the
appliance.
∙Children must not be
permitted to carry out any
cleaning or maintenance
work on the appliance
unless they are supervised.
∙The appliance and its
power cord must be kept
well away from children
under 8 at all times.
∙Caution: Keep any packaging materials
well away from children – these
materials are a potential source of
danger, e.g. of suffocation.
∙Always remove the plug from the wall
socket
-after each cycle of use,
-in case of any malfunction,
-before cleaning the appliance.
∙When removing the plug from the wall
socket, never pull on the power cord;
always grip the plug itself.
∙Do not allow the power cord to hang
free; the cord must be kept well away
from hot parts of the appliance.
∙Always place the pot on a level surface,
resistant to heat and water.
∙Do not place the appliance on or near
hot surfaces or open ames such as
hot-plates or gas ames.
∙Do not operate the appliance below
wall-cupboards etc. that could be
damaged, as steam may be emitted
during use.
∙When operating this appliance, ensure
that
16
104 x 142 mm
- only genuine accessories are used,
- the appliance is under supervision at
all times,
- clean tap water has been lled in (not
de-ionised or distilled).
∙Caution: Do not use the appliance to
heat unsealed food.
∙Caution: Heat only vacuum-packed
food. Should any food come into contact
with the water, switch off, clean and ll
again with clean water.
∙Caution: Do not operate the appliance
without its stainless-steel jacket properly
tted. Do not remove the fan protection
cap.
∙Caution: Always use suitable utensils
to remove the cooked food. Beware
of escaping steam and drips from hot
condensation water: there is a danger
of scalding.
∙Do not move the appliance or the pot
until they have completely cooled down.
∙No responsibility is accepted if damage
results from improper use, or if these
instructions are not complied with.
Vacuum cooking
With vacuum cooking, the food is sealed
inside a vacuum bag and cooked at low
temperature in a water bath. The ideal
temperature range for such cooking is
55° to 65°C. Pasteurisation of the food is
achieved at a core temperature of 62°C.
Heating food evenly results in the perfect
consistency of the entire content, so
that the juice and avour remain largely
unaffected.
As vacuum cooking is carried out at
low temperatures, hygiene and quick
processing of the food are essential. Once
vacuum-cooked, the food must be either
consumed immediately, or cooled in iced
water and then deep-frozen or stored in a
refrigerator at a temperature of below 3°C.
Only high-quality vacuum bags suitable
for both deep-freezing and heating must
be used for vacuum cooking. We therefore
recommend using SEVERIN vacuum
foil bags (available commercially or via
http://www.severin.de under ‘Service /
Ersatzteile’).
Before using for the rst time
Remove any stickers and remaining
packaging materials, and clean the
appliance as described in the Cleaning and
care section.
104 x 142 mm
17
Operation
Preparing the pot
∙Select a suitable pot with a minimum
depth of 15.5 cm.
∙Fill with warm water.
HINT:
The use of warm water shortens the
time before the required cooking
temperature is reached. Note: it may
take several minutes for the built-in
sensor to register the current water
temperature.
If the selected temperature is below
that of the water, the fan will turn, but
the appliance does not heat up and
the remaining running time does not
count down.
∙ When lling with water, always observe
the MIN and MAX markings on the
appliance. With the food to be cooked
in position, the water level must be
between the MIN and MAX markings.
∙Keep in mind that the level will rise
when the food is put in. We therefore
recommend using a smaller amount of
water and then, if required, adding more
warm water up to the MAX mark after
the bags have been put in.
∙The appliance will not work if the water
level is below the MIN mark. In this
case, 3 beep signals are heard and the
display shows EE1.
∙Should the water level fall below the MIN
mark during operation, the appliance
switches off, 3 beep signals are heard
and the display shows EE1.
∙To prevent excessive loss of water
during extended cooking, the pot may
be covered with aluminium foil or heat-
insulating sous-vide balls.
Placing the sous-vide stick
∙Place the prepared pot on a level, water
and heat-resistant surface.
∙ Use the clamp to t the sous-vide-stick
on the pot rim.
Adding the food to be cooked
∙Place the vacuum bags containing the
food into the pot.
∙Ensure that they are covered with water
at all times. Should you see a bag
oating on the surface, put a suitable
heat-resistant weight (eg a plate) on top
of it.
Programming the unit
∙Connect the mains plug to a suitable
mains outlet.
A beep signal is heard, the button
and the indicator light show red and the
display lights up briey. The appliance is
now in stand-by mode.
∙Press the button briey. The display
shows ‘C’ and the temperature last
selected.
∙Use the +/- buttons to set the desired
cooking temperature in 0.5-degree steps
(up to max. 90°C). The temperature
settings can be adjusted in small steps
by a single push; keeping the button
pressed results in rapid scrolling.
∙Press the button; the display shows
the cooking time last selected: 00:01
(hrs : min).
∙The cooking time in hours starts
18
104 x 142 mm
ashing. Set the required cooking time
using the +/- buttons (up to 99 hours).
∙Press the button again to set the
minutes (up to 59).
∙Start the cooking process by pressing
the button.
∙The indicator light shows blue and
the display gives the current water
temperature.
∙Once the pre-set temperature is
reached, 2 beep signals are heard,
and the indicator light starts ashing
blue. From now on, the pre-set time
starts running, with the time remaining
showing in the display.
∙Once the programmed cooking time has
elapsed, 3 beep signals are heard, the
indicator light turns red and the display
shows ‘END’. The bags can now be
removed and used or stored.
∙To interrupt cooking, to re-
programme or to switch the appliance
off, press the On/Off button for
more than 2 seconds.
∙Always remove the plug from the wall
socket after use; allow sufcient time
for the appliance to cool down before
pouring out the water and starting the
cleaning process.
∙HINT:
During cooking, you may notice small
eddies in the water. This is harmless,
but may be stopped by briey
inserting a wooden spoon.
104 x 142 mm
19
Cooking times
Table for temperatures and cooking times
The cooking time starts counting once the pre-set temperature is reached.
To achieve a ‚roast-like‘ aroma, meat can be fried briey at high heat in a pan after sous-
vide cooking is nished.
Specialised cook books offer a wide range of recipes.
Type of food: Cooking time (depending on
thickness)
Medium Well done
Beef: 90 - 180 mins
Fillet ca. 55 - 60°C
Roast ca. 80 - 90°
Pork: 60 - 150 mins ca. 65 - 70°C ca. 70 - 80°
Poultry: 120 - 210 mins
Duck breast ca. 65°
Other poultry ca. 80 - 90°
Fish: 40 - 60 mins ca. 60°
Potatoes/vegetables: 60 - 180 mins ca. 85°
Note: Special attention should be paid when processing meat. Should you have
concerns regarding germs, pathogens or salmonella (eg in poultry), ensure continuous,
thorough heating of meat to over 70°C.
Infants, pregnant women, sick or elderly people should eat meat only if a core
temperature exceeding 75°C has been reached.
20
104 x 142 mm
Cleaning and care
∙Before cleaning the appliance, ensure it
is disconnected from the power supply
and has cooled down completely.
∙To avoid the risk of electric shock, the
main unit should only be wiped with a
damp cloth.
∙In the case of contact with water, wipe
the main unit thoroughly dry. I may not
be used again until completely dry.
∙Do not use abrasives or harsh cleaning
solutions.
∙The main unit and heating element may
be cleaned with a damp cloth.
∙Unlock the stainless-steel jacket by
turning it, then take it off and clean it
with hot soapy water; dry thoroughly
afterwards.
∙Once properly dry, re-assemble the
appliance as follows:
Fit the stainless-steel jacket onto the
main unit, so that the and symbols
are facing each other. Lock by turning
clockwise until the and symbols
are aligned.
Descaling
∙Depending on the water quality (lime
content) in your area as well as the
frequency of use, all thermal household
appliances using hot water need
descaling (i.e. removal of lime deposits)
on a regular basis to warrant proper
functioning.
∙Any warranty claim will be null and
void if the appliance malfunctions
because of insufcient descaling.
∙Excessive lime-scale build-up on the
heating tube indicates that descaling
has become necessary.
∙For descaling, a vinegar solution may be
used.
∙Mix vinegar essence at a 1:15 ratio with
cold water in a pot.
∙Insert the appliance with the stainless-
steel jacket (observing the Min-/Max
markings) and operate at 60°C for
approx. 5 hrs.
∙Repeat the procedure if necessary.
∙ During descaling, ensure sufcient
ventilation and do not inhale any vinegar
vapours.
∙After descaling, insert the appliance up
to the Max mark in clean tap water and
dry thoroughly afterwards.
∙Do not pour descalers down enamel
sinks.
104 x 142 mm
21
Disposal
Devices marked with this symbol
must be disposed of separately
from your household waste, as
they contain valuable materials
which can be recycled. Proper disposal
protects the environment and human
health. Your local authority or retailer can
provide information on the matter.
Guarantee
This product is guaranteed against defects
in materials and workmanship for a period
of two years from the date of purchase.
Under this guarantee the manufacturer
undertakes to repair or replace any parts
found to be defective, providing the product
is returned to one of our authorised service
centres. This guarantee is only valid if the
appliance has been used in accordance
with the instructions, and provided that
it has not been modied, repaired or
interfered with by any unauthorised person,
or damaged through misuse.
This guarantee naturally does not cover
wear and tear, nor breakables such as
glass and ceramic items, bulbs etc. This
guarantee does not affect your statutory
rights, nor any legal rights you may have
as a consumer under applicable national
legislation governing the purchase of
goods. If the product fails to operate and
needs to be returned, pack it carefully,
enclosing your name and address and the
reason for return. If within the guarantee
period, please also provide the guarantee
card and proof of purchase.

Other SEVERIN Kitchen Appliance manuals

SEVERIN SEV2447 User manual

SEVERIN

SEVERIN SEV2447 User manual

SEVERIN FW 3782 - User guide

SEVERIN

SEVERIN FW 3782 - User guide

SEVERIN 3650 User manual

SEVERIN

SEVERIN 3650 User manual

SEVERIN PROFI-MIX SM 3808 - User guide

SEVERIN

SEVERIN PROFI-MIX SM 3808 - User guide

SEVERIN AS 3915 User manual

SEVERIN

SEVERIN AS 3915 User manual

SEVERIN SM 3586 User manual

SEVERIN

SEVERIN SM 3586 User manual

SEVERIN KG 2385 User manual

SEVERIN

SEVERIN KG 2385 User manual

SEVERIN 3584000 User manual

SEVERIN

SEVERIN 3584000 User manual

SEVERIN CP 9217 User manual

SEVERIN

SEVERIN CP 9217 User manual

SEVERIN SM9687 User manual

SEVERIN

SEVERIN SM9687 User manual

SEVERIN MULTI-SANDWICH-TOASTER SA 2962 - User manual

SEVERIN

SEVERIN MULTI-SANDWICH-TOASTER SA 2962 - User manual

SEVERIN ZB 8182 SEVO User manual

SEVERIN

SEVERIN ZB 8182 SEVO User manual

SEVERIN PROFI-MIX SM 3807 - User guide

SEVERIN

SEVERIN PROFI-MIX SM 3807 - User guide

SEVERIN SM 9667 - EMULSIONNEUR DE LAIT User guide

SEVERIN

SEVERIN SM 9667 - EMULSIONNEUR DE LAIT User guide

SEVERIN FS 3601 User manual

SEVERIN

SEVERIN FS 3601 User manual

SEVERIN ZB 5564 User manual

SEVERIN

SEVERIN ZB 5564 User manual

SEVERIN CP 3548 User guide

SEVERIN

SEVERIN CP 3548 User guide

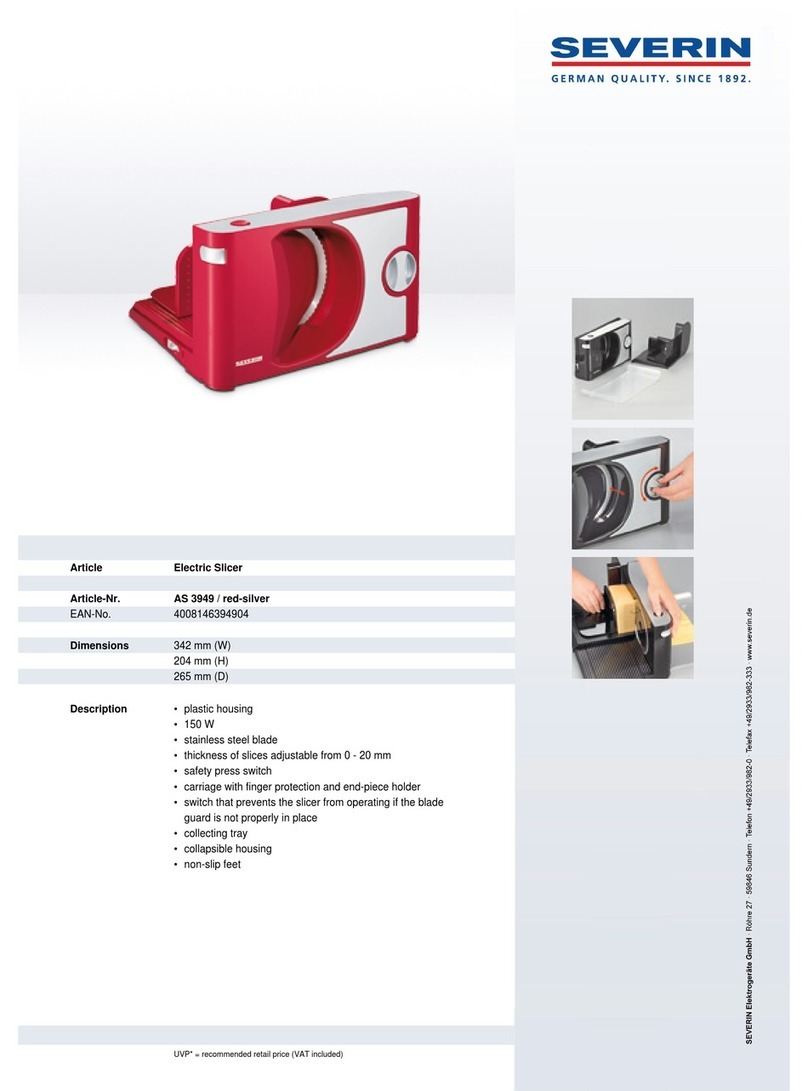
SEVERIN AS 3949 User guide

SEVERIN

SEVERIN AS 3949 User guide

SEVERIN SM 3730 User manual

SEVERIN

SEVERIN SM 3730 User manual

SEVERIN SM 9684 User manual

SEVERIN

SEVERIN SM 9684 User manual

SEVERIN WS 3032 User manual

SEVERIN

SEVERIN WS 3032 User manual

SEVERIN SV 2450 User manual

SEVERIN

SEVERIN SV 2450 User manual

SEVERIN MULTI-SANDWICH-TOASTER SA 2962 - User manual

SEVERIN

SEVERIN MULTI-SANDWICH-TOASTER SA 2962 - User manual

SEVERIN SM 3803 User manual

SEVERIN

SEVERIN SM 3803 User manual

Popular Kitchen Appliance manuals by other brands

Brice 330IK Operation and safety manual

Brice

Brice 330IK Operation and safety manual

Elba EMC-K5015PK owner's manual

Elba

Elba EMC-K5015PK owner's manual

Saivod CW1402 manual

Saivod

Saivod CW1402 manual

Kuhn Rikon HOTPAN Instructions for use

Kuhn Rikon

Kuhn Rikon HOTPAN Instructions for use

Redmond RMC-PM4506A user manual

Redmond

Redmond RMC-PM4506A user manual

Koolatron TotalChef WTF-43E owner's manual

Koolatron

Koolatron TotalChef WTF-43E owner's manual

Trebs Comfortbakery 99356 manual

Trebs

Trebs Comfortbakery 99356 manual

Artel ART-JM-378 user manual

Artel

Artel ART-JM-378 user manual

Blomberg HMS 81120 manual

Blomberg

Blomberg HMS 81120 manual

Star 39-A Specification sheet

Star

Star 39-A Specification sheet

Graef 188 MASTER operating instructions

Graef

Graef 188 MASTER operating instructions

Cannon Kendal Pressure Cookers owner's manual

Cannon

Cannon Kendal Pressure Cookers owner's manual

Abode ASLC5501 user guide

Abode

Abode ASLC5501 user guide

inventum MK500 instruction manual

inventum

inventum MK500 instruction manual

CALOR DT71 Series manual

CALOR

CALOR DT71 Series manual

Guzzanti GZ 8 instruction manual

Guzzanti

Guzzanti GZ 8 instruction manual

Hotpoint C 34S G1 operating instructions

Hotpoint

Hotpoint C 34S G1 operating instructions

Vega TM VEGA COMFORT operating instructions

Vega

Vega TM VEGA COMFORT operating instructions

manuals.online logo
manuals.online logoBrands
  • About & Mission
  • Contact us
  • Privacy Policy
  • Terms and Conditions

Copyright 2025 Manuals.Online. All Rights Reserved.