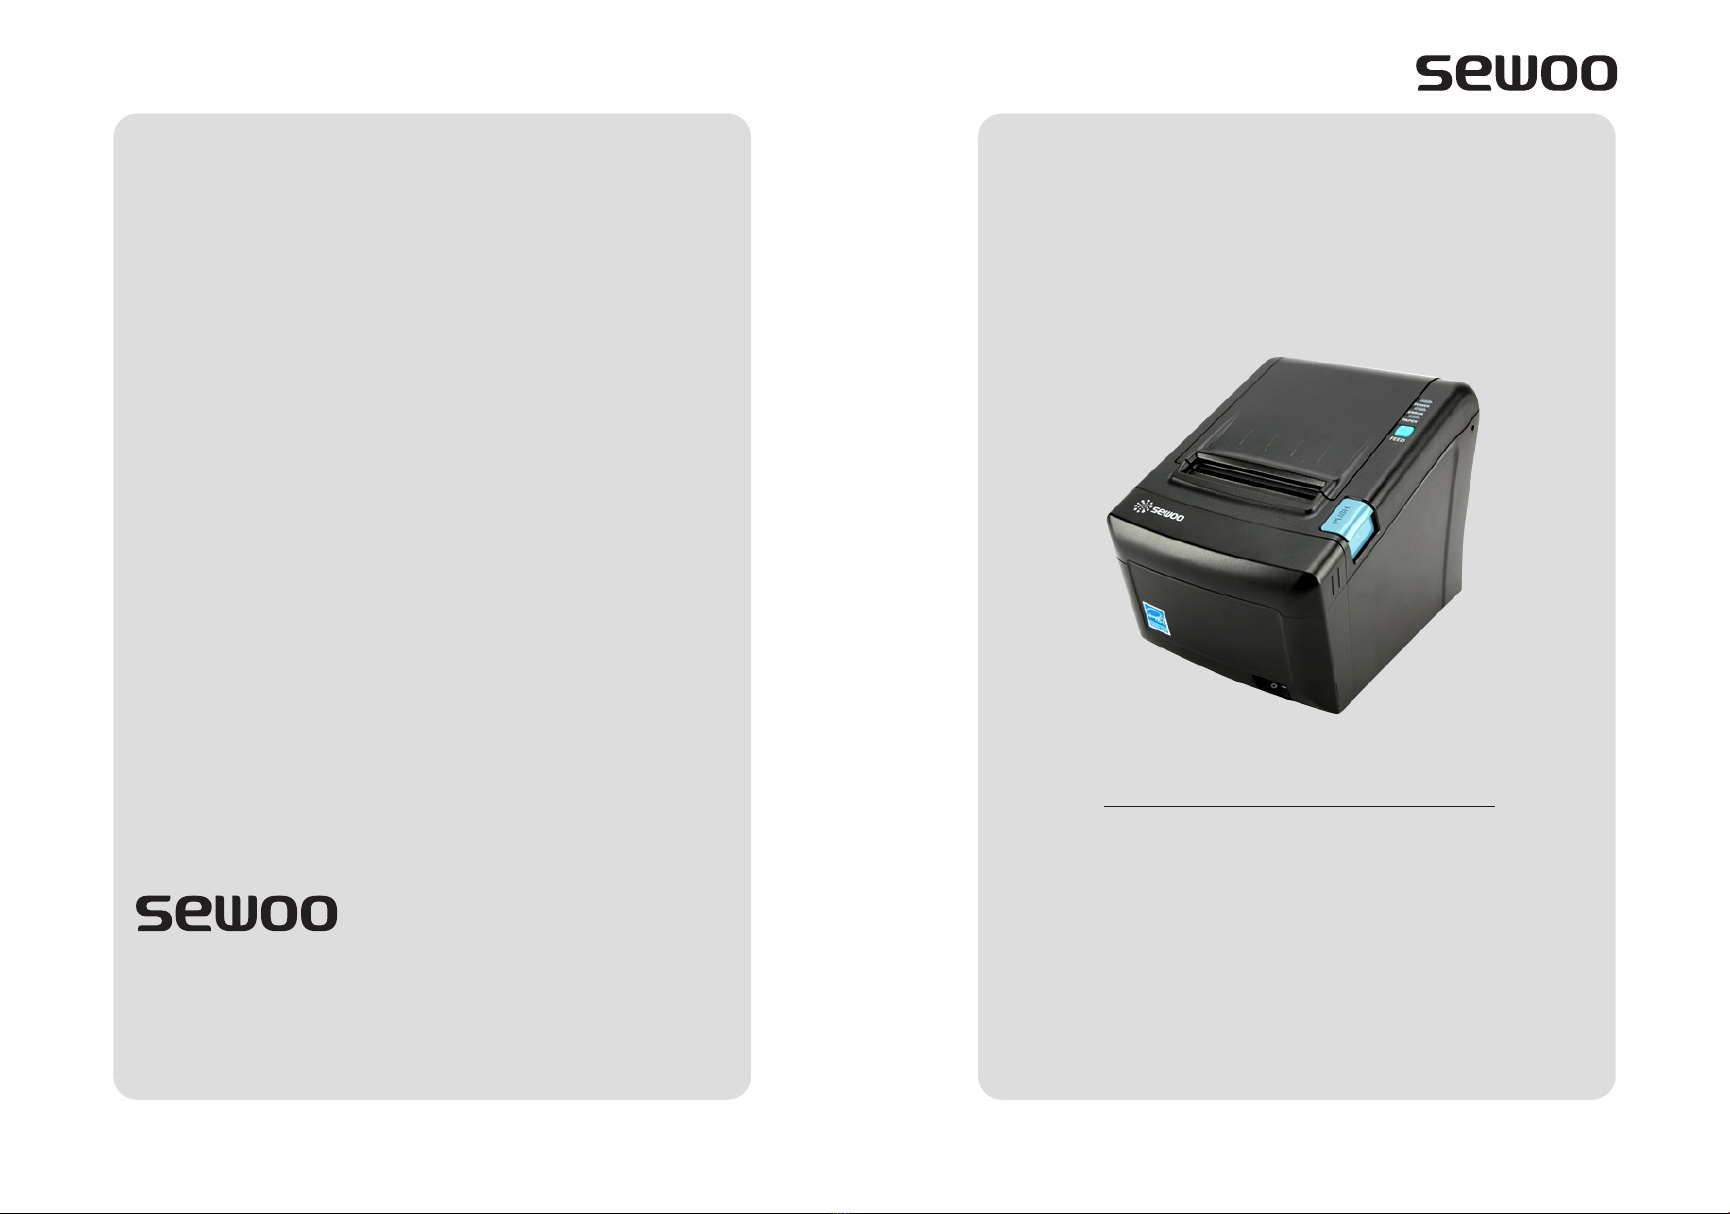
SEWOO SLK-TE122 User manual
Aroot Co., Ltd.
MODEL : SLK-TE122
Receipt Printer User’s Manual

This device co mplies with part 15 of the FCC Rules.
Operation is subject to the following two conditions.
Vic Barczyk
Victor Almazan
Disposal of Old Electrical&Electronic Equipment(Applicable in the European Union and other
European countries with separate collection systems)
2-1. Unpacking
2-2. Connecting the cables
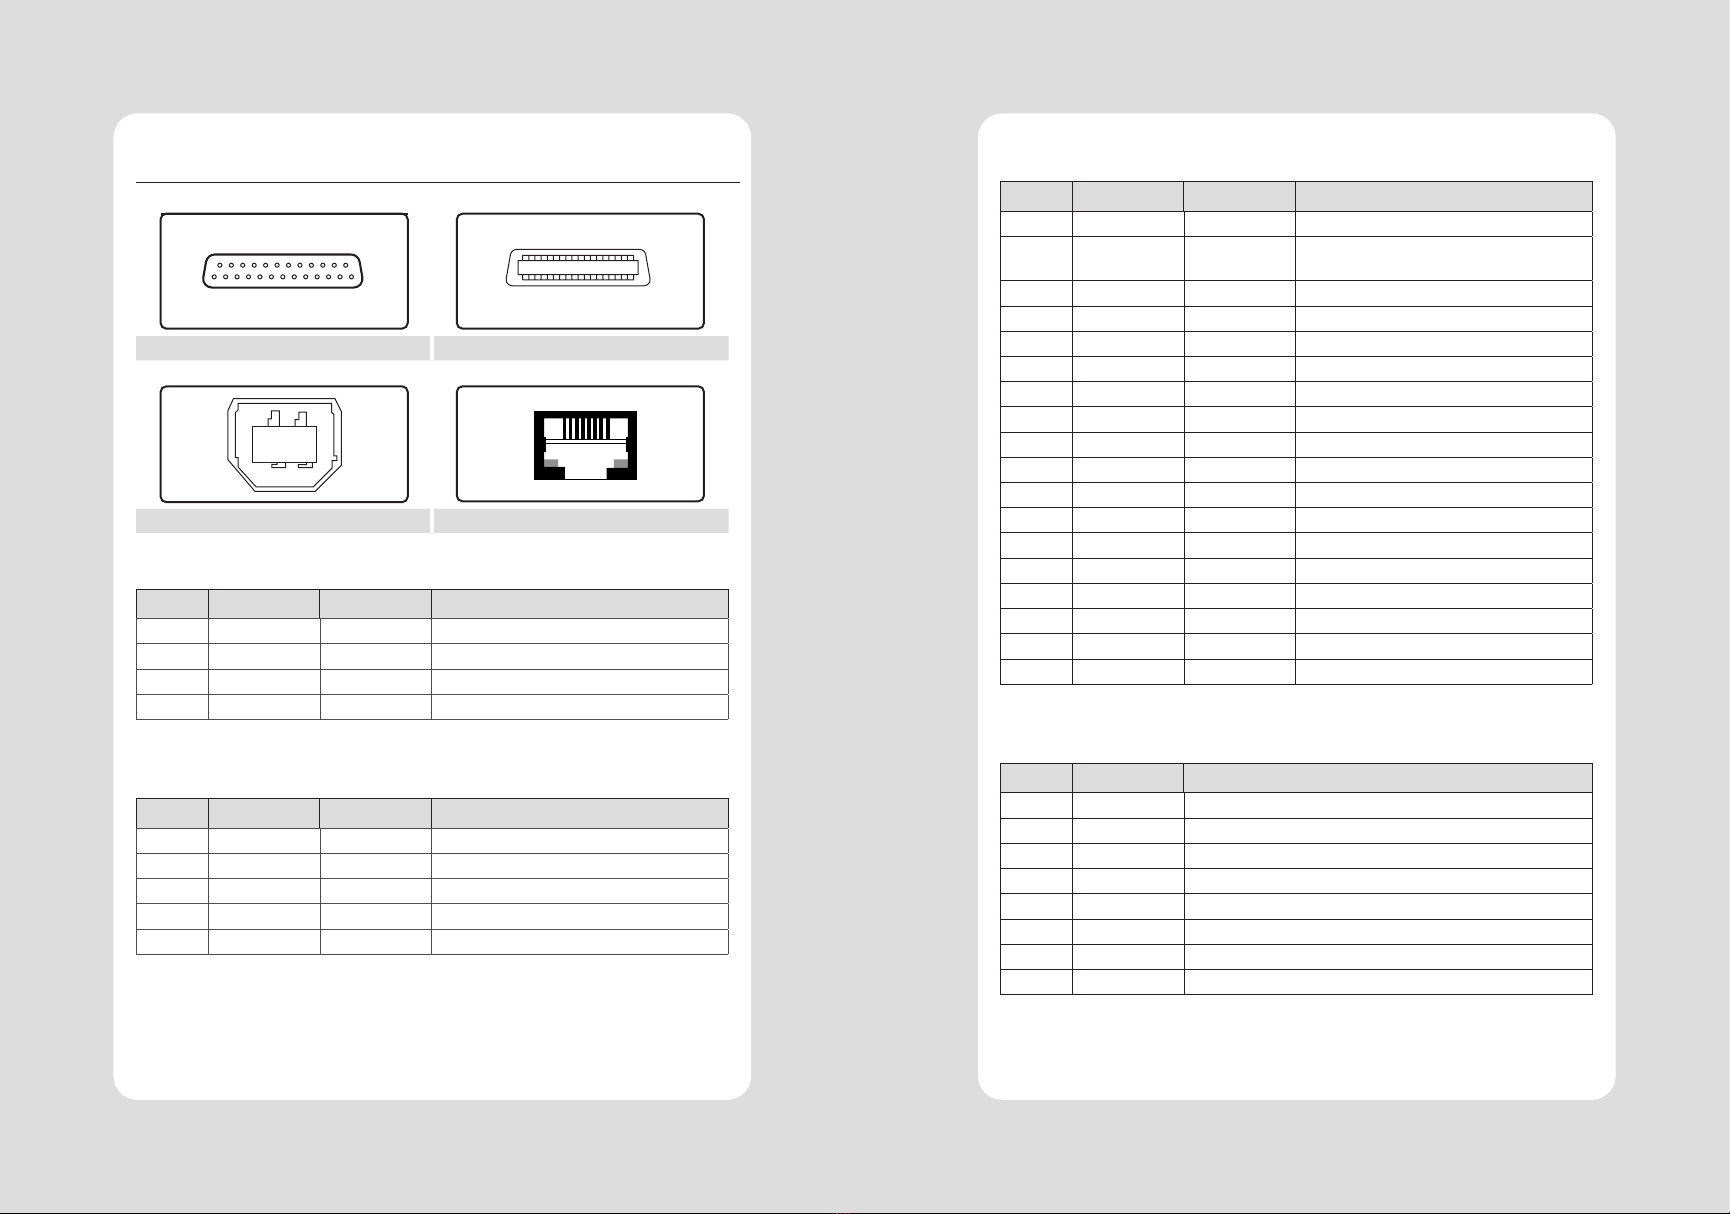
2-2-1. Interface Connector
2-2-2. Cash Drawer Connector
2-3. Loading the roll paper
2-4. Adjustment of paper width
3-1. Control panel
3-2. Error Indicating
6-1. Font
6-2. Paper Reduce
6-3. Density
7-1. Baudrate
7-2. Cutter
7-3. Error Beep
7-4. Melody
Table of Contents

3
1. Parts Identications
CONTROL PANEL
POWER SWITCH
PRINTER COVER
PRINTER COVER
11-1. Linerless Printer Cleaning
22
11-2. Recommended Paper
22

5
2. Setting Up the Printer
2-1. Unpacking
2-2. Connecting the Cables
INTERFACE CONNECTOR
CASH DRAWER CONNECTOR
USB CONNECTOR POWER CONNECTOR
7
6
2-2-1. Interface Connector
USB Interface
PIN SIGNAL I/O Description
25Pin Serial Interface
PIN SIGNAL I/O Description
TxD
DTR
DSR
Centronics Parallel Interface
PIN SIGNAL I/O Description
Ethernet Interface
PIN SIGNAL I/O

9
8
2-2-2. Cash Drawer Connector
PIN SIGNAL Description
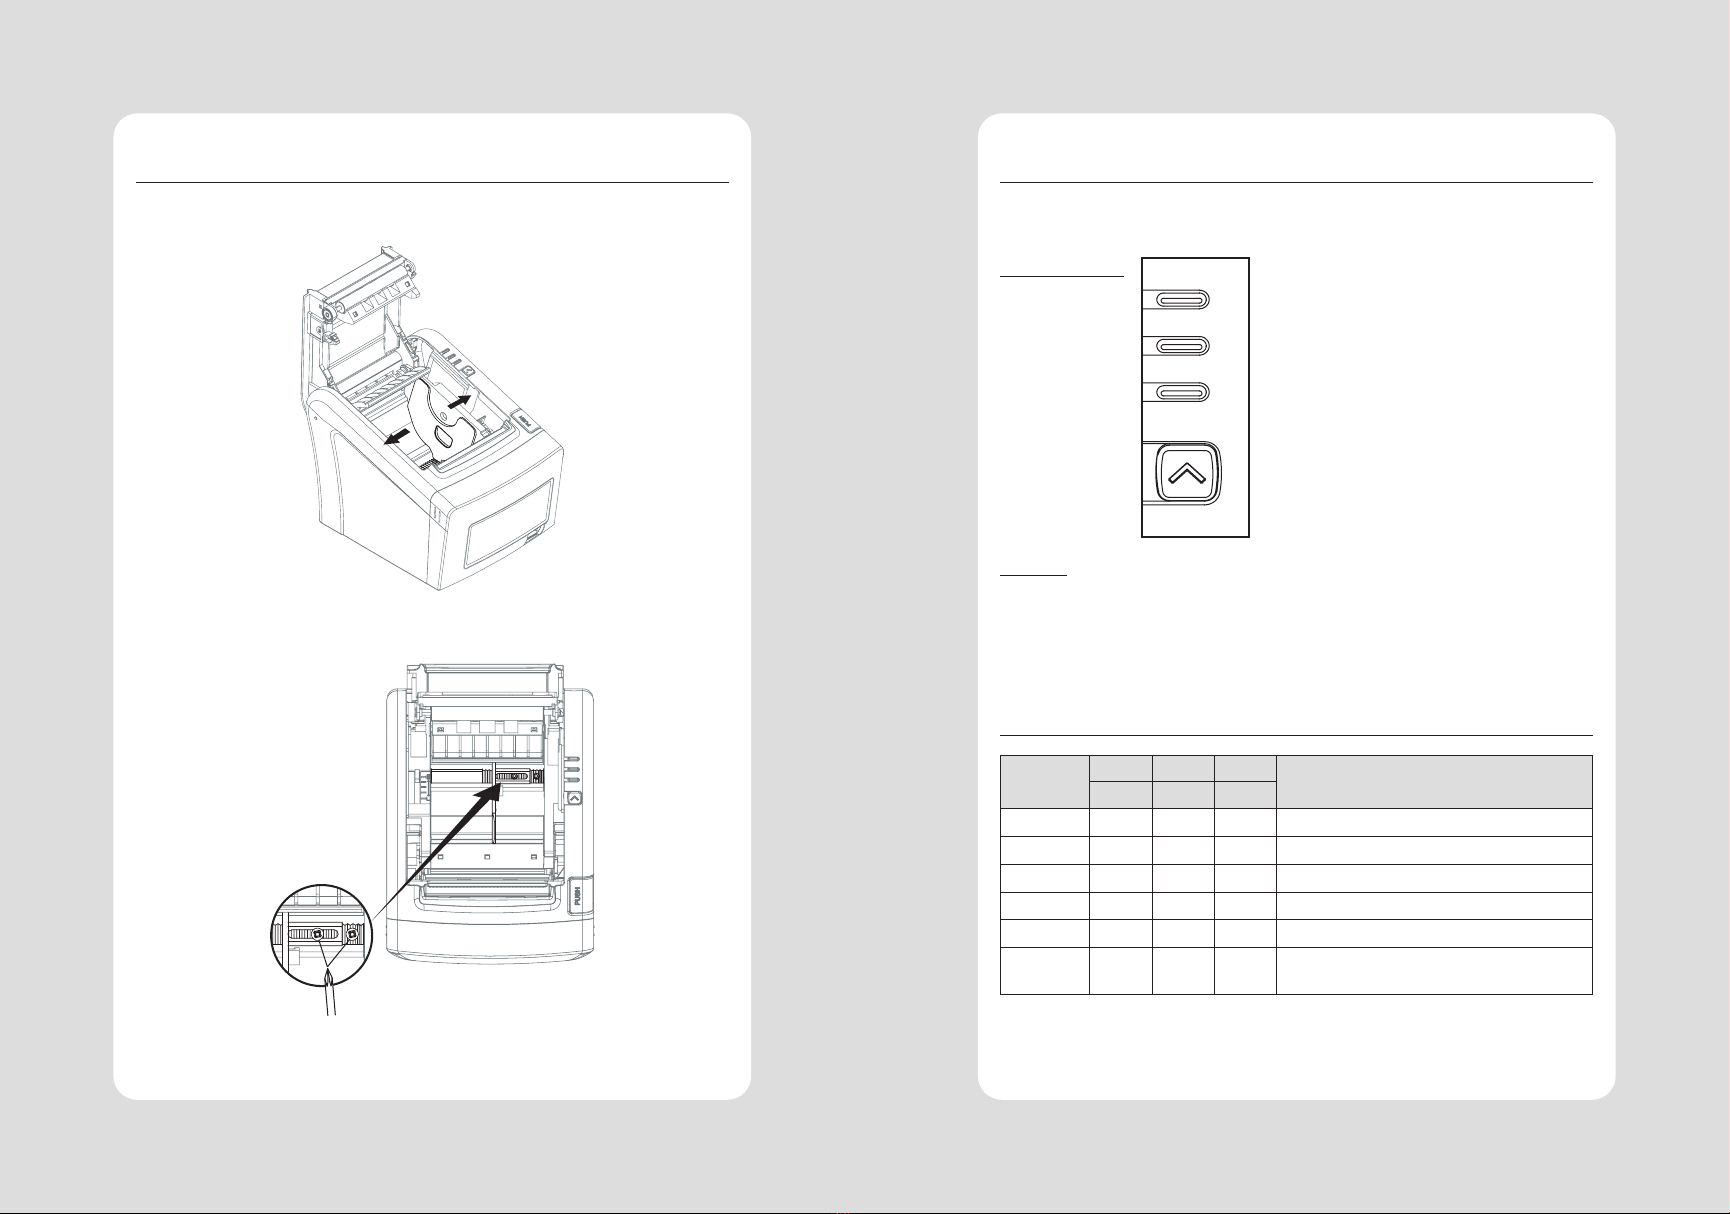
2-3. Loading the Roll Paper
NOTE
Turn o power switch.
1 Make sure that the printer is not receiving data; Otherwise, data may be lost.
2 Open the paper roll cover by pushing down the cover open push button.
3 Remove the used paper roll core if there is one inside.
4 Insert new paper roll as shown.

11
10
5 Note the correct direction that the paper comes o the roll:
O X
6 Pull out a small amount of paper as shown. Then, close the cover.
7 Tear o the paper as shown.
CAUTION
1 Make sure the printer is turned o.
2 Take out cutter cover as shown.
STANDARD LINERLESS
3 Turn screw with drivers to a direction until paper is released from the cutter.
STANDARD LINERLESS
13
12
2-4. Adjustment of paper width
1 Please adjust the Paper Guide to t to the paper width as the direction of arrow.
2 Tight the screw after adjusting the Paper Guide.
3 Pull the edge of paper once the paper roll is installed correctly and close the
Paper Cover.
3. Control panel and other functions
3-1. Control panel
Control Panel
POWER
ERROR
PAPER
FEED
Button
3-2. Error indicators
STATUS
PAPER ERROR POWER
REMARKS
RED RED GREEN

14
4. Self Test
Running the self test
1 Make sure the printer is turned o and the printer cover is closed properly
before performing the self test.
2 Turn the printer on holding the FEED button, then the self-test will start.
The self-test prints the printer setting value and then prints the following, and
pauses. (Error LED On)
SELECT MODE BY BUTTON
3 Press the FEED button consecutively (1~4)
4 The printer is ready to receive data after nishing setting.
15
5. ASCII Print
6. ECO Mode
*** Completed ***
ECO MODE
6-1. Font
-
-
FONT SETTING

17
16
6-2. Paper Reduce
-Line space
-Line feed
-Barcode Height
LINE SPACE SETTING
01
02
03
04
LINE FEED SETTING
01
02
03
04
1D BARCODE HEIGHT SETTING
01
02
03
04
6-3. Density
SELECT DENSITY
01
02
03
7. Printer Setting
PRINTER SETTING
01
02
03
04
7-1. Baudrate
SELECT BAUDRATE
01
02
03
04
05
06
7-2. Cutter
SELECT CUTTING MODE
01
02
7-3. Error Beep
SELECT ERROR BEEP OPTION
01
02

19
18
7-4. Melody
-
-
SELECT MELODY OPTION
01
02
MELODY SETTING
01
02
SELECT MELODY TYPE
01
02
03
8. Hexadecimal Dump
To use the hex dump feature, follow these steps
1 Please turn printer o.
2 Please turn printer on while press down “Feed” button.
3 Press the FEED button three times when the Self Test printed.
4 Now printer had entered into Hexa dump mode.
5 Run any software program that sends data to the printer. The printer prints
”Hexadecimal printing mode…” and then all the codes it receives in a
two-column format. The rst column contains the hecadecimal codes and the
second column gives the ASCII characters that correspond to the codes.
Hecadecimal Dump
6 Turn o the printer.
7 Turn on the printer.

21
20
10. Printer Cleaning9. Peripherals Connection
NOTE
1
2
3
4
1 Use an applicator swab moistened with an alcohol solution to clean the print
head and remove any dusts.
2 Once the cleaning is completed, insert paper roll into the printer few minutes
later and close the printer cover.
Preventing Overheating
9-1. Bluetooth Connection
1 The Printer can be connected to devices equipped with Bluetooth communication
capacity (PDAs, PCs, etc.)
2 Use the Bluetooth connection function supported by the device to connect to
the printer.
9-2. Wi-Fi Connection
1 The Printer can be connected to devices equipped with Wi-Fi communication
capacity(PDAs, PCs, etc.)
2 Use the Wi-Fi connection function supported by the device to connect to the
printer.
NOTE
Optional
Optional

23
22
11. Linerless Printer
11-1. Linerless Printer Cleaning
1 Open the printer cover and clean the paper PASS part.
2 Remove the paper if it is jammed.
3
4
5
6
NOTE
11-2. Recommended Paper
WARNING
12. Specications
Linerless - Max. 160mm/sec
Windows Driver(XP ~, Server2003 ~),Win-
dows CE & Mobile Driver(CE 4.2 ~, Mobile
5.0 ~),Linux Driver, Mac Driver, OPOS Driver,
JavaPOS Driver, iOS SDK, Android(6.0 ~) SDK,
Windows SDK, Windows CE SDK Linux SDK
25
24
/
Linerless - 1,000,000 cuts
No. Command Function
REMARKS
ESC \
13. Command List
27
26
No. Command Function
REMARKS
No. Name Description
14. Utilities

29
28
No. Name Description
15. S/W
No. Name Description
Table of contents
Other SEWOO Printer manuals

SEWOO
SEWOO SLK-T32EB II User manual

SEWOO
SEWOO WTP-100 User manual

SEWOO
SEWOO SLK-TE21X Series User manual

SEWOO
SEWOO SLK-T42 User manual

SEWOO
SEWOO LK-P31 User manual

SEWOO
SEWOO SLK-TS400 User manual

SEWOO
SEWOO LK-P22 User manual

SEWOO
SEWOO WTP-150 User manual

SEWOO
SEWOO LK-P SERIES Instruction sheet

SEWOO
SEWOO SLK-TL100II User manual

SEWOO
SEWOO SLK-TL100 User manual

SEWOO
SEWOO LK-TL200 User manual

SEWOO
SEWOO SLK-TL12X Series User manual

SEWOO
SEWOO SLK-T12EB User manual

SEWOO
SEWOO SLK-TL122 User manual

SEWOO
SEWOO LK-P41W User manual

SEWOO
SEWOO LK-P30B User manual

SEWOO
SEWOO LK-P41 Installation guide

SEWOO
SEWOO LK-P43 User manual

SEWOO
SEWOO SLK-T213EB Series User manual


