TROUBLESHOOTING
PROBLEM POSSIBLE REASONS & SOLUTIONS
Garment
Steamer/Iron does
not heat
Pilot light
goes On and Off
Some odor or small
particles come out
of steam vents of
new iron
Garment
Steamer/Iron does
not steam
Water droplets coming
from steam vents
•Make sure that the plug is securely in the socket.
•Temperature setting too low.
Turn to higher setting.
•This is normal.
The light goes On and Off as the thermostat is
switching the heating element On and Off to
maintain the selected temperature.
•This is normal.
Follow instructions for first use and allow iron to steam
through 2-3 fillings & press the steam trigger
occasionally to eliminate small white particles.
• Water tank may be empty or water level is very low.
Add water.
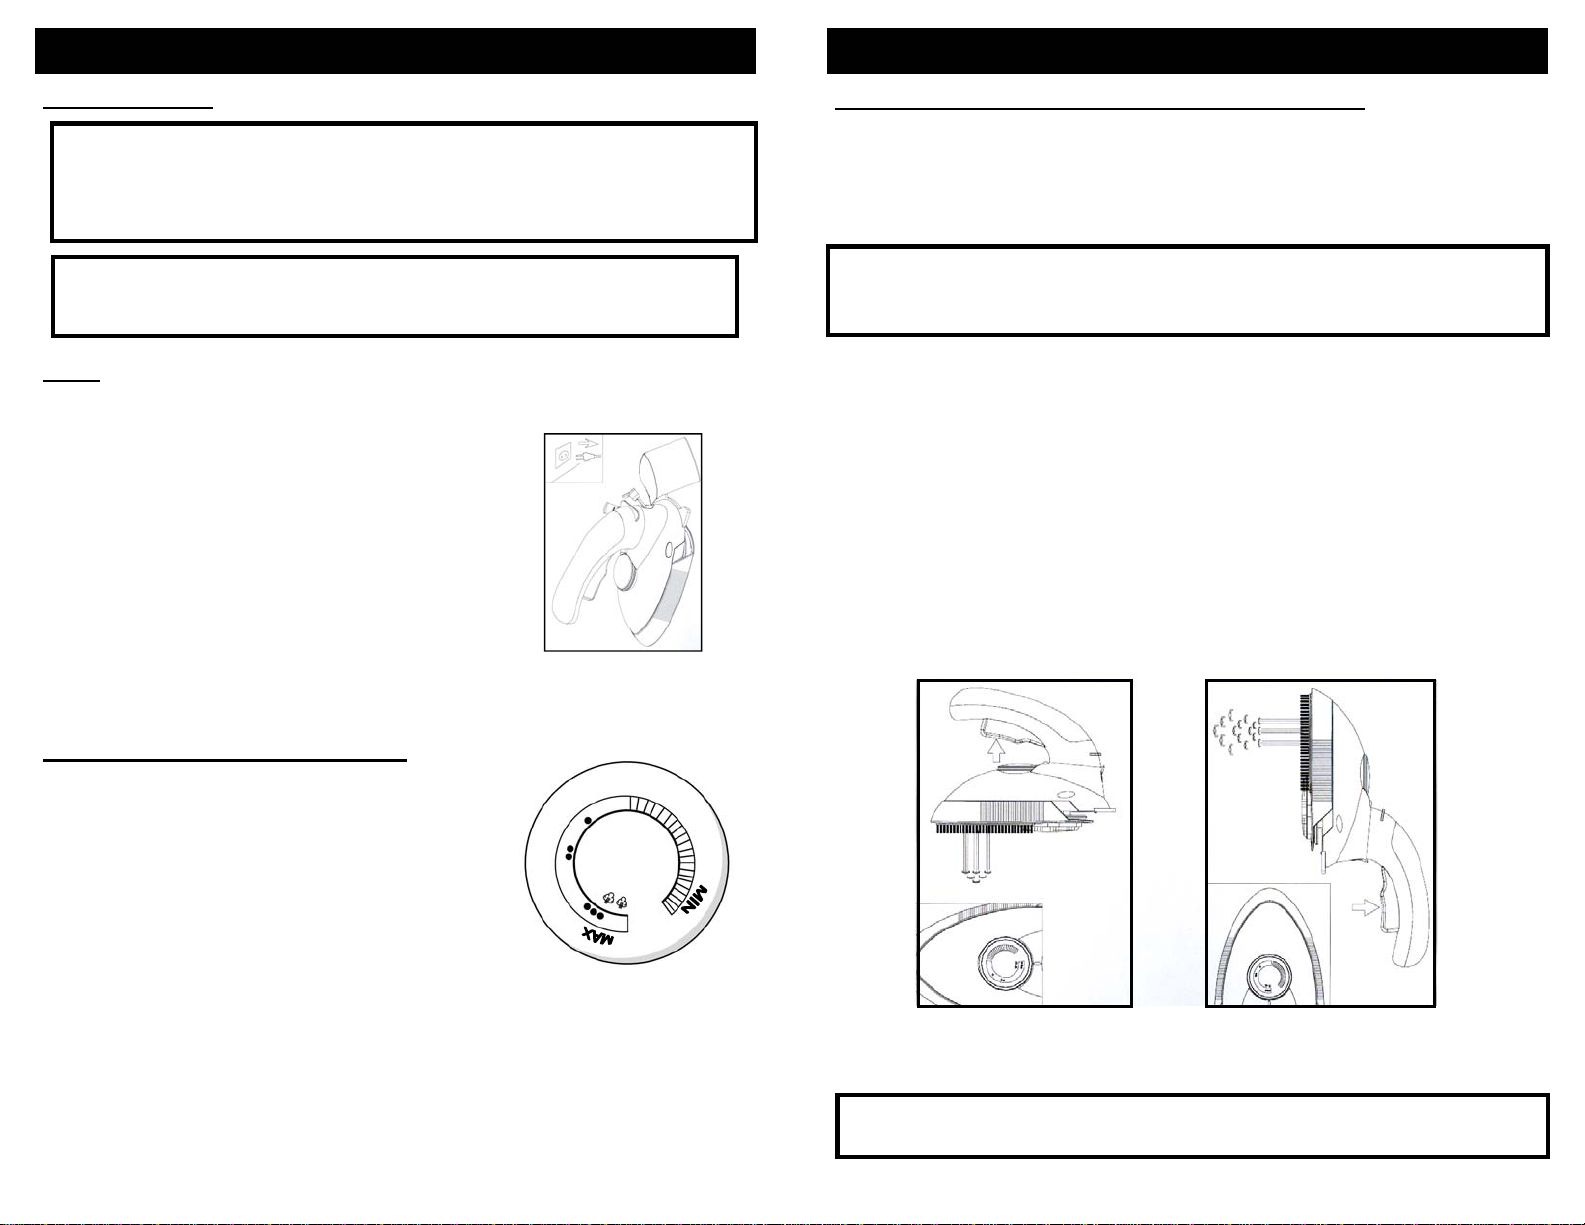
• Make sure that the temperature control dial is correctly
set. For maximum steam, (setting ‘Max’ on steam
control), temperature control dial should be set on ‘•••’.
• Make sure the iron has reached the selected
temperature by confirming that the pilot light has gone
"Off". For more steam, turn temperature dial to
higher setting, e.g. ‘•••’.
• If temperature setting is correct and there is no steam,
gently tap the soleplate on the ironing board a few
times. Move the temperature control dial from ‘MIN’ to
‘Max’ a few times.
• Iron may not be hot enough. Set temperature control
dial to the ‘Max’ position. Always allow iron sufficient
time to heat up (pilot light goes off).
•Overuse of steam trigger. Allow more time between
each burst.
•Iron may have been overfilled. Turn iron off,empty
water and follow instructions for filling.
•Steam performance may be low if iron requires
seasoning. To season, use regular tap water for 1or 2
tanks until steam performance improves.
9
ONE (1) YEAR LIMITED WARRANTY
EURO-PRO Operating LLC warrants this product to be free from defects in material and
workmanship for a period of one (1) year from the date of the original purchase, when utilized for
normal household use, subject to the following conditions, exclusions and exceptions.
If your appliance fails to operate properly while in use under normal household conditions within
the warranty period, return the complete appliance and accessories, freight prepaid. For Customer
Service support, call 1 (800) 798-7398 or visit our website www.sharkcompany.com.
If the appliance is found to be defective in material or workmanship, EURO-PRO Operating LLC
will repair or replace it free of charge. Proof of purchase date and $ 9.95 to cover the cost of return
shipping and handling must be included. *
The liability of EURO-PRO Operating LLC is limited solely to the cost of the repair or replacement
of the unit at our option. This warranty does not cover normal wear of parts and does not apply to
any unit that has been tampered with or used for commercial purposes. This limited warranty does
not cover damage caused by misuse, abuse, negligent handling or damage due to faulty
packaging or mishandling in transit. This warranty does not cover damage or defects caused by
or resulting from damages from shipping or repairs, service or alterations to the product or any of
its parts, which have been performed by a repair person not authorized by EURO-PRO Operating
LLC.
This warranty is extended to the original purchaser of the unit and excludes all other legal and/or
conventional warranties. The responsibility of EURO-PRO Operating LLC if any, is limited to the
specific obligations expressly assumed by it under the terms of the limited warranty. In no event is
EURO-PRO Operating LLC liable for incidental or consequential damages of any nature
whatsoever. Some states do not permit the exclusion or limitation of incidental or consequential
damages, so the above may not apply to you.
This warranty gives you specific legal rights, and you may also have other rights which vary from
state to state or province to province.
*Important: Carefully pack item to avoid damage in shipping. Be sure to include proof of
purchase date and to attach tag to item before packing with your name, complete address
and phone number with a note giving purchase information, model number and what you
believe is the problem with item. We recommend you insure the package (as damage in
shipping is not covered by your warranty). Mark the outside of your package “ATTENTION
CUSTOMER SERVICE”. We are constantly striving to improve our products, therefore the
specifications contained herein are subject to change without notice.
_ _ _ _ _ _ _ _ _ _ _ _ _ _ _ _ _ _ _ _ _ _ _ _ _ _ _ _ _ _ _ _ _ _ _ _ _ _ _
OWNERSHIP REGISTRATION CARD
FOR CANADIAN CONSUMERS ONLY
Model GI460A
Printed in China 10
Please complete and return within ten (10) days of purchase. The registration will enable us to
contact you in the event a product defect is discovered. By returning this card you acknowledge
to have read and understood the instructions for use, and warnings set forth in the accompanying
instructions.
RETURN TO:
EURO-PRO Operating LLC, 4400 Bois Franc, St. Laurent, Quebec H4S 1A7
PURCHASER: ……………………………………………………………………………………………
ADDRESS: ……………………………………………………………………………………………….
DATE OF PURCHASE: …………………….. MODEL: ………………. SERIAL NO: .…………….
NAME AND ADDRESS OF STORE: …………………………………………………………………..
GI460A