13 ninjakitchen.com 14
ninjakitchen.com
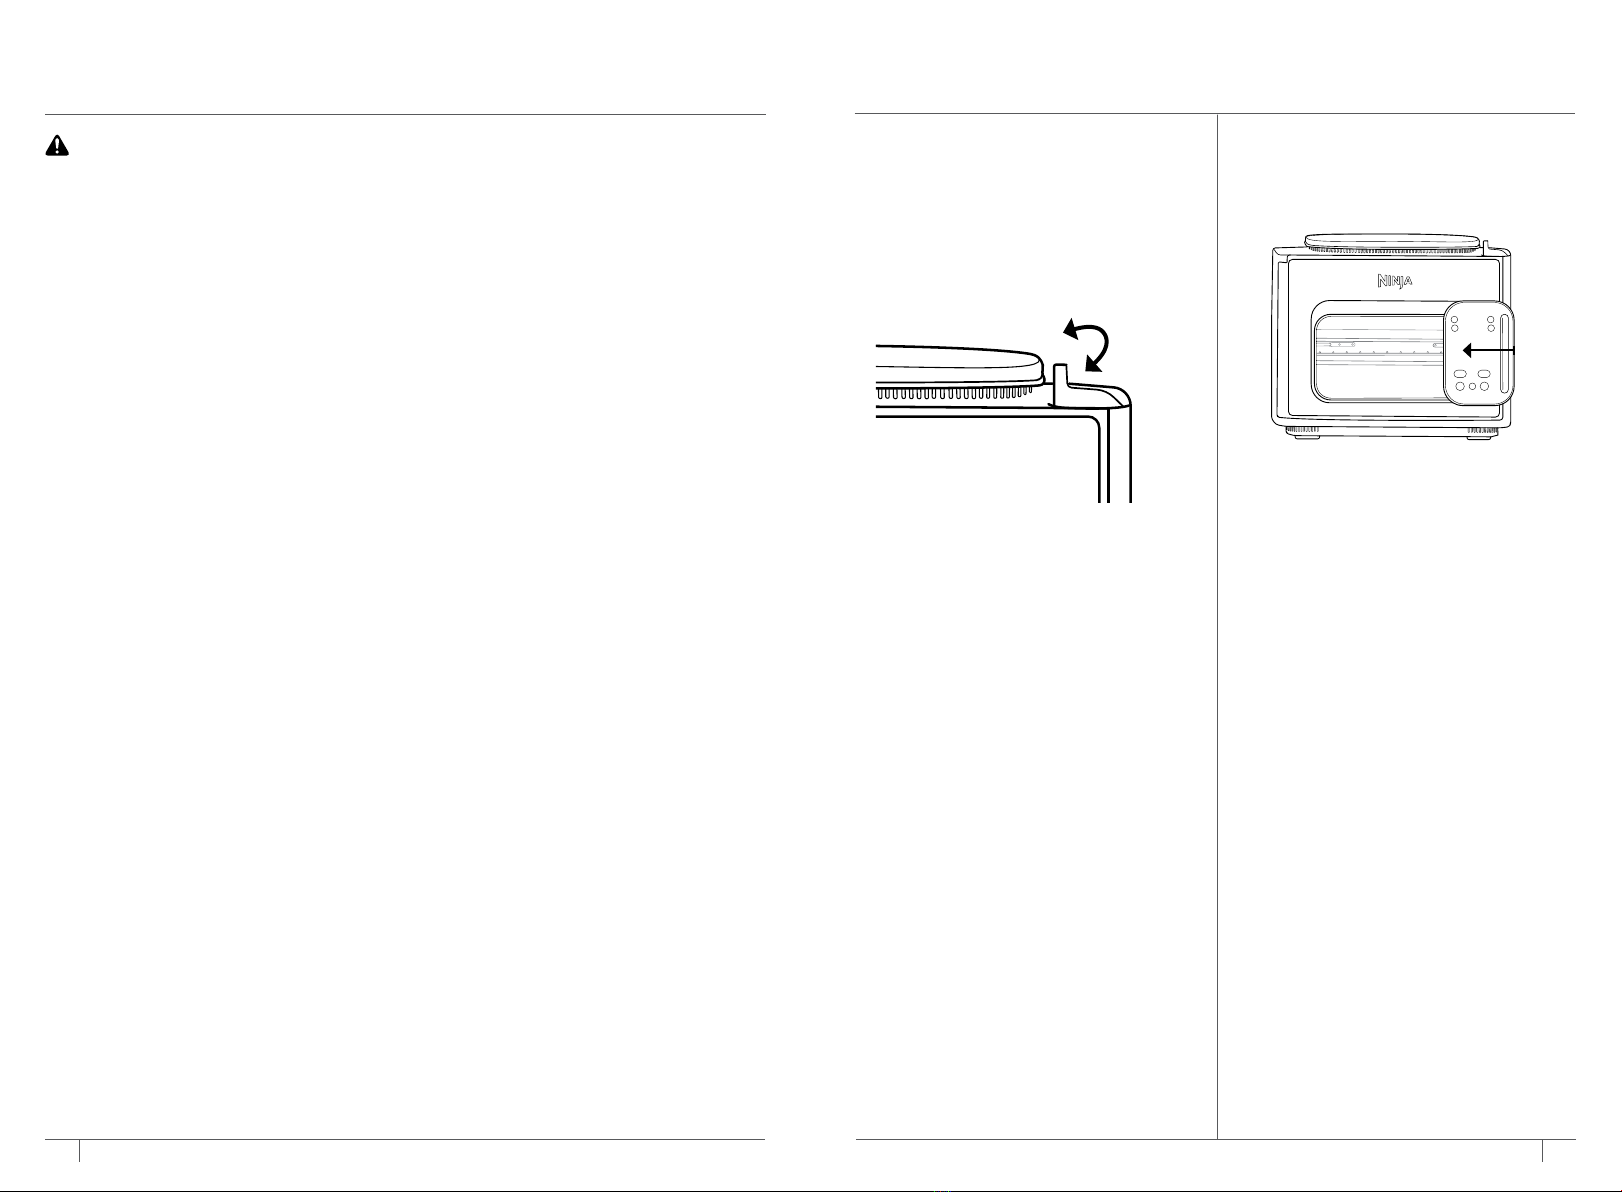
CLEANING & MAINTENANCE
EVERYDAY CLEANING INSTRUCTIONS:
The unit should be cleaned thoroughly after
every use.
1Unplug the unit from the wall outlet and
ensure the unit is fully cool before washing.
2To clean the internal unit and the control
panel, wipe them clean with a damp cloth.
DO NOT use abrasive scouring pads.
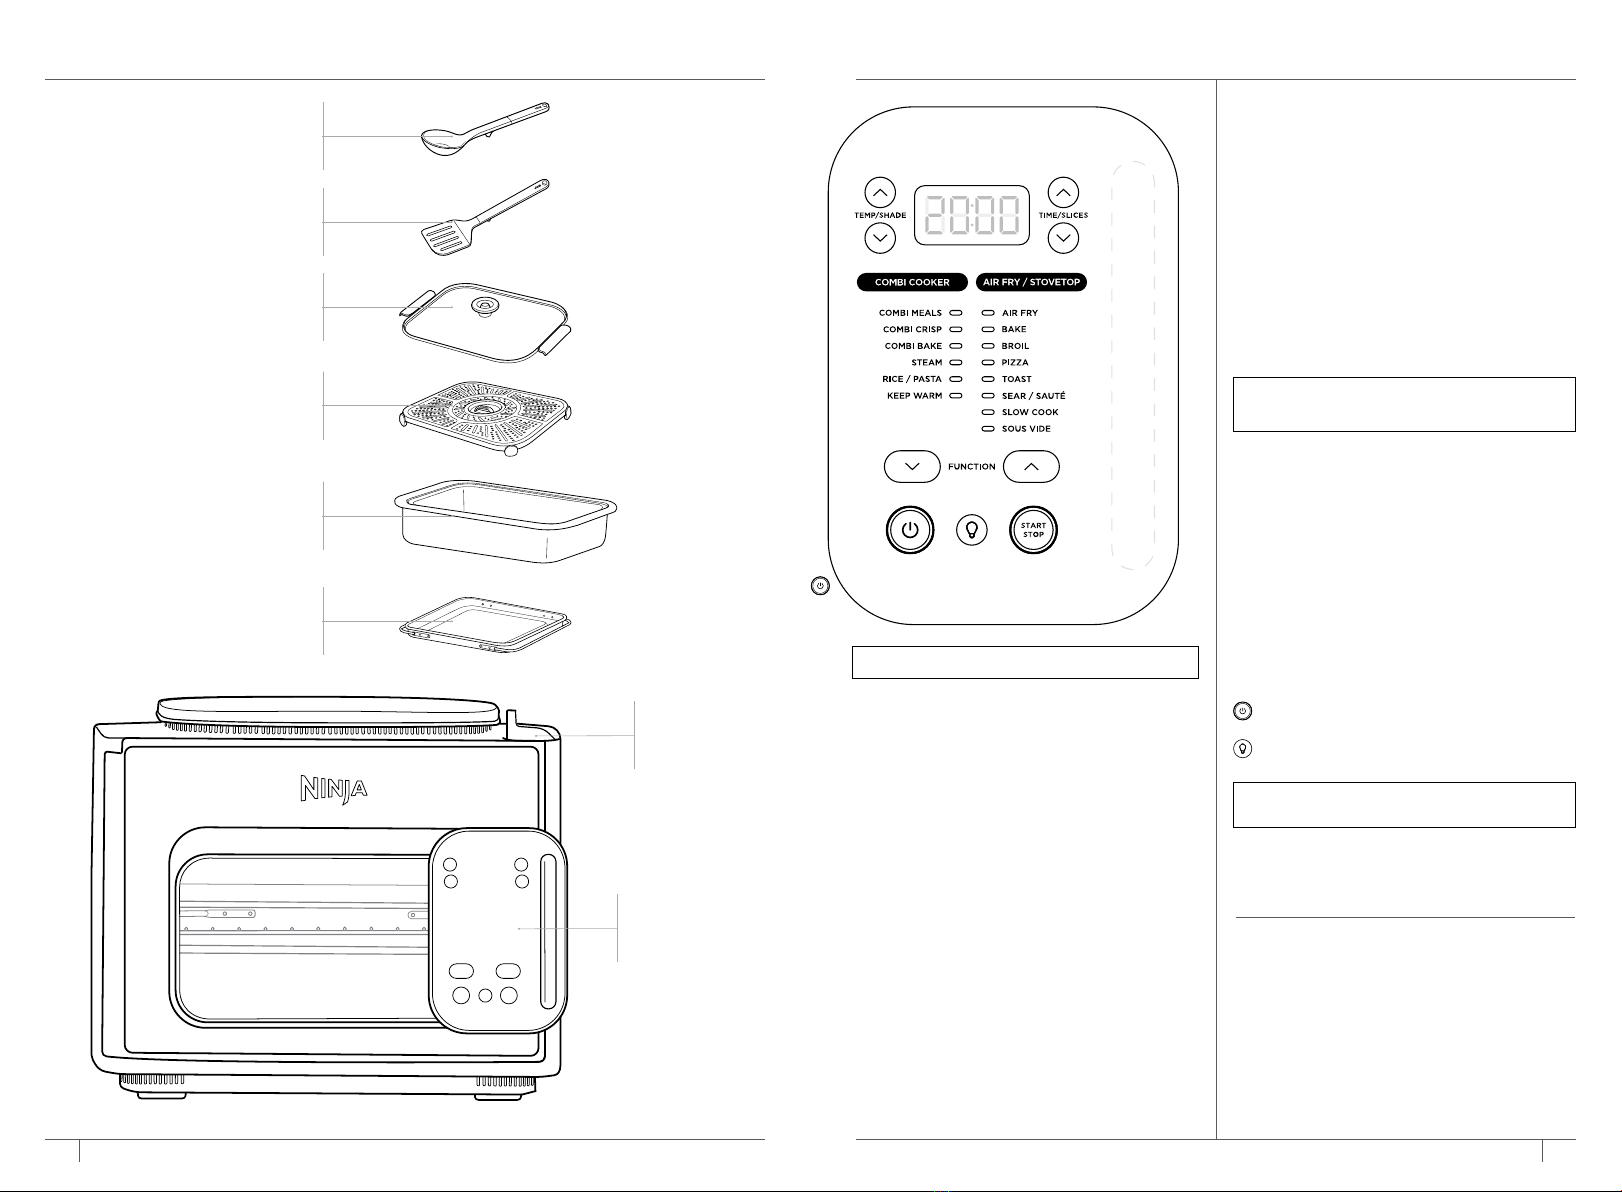
3The Combi Cooker Pan, crisper plate, and
bake tray can be washed in the dishwasher.
4If food residue is stuck on the Combi Cooker
Pan or crisper plate, fill the pot with water and
allow to soak before cleaning. DO NOT use
scouring pads. If scrubbing is necessary, use a
non-abrasive cleanser or liquid dish soap with a
nylon pad or brush.
5Air-dry all parts after each use.
NOTE: NEVER put the cooker base in the
dishwasher, or immerse it in water or any
other liquid. NOTE: The Combi Cooker Pan and bottom
heater of the unit will be very hot. Clean the
sides of the interior with caution.
DEEP CLEANING INSTRUCTIONS:
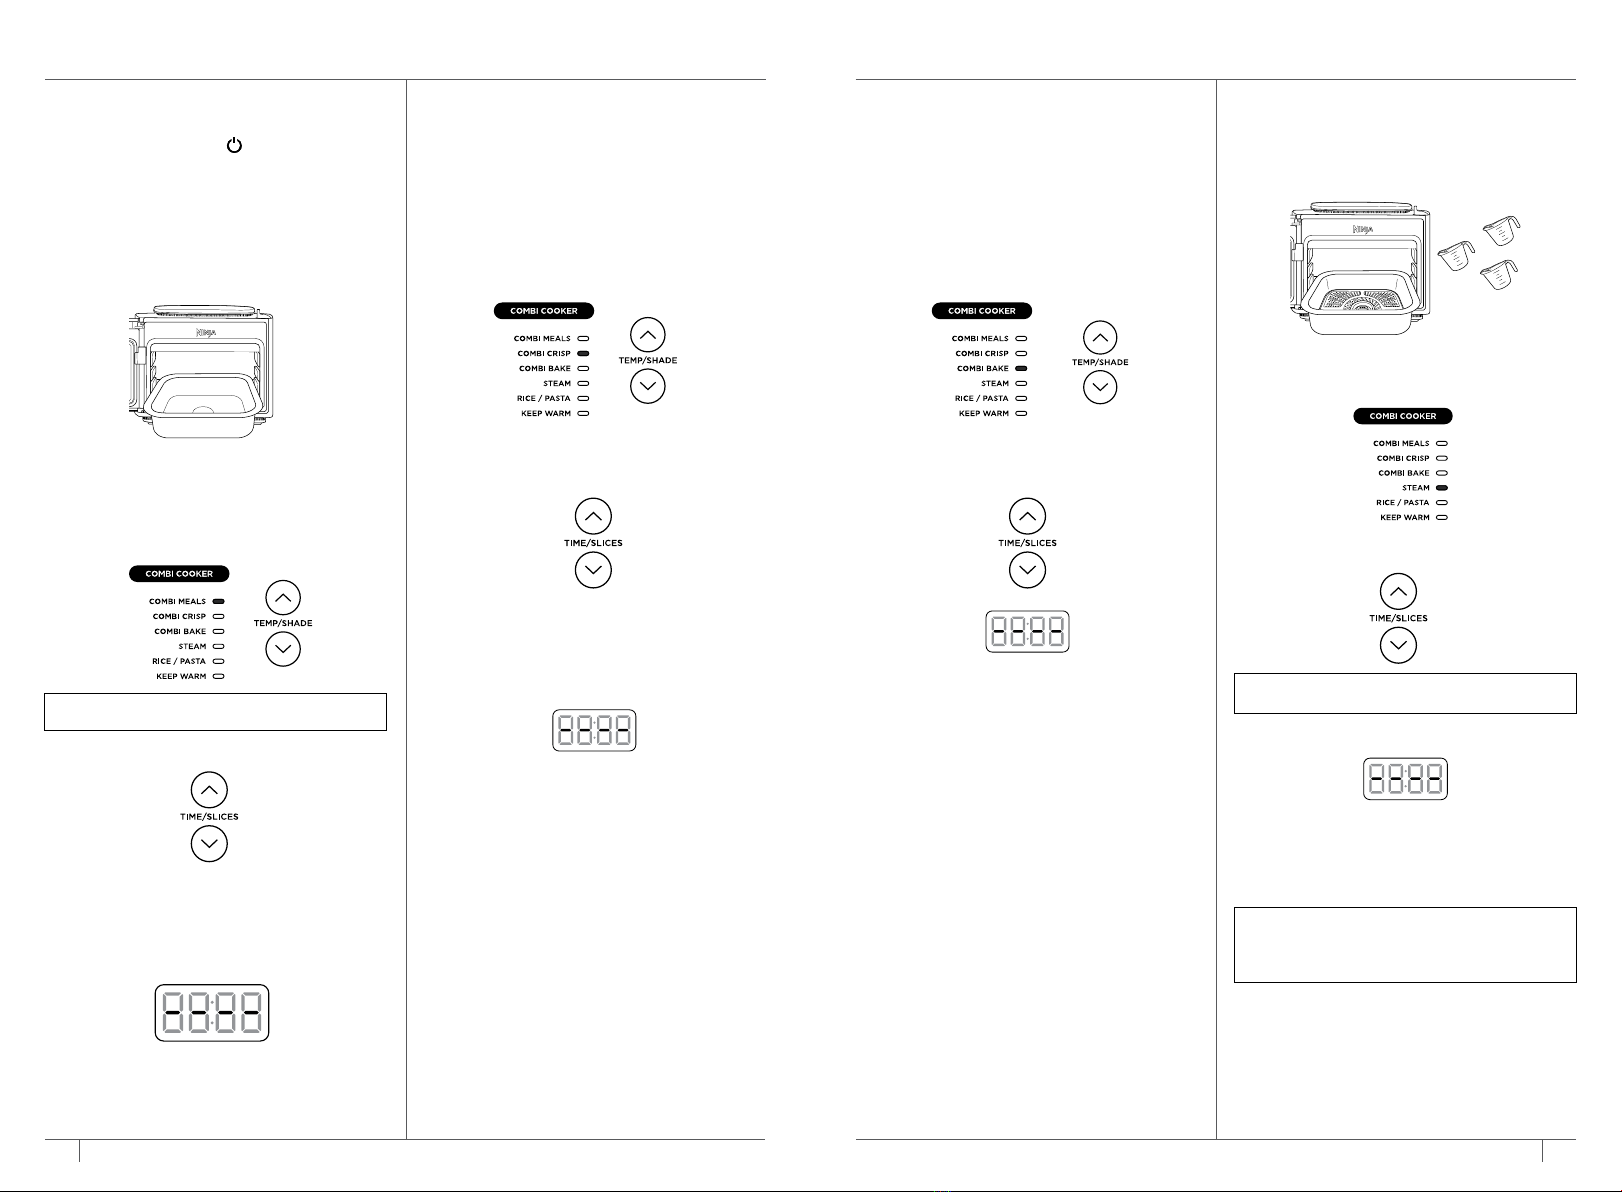
1 Fill Combi Cooker Pan with 3 cups of water.
2 Move SmartSwitch to COMBI COOKER.
3 Select STEAM and set time to 10 minutes.
Close door and press START/STOP.
4 When time reaches zero and the unit has
cooled down, use a wet cloth or sponge to
wipe down the interior of the unit.
CAUTION: When cleaning the interior of the
unit, do not touch the fan.
5 Remove water from pot and be sure to rinse
both the cooking pot and crisper plate to
ensure all residue has been removed.
Slow Cook
1Before getting started, ensure that you are
only using the Combi Cooker Pan without the
crisper plate.
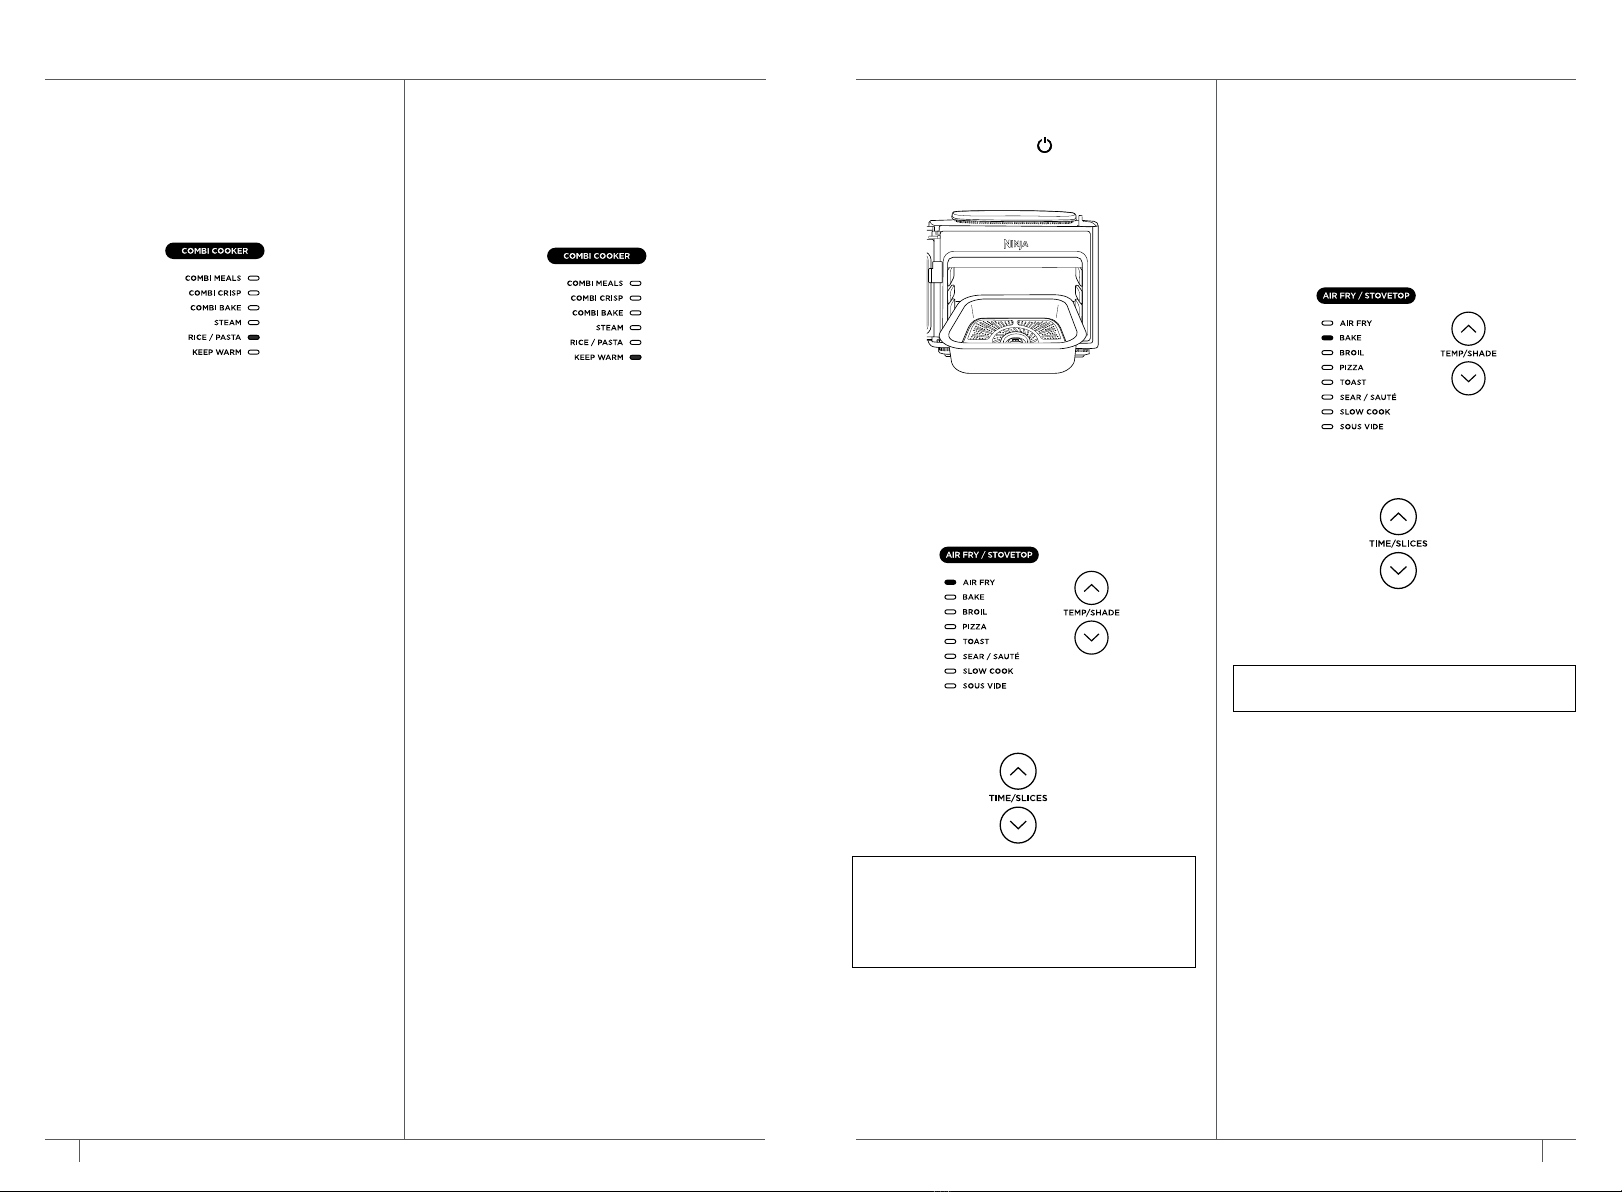
2Move SmartSwitch to AIR FRY/STOVETOP,
then use the FUNCTION arrows select SLOW
COOK. The default temperature setting will
display. Use the TEMP/SHADE arrows to
select "Lo" or "Hi."
3Use the TIME/SLICES arrows to select a
cook time.
4Press START/STOP to begin cooking.
5When cook time reaches zero, the unit will
beep, automatically switch to Keep Warm
mode, and begin counting up.
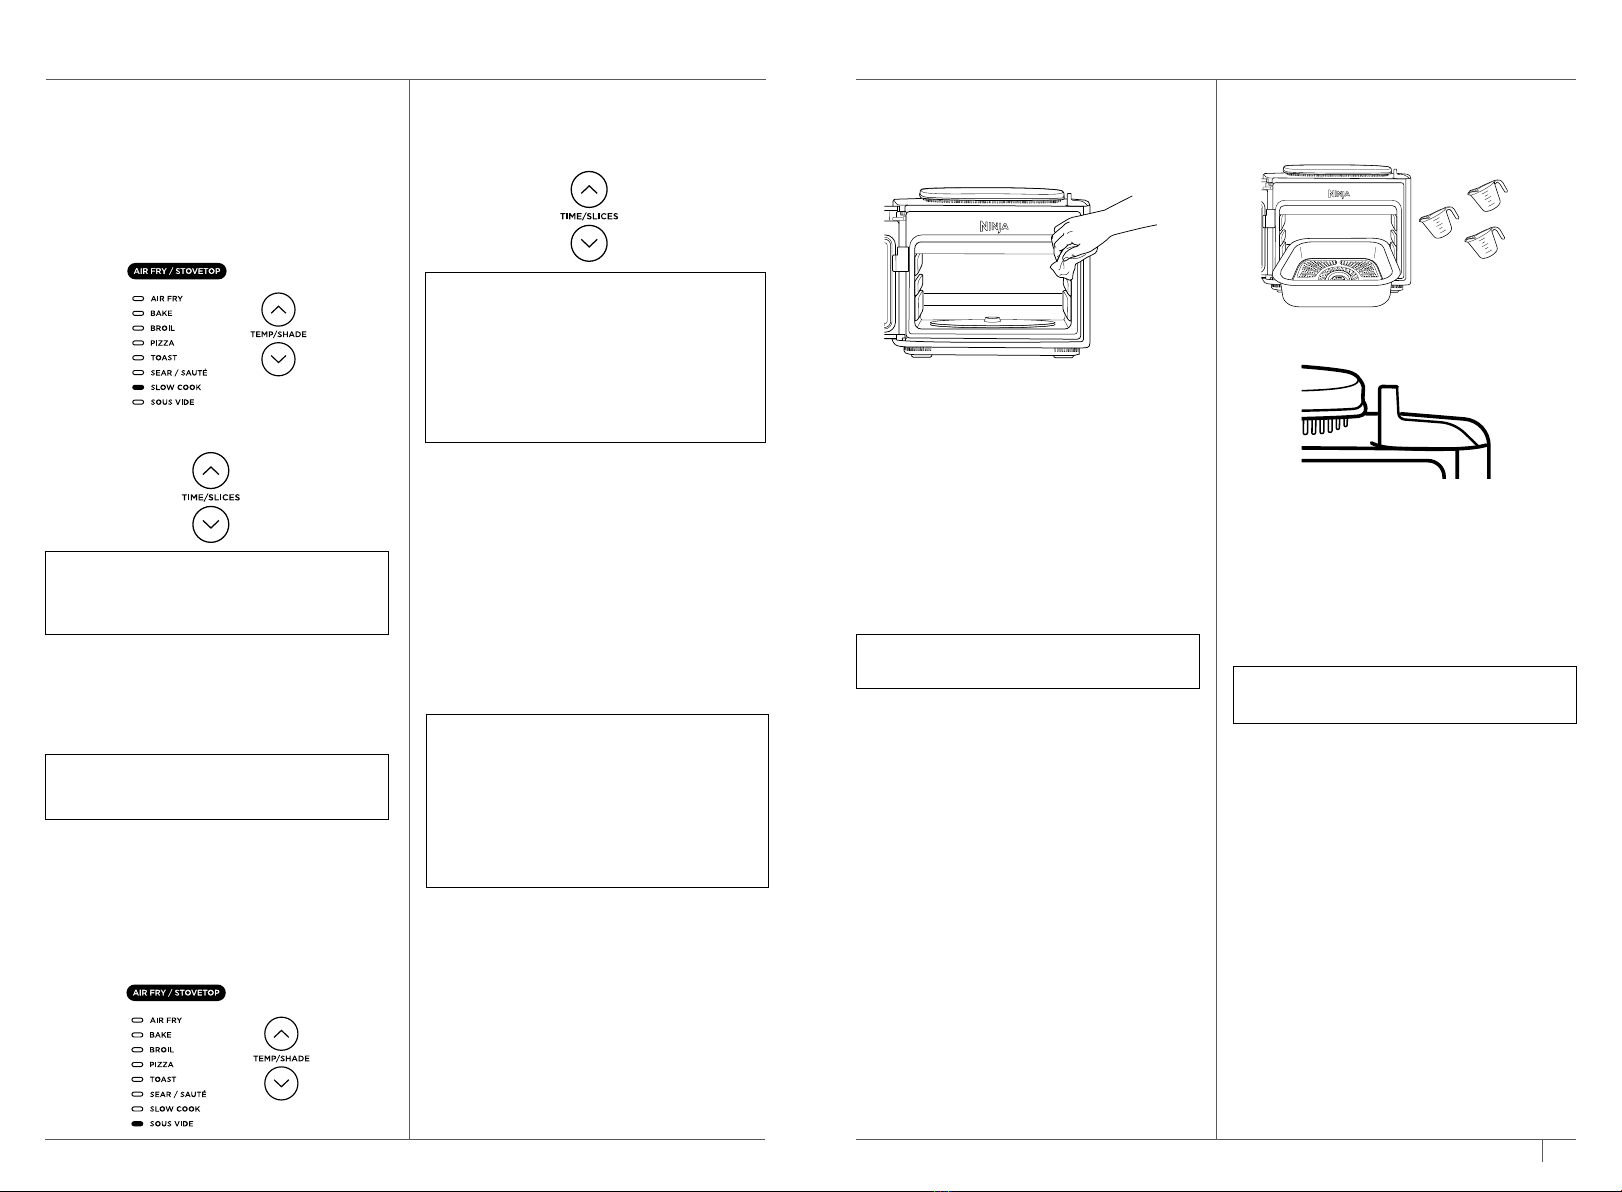
Sous Vide
1Before getting started, add 12 cups of room-
temperature water to the Combi Cooker Pan.
Then add ingredients to the Combi Cooker Pan.
2Move the SmartSwitch to AIR FRY/STOVETOP,
then use the FUNCTION arrows to select SOUS
VIDE. The default temperature setting will
display. Use the TEMP/SHADE arrows to select
a temperature between 120°F and 190°F in
5-degree increments.
NOTES: Sous Vide is almost always the first
step in the cooking process. Foods should be
finished by using a dry heat method such as
broiling, sauteéing, roasting, or air frying.
Use the Sous Vide function when reheating
food that had been previously cooked using
the Sous Vide function. After preheating
the water, add food in resealable bags and
cook approximately 15–20 minutes using the
desired cook temperature.
NOTE: The SLOW COOK LO time setting
may be adjusted between 6 and 12 hours. The
SLOW COOK HI time setting may be adjusted
between 4 and 12 hours.
NOTES: Time for preheating depends on the
temperature of the water added. Prepare up
to 3 pounds of ingredients during this time by
seasoning them, then placing each portion in a
single-use resealable plastic bag.
For cook times of 4+ hours with a temp above
160°F, double-bag each portion or wrap in
plastic wrap before placing in the plastic bag
to help protect food during the long period of
submersion.
NOTE: For best results, make sure the Combi
Cooker Pan isn't hot or warm, and do not use
warm water.
USING YOUR NINJA COMBITM - CONT.
+
+
3The cook time will default to 3 hours. Use the
TIME/SLICES arrows to select a cook time up
to 12 hours in 15-minute increments, then from
12 to 24 hours in 1-hour increments
4Press START/STOP to begin preheating.
5
The unit will beep when preheating is complete
and "ADD FOOD" will appear on the display.
Open the door and place bags in the water
using the water displacement method:
Working with one bag at a time, leave a corner
of the bag unzipped—as you slowly lower the
bag into the water, the pressure of the water
will force the air out of the bag. When just the
bag’s seal is above the water line, finish closing
the bag, making sure no water gets inside.
Keep the bag’s seal just above the water line.
6Close the door.
7When cook time reaches zero, the unit will beep
and display "End".