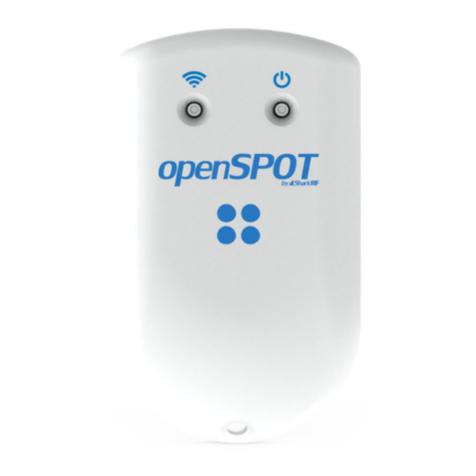
SharkRF openSPOT3 User manual


1.1
1.2
1.2.1
1.2.2
1.3
1.3.1
1.3.1.1
1.3.1.2
1.3.2
1.3.2.1
1.3.3
1.3.3.1
1.3.3.2
1.3.4
1.3.5
1.3.6
1.4
1.4.1
1.4.2
1.5
1.5.1
1.5.2
2.1
2.2
2.3
2.4
2.5
2.6
2.6.1
2.6.2
2.6.3
2.6.4
2.6.5
2.6.6
2.6.7
TableofContents
openSPOT3usermanual
Firststeps
ConnectingtoaWi-Finetwork
QuickSetup
Settingupyourtransceiver
DMRradiosetup
Exampleconfigurations
DMRusagenotes
D-STAR®radiosetup
D-STAR®APRS®
C4FM/Fusion®radiosetup
UsingtheWires-X®button
C4FM/Fusion®APRS®
NXDN®radiosetup
P25radiosetup
POCSAGpagersetup
LEDstates
StatusLED
PowerLED
Buttonusage
Powerbutton
Wi-Fibutton
Webinterface
Openingthewebinterface
Aboutthewebinterface
Statuspage
Connectorspage
Modempage
Settingspage
Configurationprofile
Firmwareupgrade
SharkRFNetwork
Voiceannouncements
Locationsettings
DMRsettings
D-STAR®settings
2

2.6.9
2.6.10
2.6.11
2.6.12
2.6.13
2.6.14
2.6.15
2.6.16
2.6.17
2.6.18
2.6.8
2.7
2.7.1
2.7.2
2.7.3
2.7.4
2.7.5
2.7.6
2.8
2.8.1
2.8.2
2.8.3
2.8.4
2.8.5
2.8.6
2.8.7
2.9
3.1
3.2
3.3
3.4
3.5
3.6
3.7
3.8
3.9
3.10
3.11
C4FM/Fusion®settings
NXDN®settings
P25settings
POCSAGsettings
Transcodegainsettings
Locksettings
Callmutesettings
Beepersettings
RTCsettings
Callaudiosettings
Miscellaneoussettings
Networkpage
Networktraffic
Networksettings
NTPsettings
Wirelesssettings
IPsettings
MACsettings
Sidepanels/Toolspage
Quickcall
BrandMeisterManager
DMRSMSchat
POCSAG/DAPNET
APRS®chat
IDdatabaselookup
Upgrade
Loginpage
Connectors
Null
Homebrew/MMDVM®
DMRplusdongle
DCS/XLX
REF/XRF
FCS
YSFReflector
NXDNReflector
P25Reflector
DAPNET
APRS®
3

3.13
3.14
4.1
4.2
4.3
4.3.1
4.3.2
4.3.3
4.3.4
4.3.5
4.4
4.5
4.6
5.1
5.2
5.3
5.4
3.12
SharkRFIPConnectorClient
SharkRFIPConnectorServer
AutoCal
Advancedusage
Powersaving
Controlcalls
Crossmodes
DMRtransceiver
D-STAR®transceiver
C4FMtransceiver
NXDN®transceiver
P25transceiver
USBserialconsole
API
Factoryreset
Miscellaneous
Troubleshooting
Specifications
Acknowledgement
Opensourcelicences
4

openSPOT3usermanual
Thisusermanualisforthestablefirmwareversionv12.It'supdatedwithnewinformationwhenanewstable
firmwareisreleased.
ThePDFversionisavailablehere.
Companynamesandproductsinthismanualaretrademarksorregisteredtrademarksoftherespectivecompany.
D-STAR®isaregisteredtrademarkofIcomInc.
SystemFusion®isaregisteredtrademarkofYaesuMusenCo.,Ltd.
NXDN®isaregisteredtrademarkofJVCKenwoodCorp.andIcomInc.
APRS®isaregisteredtrademarkBobBruninga,WB4APR
MMDVM®isaregisteredtrademarkofShenzhenHKCNMACo.,Ltd.
Supportinformation
openSPOT3usermanual
5

TheopenSPOT3isdesignedtobeverysimpletouse,butifyouhavequestions,feelfreetoasktheminemail.
Youcanalsoseekhelpinourcommunityforum.
Pleasenotethatwedon'thaveofficialsupportonotherplatformslikeFacebook.
Packagecontents
TheopenSPOT3packagecontainsanAC/USBpowersupplyandaUSBcable.Theseareallyouneedtooperate
theopenSPOT3,however,youwillneedawebbrowseronacomputer,tabletormobilephoneforsettingupthe
openSPOT3throughit'swebinterface,butafterthat,thedevicecanworkstandalone.
PleaseonlyusethesuppliedAC/USBpowersupplytochargetheopenSPOT3,unlessyouarepluggingthe
openSPOT3toapowerbank,acomputeroryourvehicle'sbuilt-inUSBpoweradapter.Theusageof
inappropriatepowersuppliesvoidsthewarranty.
openSPOT3usermanual
6

Firststeps
Chargingthebattery
ConnecttheopenSPOT3toaUSBpowersupplytostartchargingthebattery.TheopenSPOT3isfullyfunctional
whileitischarging.
Poweringup
PoweruptheopenSPOT3bypressingthepowerbuttonforatleast1second.
Ifthedeviceisrunningwiththefactorydefaultconfiguration,thenthere'saninitializationrunningforabout15-
20secondsandthestatusLEDwillbeblinkingwhite:
Afterthis,theLEDwillbeslowlypulsatingwhiteindicatingthatthedevicehasenteredaccesspoint(AP)mode
andit'sbroadcastingit'sownWi-FinetworkcalledopenSPOT3AP:
Firststeps
7

TheAPmodeistheopenSPOT3'sdefaultmodeofoperationifnoWi-Finetworksareconfigured.APmodelets
youconfigureaWi-FinetworkwhichtheopenSPOT3willconnectinnormalmode.YoucanswitchbetweenAP
andnormalmodeanytimebypressingtheWi-Fibuttonforabout3seconds.
ConnectingtheopenSPOT3toaWi-Finetwork
Connectyourwebbrowserdevice(phone/tablet/computer)totheWi-FinetworkcalledopenSPOT3AP.
IfthereisnoWi-FinetworkcalledopenSPOT3AP,thenmakesuretheopenSPOT3isinAPmode(status
LEDispulsatingwhite).YoucanswitchbetweenAPandnormalmodeanytimebypressingthebuttonfor3
seconds.
AlsomakesuretheopenSPOT3isplacedclosetoyourphone/tablet/computer.
Theinitializationsetupopensautomatically.
Iftheinitializationsetupwon'topenautomatically,thenyoucanopenitbyenteringhttp://192.168.99.1/
intothewebbrowserwhileyourbrowserdeviceisconnectedtotheWi-FinetworkopenSPOT3AP.
Selectthecountryofoperation,thenclickontheNextbutton.
SelectwhichWi-FinetworktheopenSPOT3willuse(usuallyyourownWi-Finetwork)byclickingonthe
ConnectbuttonatthedesiredWi-Finetwork.EntertheWi-FinetworkpasswordintheNetworkkeydialog
(makesureyouenterthepasswordcasesensitive),thenclickonthedialog'sConnectbutton.
TheopenSPOT3stopsbroadcastingit'sownWi-Finetwork,andautomaticallytriestoconnecttotheselected
Wi-Finetwork.ThisisindicatedbythestatusLEDbecomingblueandtheneventuallyalternating
green/orange,orgreen.
Thewebbrowserdevice(ex.yourphone)detectsthattheopenSPOT3APisnolongeravailable,anddrops
theconnection.ItshouldautomaticallyconnectbacktothepreviouslyusedWi-Finetwork.Ifitdoesnot,
connectittothesameWi-FinetworkastheopenSPOT3.
AsuccessfulconnectiontotheWi-Finetworkisindicatedbyanalternatinggreen/yellow(orgreen)statusLEDon
theopenSPOT3whichmeanstheNullconnectorisactiveandthedeviceisconnectedtotheWi-Finetwork.
QuickSetupinitialization
OpenSharkRFLinkinyourwebbrowser.EntertheopenSPOT3'sdeviceUID(youcanfindthisIDonthestickerat
thebottomoftheopenSPOT3),thenclickontheConnectbutton.
TheopenSPOT3'swebinterfacewillopeninyourwebbrowser.Ifnot,thenmakesureyourbrowserdevice
(phone/tablet/computer)isconnectedtotheexactsameWi-FinetworkastheopenSPOT3,andthatthe
openSPOT3isconnectedtotheWi-Finetworkindicatedbegreen/orangeorgreenLED.
FillinyourcallsignandIDsintheQuicksetup,thenclickontheSavebutton.
Firststeps
8

QuickSetup
QuickSetuphelpsyoutoconfiguretheopenSPOT3withyourtransceiverandconnecttothepreferrednetwork.
Selectthetypeofyourradio
Setsomebasicsettingslikethefrequency,andselectthenetworkyouwanttoconnect(thiswillsetwhich
connectorwillbeused)
Selecttheservertoconnect,settheneedednetworkparameters(likeyourcallsign,IDs,etc.),andclickon
theConnectbutton
AftertheopenSPOT3isconnectedtotheselectedserveritisreadytousewithyourtransceiver
Firststeps
9

Settingupyourtransceiver
Herearesometipsonsettingupdifferenttypesoftransceivers.
DMRradiosetup
Setupasimplexchannel(withthesameRXandTXfrequencies).Youcansetthetimeslottoanyvalue,asit
isnotusedinsimplexmode.
Setthechannel'scolorcodetotheopenSPOT3'scolorcode(bydefaultit's1,itcanbechangedonthe
Settingspage,DMRsettingssection).
SettheTXcontactforthecurrentchanneltothetalkgroupyouwanttotalkon.Ifyouwanttousea
reflector,orHomebrewcallrerouting,setittoID9withagroupcall(whichmeansTG9).
CreateanRXgrouplistandaddTG9toit.AssignthisRXgrouplisttothepreviouslycreatedsimplexchannel.
Thiswayyou'llbeabletoheartheopenSPOT3'svoiceannouncements,whichwillbesenttoTG9.
CreateacontactwithprivatecalltoID9999,whichistheopenSPOT3'sbuilt-inlocalechoservice.Makea
calltothisIDtotesttheconnectionbetweenthetransceiverandtheopenSPOT3.
RunAutoCalincaseyouhavevoicequalityissues.SeetheAutoCal'susagedescriptionintheConnectors
sectionbelow.
Takealookattheexamplechannelconfigurations.
D-STAR®radiosetup
Settheradiotosinglefrequencymode.
Ifyouwanttouseareflector,settheURCALLonyourradiotoCQCQCQ,andthelocalmoduleonthe
openSPOT3toD.
Ifyouwanttouseagateway,settheURCALLonyourradiotothegateway'scallsignandremotemodule.
TheremotemoduleshouldbethelastcharacteroftheURCALL.Makesureyouhaveregisteredyourlocal
moduleontheD-STAR®gatewayregistrationsystem.Ifyouhavearegistration,youhaveprobably
registeredthe"space"localmodule.InthiscasesetyouropenSPOT3'slocalmoduletoaspace(empty)
character.
YoucancheckyourD-STAR®registrationhere.
Youdon'thavetocareaboutRPT1andRPT2settings.
YoucanmakeatestcalltotheopenSPOT3'sbuilt-inlocalechoservicetotesttheconnectionbetweenthe
transceiverandtheopenSPOT3bysettingtheURCALLto .......E(7spacesandanE,replacedotswith
spaces).
TakealookattheD-STAR®APRS®pageifyouwanttoforwardyourtransceiver'sGPSpositiontotheAPRS®
network.
IfyouuseaKenwoodTH-D74Atransceiver,thenmakesuretheDirectReplyfeatureisturnedoff,asitbasically
causesautomaticcallsignrouting,whichcouldcauseone'stransmissiontonotbeheardontheusedreflector.
C4FM/Fusion®radiosetup
Settheradiotosinglefrequencymode.
Usedigitalnarrow(DN)mode.Voicewide(VW)modedoesnotsupportlateentry.
Ifyourradiohashalfdeviationmodeturnedon,makesureyouusetheC4FMHalfDeviationmodemmode
ontheopenSPOT3.
YoucanmakeatestcalltotheopenSPOT3'sbuilt-inlocalechoservicetotesttheconnectionbetweenthe
transceiverandtheopenSPOT3bysettingtheDGIDto99inyourradio.Don'tforgettosettheDGIDbackto
Settingupyourtransceiver
10

AUTO(orALLor00,dependingwhat'savailableonyourradio)afteryou'vedonewiththelocalechotest.
RunAutoCalincaseyouusetheC4FMHalfDeviationmodeandtherearevoicequalityissues.Seethe
AutoCal'susagedescriptionintheConnectorssectionbelow.
TakealookattheWires-X®buttonusagedescriptionandtheC4FM/Fusion®APRS®pageifyouwanttoforward
yourtransceiver'sGPSpositiontotheAPRS®network.
NXDN®radiosetup
Setupasimplexchannel(withthesameRXandTXfrequencies).
Setthechannel'sRadioAccessNumber(RAN)totheopenSPOT3'sRAN(bydefaultit's0,itcanbechanged
ontheSettingspage,NXDN®settingssection).
CreateacontactwithprivatecalltoID9999,whichistheopenSPOT3'sbuilt-inlocalechoservice.Makea
calltothisIDtotesttheconnectionbetweenthetransceiverandtheopenSPOT3.
RunAutoCalincaseyouhavevoicequalityissues.SeetheAutoCal'susagedescriptionintheConnectors
sectionbelow.
P25radiosetup
Setupasimplexchannel(withthesameRXandTXfrequencies).
Setthechannel'sNetworkAccessCode(NAC)totheopenSPOT3'sNAC(bydefaultit's0,itcanbechanged
ontheSettingspage,P25settingssection).NotethattheopenSPOT3requirestheNACindecimalformat
(example:ifyouhavetheNAC0x293inyourradiothenyouhavetoenter659intheopenSPOT3).
CreateacontactwithprivatecalltoID9999,whichistheopenSPOT3'sbuilt-inlocalechoservice.Makea
calltothisIDtotesttheconnectionbetweenthetransceiverandtheopenSPOT3.
RunAutoCalincaseyouhavevoicequalityissues.SeetheAutoCal'susagedescriptionintheConnectors
sectionbelow.
POCSAGpagersetup
Makesureyousettheyourpager'sreceivefrequencytotheopenSPOT3'sPOCSAGfrequency,andthatthe
baudratesmatch.Polarityshouldbenormal.TheopenSPOT3'sPOCSAGfrequencyandothersettingscanbe
changedontheSettingspage,POCSAGsettingssection.
MakesureyousettheRIC(s)inyourpager'sconfigurationtotheaddress(es)youwanttoreceivemessages
on.
SeetheDAPNETWikiformoreinformationaboutPOCSAGandDAPNET.
Settingupyourtransceiver
11

ExampleDMRradiochannelconfigurations
Hytera
Motorola
Settingupyourtransceiver
12

Settingupyourtransceiver
13

Tyt
Settingupyourtransceiver
14

DMRusagenotes
TherearetwobasictypesofDMRcallsyourtransceivercantransmitorreceive:privateandgroup.The
openSPOT3forwardswhatitreceivesfromyourradiotothenetwork,orfromthenetworktoyourradio.The
networkmayforwardyourcallstoit'sotherconnectedstations(hotspots/repeaters/gateways)orcallsfromother
connectedstationstoyoubasedonlinkedtalkgroupsandreflectors.
Talkgroupsandreflectorsarenetworkfeatures,theyarecompletelyhandledbythenetworkandnotthe
openSPOT3,andtheirbehaviormaybedifferentoneachnetwork.
Talkgroups
DMRnetworksusuallyhavestaticordynamiclinkingavailableforatalkgroup.StaticallylinkedTGsremain
linkedallthetime,dynamicallylinkedTGsstaylinkedforyouonlyforalimitedamountoftimeafterthelast
call(usually15minutesonBrandMeister,dependingonthecurrentlyusedserver'sconfiguration).
Havingatalkgrouplinkedeitherdynamicallyorstaticallymeansthatstationswhichhavethesamelinked
talkgroupwillreceiveall(usuallygroup)callssenttothattalkgroup.
Dynamictalkgroups
YoucanlinkaTGdynamicallybysimplystartinga(group)calltothetalkgroupID.Thenetworkwill
automaticallylinkyouropenSPOT3tothecalledTGID.
Tounlinkalldynamicallylinkedtalkgroups,callTG4000(startashortgroupcalltoDMRID4000).
Note:callingTG4000willalsounlinklinkedreflectors,notjustalldynamictalkgroups.
DynamictalkgroupsontheBrandMeisterNetwork
TheBrandMeisterNetworkletsyoucallanytalkgroupIDandwillcreatethattalkgroupdynamicallyforyou.
There'sBrandMeisterNetworkfeatureforhotspotscalledautostatictalkgroups:thefirsttalkgroupIDyoucall
aftercallingTG4000willbelinkedautostaticwhichmeansitwon'tbeunlinkedafteratimeout.Youcan
unlinkthisautostaticTGbycallingTG4000.
StatictalkgroupsontheBrandMeisterNetwork
StaticallylinkedTGscanbeconfiguredontheBrandMeisterNetwork'sdashboardafterloggingin,orbyusingthe
openSPOT3'sBrandMeisterManager.
Settingupyourtransceiver
15

Reflectors
ReflectorIDsarebetweenDMRID4000and5000.Tolinkareflector,startashortprivatecalltothereflector
ID.Tounlinkthereflector,startashortprivatecalltoDMRID4000.
Only1reflectorcanbelinkedatatime.Totalkonthelinkedreflector,sendyourcallstoDMRID9withagroup
call(TG9).You'llreceiveallcallsfromthereflectoralsotoTG9.
ReflectorsontheBrandMeisterNetwork
Reflectorusageisdeprecated(andnowadaysmostlydisabled)onBrandMeisterservers.Usetalkgroupsinstead.
Advicesforhotspotusage
BrandMeisterNetwork
Avoidstaticallylinkingtalkgroupsandonlyuseoneautostatictalkgroupatatime.
DMRplus/IPSC/othernetworks
DefinewhatTGstolinkstaticallyattheDMRplusoptionssectionatthebottomoftheHomebrew/MMDVM®
connectorsettingspage.
ChangingmodulesonXLXservers
Tounlinkthecurrentlylinkedmodule,callDMRID4000.ToconnecttomoduleA,callDMRID4001,formodule
BcallDMRID4002andsoon.
Settingupyourtransceiver
17

Example
IfyouhaveTG969linkedeitherdynamicallyorstatically,thentheserverwillforwardgroupcalls(comingfrom
otherstations(repeaters,hotspots,gateways))goingtoDMRID969toyouropenSPOT3.YouropenSPOT3will
transmititonRFandyourradiowillreceiveit.Yourradiowillopenthesquelchif:
TheTXcontactofthecurrentlyactivechannelissettoTG969,or
YouhaveanRXgrouplistwithTG969initandthisRXgrouplistisassignedtothecurrentlyactivechannel.
Settingupyourtransceiver
18

D-STAR®APRS®
YoucansetuptheopenSPOT3toforwardyourD-STAR®transceiver'slocationinformationtotheAPRS®
network,soitwillbevisibleonAPRS®mapslikeaprs.fi
SettinguptheAPRS®connection
FirstyouhavetosetuptheAPRS®specialconnectorusingtheopenSPOT3'sQuickSetup.
MakesureyouchecktheEnableinbackgroundcheckbox.Youdon'tneedtochecktheAllowuploadingdevice
locationcheckboxforD-STAR®locationforwarding.
YoucanverifytheAPRS®connectionstatusontheStatuspage.
SettingupyourD-STAR®transceiver
ThefollowingsetupisdescribedusingtheIcomID51'smenustructure.Themenustructureofyourtransceiver
maybedifferent,butthenamesofthesettingsshouldbethesameorsimilar.
Settingupyourtransceiver
19

EnablingtheGPSreceiver
GotoMenu>GPS>GPSSet>GPSSelectandselectInternalGPS.
Selectingthepositiondataformat
GotoMenu>GPS>GPSTXModeandselectD-PRS(DV-A).Thisistheeasiestmethod.Youcanenablethe
Course/Speedextension.
NowyourradiowilltransmitlocationinformationduringyourcallsifithasaGPSfixandyouholdthePTTforat
least5-10seconds.TheAPRS®locationcommentwillbeyourD-STAR®radio'sTXmessage(Menu>MyStation
>TXMessage).
Advancedsettings
IfyouwanttoselectyourownAPRS®symbol,SSIDandcommentforyourtransceiverthenenableAdvanced
mode,gototheConnectorspage,opentheAPRS®connectorsettings,andenableforcedSSID/symbol/comment.
YoucanalsosettheAPRS®symbolandSSIDinyourtransceiverwithoutusingforcedsettingsontheweb
interface:selecttheNMEA(DV-G)GPSTXmode.EnabletheRMCandGGAGPSsentences.Othersentencesare
ignoredbytheopenSPOT3soturnthemoff.
YoucansettheAPRS®symbolforyourtransceiverbyenteringitasthefirst2charactersoftheGPSMessage.
YoucanusethesymbolselectorontheopenSPOT3'swebinterfaceattheAPRS®connectorsettingstofindout
thecharactercodeofasymbol.
YoucansetanSSIDforyourtransceiverbyenteringitaftertheAPRS®symbolintheGPSMessage.
SettingasymbolandanSSIDisoptional.Youcanenter2spacecharactersfortheAPRS®symbol,ornothingfor
theSSID,oryoucanleavetheGPSmessagecompletelyemptyifyouwant.
GPSmessageexamples:
HousesymbolwithnoSSID: /y
CarsymbolwithSSID9: />9
DefaultsymbolwithSSID12: ..12(replacethe2dotswith2spaces)
Settingupyourtransceiver
20
Table of contents
Other SharkRF Gateway manuals
Popular Gateway manuals by other brands
ALTA
ALTA Monnit MNG2-4-CME-CCE-ND user guide

ZyXEL Communications
ZyXEL Communications ZYAIR B-2000 Quick installation guide
Anviz
Anviz OA1000 Mercury user manual
molex
molex CORESYNC installation instructions
ZyXEL Communications
ZyXEL Communications VMG4927-B50A quick start guide
Fireye
Fireye MB485ETH-CG Installation and operation

