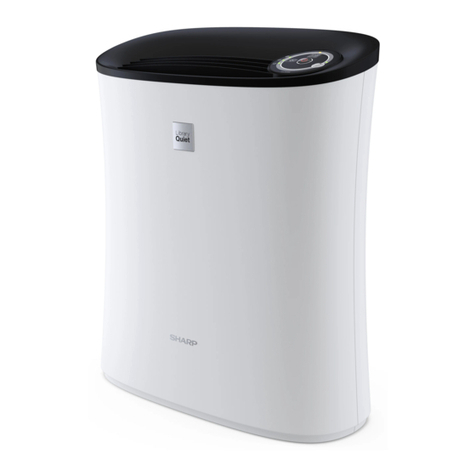
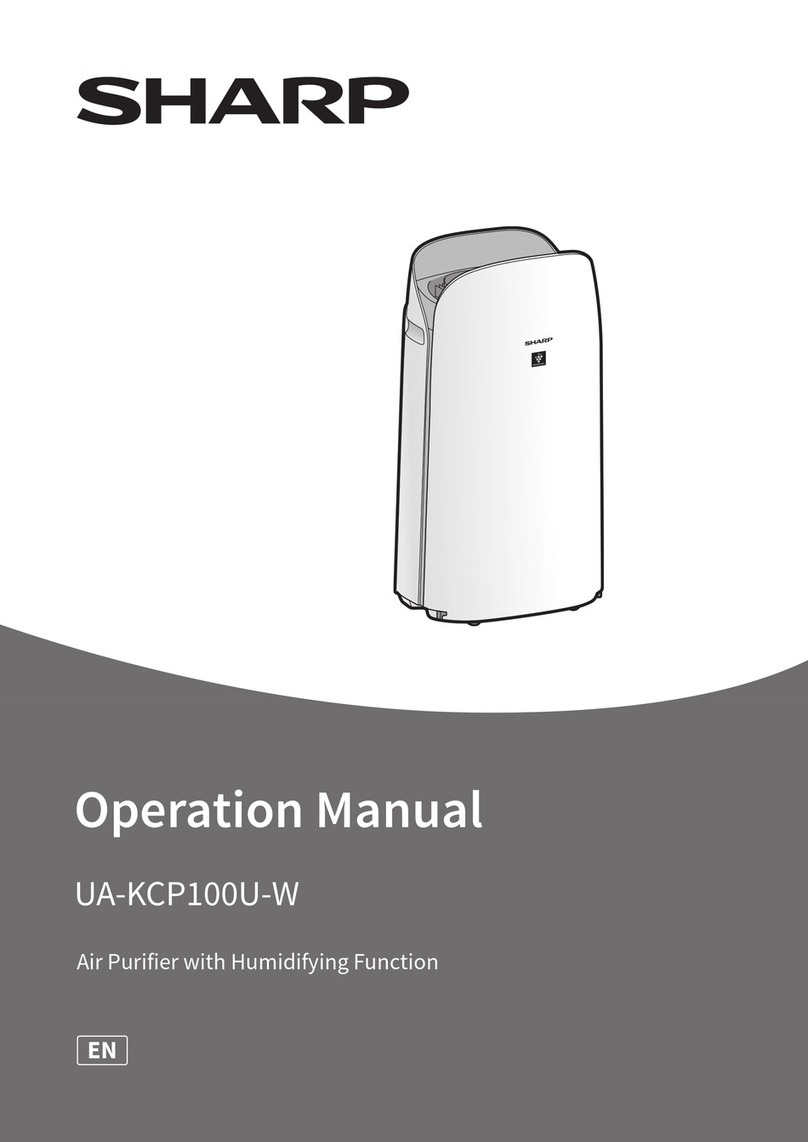
Sharp UA-PM50E User manual

UA-PM50E
Operation Manual
Air Purifier
EN ESDE PT FR PL NL


R
UA-PM50E
ENGLISH
AIR PURIFIER
WITH MOSQUITO CATCHER
OPERATION MANUAL
“Plasmacluster” and “Device of a cluster of grapes” are
trademarks of Sharp Corporation.
Free standing type
*The number in this technology mark indicates an
approximate number of ions supplied into air of 1 cm3,
which is measured around the centre of a room with
the “high-density plasmacluster 7000” applicable fl oor
area (at 1.2 m height above the fl oor) at the medium
wind volume in air purifying mode, when an air purifi er
using the high-density Plasmacluster ion evolving
device is placed close to a wall. This product is
equipped with a device corresponding to this capacity.

FEATURES
Air Purifier with Mosquito Catcher protects your family’s health by catching
mosquitoes and cleaning the air by plasmacluster technogy.
Catches mosquitoes with Insecticide-free material.
5 eff ective steps*1 based on fi ndings about mosquito habits, and by using air purifi er function.
2
1
345
1
2
34
5
mosquito catcher mode may not catch all the mosquitoes in the room
UV light attracts mosquitoes Enticing ‘Black’ colour
Ideal entrance design Powerful airfl ow and suction Strong glue sheet
*1 In collaboration with Institute for Medical Research, Malaysia
The air purifi er draws in room air from the air intake, passes the air through a Pre-
Filter, a Deodorizing Filter and a HEPA Filter inside of the unit, then discharges the air
through the air outlet. The HEPA Filter can remove 99.97% of dust particles as small
as 0.3 microns that pass through the fi lter.
The Deodorizing Filter gradually absorbs odours as they pass through the fi lter.
Some odours absorbed by the fi lters may break down over time, resulting in additional
odour. Depending on the usage environment, especially when the product is used in
extreme environments (significantly more severe than normal household use), this
odour may become strong in a shorter period than expected. If the odour persists, the
fi lters should be replaced.
Please read before operating your new Air Purifi er

E-1
ENGLISH
ENGLISH
Thank you for purchasing the SHARP Air Purifi er.
Please read this manual carefully.
Before using this product, be sure to read the
section: “Important Safety Instructions.”
After reading this manual, keep it in a convenient
location for future reference.
For your reference, we recommend to keep this
manual in the place where you can read at any
time.
IMPORTANT SAFETY INSTRUCTIONS ..... E-2
PART NAMES .............................................. E-4
FILTER AND GLUE SHEET
INSTALLATION ............................................ E-6
OPERATION ................................................E-8
USEFUL FUNCTIONS ............................... E-10
CARE AND MAINTENANCE ..................... E-12
REPLACEMENT GUIDELINES ................. E-14
TROUBLESHOOTING ............................... E-16
SPECIFICATIONS ...................................... E-17
CONTENTS
High density Plasmacluster 7000
Plasmacluster treats the air similar to the way
nature cleans the environment by emitting a bal-
ance of positive and negative ions.
Quiet operation while capture the
mosquitoes at the time of sleep
When you switch to Sleep mode, it operates qui-
etly with the Plasmacluster sign and Dust and
Odour sign light off and the UV light less bright,
while mosquito catcher function is still on.
Filtration System
Traps Dust*2
Pre-filter traps dust and other large airborne par-
ticles.
Reduces Pollen & Mold*2
HEPA filter traps 99.97% of particles as small as
0.3 microns.
*2 When air is drawn through the filter system.
Reduces Odours
Deodorizing fi lter absorbs many common house-
hold odours.

E-2
When using electrical appliances, basic safety precautions should be
followed, including the following:
WARNING - To reduce the risk of electric shock, fi re or injury to persons:
• Read all instructions before using the unit.
• Use only a 220-240 volt outlet.
• Do not use the unit if the power cord or plug is damaged or the connection
to the wall outlet is loosened.
• Periodically remove dust from the power plug.
• Do not insert fi ngers or foreign objects into the intake or air outlet.
• When removing the power plug, always hold the plug and never pull the
cord.
Electric shock and/or fi re from short circuit may occur as a result.
• Be careful not to damage the power cord, it may cause electric shock, excess heat
or fi res.
• Do not remove the plug when your hands are wet.
• Do not use this unit near gas appliances or fi replaces.
• Remove the power plug from the wall outlet before cleaning the unit and
when not using the unit.
Electric shock from bad insulation and/or fi re from short circuit may occur as a
result.
• When cleaning the unit, or when the unit is not in use, be sure to unplug the unit.
Electric shock and/or fi re from a short circuit may result.
• If the power cord is damaged, it must be replaced by the manufacturer, its
service agent, Sharp Authorized Service Centre or similarly qualifi ed person
in order to avoid a hazard.
• Do not operate when using aerosol insecticides or in rooms where there is oily
residue, incense, sparks from lit cigarettes, chemical fumes in the air or in very
high humidity conditions, such as a bathroom.
• Be cautious when cleaning the unit. Corrosive cleansers may damage the exterior.
• Only a Sharp Authorized Service Centre should service this air purifi er. Contact
the nearest Service Centre for any problems, adjustments, or repairs.
• This appliance can be used by children aged from 8 years and above and persons
with reduced physical, sensory or mental capabilities or lack of experience and
knowledge if they have been given supervision or instruction concerning use of
the appliance in a safe way and understand the hazards involved. Children shall
not play with the appliance. Cleaning and user maintenance shall not be made by
children without supervision.
NOTE - Radio or TV Interference
If this air purifi er should cause interference to radio or television reception, try to
correct the interference by one or more of the following measures:
• Reorient or relocate the receiving antenna.
• Increase the separation between the unit and radio/TV receiver.
• Connect the equipment into an outlet on a circuit diff erent from that to which the
receiver is connected.
• Consult the dealer or an experienced radio/TV technician for help.
IMPORTANT SAFETY INSTRUCTIONS

E-3
ENGLISH
CAUTIONS CONCERNING OPERATION
• Do not block the intake and/or air outlet.
• Do not use the unit near or on hot objects, such as stoves or heaters or where it
may come into contact with steam.
• Do not lay the unit down when using.
• Always hold the handle on the back of the unit when moving it.
• Do not use without the fi lters inside the unit.
• Do not wash and reuse the HEPA fi lter and Deodorizing fi lter.
Not only does it not improve filter performance, it may cause electric shock or
malfunction.
• Do not look directly into the UV light. UV light meet the standards of IEC (62471).
CAUTIONS CONCERNING GLUE SHEET
• Handle the Glue Sheet with care. Avoid children or pet from touching the sticky
surface.
• If the glue material adheres to hands or clothing, wash them quickly and carefully
with soap and water after removing the material by using cooking oil.
• Dust and dirt collecting on the sheet may reduce the eff ectiveness of Glue Sheet.
• If no mosquitoes are collected on the sheet, try changing the location of this unit.
• When disposal, dispose it according to the local disposal laws and regulations.
• This is a completely safe adhesive type product. No toxic ingredients.
INSTALLATION GUIDELINES
• When using the unit, place it away from equipment utilizing electric waves such as
televisions or radios to avoid electrical interference.
• Avoid use in locations where furniture, fabrics or other items may come in
contact with and restrict the air intake and/or air outlet.
• Avoid use in locations where the unit is exposed to condensation or drastic
temperature changes. Appropriate conditions are when room temperature is
between 0 – 35 ºC.
•
Place on a stable surface with suffi cient air circulation.
When placing the unit on a heavily carpeted area, the unit may vibrate slightly.
• Avoid locations where grease or oily smoke is generated.
The unit surface may crack as a result.
• The dust collecting ability of the unit is eff ective even when the unit is close
to the wall, the surrounding walls and fl oor may get dirty. Please place the
unit at a distance from the wall. The wall directly behind the air outlet may
become dirty over time. When using the unit for an extended period of time
at the same location, periodically clean the walls adjacent to it.
FILTER GUIDELINES
•
Follow the instructions in this manual for correct care and maintenance of the fi lters
.

E-4
PART NAMES
1
1Main Unit 7MODE Button, Indicator Light (green)
(Press 3 sec.) Plasmacluster Ion ON/OFF Button
2Air Outlet 8CLEAN ION SHOWER Button, Indicator Light
(green)
(Press 3 sec.) Light ON/OFF Button
3CATCH Lamp (blue)
4UV LIGHT Lamp (blue) 9POWER ON/OFF Button
5GLUE SHEET Lamp (blue) 10 Odour Sensor
6MOSQUITO CATCHER Button
(Press 3 sec.)
SHEET SET Button
11 DUST AND ODOUR SIGN
12 PLASMACLUSTER SIGN
FRONT
PLASMACLUSTER SIGN
Blue Plasmacluster ON
Off Plasmacluster OFF
11
7
DUST AND ODOUR SIGN
Indicates the air purity of the room
in 3 levels with colour changes.
3
2
5
4
86
12
Green
Orange
Red
Clean
Impure
10
9

E-5
ENGLISH
BACK
13
1UV Light 9Bottom Hooks
2Magnet Sensor 10 Magnet
3Dust sensor / Dust sensor Filter 11 Upper Hooks
4HEPA Filter 12 Power Plug
5Deodorizing Filter 13 Power Cord
6Pre-Filter 14 Handles
7Pre-Filter Tabs 15 Glue Sheet
8Catch panel
INCLUDED
•Glue Sheet : 1unit
•Glue Sheet
Operation Manual
13
45
12
6
8
7
9
14
15
2
11
10
X 3 SETS

E-6
FILTER AND GLUE SHEET INSTALLATION
To maintain the quality of the fi lter and Glue Sheet, it is installed in the main unit and packed in plas-
tic bag. Be sure to remove the fi lter and Glue Sheet from the plastic bag before using the unit.
1
Remove the Catch Panel from
underpart.
2 Hold the tabs of Pre-fi lter, lift it
and remove it from its under-
part.
3
Remove the plastic bags and
take out the Filter.
4
Place the Filter inside the main
unit.
5 Hold the tabs of Pre-Filter, and
replace it from upper part.
HEPA Filter Deodorizing Filter

E-7
ENGLISH
6
Remove the plastic bag and take
out the Glue Sheet.
• Keep the additional Glue Sheet
from direct sunlight and lay it
fl at with glue side face up.
7 Hang the Glue Sheet on Upper
Hooks and then insert into
Bottom Hooks.
8
Remove the protective fi lm slowly
from the corner of Glue Sheet.
• Dispose protective fi lm as
burnable rubbish.
• Make sure that its bottom part is
properly inserted to the Bottom
Hooks.
9
Replace Catch Panel to the main
unit.
Be careful that Glue Sheet
doesn’t stick to hairs and clothes.
click
click
Be sure to remove the power plug from the wall outlet.

E-8
OPERATION
CLEAN AIR
START
• Select the desired fan speed.
• Unless the power cord has been unplugged,
the operation starts in the previous mode it
was operated in.
STOP
Releases high-density Plasmacluster ions and discharges strong air fl ow for 60 minutes.
CLEAN ION SHOWER
START
• If Plasmacluster Ion is OFF, Plasmacluster Ion will not be
released.
• When the operation fi nishes, the unit will return to the prior
operation mode.
It is able to change the other mode or turn off during this
mode.
NOTE
AUTO SLEEP MED MAX
FAN SPEED
SLEEP
• The unit will operate very quietly, and the fan speed
is automatically switched depending on the amount of
impurities in the air.
It will darken the brightness of the following lamp.
CATCH Lamp / UV Light Lamp / GLUE SHEET Lamp / UV
Light of the backside.
DUST AND ODOUR / PLASMACLUSTER SIGN go off
automatically.
Even though the indicator is off , Plasmacluster Ion is
released into air unless Plasmacluster Ion is turned off by
NOTE
AUTO
• The fan speed is automatically switched depending on the
amount of impurities in the air. The sensors detect impurities
for efficient air purfication.

E-9
ENGLISH
MOSQUITO CATCHER
Use this function to catch mosquitoes.
Mosquito catching function (CATCH lamp) will turn on when both UV LIGHT and GLUE SHEET work
properly.
When UV LIGHT lamp is on and GLUE SHEET lamp is on, CATCH lamp is on.
When UV LIGHT lamp is off or GLUE SHEET lamp is fl ashing, CATCH lamp is off .
NOTE
UV Light ON UV Light OFF
• Flashing Glue Sheet lamp indicates time to change Glue Sheet.
Replace with a new sheet.(Ref.E-15)
Press the Mosquito Catcher button for 3 seconds.
Glue Sheet lamp changes from fl ashing to lighting.
• Glue Sheet lamp fl ashes approx. 2 month (24 hours x 60 days) after you press Mosquito Catcher
button for 3 seconds.
• At the fi rst time of using the product, after inserting the power plug in socket and turning on the
power, Glue Sheet lamp will be fl ashing by default. Install Glue Sheet to catch panel (Ref. E-7),
then press the Mosquito Catcher button for 3 seconds.
• We recommend you to keep this air purifi re working as much as possible to maximize its function
except for exchanging fi lter and Glue sheet.
Select Max mode to catch mosquitoes more eff ectively.
The higher the air volume is, the easier to capture mosquitoes becomes.
CATCH lamp
UV LIGHT lamp
GLUE SHEET lamp
Press 3 seconds
fl ashing
When Mosquito Catcher button is pressed, UV LIGHT lamp is turned on and conversely.
UV LIGHT off When Catch Panel comes off, UV light is turned off automatically by
Magnet sensor. Check whether catch panel is properly attached.
UV LIGHT
fl ashing
When UV LIGHT lamp is flashing, UV Light has failed. Contact the
service centre authorized by Sharp.

E-10
You can set the DUST AND ODOUR /PLASMACLUSTER SIGN to OFF when their SIGN is bright.
ON OFF
・DUST AND ODOUR / PLASMACLUSTER SIGN go off .
It will darken the brightness of the following lamp.
CATCH Lamp / UV Light Lamp / GLUE SHEET Lamp / UV Light of the backside.
• When the unit restarts its operation, Light Control resumes its setting set before
turning off .
• At Sleep Mode, Light Control is available.
NOTE
When Plasmacluster Ion is ON, the PLASMACLUSTER SIGN will turn on. (blue)
(In operation)
ON OFF
more than 3 sec.
more than 3 sec. more than 3 sec.
USEFUL FUNCTIONS
LIGHT CONTROL
PLASMACLUSTER ION ON/OFF
more than 3 sec.

E-11
ENGLISH
ADJUSTMENT OF SENSOR DETECTION SENSITIVITY
Set to “Low” if the DUST AND ODOUR SIGN is constantly red to reduce sensitivity, and set to “High”
if the DUST AND ODOUR SIGN is constantly green to increase sensitivity.
• If the POWER ON/OFF button is not pressed within 8 seconds of adjusting sensor
sensitivity, the setting will be saved automatically.
• The sensor sensitivity setting will be saved even if the unit is unplugged.
NOTE
ON OFF
(with the unit OFF) (with the unit OFF)
If the , , lamps light up
for 10 seconds, the setting is completed.
(simultaneously for more than 3 sec.)
AUTO RESTART
If the unit is unplugged or there is a power failure, the unit will resume operation with the previous
settings after power is restored.
(simultaneously for more than 3 sec.)
High
Standard
Low
more than 3 sec.
Select the sensor
detection sensitivity.
(with the unit OFF)
1
2
3

E-12
Gently remove dust from the Pre-fi lter panel
by using a vacuum cleaner attachment or
similar tool.
Pre-fi lter
To maintain optimum performance of this air purifi er, please clean the unit including the fi lter
periodically.
Be sure to disconnect the power cord from the wall outlet before performing any maintenance.
CARE AND MAINTENANCE
Pre-fi lter
CAUTION
Do not apply excessive pressure, when
scrubbing the pre-fi lter.
1. Add a small amount of kitchen detergent to water and
soak for about 10 minutes.
2. Rinse off the kitchen detergent with clean water.
3. Completely dry the fi lter in a well-ventilated area.
NOTE How to clean hard to remove dirt
Pre-fi lter
CATCH PANEL
Remove the Glue Sheetand Mosquito Tray, and then gen-
tly remove dust from the Catch Panel by using a vacuum
cleaner attachment or similar tool.
CAUTION
Do not apply excessive pressure, when scrubbing the
catch panel.
When the smell from the Air Outlet
When the smell is hard to take
Do not WASH
Pre-fi lter Once a month
CATCH PANEL
Once in two months
UNIT
Once in
two months
HEPA FILTER
When the smell from the Air Outlet
When the smell is hard to take
Deodorizing FILTER

E-13
ENGLISH
UNIT
Be sure to remove the power plug from the wall outlet.
Wipe with a dry, soft cloth
For stubborn stains or dirt, use a soft cloth dampened with warm water.
CAUTION
•Do not use volatile fl uids
Benzine, paint thinner, polishing powder, etc., may damage the surface.
•Do not use detergents
Detergent ingredients may damage the unit.
FILTERS
Tag
HEPA Filter
Deodorizing Filter
CAUTION
Gently remove dust from HEPA Filter and Deodorizing Filter with a
vacuum cleaner attachment or similar tool.
Do not WASH in water and DRY in the sun.
The fi lters are fragile, be careful not to apply too much force.
• HEPA Filter
Apply the maintenance only on the side with the tag.
Do not clean the opposite side; otherwise, the fi lter will be
damaged.
• Deodorizing Filter
The maintenance can be applied to the both sides.
SENSORS
1. Remove the Catch Panel.
2. Remove the Pre-fi lter.
3. Remove the Dust sensor fi lter.
4. If it is very dirty, wash it with water and
dry it thoroughly.
Dust sensor
fi lter
Odour sensor
Dust sensor
Gently remove dust from the odour sensor,
using a vacuum cleaner attachment orsimilar
tool.
Odour sensor

E-14
REPLACEMENT GUIDELINES
REPLACING THE FILTER
Replacement Filter
• Please consult your dealer for purchase of replacement fi lter.
• Use only fi lters designed for this product.
FILTERS
Do not wash and reuse the fi lters
The fi lter life and replacement period are based on the condition of smoking 5 cigarettes per
day and the dust and odour collection power is reduced by half compared with that of new fi lter.
Filter life varies depending on the room environment, usage, and location of the unit.
We recommend to replace the fi lter more frequently if the product is used in a condition
signifi cantly severer than normal household use.
Disposal of Filter
Please dispose of the replaced fi lter according to the local disposal laws and regulations.
See page E-6 for directions on how
to install the fi lter when replacing.
Replacement timing About 10 years after operating
HEPA Filter materials :
•Filter : Polypropylene
•Frame : Polyester
Deodorizing Filter materials :
•Polypropylene, Polyester, Activated charcoal
Model:UZ-PM5HF
• HEPA Filter : 1 unit • Deodorizing Filter : 1 unit
Model:UZ-PM5DF

E-15
ENGLISH
Be sure to remove the power plug from the wall outlet.
Replacement timing When Glue sheet lamp is fl ashing.
Disposal of Glue Sheet
Please dispose of the replaced Glue Sheet according to the local disposal laws and regulations.
Glue Sheet materials :
•Glue:Acrylic copolymer
•Film:paper
•Base Sheet:Polycarbonate
Glue Sheet
Replace the Glue sheet according to the operation manual included in the replacement glue
sheet.
Please discard the used glue sheet carefully.
Do not touch the
adhesive surface.
After the exchange, insert the power plug in socket and press the POWER button, and MOS-
QUITO CATCHER(UV) button 3 seconds.
• Please consult your dealer for purchase of replacement Glue Sheet.
• Use only Glue Sheet designed for this product.
Model : UZ-PM5ST
Glue sheet lamp will fl ash approx.2 month (24 hours x 60 days) later when you insert the power
plug in socket.
The replacement timing is about 2 months, but it may be early depending on the room environ-
ment.
Check the glue sheet sometimes.
flashing lighting
Press 3 seconds

E-16
TROUBLESHOOTING
SYMPTOM REMEDY (not a malfunction)
Odours and smoke are not
removed.
• Clean or replace the fi lters if they appear to be heavily soiled.
(Ref. E-13,E-14)
The DUST AND ODOUR SIGN
illuminates green even when the air
is impure.
• The air could be impure at the time the unit was plugged in.
Unplug the unit, wait one minute, and plug the unit in again.
The DUST AND ODOUR SIGN
illuminates orange or red even
when the air is clean.
• Sensor operation is aff ected if the odour sensor and dust sensor
fi lter are dirty or clogged. Gently clean the odour sensor and
dust sensor fi lter. (Ref. E-13).
A clicking or ticking sound is heard
from the unit.
• Clicking or ticking sounds may be audible when the unit is
generating ions.
The discharged air has an odour. • Check to see if the fi lters are heavily soiled.
• Clean or replace the fi lters.
• Plasmacluster Air Purifi ers emit small traces of ozone which may
produce an odour. These ozone emissions are well below safety
level.
The unit does not operate properly
when cigarette smoke is in the air.
• Is the unit installed in a location that is diffi cult for the sensor to
detect cigarette smoke?
• Is the dust sensor fi lter blocked or clogged?
(In this case, clean the fi lter.) (Ref. E-13)
The
DUST AND ODOUR SIGN
is
turned off .
• Check to see if the Lights OFF Mode is selected.
Press for 3 seconds to turn light ON.
(Ref. E-10)
• Check to see if the SLEEP mode is selected.
The DUST AND ODOUR /PLASMACLUSTER SIGN are turned off
automatically after the SLEEP mode is selected.
The DUST AND ODOUR SIGN
changes colour frequently.
• The DUST AND ODOUR SIGN automatically changes colours
as impurities are detected by the dust sensor and odour sensor.
The sensor detection sensitivity can be adjusted lower.
(Ref.E-11)
Catch lamp is turned off . Please check whether the following 2 lamps are on.
1) UV LIGHT lamp lights in blue.
2) GLUE SHEET lamp lights in blue.
When UV LIGHT lamp is off or GLUE SHEET lamp is fl ashing,
CATCH lamp does not turn on.
UV LIGHT lamp is turned off . This lamp is the indicator of the UV Light at the back. If Catch
Panel comes off or is not properly set, UV light is automatically
turned off by Magnet Sensor. Please confi rm whether catch panel
is properly attached.
UV LIGHT lamp is fl ashing. UV Light has failed. Please call the service centre authorized by
Sharp.
Before calling for service, please review the Troubleshooting chart below, since the problem may not be a
unit malfunction.
Table of contents
Languages:
Other Sharp Air Cleaner manuals

Sharp
Sharp FU-W40A User manual

Sharp
Sharp KC-G60SA User manual

Sharp
Sharp Plasmacluster KC-860U User manual

Sharp
Sharp FP-FM40A User manual

Sharp
Sharp FU-A28TA User manual

Sharp
Sharp FU-S63E User manual

Sharp
Sharp Plasmacluster IG-A20E User manual

Sharp
Sharp KC-860EKW User manual

Sharp
Sharp Plasmacluster KC-C70U User manual

Sharp
Sharp FU-551KB User manual

Sharp
Sharp FZ-Y30SFE Guide

Sharp
Sharp FU-40SE User manual

Sharp
Sharp KC-G61R User manual

Sharp
Sharp FU-A28E User manual

Sharp
Sharp FU-D40A User manual

Sharp
Sharp KC-G60TA User manual

Sharp
Sharp UA-KIN40E-W User manual

Sharp
Sharp UJ-GC20E User manual

Sharp
Sharp FU-A80A User manual

Sharp
Sharp KC-F30Y User manual