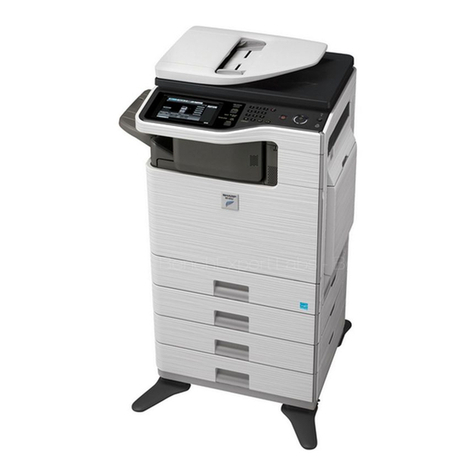
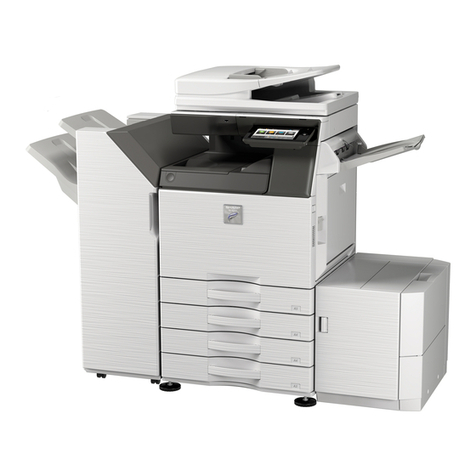
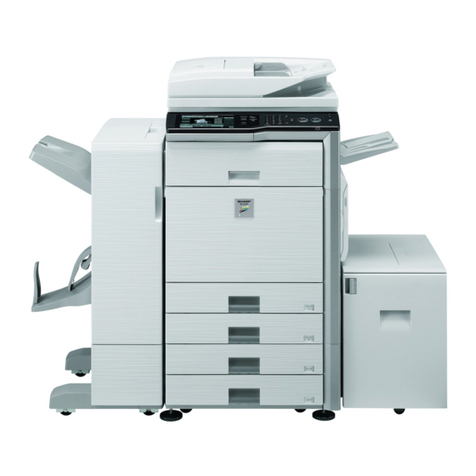
Sharp SF-2040 User manual

SERVICE MANUAL
CODE: 00ZSF2040FM/E
No.1
MODEL SF-2040
MODEL SF-D23
MODEL SF-DM11
[ 1 ] PRODUCT OUTLINE . . . . . . . . . . . . . . . . . . . . . . . . . . . . . . . . . . . . . . . 1-1
[ 2 ] PRODUCT SPECIFICATIONS . . . . . . . . . . . . . . . . . . . . . . . . . . . . . . . . 2-1
[ 3 ] OPTIONS SPECIFICATIONS . . . . . . . . . . . . . . . . . . . . . . . . . . . . . . . . 3-1
[ 4 ] COMPONENT IDENTIFICATION . . . . . . . . . . . . . . . . . . . . . . . . . . . . . . 4-1
[ 5 ] INSTALLATION . . . . . . . . . . . . . . . . . . . . . . . . . . . . . . . . . . . . . . . . . . . 5-1
[ 6 ] DISASSEMBLY AND REASSEMBLY . . . . . . . . . . . . . . . . . . . . . . . . . . 6-1
[ 7 ] ADJUSTMENTS . . . . . . . . . . . . . . . . . . . . . . . . . . . . . . . . . . . . . . . . . . . 7-1
[ 8 ] SIMULATION AND DIAGNOSTICS . . . . . . . . . . . . . . . . . . . . . . . . . . . . 8-1
[ 9 ] MAINTENANCE AND OTHERS . . . . . . . . . . . . . . . . . . . . . . . . . . . . . . . 9-1
CONTENTS
SHARP CORPORATION This document has been published to be used for
after sales service only.
The contents are subject to change without notice.

CONTENTS
[ 1 ] PRODUCT OUTLINE . . . . . . . . . . . . . . . . . . . . . . . . . . . . . . . . . . . . . . . . . . . . . . . . . . . . . . . . . . . . . . . . . . . . . . . . 1-1
1. General description . . . . . . . . . . . . . . . . . . . . . . . . . . . . . . . . . . . . . . . . . . . . . . . . . . . . . . . . . . . . . . . . . . . . . . . . . . . . 1-1
2. Target users . . . . . . . . . . . . . . . . . . . . . . . . . . . . . . . . . . . . . . . . . . . . . . . . . . . . . . . . . . . . . . . . . . . . . . . . . . . . . . . . . . 1-1
3. Major features . . . . . . . . . . . . . . . . . . . . . . . . . . . . . . . . . . . . . . . . . . . . . . . . . . . . . . . . . . . . . . . . . . . . . . . . . . . . . . . . 1-1
(1) Compact body . . . . . . . . . . . . . . . . . . . . . . . . . . . . . . . . . . . . . . . . . . . . . . . . . . . . . . . . . . . . . . . . . . . . . . . . . . . . 1-1
(2) Serviceability and functionality . . . . . . . . . . . . . . . . . . . . . . . . . . . . . . . . . . . . . . . . . . . . . . . . . . . . . . . . . . . . . . . 1-1
(3) High copy performance . . . . . . . . . . . . . . . . . . . . . . . . . . . . . . . . . . . . . . . . . . . . . . . . . . . . . . . . . . . . . . . . . . . . . 1-1
(4) Options . . . . . . . . . . . . . . . . . . . . . . . . . . . . . . . . . . . . . . . . . . . . . . . . . . . . . . . . . . . . . . . . . . . . . . . . . . . . . . . . . 1-1
4. System outline . . . . . . . . . . . . . . . . . . . . . . . . . . . . . . . . . . . . . . . . . . . . . . . . . . . . . . . . . . . . . . . . . . . . . . . . . . . . . . . . 1-1
[ 2 ] PRODUCT SPECIFICATIONS . . . . . . . . . . . . . . . . . . . . . . . . . . . . . . . . . . . . . . . . . . . . . . . . . . . . . . . . . . . . . . . 2-1
1. Basic specification . . . . . . . . . . . . . . . . . . . . . . . . . . . . . . . . . . . . . . . . . . . . . . . . . . . . . . . . . . . . . . . . . . . . . . . . . . . . . 2-1
(1) Type . . . . . . . . . . . . . . . . . . . . . . . . . . . . . . . . . . . . . . . . . . . . . . . . . . . . . . . . . . . . . . . . . . . . . . . . . . . . . . . . . . . 2-1
(2) Copy method . . . . . . . . . . . . . . . . . . . . . . . . . . . . . . . . . . . . . . . . . . . . . . . . . . . . . . . . . . . . . . . . . . . . . . . . . . . . . 2-1
(3) Kinds of originals . . . . . . . . . . . . . . . . . . . . . . . . . . . . . . . . . . . . . . . . . . . . . . . . . . . . . . . . . . . . . . . . . . . . . . . . . . 2-1
(4) Copy speed . . . . . . . . . . . . . . . . . . . . . . . . . . . . . . . . . . . . . . . . . . . . . . . . . . . . . . . . . . . . . . . . . . . . . . . . . . . . . . 2-1
(5) First copy time . . . . . . . . . . . . . . . . . . . . . . . . . . . . . . . . . . . . . . . . . . . . . . . . . . . . . . . . . . . . . . . . . . . . . . . . . . . 2-1
(6) Warmup time . . . . . . . . . . . . . . . . . . . . . . . . . . . . . . . . . . . . . . . . . . . . . . . . . . . . . . . . . . . . . . . . . . . . . . . . . . . . . 2-1
(7) Multicopy . . . . . . . . . . . . . . . . . . . . . . . . . . . . . . . . . . . . . . . . . . . . . . . . . . . . . . . . . . . . . . . . . . . . . . . . . . . . . . . . 2-1
(8) Magnification ratio . . . . . . . . . . . . . . . . . . . . . . . . . . . . . . . . . . . . . . . . . . . . . . . . . . . . . . . . . . . . . . . . . . . . . . . . . 2-2
(9) Exposure . . . . . . . . . . . . . . . . . . . . . . . . . . . . . . . . . . . . . . . . . . . . . . . . . . . . . . . . . . . . . . . . . . . . . . . . . . . . . . . . 2-2
(10) Paper feed . . . . . . . . . . . . . . . . . . . . . . . . . . . . . . . . . . . . . . . . . . . . . . . . . . . . . . . . . . . . . . . . . . . . . . . . . . . . . . . 2-2
(11) Developing method . . . . . . . . . . . . . . . . . . . . . . . . . . . . . . . . . . . . . . . . . . . . . . . . . . . . . . . . . . . . . . . . . . . . . . . . 2-3
(12) Charge method . . . . . . . . . . . . . . . . . . . . . . . . . . . . . . . . . . . . . . . . . . . . . . . . . . . . . . . . . . . . . . . . . . . . . . . . . . . 2-3
(13) Transfer method . . . . . . . . . . . . . . . . . . . . . . . . . . . . . . . . . . . . . . . . . . . . . . . . . . . . . . . . . . . . . . . . . . . . . . . . . . 2-3
(14) Separation method . . . . . . . . . . . . . . . . . . . . . . . . . . . . . . . . . . . . . . . . . . . . . . . . . . . . . . . . . . . . . . . . . . . . . . . . 2-3
(15) Fusing method . . . . . . . . . . . . . . . . . . . . . . . . . . . . . . . . . . . . . . . . . . . . . . . . . . . . . . . . . . . . . . . . . . . . . . . . . . . . 2-3
(16) Cleaning method . . . . . . . . . . . . . . . . . . . . . . . . . . . . . . . . . . . . . . . . . . . . . . . . . . . . . . . . . . . . . . . . . . . . . . . . . . 2-3
(17) Light source . . . . . . . . . . . . . . . . . . . . . . . . . . . . . . . . . . . . . . . . . . . . . . . . . . . . . . . . . . . . . . . . . . . . . . . . . . . . . . 2-3
(18) Blanking areas . . . . . . . . . . . . . . . . . . . . . . . . . . . . . . . . . . . . . . . . . . . . . . . . . . . . . . . . . . . . . . . . . . . . . . . . . . . . 2-3
(19) Automatic duplex . . . . . . . . . . . . . . . . . . . . . . . . . . . . . . . . . . . . . . . . . . . . . . . . . . . . . . . . . . . . . . . . . . . . . . . . . . 2-3
(20) Paper receiving tray and finishing . . . . . . . . . . . . . . . . . . . . . . . . . . . . . . . . . . . . . . . . . . . . . . . . . . . . . . . . . . . . . 2-3
(21) Additional features . . . . . . . . . . . . . . . . . . . . . . . . . . . . . . . . . . . . . . . . . . . . . . . . . . . . . . . . . . . . . . . . . . . . . . . . 2-4
(22) Power supply . . . . . . . . . . . . . . . . . . . . . . . . . . . . . . . . . . . . . . . . . . . . . . . . . . . . . . . . . . . . . . . . . . . . . . . . . . . . . 2-4
(23) Power consumption . . . . . . . . . . . . . . . . . . . . . . . . . . . . . . . . . . . . . . . . . . . . . . . . . . . . . . . . . . . . . . . . . . . . . . . . 2-4
(24) Appearance . . . . . . . . . . . . . . . . . . . . . . . . . . . . . . . . . . . . . . . . . . . . . . . . . . . . . . . . . . . . . . . . . . . . . . . . . . . . . . 2-4
(25) Accessories . . . . . . . . . . . . . . . . . . . . . . . . . . . . . . . . . . . . . . . . . . . . . . . . . . . . . . . . . . . . . . . . . . . . . . . . . . . . . . 2-5
2. Consumables . . . . . . . . . . . . . . . . . . . . . . . . . . . . . . . . . . . . . . . . . . . . . . . . . . . . . . . . . . . . . . . . . . . . . . . . . . . . . . . . . 2-5
3. Environmentalrequirements . . . . . . . . . . . . . . . . . . . . . . . . . . . . . . . . . . . . . . . . . . . . . . . . . . . . . . . . . . . . . . . . . . . . . 2-7
[ 3 ] OPTIONS SPECIFICATIONS . . . . . . . . . . . . . . . . . . . . . . . . . . . . . . . . . . . . . . . . . . . . . . . . . . . . . . . . . . . . . . . . 3-1
1. SF-A55 . . . . . . . . . . . . . . . . . . . . . . . . . . . . . . . . . . . . . . . . . . . . . . . . . . . . . . . . . . . . . . . . . . . . . . . . . . . . . . . . . . . . . . 3-1
2. SF-S15 . . . . . . . . . . . . . . . . . . . . . . . . . . . . . . . . . . . . . . . . . . . . . . . . . . . . . . . . . . . . . . . . . . . . . . . . . . . . . . . . . . . . . . 3-1
3. SF-S53 . . . . . . . . . . . . . . . . . . . . . . . . . . . . . . . . . . . . . . . . . . . . . . . . . . . . . . . . . . . . . . . . . . . . . . . . . . . . . . . . . . . . . . 3-1
4. SF-D23 . . . . . . . . . . . . . . . . . . . . . . . . . . . . . . . . . . . . . . . . . . . . . . . . . . . . . . . . . . . . . . . . . . . . . . . . . . . . . . . . . . . . . . 3-2
5. Others . . . . . . . . . . . . . . . . . . . . . . . . . . . . . . . . . . . . . . . . . . . . . . . . . . . . . . . . . . . . . . . . . . . . . . . . . . . . . . . . . . . . . . . 3-2
I
[ 4 ] COMPONENT IDENTIFICATION . . . . . . . . . . . . . . . . . . . . . . . . . . . . . . . . . . . . . . . . . . . . . . . . . . . . . . . . . . . . 4-1
1. External view . . . . . . . . . . . . . . . . . . . . . . . . . . . . . . . . . . . . . . . . . . . . . . . . . . . . . . . . . . . . . . . . . . . . . . . . . . . . . . . . . 4-1
2. Operation panel . . . . . . . . . . . . . . . . . . . . . . . . . . . . . . . . . . . . . . . . . . . . . . . . . . . . . . . . . . . . . . . . . . . . . . . . . . . . . . . 4-3
3. Internal view . . . . . . . . . . . . . . . . . . . . . . . . . . . . . . . . . . . . . . . . . . . . . . . . . . . . . . . . . . . . . . . . . . . . . . . . . . . . . . . . . . 4-4
4. Clutches, solenoids . . . . . . . . . . . . . . . . . . . . . . . . . . . . . . . . . . . . . . . . . . . . . . . . . . . . . . . . . . . . . . . . . . . . . . . . . . . . 4-5
5. Sensors . . . . . . . . . . . . . . . . . . . . . . . . . . . . . . . . . . . . . . . . . . . . . . . . . . . . . . . . . . . . . . . . . . . . . . . . . . . . . . . . . . . . . 4-6
6. Motors . . . . . . . . . . . . . . . . . . . . . . . . . . . . . . . . . . . . . . . . . . . . . . . . . . . . . . . . . . . . . . . . . . . . . . . . . . . . . . . . . . . . . . 4-7
7. Board list . . . . . . . . . . . . . . . . . . . . . . . . . . . . . . . . . . . . . . . . . . . . . . . . . . . . . . . . . . . . . . . . . . . . . . . . . . . . . . . . . . . . 4-8
8. Duplex copy tray . . . . . . . . . . . . . . . . . . . . . . . . . . . . . . . . . . . . . . . . . . . . . . . . . . . . . . . . . . . . . . . . . . . . . . . . . . . . . . 4-9
9. Desk unit (SF-D23) . . . . . . . . . . . . . . . . . . . . . . . . . . . . . . . . . . . . . . . . . . . . . . . . . . . . . . . . . . . . . . . . . . . . . . . . . . . 4-10
[ 5 ] INSTALLATION . . . . . . . . . . . . . . . . . . . . . . . . . . . . . . . . . . . . . . . . . . . . . . . . . . . . . . . . . . . . . . . . . . . . . . . . . . . . . . 5-1
A. Installingconditions . . . . . . . . . . . . . . . . . . . . . . . . . . . . . . . . . . . . . . . . . . . . . . . . . . . . . . . . . . . . . . . . . . . . . . . . . . . . 5-1
B. Installationprocedure . . . . . . . . . . . . . . . . . . . . . . . . . . . . . . . . . . . . . . . . . . . . . . . . . . . . . . . . . . . . . . . . . . . . . . . . . . . 5-2
(1) SF-2040 . . . . . . . . . . . . . . . . . . . . . . . . . . . . . . . . . . . . . . . . . . . . . . . . . . . . . . . . . . . . . . . . . . . . . . . . . . . . . . . . . 5-2
1. Releasing optical locks
A Removing the #2/3 mirror unit lock . . . . . . . . . . . . . . . . . . . . . . . . . . . . . . . . . . . . . . . . . . . . . . . . . . . . . . 5-2
B Releasing the lens and #4/5 mirror unit lock . . . . . . . . . . . . . . . . . . . . . . . . . . . . . . . . . . . . . . . . . . . . . . . 5-2
2. Fuser unit set up . . . . . . . . . . . . . . . . . . . . . . . . . . . . . . . . . . . . . . . . . . . . . . . . . . . . . . . . . . . . . . . . . . . . . . 5-2
A Removing the fuser unit . . . . . . . . . . . . . . . . . . . . . . . . . . . . . . . . . . . . . . . . . . . . . . . . . . . . . . . . . . . . . . 5-2
B Tensioning the heat roller . . . . . . . . . . . . . . . . . . . . . . . . . . . . . . . . . . . . . . . . . . . . . . . . . . . . . . . . . . . . . 5-2
C Installing the cleaning roller . . . . . . . . . . . . . . . . . . . . . . . . . . . . . . . . . . . . . . . . . . . . . . . . . . . . . . . . . . . 5-2
D Installing the fusing unit . . . . . . . . . . . . . . . . . . . . . . . . . . . . . . . . . . . . . . . . . . . . . . . . . . . . . . . . . . . . . . 5-3
3. Cleaning corona units . . . . . . . . . . . . . . . . . . . . . . . . . . . . . . . . . . . . . . . . . . . . . . . . . . . . . . . . . . . . . . . . . . 5-3
A Clean the main corona unit . . . . . . . . . . . . . . . . . . . . . . . . . . . . . . . . . . . . . . . . . . . . . . . . . . . . . . . . . . . . 5-3
B Clean the transfer/separation corona wires . . . . . . . . . . . . . . . . . . . . . . . . . . . . . . . . . . . . . . . . . . . . . . . 5-4
4. Installing accessories . . . . . . . . . . . . . . . . . . . . . . . . . . . . . . . . . . . . . . . . . . . . . . . . . . . . . . . . . . . . . . . . . . . 5-4
A Install the copy receive tray . . . . . . . . . . . . . . . . . . . . . . . . . . . . . . . . . . . . . . . . . . . . . . . . . . . . . . . . . . . 5-4
5. Setting up the upper paper cassette . . . . . . . . . . . . . . . . . . . . . . . . . . . . . . . . . . . . . . . . . . . . . . . . . . . . . . . 5-5
A Remove the packing screw of the cassette. . . . . . . . . . . . . . . . . . . . . . . . . . . . . . . . . . . . . . . . . . . . . . . . 5-5
B Removing the cassette . . . . . . . . . . . . . . . . . . . . . . . . . . . . . . . . . . . . . . . . . . . . . . . . . . . . . . . . . . . . . . . 5-5
C Change the size using the side plates F and R. . . . . . . . . . . . . . . . . . . . . . . . . . . . . . . . . . . . . . . . . . . . 5-5
D Insert the rear plate . . . . . . . . . . . . . . . . . . . . . . . . . . . . . . . . . . . . . . . . . . . . . . . . . . . . . . . . . . . . . . . . . . 5-5
E Set the size detect spacer . . . . . . . . . . . . . . . . . . . . . . . . . . . . . . . . . . . . . . . . . . . . . . . . . . . . . . . . . . . . . 5-5
F Change the paper size indication plate . . . . . . . . . . . . . . . . . . . . . . . . . . . . . . . . . . . . . . . . . . . . . . . . . . . 5-5
G Set the cassette . . . . . . . . . . . . . . . . . . . . . . . . . . . . . . . . . . . . . . . . . . . . . . . . . . . . . . . . . . . . . . . . . . . . 5-6
H Load paper . . . . . . . . . . . . . . . . . . . . . . . . . . . . . . . . . . . . . . . . . . . . . . . . . . . . . . . . . . . . . . . . . . . . . . . . 5-6
6. Set up the lower paper cassette . . . . . . . . . . . . . . . . . . . . . . . . . . . . . . . . . . . . . . . . . . . . . . . . . . . . . . . . . . 5-6
A Remove the packing screw of the cassette. . . . . . . . . . . . . . . . . . . . . . . . . . . . . . . . . . . . . . . . . . . . . . . . 5-6
B Change the size using the side plates F and R.
(It had been set to the A3 position when the machine left the factory.) . . . . . . . . . . . . . . . . . . . . . . . . . . 5-6
C Change the size of the rear plate. . . . . . . . . . . . . . . . . . . . . . . . . . . . . . . . . . . . . . . . . . . . . . . . . . . . . . . . 5-6
D Set the size detect spacer . . . . . . . . . . . . . . . . . . . . . . . . . . . . . . . . . . . . . . . . . . . . . . . . . . . . . . . . . . . . . 5-6
E Change the paper size indication plate . . . . . . . . . . . . . . . . . . . . . . . . . . . . . . . . . . . . . . . . . . . . . . . . . . . 5-7
7. Lens lock release
A Removing the lens and releasing the lens lock . . . . . . . . . . . . . . . . . . . . . . . . . . . . . . . . . . . . . . . . . . . . 5-7
8. Setting developing unit . . . . . . . . . . . . . . . . . . . . . . . . . . . . . . . . . . . . . . . . . . . . . . . . . . . . . . . . . . . . . . . . . 5-8
A Supplying developer . . . . . . . . . . . . . . . . . . . . . . . . . . . . . . . . . . . . . . . . . . . . . . . . . . . . . . . . . . . . . . . . . 5-8
II

9. Toner density sensor level adjustment . . . . . . . . . . . . . . . . . . . . . . . . . . . . . . . . . . . . . . . . . . . . . . . . . . . . . 5-8
A Developing unit level adjustment . . . . . . . . . . . . . . . . . . . . . . . . . . . . . . . . . . . . . . . . . . . . . . . . . . . . . . . 5-8
10. Toner supply . . . . . . . . . . . . . . . . . . . . . . . . . . . . . . . . . . . . . . . . . . . . . . . . . . . . . . . . . . . . . . . . . . . . . . . . . 5-8
A Toner supply . . . . . . . . . . . . . . . . . . . . . . . . . . . . . . . . . . . . . . . . . . . . . . . . . . . . . . . . . . . . . . . . . . . . . . . 5-8
11. Label attachment . . . . . . . . . . . . . . . . . . . . . . . . . . . . . . . . . . . . . . . . . . . . . . . . . . . . . . . . . . . . . . . . . . . . . . 5-9
A Label attachment . . . . . . . . . . . . . . . . . . . . . . . . . . . . . . . . . . . . . . . . . . . . . . . . . . . . . . . . . . . . . . . . . . . . 5-9
(2) SF-A55 . . . . . . . . . . . . . . . . . . . . . . . . . . . . . . . . . . . . . . . . . . . . . . . . . . . . . . . . . . . . . . . . . . . . . . . . . . . . . . . . 5-10
1 Mount the ADF onto the copier. . . . . . . . . . . . . . . . . . . . . . . . . . . . . . . . . . . . . . . . . . . . . . . . . . . . . . . . . . . 5-10
2 Mount the ADF onto the copier. . . . . . . . . . . . . . . . . . . . . . . . . . . . . . . . . . . . . . . . . . . . . . . . . . . . . . . . . . . 5-10
3 Adjust the angle of ADF connector. . . . . . . . . . . . . . . . . . . . . . . . . . . . . . . . . . . . . . . . . . . . . . . . . . . . . . . . 5-11
4 Connect the ADF tray connector. . . . . . . . . . . . . . . . . . . . . . . . . . . . . . . . . . . . . . . . . . . . . . . . . . . . . . . . . . 5-11
5 Attach the tray. . . . . . . . . . . . . . . . . . . . . . . . . . . . . . . . . . . . . . . . . . . . . . . . . . . . . . . . . . . . . . . . . . . . . . . . 5-11
6 Set the mode. . . . . . . . . . . . . . . . . . . . . . . . . . . . . . . . . . . . . . . . . . . . . . . . . . . . . . . . . . . . . . . . . . . . . . . . . 5-11
7 Adjust the center of the copy. . . . . . . . . . . . . . . . . . . . . . . . . . . . . . . . . . . . . . . . . . . . . . . . . . . . . . . . . . . . . 5-11
8 Original lead edge position adjustment. . . . . . . . . . . . . . . . . . . . . . . . . . . . . . . . . . . . . . . . . . . . . . . . . . . . . 5-12
(3) SF-S53 . . . . . . . . . . . . . . . . . . . . . . . . . . . . . . . . . . . . . . . . . . . . . . . . . . . . . . . . . . . . . . . . . . . . . . . . . . . . . . . . 5-12
A Mounting of the staple sorter onto the copier . . . . . . . . . . . . . . . . . . . . . . . . . . . . . . . . . . . . . . . . . . . . . . . 5-14
B Staple sorter operation check . . . . . . . . . . . . . . . . . . . . . . . . . . . . . . . . . . . . . . . . . . . . . . . . . . . . . . . . . . . 5-17
(4) SF-S15 (20-Bin Sorter) . . . . . . . . . . . . . . . . . . . . . . . . . . . . . . . . . . . . . . . . . . . . . . . . . . . . . . . . . . . . . . . . . . . . 5-19
1 Install the support guide. . . . . . . . . . . . . . . . . . . . . . . . . . . . . . . . . . . . . . . . . . . . . . . . . . . . . . . . . . . . . . . . . 5-19
2 Mount the sorter seat to the desk. . . . . . . . . . . . . . . . . . . . . . . . . . . . . . . . . . . . . . . . . . . . . . . . . . . . . . . . . 5-19
3 Remove the front panel of the sorter. . . . . . . . . . . . . . . . . . . . . . . . . . . . . . . . . . . . . . . . . . . . . . . . . . . . . . . 5-19
4 Place the sorter on the sorter seat. . . . . . . . . . . . . . . . . . . . . . . . . . . . . . . . . . . . . . . . . . . . . . . . . . . . . . . . . 5-20
5 Remove the rear cabinet panel from the copier and cut out the notch in the cabinet panel. . . . . . . . . . . . . 5-20
6 Connect the sorter connectors. . . . . . . . . . . . . . . . . . . . . . . . . . . . . . . . . . . . . . . . . . . . . . . . . . . . . . . . . . . . 5-20
7 Reattach the rear cabinet panel. . . . . . . . . . . . . . . . . . . . . . . . . . . . . . . . . . . . . . . . . . . . . . . . . . . . . . . . . . . 5-20
8 Reattach the front panel of the sorter. . . . . . . . . . . . . . . . . . . . . . . . . . . . . . . . . . . . . . . . . . . . . . . . . . . . . . 5-20
9 Adjust the clearance between the sorter and the copier. . . . . . . . . . . . . . . . . . . . . . . . . . . . . . . . . . . . . . . . 5-21
10 Set the mode. . . . . . . . . . . . . . . . . . . . . . . . . . . . . . . . . . . . . . . . . . . . . . . . . . . . . . . . . . . . . . . . . . . . . . . . . 5-21
(5) SF-D23 . . . . . . . . . . . . . . . . . . . . . . . . . . . . . . . . . . . . . . . . . . . . . . . . . . . . . . . . . . . . . . . . . . . . . . . . . . . . . . . . 5-21
1 Place the copier on the desk. . . . . . . . . . . . . . . . . . . . . . . . . . . . . . . . . . . . . . . . . . . . . . . . . . . . . . . . . . . . . 5-21
2 Secure the copier to the desk. . . . . . . . . . . . . . . . . . . . . . . . . . . . . . . . . . . . . . . . . . . . . . . . . . . . . . . . . . . . 5-22
3 Remove the rear cabinet panel from the copier. . . . . . . . . . . . . . . . . . . . . . . . . . . . . . . . . . . . . . . . . . . . . . . 5-22
4 Connect the desk relay harness. . . . . . . . . . . . . . . . . . . . . . . . . . . . . . . . . . . . . . . . . . . . . . . . . . . . . . . . . . 5-22
5 Remount the rear coverlet of the copier. . . . . . . . . . . . . . . . . . . . . . . . . . . . . . . . . . . . . . . . . . . . . . . . . . . . . 5-22
6 Secure the desk on the floor. . . . . . . . . . . . . . . . . . . . . . . . . . . . . . . . . . . . . . . . . . . . . . . . . . . . . . . . . . . . . 5-22
7 Pull out the cassette. . . . . . . . . . . . . . . . . . . . . . . . . . . . . . . . . . . . . . . . . . . . . . . . . . . . . . . . . . . . . . . . . . . . 5-23
8 Adjust the front and rear paper guides. . . . . . . . . . . . . . . . . . . . . . . . . . . . . . . . . . . . . . . . . . . . . . . . . . . . . . 5-23
9 Adjust the side guide. . . . . . . . . . . . . . . . . . . . . . . . . . . . . . . . . . . . . . . . . . . . . . . . . . . . . . . . . . . . . . . . . . . 5-23
10 Set the paper size switch. . . . . . . . . . . . . . . . . . . . . . . . . . . . . . . . . . . . . . . . . . . . . . . . . . . . . . . . . . . . . . . . 5-24
11 Change the paper size indicator. . . . . . . . . . . . . . . . . . . . . . . . . . . . . . . . . . . . . . . . . . . . . . . . . . . . . . . . . . 5-24
12 Place the paper in the cassette. . . . . . . . . . . . . . . . . . . . . . . . . . . . . . . . . . . . . . . . . . . . . . . . . . . . . . . . . . . 5-24
13 Set the mode. . . . . . . . . . . . . . . . . . . . . . . . . . . . . . . . . . . . . . . . . . . . . . . . . . . . . . . . . . . . . . . . . . . . . . . . . 5-24
14 Adjust any center misalignment. . . . . . . . . . . . . . . . . . . . . . . . . . . . . . . . . . . . . . . . . . . . . . . . . . . . . . . . . . . 5-25
III

(6) SF-IC11 . . . . . . . . . . . . . . . . . . . . . . . . . . . . . . . . . . . . . . . . . . . . . . . . . . . . . . . . . . . . . . . . . . . . . . . . . . . . . . . . 5-25
1 To remove the stopper for the cassette unit. . . . . . . . . . . . . . . . . . . . . . . . . . . . . . . . . . . . . . . . . . . . . . . . . 5-26
2 To change the size setting of side plate F and side plate R. . . . . . . . . . . . . . . . . . . . . . . . . . . . . . . . . . . . . 5-26
3 To change the size position of the rear end plate. . . . . . . . . . . . . . . . . . . . . . . . . . . . . . . . . . . . . . . . . . . . . 5-26
4 To set the size detection spacer. . . . . . . . . . . . . . . . . . . . . . . . . . . . . . . . . . . . . . . . . . . . . . . . . . . . . . . . . . 5-26
5 To place the cassette size labels. . . . . . . . . . . . . . . . . . . . . . . . . . . . . . . . . . . . . . . . . . . . . .. . . . . . . . . . . . 5-27
6 To change the paper size indication plate. . . . . . . . . . . . . . . . . . . . . . . . . . . . . . . . . . . . . . . . . . . . . . . . . . . 5-27
7 To install the cassette main unit on the paper tray. . . . . . . . . . . . . . . . . . . . . . . . . . . . . . . . . . . . . . . . . . . . 5-27
(7) SF-DM11 . . . . . . . . . . . . . . . . . . . . . . . . . . . . . . . . . . . . . . . . . . . . . . . . . . . . . . . . . . . . . . . . . . . . . . . . . . . . . . . 5-27
1 To remove the rear cabinet of the copier main unit. . . . . . . . . . . . . . . . . . . . . . . . . . . . . . . . . . . . . . . . . . . . 5-27
2 To install the ADU drive unit. . . . . . . . . . . . . . . . . . . . . . . . . . . . . . . . . . . . . . . . . . . . . . . . . . . . . . . . . . . . . 5-28
3 To install the rear cabinet of the copier main unit. . . . . . . . . . . . . . . . . . . . . . . . . . . . . . . . . . . . . . . . . . . . . 5-28
4 To remove the toner collecting container. . . . . . . . . . . . . . . . . . . . . . . . . . . . . . . . . . . . . . . . . . . . . . . . . . . . 5-28
5 To remove the cover plate. . . . . . . . . . . . . . . . . . . . . . . . . . . . . . . . . . . . . . . . . . . . . . . . . . . . . . . . . . . . . . . 5-28
6 To install the ADU unit. . . . . . . . . . . . . . . . . . . . . . . . . . . . . . . . . . . . . . . . . . . . . . . . . . . . . . . . . . . . . . . . . . 5-28
7 To install the right stopper. . . . . . . . . . . . . . . . . . . . . . . . . . . . . . . . . . . . . . . . . . . . . . . . . . . . . . . . . . . . . . . 5-28
8 To install the toner collecting container. . . . . . . . . . . . . . . . . . . . . . . . . . . . . . . . . . . . . . . . . . . . . . . . . . . . . 5-29
9 To check and adjust the matching guide. . . . . . . . . . . . . . . . . . . . . . . . . . . . . . . . . . . . . . . . . . . . . . . . . . . . 5-29
10 To adjust the center dislocation. . . . . . . . . . . . . . . . . . . . . . . . . . . . . . . . . . . . . . . . . . . . . . . . . . . . . . . . . . . 5-29
(8) SF-CM11 . . . . . . . . . . . . . . . . . . . . . . . . . . . . . . . . . . . . . . . . . . . . . . . . . . . . . . . . . . . . . . . . . . . . . . . . . . . . . . . 5-30
1 Remove the rear cabinet panel from the desk. . . . . . . . . . . . . . . . . . . . . . . . . . . . . . . . . . . . . . . . . . . . . . . . 5-30
2 Install the lift-up unit. . . . . . . . . . . . . . . . . . . . . . . . . . . . . . . . . . . . . . . . . . . . . . . . . . . . . . . . . . . . . . . . . . . . 5-30
3 Remount the rear cabinet panel onto the desk. . . . . . . . . . . . . . . . . . . . . . . . . . . . . . . . . . . . . . . . . . . . . . . 5-31
4 Remove the right cabinet panel from the front right cabinet panel of the desk. . . . . . . . . . . . . . . . . . . . . . . 5-31
5 Remove the cover. . . . . . . . . . . . . . . . . . . . . . . . . . . . . . . . . . . . . . . . . . . . . . . . . . . . . . . . . . . . . . . . . . . . . 5-31
6 Install the paper feed unit. . . . . . . . . . . . . . . . . . . . . . . . . . . . . . . . . . . . . . . . . . . . . . . . . . . . . . . . . . . . . . . . 5-31
7 Remove the packing screw from the paper cassette. . . . . . . . . . . . . . . . . . . . . . . . . . . . . . . . . . . . . . . . . . . 5-31
8 Change the positions of the front and rear side plates. . . . . . . . . . . . . . . . . . . . . . . . . . . . . . . . . . . . . . . . . 5-31
9 Position the rear edge plate. . . . . . . . . . . . . . . . . . . . . . . . . . . . . . . . . . . . . . . . . . . . . . . . . . . . . . . . . . . . . . 5-32
10 Set the paper size detection spacer. . . . . . . . . . . . . . . . . . . . . . . . . . . . . . . . . . . . . . . . . . . . . . . . . . . . . . . . 5-32
11 Change the paper size indicator. . . . . . . . . . . . . . . . . . . . . . . . . . . . . . . . . . . . . . . . . . . . . . . . . . . . . . . . . . 5-32
12 Fit the paper cassette guides into the guide rails. . . . . . . . . . . . . . . . . . . . . . . . . . . . . . . . . . . . . . . . . . . . . 5-32
13 Mount the right stopper. . . . . . . . . . . . . . . . . . . . . . . . . . . . . . . . . . . . . . . . . . . . . . . . . . . . . . . . . . . . . . . . . 5-32
14 Install the paper cassette. . . . . . . . . . . . . . . . . . . . . . . . . . . . . . . . . . . . . . . . . . . . . . . . . . . . . . . . . . . . . . . . 5-33
15 Place the paper. . . . . . . . . . . . . . . . . . . . . . . . . . . . . . . . . . . . . . . . . . . . . . . . . . . . . . . . . . . . . . . . . . . . . . . 5-33
16 Remount the right cabinet panel onto the desk. . . . . . . . . . . . . . . . . . . . . . . . . . . . . . . . . . . . . . . . . . . . . . . 5-33
[ 6 ] DISASSEMBLY AND REASSEMBLY . . . . . . . . . . . . . . . . . . . . . . . . . . . . . . . . . . . . . . . . . . . . . . . . . . . . . . . 6-1
1. Process unit . . . . . . . . . . . . . . . . . . . . . . . . . . . . . . . . . . . . . . . . . . . . . . . . . . . . . . . . . . . . . . . . . . . . . . . . . . . . . . . . . . 6-1
2. Manual feed multicopy unit . . . . . . . . . . . . . . . . . . . . . . . . . . . . . . . . . . . . . . . . . . . . . . . . . . . . . . . . . . . . . . . . . . . . . . 6-3
3. Paper feed unit . . . . . . . . . . . . . . . . . . . . . . . . . . . . . . . . . . . . . . . . . . . . . . . . . . . . . . . . . . . . . . . . . . . . . . . . . . . . . . . . 6-5
4. Transport baseplate unit . . . . . . . . . . . . . . . . . . . . . . . . . . . . . . . . . . . . . . . . . . . . . . . . . . . . . . . . . . . . . . . . . . . . . . . . 6-7
5. Fuser unit . . . . . . . . . . . . . . . . . . . . . . . . . . . . . . . . . . . . . . . . . . . . . . . . . . . . . . . . . . . . . . . . . . . . . . . . . . . . . . . . . . . . 6-9
6. Duplex copy unit . . . . . . . . . . . . . . . . . . . . . . . . . . . . . . . . . . . . . . . . . . . . . . . . . . . . . . . . . . . . . . . . . . . . . . . . . . . . . . 6-11
7. Rear frame side major components . . . . . . . . . . . . . . . . . . . . . . . . . . . . . . . . . . . . . . . . . . . . . . . . . . . . . . . . . . . . . . . 6-13
8. Operation panel unit and document size sensor board . . . . . . . . . . . . . . . . . . . . . . . . . . . . . . . . . . . . . . . . . . . . . . . 6-16
9. Optical unit . . . . . . . . . . . . . . . . . . . . . . . . . . . . . . . . . . . . . . . . . . . . . . . . . . . . . . . . . . . . . . . . . . . . . . . . . . . . . . . . . . 6-18
IV

[ 7 ] ADJUSTMENT . . . . . . . . . . . . . . . . . . . . . . . . . . . . . . . . . . . . . . . . . . . . . . . . . . . . . . . . . . . . . . . . . . . . . . . . . . . . . . . 7-1
1. Developing Unit . . . . . . . . . . . . . . . . . . . . . . . . . . . . . . . . . . . . . . . . . . . . . . . . . . . . . . . . . . . . . . . . . . . . . . . . . . . . . . . 7-1
(1) Clearance Adjustment of Developing Doctor Blade . . . . . . . . . . . . . . . . . . . . . . . . . . . . . . . . . . . . . . . . . . . . . . . 7-1
(2) Position Adjustment of Developing Magnet Roller Main Pole . . . . . . . . . . . . . . . . . . . . . . . . . . . . . . . . . . . . . . . 7-1
(3) Developing Bias Adjustment . . . . . . . . . . . . . . . . . . . . . . . . . . . . . . . . . . . . . . . . . . . . . . . . . . . . . . . . . . . . . . . . . 7-2
(4) Notes on installing various rollers of the developing unit . . . . . . . . . . . . . . . . . . . . . . . . . . . . . . . . . . . . . . . . . . . 7-2
(5) Notes on applying the developing side seals (front and rear) . . . . . . . . . . . . . . . . . . . . . . . . . . . . . . . . . . . . . . . 7-2
2. Processing Unit . . . . . . . . . . . . . . . . . . . . . . . . . . . . . . . . . . . . . . . . . . . . . . . . . . . . . . . . . . . . . . . . . . . . . . . . . . . . . . . 7-3
(1) Adjustment of Blank Lamp Position . . . . . . . . . . . . . . . . . . . . . . . . . . . . . . . . . . . . . . . . . . . . . . . . . . . . . . . . . . . 7-3
(2) Adjustment of High-Voltage Output Balance . . . . . . . . . . . . . . . . . . . . . . . . . . . . . . . . . . . . . . . . . . . . . . . . . . . . 7-3
A. Applying the Special Measuring Tool . . . . . . . . . . . . . . . . . . . . . . . . . . . . . . . . . . . . . . . . . . . . . . . . . . . . . . 7-3
B. Adjusting the Transfer Charger Current . . . . . . . . . . . . . . . . . . . . . . . . . . . . . . . . . . . . . . . . . . . . . . . . . . . . . 7-4
C. Checking the Electrostatic Main Charger Current . . . . . . . . . . . . . . . . . . . . . . . . . . . . . . . . . . . . . . . . . . . . . 7-5
D. Adjusting the Electrostatic Main Charger Grid Voltage . . . . . . . . . . . . . . . . . . . . . . . . . . . . . . . . . . . . . . . . . 7-5
E. Adjusting the Separation Charger Output . . . . . . . . . . . . . . . . . . . . . . . . . . . . . . . . . . . . . . . . . . . . . . . . . . . 7-6
(3) Notes on maintenance for high-voltage units . . . . . . . . . . . . . . . . . . . . . . . . . . . . . . . . . . . . . . . . . . . . . . . . . . . . 7-6
A. Electrostatic Charger Unit . . . . . . . . . . . . . . . . . . . . . . . . . . . . . . . . . . . . . . . . . . . . . . . . . . . . . . . . . . . . . . . 7-6
B. Transfer/SeparationCharger Unit . . . . . . . . . . . . . . . . . . . . . . . . . . . . . . . . . . . . . . . . . . . . . . . . . . . . . . . . . 7-6
3. Optical System . . . . . . . . . . . . . . . . . . . . . . . . . . . . . . . . . . . . . . . . . . . . . . . . . . . . . . . . . . . . . . . . . . . . . . . . . . . . . . . . 7-7
(1) Adjusting the Reference Position of Lens . . . . . . . . . . . . . . . . . . . . . . . . . . . . . . . . . . . . . . . . . . . . . . . . . . . . . . . 7-8
(2) Adjusting the Reference Position of 4. and 5. Mirror . . . . . . . . . . . . . . . . . . . . . . . . . . . . . . . . . . . . . . . . . . . . 7-8
(3) Adjusting the Longitudinal Magnification . . . . . . . . . . . . . . . . . . . . . . . . . . . . . . . . . . . . . . . . . . . . . . . . . . . . . . . 7-8
(4) Adjusting the Resolution . . . . . . . . . . . . . . . . . . . . . . . . . . . . . . . . . . . . . . . . . . . . . . . . . . . . . . . . . . . . . . . . . . . . 7-9
(5) Adjusting the Lateral Magnification . . . . . . . . . . . . . . . . . . . . . . . . . . . . . . . . . . . . . . . . . . . . . . . . . . . . . . . . . . . 7-10
(6) Inputting the Lens Travel Correction Value . . . . . . . . . . . . . . . . . . . . . . . . . . . . . . . . . . . . . . . . . . . . . . . . . . . . . 7-10
(7) Correcting the Longitudinal Distortion . . . . . . . . . . . . . . . . . . . . . . . . . . . . . . . . . . . . . . . . . . . . . . . . . . . . . . . . . 7-12
(8) Correcting the Lateral Distortion . . . . . . . . . . . . . . . . . . . . . . . . . . . . . . . . . . . . . . . . . . . . . . . . . . . . . . . . . . . . . 7-13
(9) Adjusting the Center Deviation . . . . . . . . . . . . . . . . . . . . . . . . . . . . . . . . . . . . . . . . . . . . . . . . . . . . . . . . . . . . . . 7-14
(10) Adjusting the Exposure Balance . . . . . . . . . . . . . . . . . . . . . . . . . . . . . . . . . . . . . . . . . . . . . . . . . . . . . . . . . . . . . 7-14
(11) Adjusting the Copy . . . . . . . . . . . . . . . . . . . . . . . . . . . . . . . . . . . . . . . . . . . . . . . . . . . . . . . . . . . . . . . . . . . . . . . 7-15
4. Original Detecting Mechanism . . . . . . . . . . . . . . . . . . . . . . . . . . . . . . . . . . . . . . . . . . . . . . . . . . . . . . . . . . . . . . . . . . . 7-17
(1) Adjusting the Original Detecting Arm Unit . . . . . . . . . . . . . . . . . . . . . . . . . . . . . . . . . . . . . . . . . . . . . . . . . . . . . . 7-17
(2) Adjusting the Original Detection Level . . . . . . . . . . . . . . . . . . . . . . . . . . . . . . . . . . . . . . . . . . . . . . . . . . . . . . . . 7-18
5. Adjustment of Copy Density . . . . . . . . . . . . . . . . . . . . . . . . . . . . . . . . . . . . . . . . . . . . . . . . . . . . . . . . . . . . . . . . . . . . 7-19
1. When must the copy density be adjusted ? . . . . . . . . . . . . . . . . . . . . . . . . . . . . . . . . . . . . . . . . . . . . . . . . . . . . 7-19
2. Notes on adjustment of copy density . . . . . . . . . . . . . . . . . . . . . . . . . . . . . . . . . . . . . . . . . . . . . . . . . . . . . . . . . 7-19
3. Procedure for copy density adjustment . . . . . . . . . . . . . . . . . . . . . . . . . . . . . . . . . . . . . . . . . . . . . . . . . . . . . . . . 7-19
(1) Initial setting of auto-exposure density level (User adjustment) . . . . . . . . . . . . . . . . . . . . . . . . . . . . . . . . . . 7-19
(2) Initial setting of TSM mode (User adjustment) . . . . . . . . . . . . . . . . . . . . . . . . . . . . . . . . . . . . . . . . . . . . . . . 7-19
(3) Adjustment of AE sensor level . . . . . . . . . . . . . . . . . . . . . . . . . . . . . . . . . . . . . . . . . . . . . . . . . . . . . . . . . . . 7-19
(4) Setting of drum sensitivity . . . . . . . . . . . . . . . . . . . . . . . . . . . . . . . . . . . . . . . . . . . . . . . . . . . . . . . . . . . . . . . 7-20
(5) Setting of test chart . . . . . . . . . . . . . . . . . . . . . . . . . . . . . . . . . . . . . . . . . . . . . . . . . . . . . . . . . . . . . . . . . . . . 7-20
(6) Adjustment of copy density . . . . . . . . . . . . . . . . . . . . . . . . . . . . . . . . . . . . . . . . . . . . . . . . . . . . . . . . . . . . . . 7-20
6. Adjustments relating to Process Control . . . . . . . . . . . . . . . . . . . . . . . . . . . . . . . . . . . . . . . . . . . . . . . . . . . . . . . . . . . 7-24
V

[ 8 ] Simulation and diagnostics . . . . . . . . . . . . . . . . . . . . . . . . . . . . . . . . . . . . . . . . . . . . . . . . . . . . . . . . . . . . . . . . 8-1
1. Simulation . . . . . . . . . . . . . . . . . . . . . . . . . . . . . . . . . . . . . . . . . . . . . . . . . . . . . . . . . . . . . . . . . . . . . . . . . . . . . . . . . . . . 8-1
(1) Introduction . . . . . . . . . . . . . . . . . . . . . . . . . . . . . . . . . . . . . . . . . . . . . . . . . . . . . . . . . . . . . . . . . . . . . . . . . . . . . . 8-1
(2) Purpose . . . . . . . . . . . . . . . . . . . . . . . . . . . . . . . . . . . . . . . . . . . . . . . . . . . . . . . . . . . . . . . . . . . . . . . . . . . . . . . . . 8-1
(3) Simulation execution procedure . . . . . . . . . . . . . . . . . . . . . . . . . . . . . . . . . . . . . . . . . . . . . . . . . . . . . . . . . . . . . . 8-1
[ 9 ] Maintenance and Others . . . . . . . . . . . . . . . . . . . . . . . . . . . . . . . . . . . . . . . . . . . . . . . . . . . . . . . . . . . . . . .. . . . 9-1
1. Maintenance Schedule . . . . . . . . . . . . . . . . . . . . . . . . . . . . . . . . . . . . . . . . . . . . . . . . . . . . . . . . . . . . . . . . . . . . . . . . . . 9-1
2. Counters and Simulations Related to Maintenance . . . . . . . . . . . . . . . . . . . . . . . . . . . . . . . . . . . . . . . . . . . . . . . . . . . . 9-2
(1) List of counters and simulations related to maintenance . . . . . . . . . . . . . . . . . . . . . . . . . . . . . . . . . . . . . . . . . . . 9-2
(2) Alarm message . . . . . . . . . . . . . . . . . . . . . . . . . . . . . . . . . . . . . . . . . . . . . . . . . . . . . . . . . . . . . . . . . . . . . . . . . . . 9-3
(3) Setting the copy counter mode . . . . . . . . . . . . . . . . . . . . . . . . . . . . . . . . . . . . . . . . . . . . . . . . . . . . . . . . . . . . . . . 9-5
3. Replacing the Ozone Filter . . . . . . . . . . . . . . . . . . . . . . . . . . . . . . . . . . . . . . . . . . . . . . . . . . . . . . . . . . . . . . . . . . . . . . . 9-5
(1) Replacing the suction ozone filter . . . . . . . . . . . . . . . . . . . . . . . . . . . . . . . . . . . . . . . . . . . . . . . . . . . . . . . . . . . . . 9-5
4. Oil/Grease Points . . . . . . . . . . . . . . . . . . . . . . . . . . . . . . . . . . . . . . . . . . . . . . . . . . . . . . . . . . . . . . . . . . . . . . . . . . . . . 9-6
(1) Gear of main driving unit . . . . . . . . . . . . . . . . . . . . . . . . . . . . . . . . . . . . . . . . . . . . . . . . . . . . . . . . . . . . . . . . . . . . 9-6
(2) Gear of variable-speed paper-feed unit . . . . . . . . . . . . . . . . . . . . . . . . . . . . . . . . . . . . . . . . . . . . . . . . . . . . . . . . 9-6
(3) Gear of paper-feed driving unit . . . . . . . . . . . . . . . . . . . . . . . . . . . . . . . . . . . . . . . . . . . . . . . . . . . . . . . . . . . . . . . 9-6
(4) Fusing unit driving gear . . . . . . . . . . . . . . . . . . . . . . . . . . . . . . . . . . . . . . . . . . . . . . . . . . . . . . . . . . . . . . . . . . . . . 9-6
(5) Paper exit roller driving gear . . . . . . . . . . . . . . . . . . . . . . . . . . . . . . . . . . . . . . . . . . . . . . . . . . . . . . . . . . . . . . . . . 9-6
(6) Paper-feed torque limiter 500-sheet cassette brake spring . . . . . . . . . . . . . . . . . . . . . . . . . . . . . . . . . . . . . . . . . 9-7
(7) Optical rail . . . . . . . . . . . . . . . . . . . . . . . . . . . . . . . . . . . . . . . . . . . . . . . . . . . . . . . . . . . . . . . . . . . . . . . . . . . . . . . 9-7
5. Maintenance Schedule of Option . . . . . . . . . . . . . . . . . . . . . . . . . . . . . . . . . . . . . . . . . . . . . . . . . . . . . . . . . . . . . . . . . . 9-7
VI

[1] PRODUCT OUTLINE
1. General description
The SF-2040 is medium class copier that produces 40 copies per
minute. The SF-2040 has all the standard features of medium class
copiers to provide high productivity in offices with improved versatility
for users.
2. Target users
Average copy volume: 12,000 ~ 15,000 copies/month
3. Major features
(1) Compact body
Use of a front loading paper cassette.
(2) Serviceability and functionality
1Use of a liquid crystal display with backlight.
2Department control counter (standard provision, max. 50 depart-
ments).
3Use of key operator codes.
(3) High copy performance
1First copy time: 3.1sec
2Job speed
S →S: 100%, D →D: 70%
(4) Options
Refer to the system outline below.
4. System outline
Cassette (for replacement)
(SF-CM11)
Cassette (SF-IC11)
Reversing automatic document feeder
(SF-A55)
Document cover (SF-CV13)
Stand/3000-sheet paper drawer (SF-D23)
20-bin sorter (SF-S15)
1/bin staple sorter (SF-S53)
· Card counter (SF-EA11)
· Auditor (SF-EA12)
· Counter commander (SF-EA13)
· Personal counter (SF-71A/71B)
1 – 1

[2] PRODUCT SPECIFICATIONS
1. Basic specification
(1) Type Desktop
(2) Copy method Dry electrostatic copier
(3) Kinds of originals Sheet, book, three dimensional object
Thickness of original: Maximum 30mm in level with the original cover in use.
Weight of original: Maximum 1.8 kg (4 pounds)
Maximum original size: A3, Ledger
Original alignment: Center and left
Original sensor: Not used. (Provided in RADF.)
Sensing size AB series; A3, B4, A4, A4R, A5
Inch series: Ledger, Legal, Letter, Letter R, Invoice
Option: RADF
Original loading capacity: 50 sheets
Original size: A3 to A5, Ledger ∼Invoice
Original replace speed: 40 sheets per minute
Weight of original: 35 to 128 g/m2(14 to 34 lbs)
Mixed paper feed mode: Possible (same width)
(4) Copy speed Actual (1:1) Enlarge (ratio) Reduce (ratio)
A3 22 sheets per minute 16 sheets per minute
(200%) 19 sheets per minute
(50%)
B4 26 sheets per minute 16 sheets per minute
(200%) 23 sheets per minute
(50%)
A4 (portrait) 40 sheets per minute 21 sheets per minute
(200%) 33 sheets per minute
(50%)
A4 (landscape) 31 sheets per minute 18 sheets per minute
(200%) 27 sheets per minute
(50%)
B5 (portrait) 40 sheets per minute 21 sheets per minute
(200%) 33 sheets per minute
(50%)
B5 (landscape) 31 sheets per minute 18 sheets per minute
(200%) 27 sheets per minute
(50%)
Ledger 22 sheets per minute 16 sheets per minute
(200%) 19 sheets per minute
(50%)
Legal 26 sheets per minute 16 sheets per minute
(200%) 23 sheets per minute
(50%)
Letter (portrait) 40 sheets per minute 21 sheets per minute
(200%) 33 sheets per minute
(50%)
Letter (landscape) 32 sheets per minute 18 sheets per minute
(200%) 27 sheets per minute
(50%)
NOTE: Copy speeds indicated in Enlargement and Reduction modes are the slowest speeds in the respec-
tive mode.
(5) First copy time About 3.1 seconds from upper cassette
(6) Warmup time About 100 seconds
(With pre-heat feature)
Misfeed recovery time: 8 seconds, provided the machine is in the standard condition in 60 seconds
after opening the door.
(7) Multicopy Maximum multicopy number: 999 sheets
2 – 1

(8) Magnification ratio Fixed ratio AB series: 4R+4E; 200, 141, 122, 115, 100, 86, 81, 70, 50%
Inch series: 4R+4E; 200, 141, 129, 121, 100, 95, 77, 64, 50%
Zooming range: 50 to 200% (1% increments)
(9) Exposure system Slit exposure and moving optical system (fixed original table)
(10) Paper feed Copy size (maximum ~ minimum) AB series: A3 to A6R
Inch series: Ledger ∼Invoice
Method One cassette + multi-manual feed
Capacity 500 + 50 sheets
*For some areas, 2-tray specifications are also available.
AB series
Paper entry Paper size Paper weight Size selection Side, front
Upper cassette
(Option) B5/B5R
A4/A4R/B4/A3 56 ~ 80g/m2
15 ~ 21 lbs. Selection by way of
guide replacement
by the service
engineer
Front, drawer in the
same body
(ADU compatibility
available)
Lower cassette A5/B5/B5R
A4/A4R/B4/A3 56 ~ 80g/m2
15 ~ 21 lbs. Selection by way of
guide replacement
by the service
engineer
By way of front,
inner cassette
A5: *With the option inner cassette used
Inch series
Paper entry Paper feed size Paper weight Size selection Side, front
Upper cassette
(Option) Letter/Letter R/
Legal/Ledger 56 ~ 80g/m2
15 ~ 21 lbs. Selection by way of
guide replacement
by the service
engineer
Front, drawer in the
same body
(ADU compatibility
available)
Lower cassette Letter/Letter R/
Legal/Ledger/
Invoice
56 ~ 80g/m2
15 ~ 21 lbs. Selection by way of
guide replacement
by the service
engineer
By way of front,
inner cassette
*With the option inner cassette used
Initial setting
Japan Outside
Japan (Inch) Outside
Japan (AB) Remark
Copier upper cassette *B5R — — *When shipping, the domestic
(Japan/Oversea agents)
paper feed module is
attached.
Copier lower cassette A3 Ledger A3
Option cassette module A4 Legal A4 SF-CM11
Multi-stage desk (1st stage)
Multi-stage desk (2nd stage)
Multi-stage desk (3rd stage)
B4
A3
—
Letter R
—
—
A4R
—
—
(SF-D22 (Japan only))
LCD desk (1st stage)
LCD desk (2nd stage) —
——
Letter —
A4 SF-D23 (Outside Japan only)
Inner cassette A3 Ledger A3 SF-IC11
Manual feed
Paper size: AB series:
Inch series: A3 to A6R
Ledger ∼Invoice
(Min. width: 100mm, Min. length: 139.7mm)
Paper weight: Multifeed mode:
Single feed mode: 56 to 80 g/m2(15 to 21 Ibs)
52 to 128 g/m2(14 to 34 Ibs)
(A4 size or under, if above 105 g/m2or 28 Ibs)
Kind of paper: Standard, Sharp designated paper, OHP
Detection size Inch series:
AB series: Available: Ledger, Legal, Letter, Letter (R), invoice
Available: A3, B4, A4, A4R, A5
2 – 2

(11) Developing method Dry, two components magnetic brush method
(12) Charge method (–) DC saw-tooth electrode method
(13) Transfer method (–) DC Corotron method
(14) Separation method AC Corotron method
(15) Fusing method Heat roller method
(16) Cleaning method Blade method
(17) Light source Halogen lamp
(18) Blanking areas Void area: 4mm from the lead edge
Image loss: 4mm at maximum during the actual (1:1) copy mode
(19) Automatic duplex Option (SF-DM11)
Location Copier upper module slot
Size AB series: A3, B4, A4, A4R, B5, B5R, A5
Inch series: Ledger, Legal, Letter, Letter R
Capacity 50 sheets (below A4 or letter sizes) or 30 sheets (above B4 or Legal size)
Paper weight 56 to 80 g/m2(15 to 21 Ibs)
(20) Paper receive tray
and finishing Capacity of paper receive tray 250 sheets
Finishing With option in use
Finisher function Sorted bin capacity Non-sorted bin capacity
20-bin sorter (SF-S15) 50 sheets 100 sheets Fixed bins
21-bin stapler sorter (SF-S53) 50 sheets (50 sheets, if stapler used)
35 sheets (A4 or Less) 250 sheets Fixed bins
2 – 3

(21) Additional features Availability
of feature
APS FOverseas: Available when RADF
is used.
AMS FInhibited when mixed paper feed/
Overseas: Available when RADF
is used.
APS:
AMS: Auto paper selection
Auto magnification ratio
selection
Margin shift F9mm shift (S →S), with
adjustment function DPCM: Dual page copy mode
DPCM FEnlarge not permitted.
Combination with the duplex
function allowed.
Edge erase F7 to 12mm wide depending on
the size. Equivalent to SF-
2022/2027.
Trimming FArea input is allowed up to 2
areas. (Japan only)
Masking FArea input is allowed up to 2
areas. (Japan only)
Cover insertion FSelection of cover/rear or
cover/both
Job memory FRecordable up to 9 jobs
Auditor FAllowes up to 50 departments.
Message display F
Key operator program F
Communication FBi-directional. Option I/F PWB
(available from service parts.)
Process control F
Auto start FFrom the energy save mode.
Auto tray switching F
Priority selection of
tray ✕
Vendor F
Binding margin shift
Width AB series Inch series
Single sides to single sided 9mm 1/4"
Double sided to single sided 9mm 1/4"
Single sided to double sided (front) 9mm 1/4"
Single sided to double sided (reverse) 9mm 1/4"
Double sided to double sided (front) 9mm 1/4"
Double sided to double sided (reverse) 9mm 1/4"
Frame edge erase
AB series Inch series
Size Deleted width (mm) Size Deleted width (mm)
A3 11.5±3 Ledger 11.5±3
B4 9.5±3 Legal 7 ±3
A4 11.5±3 Letter 11.5±3
A4R 10 ±3 Letter R 7 ±3
B5 9.5±3 Invoice 7 ±3
B5R 8 ±3
(22) Power supply Voltage:
Frequency: 100V, 110V, 120V, 127V, 220V, 240V
50/60Hz, universal
(23) Power consumption Maximum power consumption: 1.5KW, maximum, with options used
(24) Appearance WxDxH (mm) 633 x 650 x 567 (at the top of the table glass)
633x 650 x 607 (at the top of the original cover)
Occupied area (W x D in mm) 1205 x 650 (with the paper receive tray and manual feed bypass open
Weight: Main body About 71.2Kg
Paper feed module: 3.9Kg
Original cover: 1.5Kg
2 – 4

(25) Accessories
Destination Japan SEC SECL SEEG SUK SCA AB agent Inch agent
Drum Installed when
shipping.
Installed when
shipping.
Installed when
shipping.
Separately
packed.
Separately
packed.
Installed when
shipping.
Partly packed. Partly packed.
Developer(Black) F×××××××
Toner cartridge F×××××××
Original cover Standard
provision
Option Option Option Option Option Standard provision
Paper exit tray 1*1 F
Original table ×F×
Toner collection
container
F(4 pcs.) One is installed when shipping.
Operation manual Japanese Exclusive English English/French GG: German
BG: None
Exclusive English English English/French/
Arabic
Typical example
English/
Spanish
Typical example
Dust cover F×F(Part)
Zooming ratio table F
ROM language Japanese English English GG: German
BG: None
English English English/French/Spanish depending on
the destination.
Key sheet Japanese English English/French GG: German
BG: None
English English English, partly
Spanish
English, partly
Spanish
SEL = English/French packed together. SEEG (BG) = Treated in a kit.
Other printed matters:
Delivery/installation report (Japan/SEEG), SCA warranty, Warranty registration (SUK), Maintenance card, Counter contract ×2 (Japan)
*1: Retractable (Japan), Fixed (Outside Japan)
2. Consumables
SF-2040 supply system (SEC)
No. Name Content Life Product name Package Remark
1 Drum OPC drum ×1 160K SF-240DR 10
2 Developer(Black) Developer (850g) ×10 80K (×10) SF-240MD1 1 (SF-240ND1) ×10 = SF-240MD1
3 Toner (Black) Toner cartridge (600g) ×10 16.5K (×10) SF-240MT1 1 (SF-240NT1) ×10 = SF-240MT1
4 Upper heat roller kit Upper heat roller
Fusing separation pawl (Upper)
Fusing gear
×1
×4
×1
160K SF-222UH 5 For replacement of the fusing separation pawl
(80K life) at every 80K, use one which is treated
as a service part.
5 Lower roller kit Lower heat roller
Fusing separation pawl (Lower) ×1
×2
160K SF-240LH 5 For replacement of the fusing separation pawl
(80K life) at every 80K, use one which is treated
as a service part.
6 80K maintenance kit Cleaner blade
Charging plate unit
Drum separation pawl unit
×1
×1
×1
80K SF-235KA1 5 Products are shipped from out division. Treated
as parts in SEC.
(222BL) ×10 = 222CB
For reception of order, SF-222CB is used.
(240RU) ×10 = 235CR2
For reception of order, SF-235CR2 is used.
7 Cleaner blade Cleaner blade ×10 80K (×10) SF-222CB 1
8 Upper cleaning roller Upper cleaning roller ×1 80K (×10) SF-240UR 1
9 Lower cleaning roller Lower cleaning roller ×10 80K (×10) SF-235CR2 1 (235RU) ×10 = 235CR2
For reception of order, SF-235CR2 is used.
10 Staple cartridge Cartridge ×5 5,000 times ×5 SD-LS20 10 Common to the cartridge for SD-2075/3075.
(SD-SC20) ×5 = SD-LS20
*For toner collection container (4 pcs./80K), screen grid (80K), charger wire (80K), ozone filter (80K), toner reception seal (160K), and DV seal
(160K), use service parts.
For charging plate unit (120K) and drum separation pawl unit(120K), service parts are also available.
SF-2040 supply system (SECL)
No. Name Content Life Product name Package Remark
1 Drum OPC drum ×1 160K A3SF240DR 10
2 Developer(Black) Developer (850g) ×10 80K (×10) A3SF240MD1 1 (SF-240ND1) ×10 = SF-240MD1
3 Toner (Black) Toner cartridge (600g) ×10 16.5K (×10) A3SF240MT1 1 (SF-240NT1) ×10 = SF-240MT1
4 80K maintenance kit Upper cleaning roller
Lower cleaning roller
Toner collection container
Fusing separation pawl (Upper)
Fusing separation pawl (Lower)
Screen grid
Cleaner blade
Charging plate unit
Drum separation pawl unit
×1
×1
×4
×4
×2
×1
×1
×1
×1
80K A3SF240KA 1
5 160K maintenance kit Upper heat roller
Lower heat roller
Toner reception seal
DV seal
Fusing gear
×1
×1
×1
×1
×1
160K A3SF240KB 1
6 Staple cartridge Cartridge ×5 5,000 times ×5 A3SDLS20 10 Common to the cartridge for SF-2075.
(SD-SC20) x 5 = SD-LS20
2 – 5

SF-2040 supply system (SEEG, SUK)
No. Name Content Life Product name Package Remark
1 Drum OPC drum ×1 160K SF-240DM 10
2 Developer(Black) Developer (850g) ×10 80K (×10) SF-240LD1 1 (SF-240DV1) ×10 = SF-240LD1
3 Toner (Black) Toner cartridge (600g) ×10 16.5K (×10) SF-240LT1 1 (SF-240T1) ×10 = SF-240LT1
4 80K maintenance
kit
Upper cleaning roller
Lower cleaning roller
Toner collection container
Fusing separation pawl (Upper)
Fusing separation pawl (Lower)
Screen grid
Cleaner blade
Charging plate unit
Drum separation pawl unit
×1
×1
×4
×4
×2
×1
×1
×1
×1
80K SF-240KA 1 To cope with Europe EAN code, distinguished
from A3SF240KA.
5 160K
maintenance kit
Upper heat roller
Lower heat roller
Toner reception seal
DV seal
Fusing gear
×1
×1
×1
×1
×1
160K SF-240KB 1 To cope with Europe EAN code, distinguished
from A3SF240KB.
6 Staple cartridge Staple cartridge ×5 5,000 times ×5 SD-LS20 10 Common to the cartridge for SD-2075.
(SD-SC20) ×5 = SD-LS20
SF-2040 supply system (SCA, SCNZ, Middle East, Africa)
No. Name Content Life Product name Package Remark
1 Drum OPC drum ×1 160K A3SF240DM 10
2 Developer(Black) Developer (850g) ×10 80K (×10) A3SF240LD1 1 (SF-240DV1) ×10 = SF-240LD1
3 Toner (Black) Toner cartridge (600g) ×10 16.5K (×10) A3SF240LT1 1 (SF-240T1) ×10 = SF-240LT1
4 80K maintenance kit Upper cleaning roller
Lower cleaning roller
Toner collection container
Fusing separation pawl (Upper)
Fusing separation pawl (Lower)
Screen grid
Cleaner blade
Charging plate unit
Drum separation pawl unit
×1
×1
×4
×4
×2
×1
×1
×1
×1
80K A3SF240KA 1
5 160K maintenance kit Upper heat roller
Lower heat roller
Toner reception seal
DV seal
Fusing gear
×1
×1
×1
×1
×1
160K A3SF240KB 1
6 Staple cartridge Cartridge ×5 5,000 times ×5 A3SDLS20 10 Common to the cartridge for SD-2075.
(SD-SC20) ×5 = SD-LS20.
SF-2040 supply system (Asia,, Middle/South America)
No. Name Content Life Product name Package Remark
1 Drum OPC drum ×1 160K A3SF240DR 10
2 Developer(Black) Developer (850g) ×10 80K (×10) A3SF240CD1 1 (SF-240SD1) ×10 = SF-240CD1
3 Toner (Black) Toner cartridge (600g) ×10 16.5K (×10) A3SF240CT1 1 (SF-240ST1) ×10 = SF-240CT1
4 80K maintenance kit Upper cleaning roller
Lower cleaning roller
Toner collection container
Fusing separation pawl (Upper)
Fusing separation pawl (Lower)
Screen grid
Cleaner blade
Charging plate unit
Drum separation pawl unit
×1
×1
×4
×4
×2
×1
×1
×1
×1
80K A3SF240KA 1
5 160K maintenance kit Upper heat roller
Lower heat roller
Toner reception seal
DV seal
Fusing gear
×1
×1
×1
×1
×1
160K A3SF240KB 1
6 Staple cartridge Carriage ×5 5,000 times ×5 A3SDLS20 10 Common to the cartridge for SD-2075.
(SD-SC20) ×5 = SD-LS20
2 – 6

3. Environmental requirements
Conditions required for proper operation of the machine, as well as assurance of copy quality, the following are requested.
1Standard conditions
Recommended temperature range at 20 to 25 Centigrade (68 to 77 degrees F) and humidity range at 65 ±5%RH.
2Operating conditions
3Shipping conditions
4Consumables storage conditions
60%
20%
30˚C 35˚C
80%
Temperature
15˚C
Humidity
60%
20%
30˚C
45˚C
90%
Temperature
-20˚C
Humidity
20%
40˚C
90%
Temperature
-5˚C
Humidity
2 – 7

[3] OPTIONS SPECIFICATIONS
1. SF-A55
Name Reversing automatic document feeder
Original feed system Continuous auto feed
Document feed sequence Bottom take-up feeding (Face-up discharge)
Document transfer drive Belt drive
Orientation of document setting Face up
Document size A3 ∼B5/W letter ∼Invoice
Document weight Thin paper mode: 35 ∼50g/m2(Japan only)
Standard mode: 51 ∼128g/m2
Max. No. of documents to be
set Max. 50 sheets (35 - 80g/m2)
(30 sheets for A3 or 11" ×17")
Function
Original reverse mechanism (duplex original)
SDF/ADF mode selection (selectable with the key
operator program. Japan only)
Original size detection mechanism
Thin film/standard mode selection (selectable with the
key operator program. Japan only)
Mixed paper feed
Random paper feed allowed
Power supply Supplied from the copier
Dimensions 600 (W) ×525 (D) ×170 (H)mm
Weight Approx. 15kg
2. SF-S15
Name 20-bin sorter
No. of bins 20 bins
Paper collection Copy face up
Capacity per bin Max. 50 sheets (100 sheets: Top bin)
Allowable paper size/weight
for collating
Max. A3, Min.: B5 (Min. A6 for non-sort)
Non-sort: 52 ∼128g/m2,
Sort/Grouping: 56 ∼80g/m2
Power source Supplied from the copier.
Dimensions 500mm (W) ×520mm (D) ×957mm (H)
Weight About 13kg
3. SF-S53
Name Staple sorter
No. of bins 20 bins
Paper collection Copy face up
Capacity per bin Max. 50 sheets (250 sheets: Top bin)
Allowable paper size/weight
for collating
Max.: A3, Min.: B5 (Non-sort: Min. A5),
Non-sort: 52 ∼128g/m2,
Sort/staple sort/grouping: 56 ∼89g/m2
No. of sheets for stapling 50 sheets (80g/m2)
Power source Supplied from the copier.
Dimensions 475mm (W) ×597mm (D) ×995mm (H)
Weight About 42.1kg
3 – 1

4. SF-D23
Name 2-cassette paper feed desk
Paper size and capacity 550 sheets of A3, B4, A4, or B5 for each cassette
Paper weight 56 ∼80g/m2
Paper transport system Roller transport (center reference)
Power source Supplied from the copier.
Dimensions 600mm (W) ×625mm (D) ×451mm (H)
Weight About 32kg
5. SF-DM11
Name Duplex module
Paper size A3 ∼B5
Paper weight 56 ∼80g/m2
Capacity A3/B4: 30 sheets, A4/B5: 50 sheets
Power source Supplied from the copier.
Weight About 6kg
6. SF-CM11 Cassette module
•Equivalent to the upper cassette of the copier body. The optional 2-cassette
paper feed desk can be attached.
7. SF-IC11 Inner cassette
•Paper cassette for replacement of the lower cassette.
8. SF-71A (counter), SF-71B (socket) •Personal counter
9. Other counters
Card-type department counter (SF-EA11)
Password-system department counter (SF-EA12)
Counter commander (SF-EA13)
10. Desk SF-DS15
999
9
9
3 – 2

[4] COMPONENT IDENTIFICATION
1. External view
1Document holder 2Exit tray 3Document cover (optional)
4Operation panel 5Document glass 6Paper clip tray
7Manual feed tray paper guides 8Manual feed tray 9Exit area cover
FPower switch GDuplex module or 500-sheet paper
drawer (optional) HLower paper tray
IFront cover JToner collecting container cover KHandles
LSide cover
1 2 3 4 5 6 7
910 11 12 13 14 15
16
8
4 – 1

MFusing section NTransport section open/close lever OPhotoconductor drum
PCharger QToner box RToner box lever
SRoller rotating knob TToner collection container
16 17 18 18 20 21
22 23
4 – 2

2. Operation panel
1COVERS key and indicator 2ERASE key and indicator 3MARGIN SHIFT key and indicator
4DUAL PAGE COPY key and indicator 5AUTO IMAGE key 6Message display
7INFORMATION key and indicator 8SCROLL DISPLAY keys 9COPY quantity display
FPROGRAM ( ) key GINTERRUPT key and indicator HLCD contrast control
ISORTER key and indicators JORIGINAL TO COPY key and indicators KZOOM keys
LReduction ( ) key MEnlargement ( ) key N100% key
OCOPY RATIO display PEXPOSUREdisplay QEXPOSURE key
RAUTO PAPER SELECT display SLIGHT key TDARK key
UPaper size display VTRAY SELECT key WOriginal size display
X10-key pad YAUDIT CLEAR ( ) key ZClear ( ) key
[CLEAR ALL ( ) key \START key and indicator
P
0/
C
CA
COVERS ERASE MARGIN
SHIFT DUALPAGE
COPY
SORTER ORIGINAL TO COPY
EVEN NUMBER
ODD NUMBER
(ORIGINALS)
1
00
AUTO IMAGE
ZOOM
100%
SORT
STAPLE
SORT
GROUP
PRE-COUNT
ORIGINALS
00
11
1
AUTO
MANUAL
PHOTO
EXPOSURE
LIGHT DARK
AUTO
EXPOSURE
COPY RATIO
1 0 0 %
00x171
8½x11
0
AUTOPAPER
SELECT
READY TO COPY.
ORIGINAL
SCROLL DISPLAY
INFORMATION
TRAY SELECT
AUDITCLEAR
CLEARALL
START
0/
CA012
543
689
C
P
PROGRAM
LCD contrast control
Use the contrast control adjustment to vary the
contrast of the message display to best suit the
room lighting conditions.
21 3 4 5 6
7
8 9 10 11 12
13 14 15
16
17 19
18 20
21 23 24 25
22
26 27 2829 30 31 32
INTERRUPT
8¼x11R
8½x11
4 – 3
This manual suits for next models
2
Table of contents
Other Sharp All In One Printer manuals

Sharp
Sharp AR-122E N User manual

Sharp
Sharp MX-2314N Guide

Sharp
Sharp MX-2310U Guide

Sharp
Sharp AL-2061 Guide

Sharp
Sharp MX-3500N User manual

Sharp
Sharp AR-M257 - Digital Imager B/W Laser User manual

Sharp
Sharp MX-M232D User manual

Sharp
Sharp MX-M354U N User manual

Sharp
Sharp AL-2051 Guide

Sharp
Sharp MX-C380 User manual

Sharp
Sharp MX-4100N User manual

Sharp
Sharp MX-M904 User manual

Sharp
Sharp MX-M503U User manual

Sharp
Sharp MX-M264U N User manual

Sharp
Sharp AR-M452U User manual

Sharp
Sharp MX-M753U User manual

Sharp
Sharp AR-M256 User manual

Sharp
Sharp AR-M237 IMAGERs User manual

Sharp
Sharp IMAGER AR-5316 User manual

Sharp
Sharp AR-M155X User manual