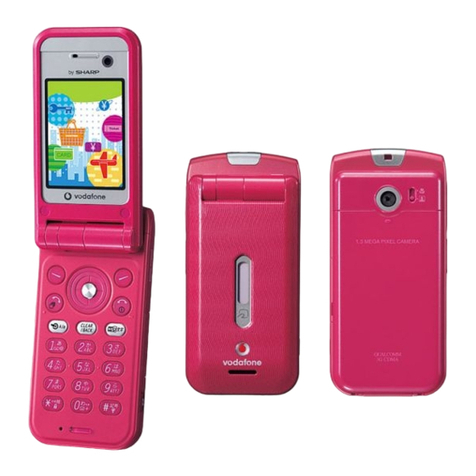
Sharp 942SH User manual

1
1-1
Getting Started
Handset Parts................................. 1-2
Parts & Functions ............................ 1-2
Charging Battery ............................ 1-4
Power On/Off .................................. 1-6
Handset Power On/Off..................... 1-6
Display & Indicators ...................... 1-7
Display..............................................1-7
Indicators..........................................1-9

Getting Started
1
1-2
Handset Parts
1Light Sensor
2Earpiece
3Display
4Internal Camera
5Microphone
6Illumi Display
7Small Light
8Charging Terminals
9Strap Eyelet
aInfrared Port
bExternal Device Port (with Port Cover)
cInternal Antenna Location
dExternal Camera (lens cover)
eMobile Light
fSpeaker
gmLogo
hBattery Cover
Keep handset closed
when not in use.
Open handset to place or
answer calls, enter text, etc.
Parts & Functions
6
7
5
h
d
c
8b
g
f
e
1
3
4
2
9
a
.Do not cover or place stickers, etc. over
Light Sensor or Internal Antenna area.
.Replace Port Cover after Port use.
.Avoid metallic straps; Antenna sensitivity
may be affected.
Handset Positions
Handset Closed
Handset Open

Getting Started
1
1-3
Handset Parts
.Keys are indicated in this guide as shown.
.Change functions with *via Set Key
Shortcut as needed.
1Multi Selector (right) d
Open Received Calls. Long Press to
activate/cancel Infrared*.
2Multi Selector (up) a
Open Mobile Widget window. Long Press
to open PC Site Browser menu*.
3Center Key %
Open Main Menu. Long Press to activate/
cancel Keypad Lock.
4Multi Selector (left) c
Open Dialed Numbers. Long Press to
activate/cancel Bluetooth®*.
5Mail Key B
Open Messaging menu. Long Press to
open S! Mail Composition window*.
6Shortcuts & A/a Key '
Open Shortcuts menu. Long Press to
show active indicators (Status Icon List).
7Clear/Back Key $
Play Answer Phone messages. Long
Press to activate/cancel Answer Phone.
8Start Key !
Open All Calls. Long Press to open
Double Number Mode menu.
9Keypad 0- 9
Enter numbers to place calls or access
functions (Quick Operations). Long Press
to open Phone Book.
anKey (
Enter
n
, +, P, ?and -. Long Press to open
S! Friend's Status member list.
bDictionary Key ~
Open Dictionary. Long Press to activate/
cancel VeilView.
cMulti Job & Manner Key )
Select handset mode. Long Press to
activate/cancel Manner mode.
dYahoo! Keitai Key A
Open Yahoo! Keitai portal. Long Press to
activate Familink Remote*.
eTV & Text Key &
Activate TV. Long Press to open Change
Menu window.
fMulti Selector (down) b
Open Phone Book. Long Press to open
Exchange Profile menu*.
gPower On/Off Key "
Toggle Standby display. Long Press to
power handset off.
h# Key #
Enter #. Long Press to activate/cancel
Manner mode.
iCamera Key |
Activate mobile camera. Long Press to
activate Review.
jVolume Up Key E
Long Press to illuminate Mobile Light.
kVolume Down Key F
Open: Show/hide Softkeys.
lShutter Key I
Open:
Long Press to activate mobile camera.
Closed: Toggle Illumi Display view.
Handset Keys
1
2
3
4
5
e
i
f
g
d
6
8
7
9
b
c
a h
j
k
l
Side Keys
Multi Selector & Side Keys
.In this guide, Multi Selector and Side Key
operations are indicated as follows:
Press aor b e
Press cor d f
Press a, b, cor d g
Press Eor F L

Getting Started
1
1-4
Charging Battery
Battery must be inserted in handset to
charge it.
Use specified AC Charger ZTDAA1 (sold
separately) only.
.In this guide, ZTDAA1 is referred to as "AC
Charger."
.Handset and AC Charger may warm while
charging.
1Open Port Cover as shown
2Insert Charger Connector
.With arrows up, insert connector until
it clicks.
3Extend blades and plug AC
Charger into AC outlet
.Small Light illuminates red while
charging.
.Small Light goes out when battery is
full.
4Unplug AC Charger
.Pull AC Charger straight out.
5Disconnect handset
.Squeeze Charger Connector release
tabs and pull straight out to remove.
6Fold back blades and
replace Port Cover
Charging Battery
Charging Battery Outside Japan
.SoftBank Mobile is not liable for problems
resulting from charging battery abroad.
AC Charger
Small Light
External Device
Port
Charger
Connector
AC 100VOutlet
Blades
AC Charger
Release Tabs
Port
Cover
Arrows
When Small Light Flashes
.
Battery is unchargeable; may be defective
or simply at the end of its life; replace it.
Important AC Charger Usage Note
.Fold back blades after charging. Do not
pull, bend or twist the cord.

Getting Started
1
1-5
Charging Battery
Connect handset (with power on) to PC
via USB Cable to charge battery.
.Download and install USB Cable driver
beforehand.
.Handset must be on to charge battery.
.Battery may not charge if handset is
connected through a USB hub.
In-Car Charger may be purchased
separately.
1Open Port Cover
2Insert Charger Connector
.With arrows up, insert connector until
it clicks.
3Plug Charger into cigarette
lighter socket
4Start car engine
.Small Light illuminates red while
charging.
.Small Light goes out when battery is
full.
5Unplug Charger
6Disconnect handset
.Squeeze Charger Connector release
tabs and pull straight out to remove.
7Replace Port Cover
USB Charge
Disabling USB Charge
%
S
Tools
S
%
S
f
Connectivity
S
USB Charge
S
%
S
Disable
S
%
In-Car Charger
Small Light
Cigarette Lighter Socket
Plug
In-Car Charger
External
Device Port
Charger
Connector
Arrows
Port Cover
Release Tabs
Important In-Car Charger Usage Notes
.
Disconnect Charger before leaving vehicle
to prevent charging with engine off.
.Do not use In-Car Charger with Desktop
Holder.
.Avoid charging battery inside extremely
hot vehicles.

Getting Started
1
1-6
Power On/Off
Follow these steps when powering on
942SH for the first time:
1"(Long)
.After Power On Graphic, follow the
steps below.
"S"S%SbS%S
設定
S%SLanguage S%SEnglish
S%S"(Long) S"(Long) S
Change Menu window opens
2Select option S%
Guide descriptions are based on
Standard Menu.
.My Details setup starts.
3Enter last name S%S
Enter first name S%
.Change Menu display option
confirmation appears.
4Yes or No S%
Standby
.Choose No to enter Standby
immediately after powering on.
Handset initiates Network Information
retrieval when %, a, Bor Ais
pressed for the first time.
Follow these steps to retrieve Network
Information to use Network-related
services and TV; retrieval automatically
sets Clock:
1Yes S%SRetrieval starts
2%
1"(Long)
.After Power Off Graphic, handset
shuts down.
Handset Power On/Off
Power On
When USIM Card is Not Installed
.Insert USIM Card appears; insert the
card to use handset.
Retrieving Network Information
Power Off

Getting Started
1
1-7
Display & Indicators
Hereafter, most screenshots omit Mobile
Widgets and other icons.
Check active indicators and their
descriptions. (Status Icon List)
1'(Long)
.Active indicators are enlarged;
description for selected indicator
appears.
.Use gto select indicators to view
their descriptions.
.Press %to open menu/window
(e.g., Battery Meter window from
battery strength indicator). May be
unavailable for some indicators.
Information window opens at the bottom
for Missed Calls, new mail, etc.
Information Window
Information label (e.g., Message, etc.)
and count appear in Information window.
Select an item and press %to open it.
Display
Standby
Indicator Area
Mobile Widgets
Indicator Descriptions Information
Opening Information List Manually
%
S
Phone
S
%
S
Information
S
%
Clearing Information List
%SPhone S%SInformation S
%SBSYes S%

Getting Started
1
Display & Indicators
1-8
Functions/operations assigned to B, %
and Aappear at the bottom of Display.
Display goes dark after Display Saving
time elapses. Press any key (except "
during a call) to activate it.
View date, time, signal strength, etc. with
handset closed.
1With handset closed, I
.Press Ito toggle view.
Softkeys
%B A
Display Saving
Backlight
.Backlight turns off after Time Out time
elapses. Press 0- 9to illuminate it
(key press may affect active function).
.Display goes dark during a call.
(Backlight does not turn off first.)
Illumi Display
Activating

Getting Started
1
1-9
Display & Indicators
In Dual Mode, line type appears bottom
right of some indicators.
[Basic Status
1The more bars the better.
2Battery strength % (appears when Display
activates, etc.) is an approximation.
[Function Status
*Appears gold for some S! Applications (Real
3D Games, etc.).
[Notifications
[Warnings
Indicators
Display Indicators
1
Within 3G range
Within GSM range
International roaming in progress
2Signal strength1
3Battery strength2
31
2
1
Active S! Application*
Paused S! Application*
Music playback in progress
TV recording in progress (handset)
TV recording in progress
(Memory Card)
2
Memory Card inserted
Accessing Memory Card
Reading Memory Card
Formatting Memory Card
TV Timer/TV Recording Timer set
3Compass Indicator
4Music playback in progress (via
Bluetooth®)
5
Multiple functions (Multi Job)
active
31
2 4
5
1Unread mail
Unread Delivery Report
2
Answer Phone active & message
recorded
Answer Phone canceled &
message recorded
3New Voicemail
4
Missed Call or new mail on idle line
5
S! Appli/Mobile Widget Notification
6Contents Key received
7
Unread S! Information Channel info
Software Update result
Unread S! Quick News info
8
Unread S! Friend's Status
notification or unanswered
registration request
1Mail memory low
2Message delivery failure
3
Memory Card unusable/misinserted
5
6
1
7
8
3
4
2
31
2

Getting Started
1
Display & Indicators
1-10
[Transmissions
1Hidden while Mobile Widget is in use.
2Flashes while positioning.
[Settings *Indicator does not appear when Call
Forwarding is set to Video Calls only, with
Voicemail unset.
1SSL browsing in progress1
Packet transmission available
2Receiving mail
Sending mail
3S! Friend's Status online
Positioning in progress2
4Software Update in progress
5RSS-compatible site
6Weather Indicator
5
6
1
7
8
3
4
2
7
USB Cable connected
USB transmission in progress
Infrared transmission in progress
Infrared file transfer in progress
Bluetooth®transmission ready
Bluetooth®transmission in
progress ( appears for multiple
connections)
Bluetooth®talk in progress
IC Transmission in progress
S! Addressbook Back-up
transmission in progress
PC Site Browser in use
8Infrared transmission ready
1Offline Mode active
2Answer Phone active
3
Call Forwarding or Voicemail active
(forwarding condition:
Always
)
*
4Schedule/Task (Alarm set)
Schedule/Task (Alarm unset)
7
8
1
9
b
c
a
3
5
4
6
2
5Alarm set
6Hour Minder active
7
Manner mode active
Drive mode active
Original mode active
VeilView active
8Keypad Lock active
IC Card Lock active
9
Ringtone (Silent)
Ringtone (Increasing Volume)
Vibration active
aAuto Answer or Remote Monitor
active
bShow Secret Data active
Function Lock (Once) active
cWakeup TV set
Table of contents
Other Sharp Cell Phone manuals

Sharp
Sharp AQUOS Crystal User manual

Sharp
Sharp GZ200 User manual

Sharp
Sharp NTT docomo Aquos Zeta User manual

Sharp
Sharp Aquos Phone es WX04SH Setup guide

Sharp
Sharp AQUOS SHOT 933SH User manual

Sharp
Sharp Z2 User manual

Sharp
Sharp TM150 User manual

Sharp
Sharp ROUVO V User manual

Sharp
Sharp WX-T825 User manual

Sharp
Sharp AQUOS Xx User manual

Sharp
Sharp SoftBank 205SH User manual

Sharp
Sharp SL-6000L User manual

Sharp
Sharp SH930W User manual

Sharp
Sharp O2 User manual

Sharp
Sharp Aquos Xx2 User manual

Sharp
Sharp GX30 User manual

Sharp
Sharp SHV43 Quick start guide

Sharp
Sharp Disney Mobile DM003SH User manual

Sharp
Sharp GX293 User manual

Sharp
Sharp Aquos sense6s User manual