CD-DV777W
E-7
ENGLISH
General Information
CD-DV777W (Z)
TINSZA083AWZZ
1
2
20
21
22
23
24
25
26
27
28
3
4
5
6
7
8
9
10
18
19
11
15 16 17
12 13 14
33 34
37 38 39 40
29 30 31 32
35 36
HRemote control
Reference page
1. Remote Control Transmitter .............................................................. 14
2. Disc Number Select Buttons ................................................. 19, 29, 42
3. DVD Top Menu Button ........................................................................ 40
4. Clock/Timer Button ........................................................... 16, 61, 63, 64
5. Direct Search Buttons .................................................................. 47, 48
6. Clear/Display Button .......................................................................... 39
7. Enter Button .................................................................................. 20, 24
8. Cursor Left Button ........................................................................ 23, 47
9. Memory/Dimmer Button ................................. 15, 16, 39, 47, 53, 61, 64
10. Cursor Down Button ............................................................... 20, 24, 47
11. Tape 2 Record Pause Button ................................................. 58, 61, 65
12.
DVD Chapter Skip, DVD/Video CD/CD/MP3/WMA Fast Reverse,
Video CD/CD/MP3/WMA Track Down, Tape 2 Fast Wind and
Tuner Preset Down, Time Down Button .....................
30, 31, 45, 53, 56
13. DVD/Video CD/CD/MP3/WMA Pause Button..................................... 31
14.
DVD Chapter Skip, DVD/Video CD/CD/MP3/WMA Fast Forward,
Video CD/
CD/MP3/WMA Track Up, Tape 2 Fast Wind and
Tuner Preset Up, Time Up Button ....................... 30, 31, 43, 45, 53, 56
15. Tape 2 Reverse Play Button ................................. 55, 56, 57, 58, 59, 60
16. DVD/Video CD/CD/MP3/WMA/Tape Stop Button ........................ 29, 56
17. DVD/Video CD/CD/MP3/WMA/Tape 1 Play,
Tape 2 Forward Play Button .................................................. 29, 54, 55
18. Shift Button ................................................................................... 20, 51
19. Volume Up/Down Buttons .................................................................. 15
20. On/Stand-by Button ...................................................................... 14, 19
21. Echo Level Up/Down Buttons ............................................................ 50
22. DVD Direct Button .............................................................................. 33
23. DVD Menu Button ............................................................................... 40
24. Return Button ...................................................................................... 23
25. CD Random Button ............................................................................. 46
26. Cursor Up Button .................................................................... 20, 24, 47
27. Cursor Right Button ..................................................................... 23, 47
28. DVD/Video CD Slow Button ............................................................... 30
29. DVD/Video CD/CD/MP3/WMA Repeat Button ................................... 38
30. DVD Subtitle Button ........................................................................... 34
31. DVD Angle Button ............................................................................... 34
32. DVD Zoom Button ............................................................................... 37
33. DVD/Video CD/CD/MP3/WMA Button .......................................... 19, 29
34. Tuner (Band) Button ........................................................................... 52
35. Tape (1 2) Button .................................................................... 54, 55
36. Game/Video Button ............................................................................ 65
37. Equaliser Mode Select Button ........................................................... 15
38. Extra Bass Button .............................................................................. 15
39. DVD 3-D Virtual Surround Button ..................................................... 35
40. DVD On Screen Button ....................................................................... 28
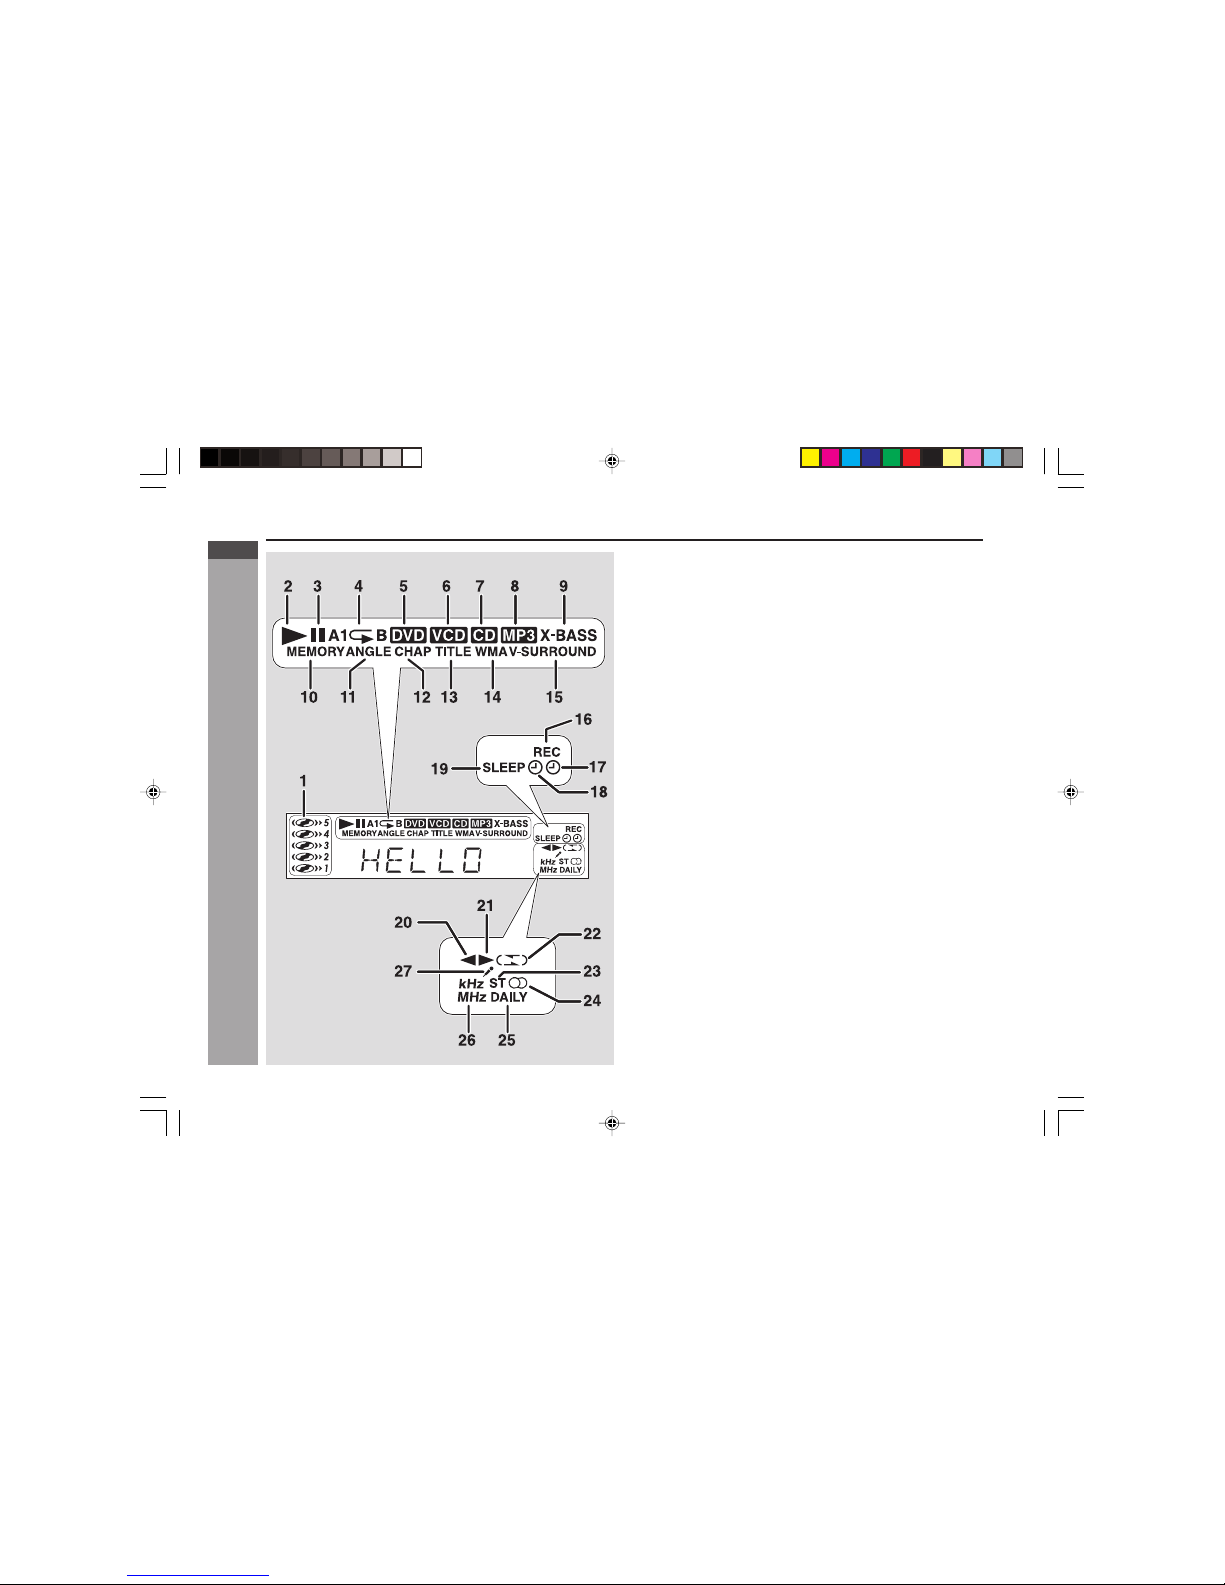
Controls and indicators (continued)
*DV777W_EP06-08 12/4/04, 13:467

 User manual")
 User manual")