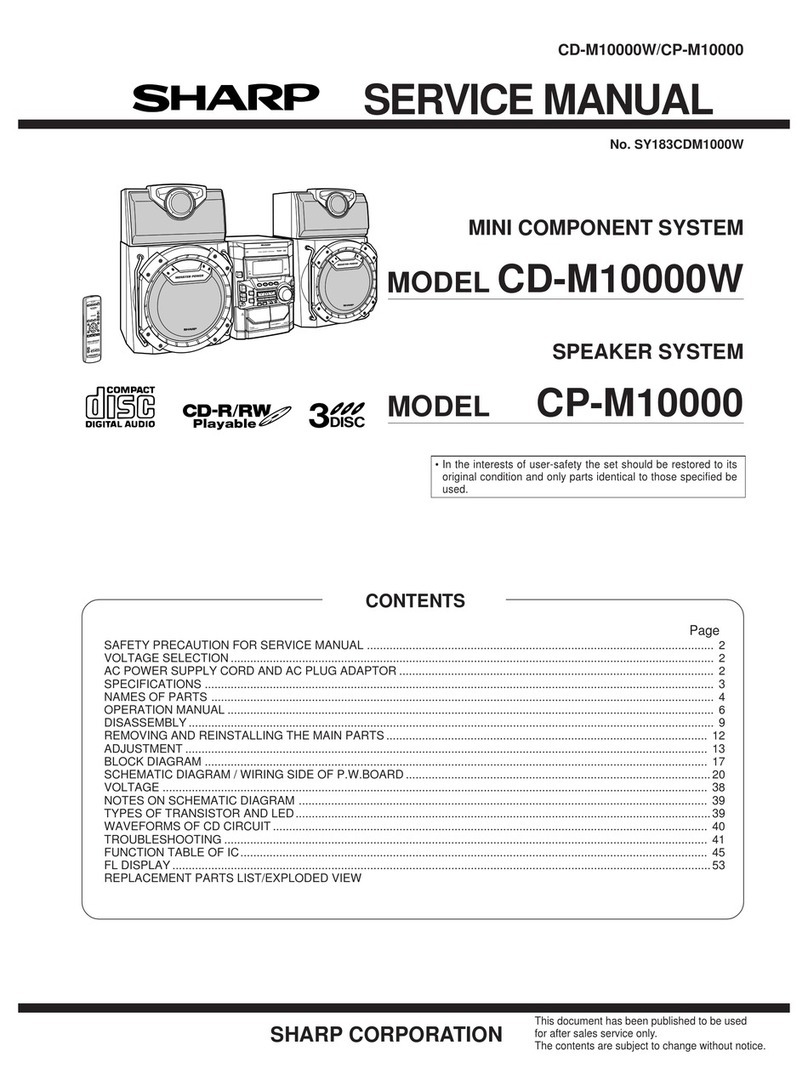
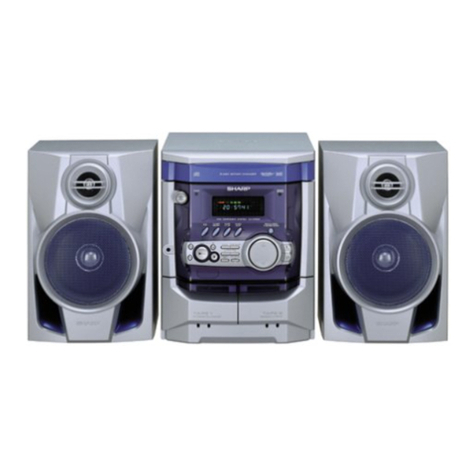
Sharp MD X5 User manual

OPERATION MANUAL
MODEL
MD-X5
MD/CD STEREO
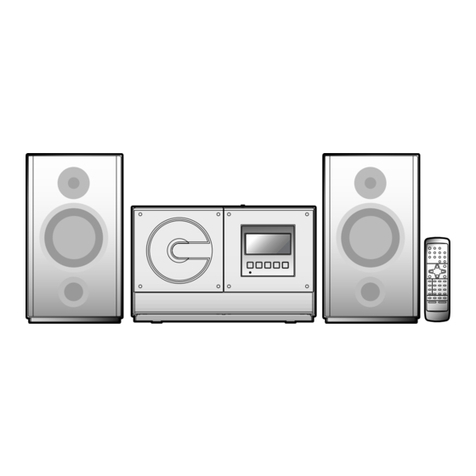
MD-X5 MD/CD stereo consisting of
MD-X5 MD/CD stereo
CP-X5 2 way speaker system.
Thank you for purchasing this SHARP product.
To obtain the best performance from this product
please read this manual carefully. It will guide you in
operating your SHARP product.
Page
RECORDING ............................................................................. 17 - 19
EDITING .................................................................................... 20 - 26
ENTERING CHARACTERS ...................................................... 27 - 28
HOW TO USE THE BUILT-IN TIMER ....................................... 29 - 32
USING EXTERNAL UNITS ....................................................... 33 - 36
WHAT IS A MINIDISC? .................................................................... 37
MINIDISC SYSTEM LIMITATIONS .................................................. 38
TROUBLESHOOTING .............................................................. 38 - 40
MAINTENANCE ............................................................................... 41
SPECIFICATIONS ............................................................................ 41
CALLING FOR SERVICE.................................................. Back cover
LIMITED WARRANTY....................................................... Back cover
A0006
Note:
Parts and accessories mentioned in this operation manual other than
those detailed above are not included.
CONTENTS
A0004 Page
IMPORTANT SAFEGUARDS ............................................................ 1
SPECIAL NOTES .......................................................................... 1 - 2
PRECAUTIONS .................................................................................. 2
NAMES OF CONTROLS AND INDICATORS............................... 3 - 4
PREPARATION FOR USE ............................................................ 5 - 6
SOUND CONTROL ............................................................................ 7
SETTING THE CLOCK ...................................................................... 8
COMPACT DISC OPERATION .......................................................... 9
MINIDISC OPERATION ................................................................... 10
RADIO OPERATION ................................................................. 11 - 12
CD AND MD OPERATIONS...................................................... 13 - 15
BASIC INFORMATION ON MINIDISCS .......................................... 16
"AA" size battery
(UM/SUM-3, R6, HP-7
or similar) x 2
[UBATU0001AWZZ]
ACCESSORIES
FM/AM loop antenna x 1
[QANTL0004AWZZ] Remote control x 1
[RRMCG0110AWSA]

1
12 OutdoorAntennaGrounding -Ifan outsideantennaisconnected tothe
receiver,besuretheantennasystemisgroundedsoastoprovidesome
protection against voltage surges and built-up static charges. Article
810 of the National Electrical Code, ANSI/NFPA 70, provides informa-
tion with regard to proper grounding of the mast and supporting
structure, grounding of the lead-in wire to an antenna discharge unit,
size of grounding conductors, location of antenna-discharge unit,
connection to grounding electrodes, and requirements for the ground-
ing electrode.
13 NonusePeriods-Thepowercordoftheapplianceshouldbeunplugged
from the outlet when left unused for a long period of time.
14 Object and Liquid Entry - Care should be taken so that objects do not
fall and liquids are not spilled into the enclosure through openings.
15 Damage Requiring Service - The appliance should be serviced by
qualified service personnel when:
AThe power-supply cord or the plug has been damaged; or
BObjects have fallen, or liquid has been spilled into the appliance; or
CThe appliance has been exposed to rain; or
DTheappliancedoesnotappeartooperatenormallyorexhibitsamarked
change in performance; or
EThe appliance has been dropped, or the enclosure damaged.
16 Servicing-Theusershouldnotattempttoservicetheappliancebeyond
thatdescribedintheoperatinginstructions.Allotherservicingshouldbe
referred to qualified service personnel.
17 Grounding or Polarization - Precautions should be taken so that the
grounding or polarization means of an appliance is not defeated.
1 HeedWarnings-Allwarningsontheapplianceandintheoperating
instructions should be adhered to.
2 Follow Instructions - All operating and use instructions should be
followed.
3 Water andMoisture -Theappliance shouldnotbe usednear water
- for example, near a bathtub, washbowl, kitchen sink, laundry tub,
in a wet basement, or near a swimming pool, etc.
4 Carts and Stands - The appliance should be used only with a cart
or stand that is recommended by the manufacturer.
• An appliance and cart combination should be
moved with care.
Quick stops, excessive force, and uneven sur-
faces may cause the appliance and cart combina-
tion to overturn.
5 Wall or Ceiling Mounting - The appliance should be mounted to a
wall or ceiling only as recommended by the manufacturer.
6 Ventilation -Theappliance shouldbesituatedso thatitslocation or
position does not interfere with its proper ventilation. For example,
the appliance should not be situated on a bed, sofa, rug, or similar
surfacethatmayblocktheventilationopenings;or,placedinabuilt-
in installation, such as a bookcase or cabinet that may impede the
flow of air through the ventilation openings.
7 Heat - The appliance should be situated away from heat sources
such as radiators, heat registers, stoves, or other appliances
(including amplifiers) that produce heat.
8 Power Sources - The appliance should be connected to a power
supplyonly ofthe typedescribed intheoperating instructionsor as
marked on the appliance.
9 Power-Cord Protection - Power-supply cords should be routed so
that they are not likely to be walked on or pinched by items placed
upon or against them, paying particular attention to cords at plugs,
convenience receptacles, and the point where they exit from the
appliance.
10Donotuseliquidcleanersoraerosolcleaners. Useadampclothfor
cleaning.
11 Power Lines - An outdoor antenna should be located away from
power lines.
ANTENNA LEAD IN
WIRE
POWER SERVICE GROUNDING
ELECTRODE SYSTEM
(NEC ART 250, PART H)
GROUND CLAMPS
GROUNDING CONDUCTORS
(NEC SECTION 810-21)
ANTENNA DISCHARGE UNIT
(NEC SECTION 810-20)
EXAMPLE OF ANTENNA GROUNDING AS PER
NATIONAL ELECTRICAL CODE
NEC - NATIONAL ELECTRICAL CODE
S2898A
IMPORTANT SAFEGUARDS
CAUTION
All the safety and operating instructions should be read before the
appliance is operated, and should be retained for future reference.
Electrical energy can perform many useful functions. This unit has
been engineered and manufactured to assure your personal safety.
Improper use can result in potential electrical shock or fire hazards. In
ordernottodefeatthesafeguards,observethefollowingbasicrulesfor
its installation, use and servicing.
FORYOURRECORDS
For your assistance in reporting this unit in case of loss or theft, please record below the model number and serial number which are located on the
rear of the unit.
Please retain this information.
Model number
Serial number
Date of purchase
Place of purchase
SPECIAL NOTES
GROUND
CLAMP
ELECTRIC
SERVICE
EQUIPMENT
CAUTION: TO REDUCE THE
RISK OF ELECTRIC SHOCK, DO
NOT REMOVE COVER (OR
BACK).
NO USER-SERVICEABLE PARTS
INSIDE. REFER SERVICING TO
QUALIFIED SERVICE
PERSONNEL.
Thelightningflashwitharrowheadsymbol,
within an equilateral triangle, is intended
to alert the user to the presence of
uninsulated “dangerous voltage” within
the product’s enclosure that may be of
sufficientmagnitudetoconstituteariskof
electric shock to persons.
Theexclamationpointwithinanequilateral
triangle is intended to alert the user to the
presence of important operating and
maintenance(servicing)instructionsinthe
literature accompanying the appliance.
CAUTION
RISK OF ELECTRIC SHOCK
DO NOT OPEN
*01-21 98.6.23, 10:09 AM1
2
Note:
Thisequipmenthas beentested andfoundtocomply withthe limitsfor
a Class B digital device, pursuant to Part 15 of the FCC Rules.
These limits are designed to provide reasonable protection against
harmful interference in a residential installation.
This equipment generates, uses, and can radiate radio frequency
energy and, if not installed and used in accordance with the instruc-
tions, may cause harmful interference to radio communications.
However, there is no guarantee that interference will not occur in a
particular installation. If this equipment does cause harmful interfer-
ence to radio or television reception, which can be determined by
turning the equipment off and on, the user is encouraged to try to
correct the interference by one or more of the following measures:
IReorient or relocate the receiving antenna.
IIncrease the separation between the equipment and receiver.
IConnectthe equipmentinto anoutlet onacircuit differentfrom that
to which the receiver is connected.
IConsult the dealer or an experienced radio/TV technician for help.
WARNING
FCCRegulations state thatany unauthorizedchanges or modificationsto
thisequipmentnotexpressly approvedbythemanufacturercould voidthe
user’s authority to operate this equipment.
SPECIAL NOTES FOR FCC COMPOSITE DEVICE:
Thisdevice is acomposite system.The digitaldevice component maynot
cause harmful interference.
IIt is the intent of Sharp that this product be used in full compliance with
the copyright laws of the United States and that prior permission be
obtined from copyright owners whenever necessary.
(Continued)
Caution - use of controls or adjustments or
performance of procedures other than those
specifiedhereinmayresultinhazardousradiation
exposure.
WARNING:TOREDUCETHERISKOFFIRE
OR ELECTRIC SHOCK, DO NOT EXPOSE
THISAPPLIANCETORAINORMOISTURE.
0001
PRECAUTIONS
0002
HH
HH
HGeneral
IDo not use oil, solvents, gasoline, paint thinner or insecticides on
the unit.
IDo not expose the unit to moisture, to temperatures higher than
140°F (60°C) or to extreme low temperatures.
IKeep the unit away from direct sunlight, strong magnetic fields,
excessivedust,humidityandelectronic/electricalequipment(home
computers, facsimiles, etc.) which generates electrical noise.
IHold the AC power plug by the head when removing it from the AC
outlet, since pulling the cord can damage internal wires.
IUse the unit on a firm, level surface free from vibration.
IIf the unit does not work properly while in use, press the POWER
buttontoturnthepoweroff,thendisconnecttheACpowercordfrom
the AC outlet. Plug the AC power cord back in, and then press the
POWER button to turn the power on.
IIf an electrical storm is taking place near you, it is suggested that
you disconnect the AC power cord from the AC outlet for safety.
IBeforemovingtheunit,besuretoremoveallCDsandMDsfromthe
unit. Then, turn the power off and unplug the AC power cord.
If you move the unit with CDs or MDs left in it, they may jam inside
the unit, leading to damage.
Warning:
Thevoltageusedmustbethesameasthatspecifiedonthisunit.Using
this product with a higher voltage than that which is specified is
dangerous and may result in a fire or other type of accident causing
damage.SHARPwillnotbeheldresponsibleforanydamageresulting
from use of this unit with a voltage other than that which is specified.
HH
HH
HVolume control
The sound level at a given volume setting depends on a combination
of speaker efficiency, location and many other factors.
It is advisable to avoid exposure to high volume levels, which occur
whileturningtheunitonwiththevolumecontrolsettinguphigh,orwhile
continually listening at high volumes.
HH
HH
HCondensation
Sudden temperature changes and storage or operation in an extremely
humid environment may cause condensation inside the cabinet.
Condensation can cause the unit to malfunction.
Follow the procedure below to eliminate condensation.
II
II
ICD and MD pickups
Leavethepoweronwithnodiscintheunituntilnormalplaybackispossible
(about 1 hour).
II
II
IRemote control
Wipe off any condensation on the transmitter LED with a soft cloth before
operating the unit.
HH
HH
HCare of compact discs
Compact discs are fairly resistant to damage, however mistracking can
occur due to an accumulation of dirt on the disc surface.
Followtheguidelines belowfor maximum enjoymentfrom your CDcollec-
tion and player.
IDo not write on either side of the disc, particularly the non-label side.
Signals are read from the non-label side. Do not mark on this surface.
IKeep your discs away from direct sunlight, heat, and excessive mois-
ture.
IAlways hold CDs by the edges. Fingerprints, dirt, or water on the CDs
cancausenoiseormistracking.IfaCDisdirtyordoesnotplayproperly,
clean it with a soft, dry cloth, wiping straight out from the center, along
the radius.
USandforeignpatentslicensedfromDolbyLaboratoriesLicensingCorpo-
ration.
*01-21 98.6.23, 10:09 AM2

3
II
II
IDisplay window
1. Level Meter/Character Information Display
2. Disc Name Indicator: DISC
3. Track Name Indicator: TRACK
4. FM Stereo Mode Indicator: STEREO
5. Date Indicator: DATE
6. FM Stereo Indicator: ST
7. Program Indicator: PRGM
8. Random Play Indicator: RANDOM
9. Recording Level Indicator
10. MD Pause Indicator: 66
66
6
11. MD Record Indicator: REC
12. Recording Level Too High Indicator
13. Repeat Indicator: RR
RR
R
14. Sleep Indicator: SLEEP
15. More Tracks Indicator: >
16. Music Schedule Indicators
17. MD TOC Indicator: TOC
18. Recording Mode Indicator: MONO LP
19. Sound Synchro Indicator: S. SYNC
20. Clock Indicator: CLOCK
21. Remaining Time Indicator: REMAIN
22. Auto Mark Indicator: AUTO MARK
23. Total Time Indicator: TOTAL
24. Timer/Timer Record Indicator
II
II
IFront panel
25. MD Slot
26. Power Button: POWER
27. Recording Mode Button: REC MODE
28. CD Track Select Button: TRACK
29. CD 00
00
0MD Edit Button
30. Volume Up/Down Buttons: /
31. 55
55
5/ 44
44
4 .-/+ Buttons
32. Tuner Call (Band Select) Button: TUNER(BAND)
33. Auxiliary Select Button: AUX
34. Extra Bass Button: X-BASS
35. Keyboard Input Terminal
36. MD Eject Button: 77
77
7
37. MD Record Button: II
II
IREC
38. MD Play/Pause Button: 0606
0606
06
39. MD Stop Button: HH
HH
H
40. Remote Sensor
41. Pre-program Equalizer Button: PRE-EQ
42. CD Stop Button: HH
HH
H
43. CD Play/Pause Button: 0606
0606
06
44. CD Open/Close Button: 77
77
7
45. CD Tray
46. Headphones Jack: PHONES
47. Input Level Control: INPUT LEVEL
NAMES OF CONTROLS AND INDICATORS
1
10
11
1617
1819202122 23 24
12
13
14
15
23456789
MD/CD STEREO MD-X5
REMOTE
SENSOR
POWER
VOLUME
PRE-EQ
X-BASS
SAMPLING RATE CONVERTER
MD/CD/TUNER
TUNER(BAND)
PHONES
KEYBOARD INPUTLEVEL
AUX
TRACK
REC MODE
CD MD
EDIT
REC
25
47
36
37
38
39
40
41
42
43
44
45
46
26
27
28
29
30
31
32
33
34
35
*01-21 98.6.23, 10:09 AM3

4
II
II
IRear panel
1. AM Loop/FM Antenna Jack
2 Phono Input Jacks
3. Auxiliary Analog Input Jacks
4. Auxiliary Analog Output Jacks
5. Auxiliary Digital Input Jack (Optical)
6. Auxiliary Digital Input Jack (Coaxial)
7. AC Power Cord
8. Reset Button
9. Speaker Terminals
(Continued)
II
II
IRemote control
1. Tuning Up/Down Buttons: XX
XX
X/WW
WW
W
2. MD Track Up/Down, Cue/Review Buttons: 55
55
5/ 44
44
4
3. Tuner Preset/CD/MD Track Number Input Buttons
4. Program Button: PROGRAM
5. Clear Button: CLEAR
6. MD Record Button: II
II
I REC
7. Play Mode Button: P-MODE
8. Time Display Select Button: TIME
9. Auxiliary Select Button: AUX
10. Cursor Buttons: CURSOR
11. Name/TOC Edit Button: NAME/TOC EDIT
12. Timer/Delete Button: TIMER/DELETE
13. Power Button: POWER
14. Extra Bass Button: X-BASS
15. FM Stereo Mode Button: ST-MODE
16. Tuner Call (Band Select) Button: TUNER/BAND
17. MD Stop Button: HH
HH
H
18. MD Play/Pause Button: 0606
0606
06
19. Sound Synchro Button: S. SYNC
20. Recording Mode Button: REC MODE
21. Auto Mark Button: A.MARK
22. CD Play/Pause Button: 0606
0606
06
23. CD Stop Button: HH
HH
H
24. CD Track Up/Down, Cue/Review Buttons: 55
55
5/ 44
44
4
25. Display Button: DISPLAY
26. ▲▼1 01 0
1 01 0
1 0Buttons
27. Message Button: MESSAGE
28. Enter Button: ENTER
29. Volume Up/Down Buttons: /
30. Pre-program Equalizer Button: PRE-EQ
II
II
ISpeaker section
1. Tweeter
2. Woofer
3. Speaker Cord
ANTENNA
PHONO
RESET
SPEAKERS
AUX ANALOG IN/OUT
AUX
DIGITAL
IN
AM
LOOP
AUX
IN
AUX
OUT
FM
RIGHT LEFT
RIGHT LEFT
RIGHT
LEFT
RATED SPEAKER
IMPEDANCE ;
6 OHMS MIN.
DIGITAL1
OPTICAL
DIGITAL2
COAXIAL
1
2
3
4
5
6
7
8
9
1
2
3
12345
678910/0
>
10
PROGRAM TUNING ST-MODE
-TUNER-
BAND
NAME
TOC EDIT
TIMER/
DELETE
CLEAR
P-MODE
REC S.SYNC
REC MODE
A.MARK
TIME CD
-AUX-
<<
CURSOR
>>
DISPLAY
ENTER
MESSAGE
POWER
X-BASS PRO-EQ
VOLUME
MD
MD/CD/TUNER DIRECT KEY
MD/CD STEREO MD-X5
REMOTE CONTROL
15
16
17
18
19
20
21
22
23
24
25
26
27
28
29
3
4
5
6
7
8
9
10
11
12
13
14
30
12
*01-21 98.6.23, 10:09 AM4

5
SPEAKERS
RIGHT
LEFT
RATED SPEAKER
IMPEDANCE ;
6 OHMS MIN.
1 2 3
Left speakerRight speaker
Black Black
Red
Red
,,
Left speaker Right speaker
For the
left side For the
right side
1 2 3
ANTENNA
FM aerial
AM loop antenna
AM
LOOP
FM
(1) (2)
HH
HH
HAntenna connection
Connect the antenna wire to the ANTENNA jack.
(1) FM antenna
PositiontheFMantennawireinthedirectionwherethestongestsignalcan
be received.
(2) AM loop antenna
Position the AM loop antenna for optimum reception.
PlacetheAMloopantennaonashelf,etc.,orattachittoastandorwallwith
screws (not supplied).
Notes:
IDo not place the antenna on the unit. It may result in noise generation,
since the unit is equipped with digital electronics. Place the antenna
away from the unit for better reception.
IIftheAMloopantennaandtheFMantennawireareplacedneartheAC
power cord, interference may result.
HH
HH
HSpeaker connection
Connect each speaker wire to the SPEAKER terminals as shown.
Use speakers with an impedance of 6 ohms or more, as lower impedance
speakers can damage the unit.
Cautions:
IConnecttheblackwireto theminus (–)terminal, andthe redwireto the
plus (+) terminal.
IDonotmixtherightchannelandleftchannelwiringwhenconnectingthe
speakers to the unit.
IDonotlet barespeakerwires toucheachotherasthis maydamagethe
amplifier and/or speakers.
Note:
IThe speaker grille is not removable.
PREPARATION FOR USE
IUnplug the AC power cord from the AC outlet before connecting or
disconnecting any component.
HH
HH
HPlacing the system
IBe sure to keep space between the units for ventilation.
IKeep the back and sides of this unit at least 2" (5 cm) away from the
wall.
IIfanykindofmagnetoranelectromagnetisplacedtooclosetotheTV
set and the system, irregular color may be seen.
TV set location
IDependingon theparticular locationof a TVset, colorvariations may
be seen on the TV screen. If this happens, move the system and its
speakers away from the TV and turn off the TV set. After 15 - 30
minutes, turn on the TV again.
TheTV'sowndemagnetisingfunctionshouldeliminatethevariations.
However,if the colorstill does notlook right,move the systemfurther
away from the TV set.
Note:
IAcooling fanis builtinto thisproduct toavoidheat buildup.When the
power is turned on, the cooling fan will run.
*01-21 98.6.23, 10:09 AM5

6
I 2 "AA" size
batteries
(UM/SUM-3, R6,
HP-7 or similar)
8" - 20'
(0.2m - 6m)
15
Remote sensor
15
DISPLAY
HH
HH
HConnecting the AC power cord
IAfter connecting the speakers, plug the AC power cord into a conven-
ient AC outlet.
IPlugtheACpowercordintoaconvenientACoutlet.Theletters"ENJOY
MUSIC!" will be scrolled across the display.
IUnplugtheACpower cordfrom theAC outletif theunit isnottobeused
for a prolonged period of time.
(Continued)
1
2
3
HH
HH
HLoading the batteries for the remote control
IWhen inserting or removing the batteries, push them towardr the Ï
battery terminals.
IInstalling the batteries incorrectly may cause the unit to malfunction.
Precautions for battery use:
IInsert the batteries according to the direction indicated in the battery
compartment.
IReplace all old batteries with new ones at the same time.
IDo not mix old and new batteries.
IRemove the batteries if they are weak or if the unit is not in use for long
periods to prevent potential damage due to battery leakage.
Caution:
Do not use rechargeable batteries (nickel-cadmium battery, etc.)
HH
HH
HTo change the brightness of the display
Turn the power on, and keep pressing the DISPLAY button for more than
two seconds.
The “DIMMER ON” display will appear, and the display will be dimmer.
To return to the original brightness, keep pressing the DISPLAY
button for more than two seconds.
The “DIMMER OFF” display will appear, and the original brightness is
retrieved.
To an AC outlet
AC 120 V, 60 Hz
Ï
Notes concerning use:
IReplace the batteries if the control distance decreases or operation
becomes erratic.
IPeriodically clean the transmitter LED on the remote control and the
sensor on the main unit with a soft cloth.
IExposing the sensor on the main unit to strong light may interfere with
operation. Change the lighting or the direction of the unit.
IKeep the remote control away from moisture, excessive heat, shock,
and vibrations.
*01-21 98.6.23, 10:09 AM6

7
HH
HH
HVolume
Pressthe VOLUME buttonto increase thevolume andthe VOLUME
button to decrease the volume.
IThe volume display can be changed within the range of "0" to "10".
HH
HH
HPre-programmed equalizer
When the PRE-EQ button is pressed, the current mode setting will be
displayed. To change to a different mode, press the PRE-EQ button
repeatedly.
FLAT: The sound is not modified.
HEAVY-2: Bass and treble are emphasized a lot.
HEAVY-1: Bass and treble are slightly emphasized.
VOCAL: Vocals (midrange tones) are emphasized.
SOFT-2: Treble is reduced a lot.
SOFT-1: Treble is cut a little.
HH
HH
HExtra bass (X-BASS)
Press the X-BASS button to emphasize the bass region of the frequency
spectrum.
"X-BASS ON" will appear.
Press the X-BASS button again to cancel the extra bass mode. "X-BASS
OFF" will appear.
VOLUME
VOLUME
Volume level
(0 to 10)
PRE-EQ
PRE-EQ
X-BASS
X-BASS
SOUND CONTROL
*01-21 98.6.23, 10:09 AM7

8
When you have set the date and time, this unit can be used as a clock. It
canbeusedfortimerrecordingorfortimerplayback.It isalsousedtostore
the MD recording date in memory.
1Press the POWER button to turn the power on.
2Press the TIMER/DELETE button.
3Within 10 seconds, press the ▲ or ▼button to select "TIME ADJUST".
4Within 10 seconds, press the ENTER button.
IThe unit will enter the date setting mode.
5Adjust the month by pressing the 1 or 0button.
6Press the ENTER button to set the month.
7Adjust the day by pressing the 1 or 0button.
8 Press the ENTER button to set the date.
9Adjust the year by pressing the 1 or 0button.
IPress the button once to increase or decrease the year by one. Keep
pressing it to advance continuously.
IFor a year after 2000, set "00" for 2000, "01" for 2001 and so on.
10 Press the ENTER button to set the year.
IThe unit will enter the time setting mode.
11Adjust the hour by pressing the 1 or 0button.
IPress the button once to increase or decrease the hour by one. Keep
pressing it to advance continuously.
IOnthe display,midnight isshown as"12:00 AM"and noonis shownas
"12:00 PM". When setting the time, be careful not to confuse AM and
PM.
12 Press the ENTER button to set the hour.
13 Adjust the minute by pressing the 1 or 0button.
IPress the button once to increase or decrease the minutes by one.
When the button is held down, the time will change in increments of 5
minutes.
14 Press the ENTER button to set the minute.
IThe clock will start operating.
IWhenabout3secondshaveelapsed,theoriginaldisplaywillreappear.
Notes:
IIn the event of a power failure or when the AC power cord is discon-
nected, the clock display will go out.
When the AC power supply is restored, the clock display will flash on
andofftoindicate thetime whenthe powerfailureoccurredorwhen the
AC power cord was disconnected.
IWhile recording an MD, you cannot set the date and clock. Be sure to
set the date and clock before recording.
IThe range of dates that can be entered is from January 1, 1997 to
December 31, 2049.
To change the setting:
IOnce you have set the date and time, "TIME ADJUST" will not be
displayedin step3. Press the▲or▼button tomake thedate andtime
appear.
IIf you don't need to change the settings, just press the ENTER button.
To check the date and time:
Press the TIMER/DELETE button, and press the ▲or ▼button until the
date and time appear.
IWhen about 10 seconds have elapsed, the original display will reap-
pear.
SETTING THE CLOCK
ENTER
TIMER/
DELETE
POWER
2
3
4
5
6
7
8
9
10
11
12
13
14
*01-21 98.6.23, 10:09 AM8

9
HH
HH
HLoading and playing CDs
1Press the CD Hbutton.
IThepowerwillbeturnedon automatically,andtheunit willenterthe CD
playback mode.
2Press the 7 button to open the disc tray.
3Place the CD on the disc tray, label side up.
IA CD can be placed on any open position on the disc tray.
IBe sure to place 3" (8 cm) CDs in the middle of the disc holder.
Caution:
Do not stack CDs in the tray.
This can damage the player and the CDs.
4Press the 7 button to close the disc tray.
IThe total number of tracks and the total disc playing time will be
displayed.
IThe music schedule will be displayed only for the number of tracks on
the disc.
IIf the CD contains more than 21 tracks, “Y” will appear.
5Press the CD 06 button.
IPlayback will begin from track 1 on the disc you have specified.
IWhen all the tracks on the CD have finished playing, the unit will stop
automatically.
To interrupt playback:
Press the CD 06 button.
Press the CD 06 button to resume playback from the same point.
To stop playback:
Press the CD Hbutton.
To remove the CDs:
While in the stop mode, press the 7button.
After use:
Press the POWER button to turn the power off.
Direct playback:
If a CD is loaded in the unit, pressing the CD 06 button turns the power
on and begins playback.
COMPACT DISC OPERATION
Cautions:
IDo not carry the unit with a disc left in the disc tray. The disc
may come loose inside the unit and be damaged or cause
damage to the unit. This may also cause malfunctions.
IDo not place two CDs in the disc tray.
IDo not push the disc tray while it is moving.
IIf the power fails while the drawer is open, wait until the power is
restored before trying to close it.
IIf the disc drawer is stopped forcibly, “ERROR” will appear on the
display and the unit will not function.
If this occurs, turn the power off, and turn it on again.
IIf TV or radio interference occurs during CD operation, move the
unit away from the TV or radio.
IIf the main unit is subjected to a sharp jolt or it is used where
vibrations are present, sound dropouts may occur. Use the unit in
a stable environment.
Ifthevolumeissettotoohigh,adropoutmayoccurduetovibrations
from the speakers. If this happens, move the main unit away from
the speakers or turn down the volume.
IDonotuseCDswithloosecellophanetapeorstickersorCDswhich
have glue left on the surface from tape or stickers. If such a CD is
inserted, you may not be able to remove the CD or the unit may
malfunction.
1
2, 4
5
1
5
3
Total number of tracks Total playing time
Music schedule (More tracks indicator)
*01-21 98.6.23, 10:09 AM9

10
1
7
3
2
1
3
DISPLAY
Arrow
MINIDISC OPERATION
HH
HH
HLoading and playing MiniDiscs
1Press the MD Hbutton.
IThepowerwillbeturnedonautomatically,andtheunitwillentertheMD
playback mode.
2Load a recorded MiniDisc in the direction indicated by the arrow on the
MiniDisc, with the labeled side facing up.
IThe total number of tracks and the total disc playing time will be
displayed.
IThe music schedule will be displayed only for the number of tracks on
the disc.
IIf the MD contains more than 21 tracks, “Y” will appear.
IIf an untitled MD is inserted, no disc name will be displayed.
3Press the MD 06 button.
IPlayback will begin from track 1 on the disc you have specified.
IIf the disc has track names, the track names will be scrolled across the
display.
IWhen the last track has been played back, this unit will stop automati-
cally.
To interrupt playback:
Press the MD 06 button.
Press the MD 06 button to resume playback from the same point.
To stop playback
Press the MD Hbutton.
To remove a MiniDisc:
Press the 7button.
IThe MiniDisc will be ejected.
Notes:
IAlthough vibration will not normally cause a MiniDisc to skip, you may
hear a skip in the sound if there is continuous vibration.
IWhen you listen to MiniDiscs near a radio or a TV set, the radio or the
TV set may pick up noise.
Keep the unit as far away as possible from tuners.
After use:
Press the POWER button to turn the power off.
Note
IThepower cannotbe turnedoffwhile theunitis readingtheinformation
on a MiniDisc.
Direct playback:
If a MiniDisc is loaded in the unit, pressing the MD 06 button turns the
power on, and begins playback.
To check a track name or the date of a recording during
playback:
Press the DISPLAY button on the remote control during playback.
IEach time this button is pressed, the display will switch.
IInthefollowingcases,discnames,tracknamesandrecordingdateswill
not be displayed:
• A MiniDisc that has not been given a disc name or track name
• A MiniDisc that does not have a recording date on it
Disc name Total number
of tracks
Music schedule (More tracks indicator)
Total
playing time
Track name
Level meters
Remaining recording time
Recording date
*01-21 98.6.23, 10:09 AM10

11
HH
HH
HTuning
1Press the TUNER (BAND) button.
IThe power is turned on, and the tuner is selected.
2Press the TUNER (BAND) button to select the desired frequency band
(FM or AM).
3Tune in to the desired station using the TUNING Xor Wbutton.
Auto tuning:
When the TUNING Xor Wbutton is pressed for more than 0.5 seconds
andthenreleased,thetuningstopsatthefirstreceivablebroadcaststation.
Notes:
IWhen radio interference occurs during auto tuning, auto tuning may
stop automatically at that point.
IIf a weak station signal is found during auto tuning, the station will be
skipped.
ITo stop auto tuning, press the TUNING Xor Wbutton again.
Manual tuning:
Press the TUNING Xor Wbutton as many times as necessary to adjust
the frequency display to the frequency of the desired station.
4ToreceiveFMstereo,presstheST-MODEbuttonontheremotecontrol
so that the "STEREO" indicator appears.
I“ST” will appear when an FM broadcast is in stereo.
5If the FM stereo reception is weak, press the ST-MODE button so that
the “STEREO” indicator goes out.
IAlthough the reception changes to monaural, the sound becomes
clearer.
After use:
Press the POWER button to turn the power off.
Direct playback:
JustpressingtheTUNER (BAND)button willturn onthepowerautomati-
cally. The radio station you were listening to last will be tuned in.
Notes:
IThe memory recalls the last station received even after changing the
TUNER (BAND) button or function selector buttons, or pressing the
POWER button to turn the power off.
IIf you are listening to the radio near personal computers, radios, or TV
sets, various noise or interference may be heard. Keep this unit as far
away as possible from these products.
RADIO OPERATION
4,5
1,23
1,2
3
Frequency
FM stereo reception indicator
Stereo mode indicator
*01-21 98.6.23, 10:09 AM11

12
(Continued)
HH
HH
HPreset tuning
You can store up to 40 stations in memory (40 stations consisting of any
combinationof FMand AMstations youlike) andrecall themtogether with
their FM reception mode (stereo or mono), at the push of a button.
1Perform steps 1 - 5 in the "Tuning" section.
2Press the ENTER button.
3Within 10 seconds, press the tuner preset number buttons.
4Repeat steps 1 - 3 to set other preset stations, or to change a preset
station.
IWhen a new station is stored in a preset number location, the previous
contents of that location will be erased.
To select preset numbers 11 to 40.
Press the Y10 button first, then press the preset number.
For example to select 35:
1Press the Y10 button.
2Within 5 seconds, press the "3" button.
3Within 5 seconds, press the "5" button.
Note:
IAftera prolongedpower failure,thecontents ofthememory willbelost.
When power is restored, enter your selections in memory again.(For
power failures of just a few hours or less, the contents of the memory
will not be lost.)
HH
HH
HTo recall a preset station
1Press the TUNER (BAND) button.
2Press the tuner preset number button to recall the preset channel.
IThe frequency will appear on the display.
Note:
IYou can create names for radio stations that have been stored in
memory. (Page 27)
1
2
3
3
Location number for storing a station in memory
*01-21 98.6.23, 10:09 AM12

13
CD AND MD OPERATIONS
HH
HH
HDirect-selection play
By using the track number input buttons on the remote control, any track
you wish to can be played directly, by entering its number.
1Selectthe desiredprogram source,CDor MD,bypressing theCD Hor
MD Hbutton.
2Use the track number input buttons to select the desired track number.
A. To select track numbers 11 to 99
Press the >10 button first, then press the track number.
For example to select 28:
1Press the >10 button.
2Within 5 seconds, press the "2" button.
3Within 5 seconds, press the "8" button.
B. To select track number 100 or higher (only for MD)
Press the >10 button twice, then press the track number.
For example to select 105:
1Press the >10 button.
2Within 5 seconds, press the >10 button.
3Within 5 seconds, press the "1" button.
4Within 5 seconds, press the "10/0" button.
5Within 5 seconds, press the "5" button.
The beginning of the selected track will be found, and play will begin
automatically.
Notes:
IA track number higher than the number of tracks on the disc cannot be
selected.
IDuring APMS play or random play, track number selection play is not
possible.
HH
HH
HAPSS (Auto Program Search System)
APSS automatically locates the beginning of any track.
To listen again to the track being played:
Press the 5 button for less than 0.5 seconds during playback.
To move to the beginning of the next track:
Press the 4button for less than 0.5 seconds during playback.
ITo skip a number of tracks at one time, press the 5 or 4button
repeatedly until the desired track number is shown.
ITostartplaybackfromadesiredtrack,pressthe 5 or4buttonwhile
in the stop mode to select the track number, and then press the 06
button.
HH
HH
HCue and review
1Load a disc and begin playback.
2Hold down the 4button for audible fast forward, and hold down
the 5button for audible fast reverse.
3Normal playback will resume when the 4or 5button is
released.
Notes:
IIf the end of the disc is reached while cueing, “DISC END” will
appear on the display, and operation will pause. Press the CD H
or MD Hbutton to stop operation.
When you want to listen to the disc again, press the 5button to
locatethe desired track. Normalplayback willstart from thatpoint.
IWhen the beginning of the first track is reached, normal playback
will start.
To search very quickly
Whenfast forwardorfast reverseisused whileinthe pausemode,the
playback point will move more quickly than when using audible fast
forward or audible fast reverse in the playback mode.
IIn this mode, no sound is heard. Therefore, you must refer to the
time display.
IWhen you lift your finger, the unit will re-enter the pause mode.
4
5
4
4
5
5
Track number
input buttons
*01-21 98.6.23, 10:09 AM13

14
(Continued)
HH
HH
HAPMS
(Automatic Programmable Music Selector)
1Selectthe desiredprogram source,CDor MD,bypressing theCD Hor
MD Hbutton.
2Press the PROGRAM button.
I"PRGM" will flash.
3Use the track number input buttons to designate the desired track
number.
4Repeat step 3 for any other tracks. Up to 20 tracks for MD or 32 tracks
for CD can be programmed.
IThe programmed playback order and the total playing time of the
programmed tracks will be automatically displayed, and only those
track numbers will appear in the music schedule.
IIfthe totalplayingtime oftheprogrammed tracksexceeds199 minutes
59 seconds, “– –:– –” will be displayed. In this case, the programmed
tracks are stored.
5Press the CD Hor MD Hbutton.
6PresstheCD06 orMD06 buttontostartplaybackoftheprogrammed
selections.
IAfter all of the programmed tracks have finished playback, the unit will
automatically stop.
To add tracks to the APMS:
When a program has been entered ("PRGM" is flashing), perform step 3.
Additionaltrackscanbeselected,andtheywillbestoredafterthelasttrack
you entered.
To clear the programmed selections:
Press the CLEAR button while "PRGM" is flashing.
IEach time the button is pressed, one track will be cleared, beginning
with the last track programmed.
To cancel the APMS:
While the unit is stopped in the APMS mode, press the CLEAR button.
IThe program contents will be erased.
IWhenyouopenthe disctray ora MiniDiscisremoved,theAPMS mode
will be canceled.
To check which tracks are programmed:
While the unit is stopped in the APMS mode, press the 5or 4button.
Notes:
IIt is not possible to insert an additional track between programmed
tracks that have already been entered.
IProgramming and canceling are not possible during playback or in the
pause mode.
You can make program selections from CDs with the main
unit.
1Press the CD Hbutton.
2Hold down the TRACK button for at least 2 seconds.
3Press the 5or 4button to select the track you want to listen to.
4Press the TRACK button.
5Repeat steps 3 and 4 for any other tracks.
6Press the CD Hbutton.
1,5
3
26
6
1,5
CLEAR
2
3
5
The last track number selected
Total playing time
Selected track numbers
*01-21 98.6.23, 10:09 AM14

15
HH
HH
HRandom and repeat play
1Select the desired program source, CD or MD, by pressing the CD H
or MD Hbutton.
2Press the P-MODE button.
IEach time this button is pressed, the mode will change in the following
order:
Repeat play →Random play →Normal play
3Press the 06 button to start playback.
IRepeat play
Play will continue until it is stopped.
IRandom play
Play will stop after all the tracks have been played once. (The same
track will not be played twice.)
To stop playback:
Press the CD Hor MD Hbutton.
To cancel repeat playback or random play:
Press the P-MODE button until the Ror "RANDOM" display disappears.
To repeat playback of selected tracks:
Enter the program for the tracks you want and start repeat play.
You can program a single track and play it repeatedly.
Notes:
IDuring APMS play, random play is not possible.
IRepeat play will continue until you stop it. Therefore, do not forget to
cancel repeat play.
HH
HH
HSwitching the time display
EachtimetheTIMEbuttonispressedduringplaybackorpause,thedisplay
will change as described below.
See the diagram to the left.
1The elapsed play time for each track will be displayed.
2The remaining play time for the current track will be displayed.
3Thetotal remainingplay timefor thedisc fromthe pointbeing playedat
that time will be displayed.
Notes:
IDuringrandomplay, thetotalremaining playtime displayedforthe disc
will be from the point being played at that time. The display cannot be
switched.
IDepending on a CD or MD to be played, the play time display may not
matchtheplaytimeindicatedon theCDorMD jacket,becausethe time
between the tracks is not included.
(Continued)
1
1
23
3
Repeat play
Random play
TIME
1
2
3
*01-21 98.6.23, 10:09 AM15

16
BASIC INFORMATION ON MINIDISCS
Area for TOC (recording track
numbers, track names, etc.) Area for recording
the sound
You don’t need to search for the starting point at which to
record.
You cannot record music on the back side of a MiniDisc.
MiniDiscs cannot be inserted when they are turned over.
(Page 37)
The unit automatically finds the point at which recording can start.
Recording will start from that point.
Youcancheckthetotalorremainingrecordabletime(possible
recording) before recording.
This lets you plan a recording session so that the last song will not
come to an abrupt end before it has finished. (Page 17)
The date and time of a recording are automatically saved with
the recording.
Ifyou haveset thedate andtime, theywillbe automaticallyrecorded
when a recording is made. (page 8)
HH
HH
HInformation (TOC) to be recorded on an MD
The TOC (Table of Contents) is information on track numbers and
recording areas to allow the unit to recognize musical selections or
sounds.
Theentire MDis controlleddependingon thisTOC,which enablesthe
unitto findthebeginning ofa trackquicklyor toautomatically recordin
a vacant area.
IThe TOC is recorded in a specific area on a MiniDisc, which is not
used for sound recording.
HH
HH
HNote about making digital copies
MiniDiscsaredesignedsothatfurthercopiescannotbemadefromdigitally
recordedMiniDisc tracks.Thisis aspecification oftheSCMS (SerialCopy
Management System).
When you start recording or editing, “TOC” will appear in the display
window.
This indicates that information in the TOC is now being changed
accordingtorecordingoreditingbeingperformed. (ThechangedTOC
is not yet recorded on the MiniDisc at this time.)
The TOC is recorded when
• you stop recording.
• you switch to another input source.
• you eject the MiniDisc.
• you turn the power off.
DoNOTunplugthepowercordwhiletheTOCisbeingrecorded(“TOC”
is flashing). Also, do not subject the unit to any shocks or sharp jolts.
Otherwise the TOC will not be correctly recorded, and consequently
proper playback may not be possible.
HH
HH
HAbout track numbers
When you make a recording on a MiniDisc, track numbers are created
automatically.
When recording from CDs inserted in this unit or making a
digital recording from an external unit (CD or MD)
New track numbers will be created automatically according to the original
tracks (Synchro mark function).
IWhen you record from a CD to a MiniDisc, the track numbers recorded
on the MiniDisc may not match the track numbers on the CD.
When recording from this unit's radio
One continuous recording is regarded as a single track.
When recording from external analog equipment
If there is 1.5 seconds or more of silence, the blank space is assumed to
bethespacebetweentracks, andanew tracknumber iscreatedautomati-
cally (Auto mark function).
IIfthesignaltoberecordedcontainssomenoise,thetracknumbersmay
not be properly created.
IYou can also record musical selections as a single track without using
the Auto mark function.
Note:
IWhen external units such as a DSS tuner or a DAT are connected and
a recording is made, the Auto mark function will work.
Track A Track B Track C
First track
First track
Second track Third track
Second
track Third track
Track A Track B Track C
(Track A) (Track B) (Track C)
First track
First track
Second track Third track
Silence
First track Second track
About 1.5
second
HH
HH
HDifferences from tape recordings
*01-21 98.6.23, 10:09 AM16

17
HH
HH
HRecording from a CD onto a MiniDisc
(One-Touch Editing)
1Press the CD Hbutton, and load the compact disc.
2Load a recordable MiniDisc.
3Check the record mode by pressing the REC MODE button.
4Press the CD 0MD button.
IPlayback of the first track and recording begin.
IWhen the disc is completely recorded, recording automatically stops.
If recording does not begin:
When not all of the tracks on a CD can be recorded, the unit will enter the
recording stand-by mode. To record on only those tracks which can be
recorded, press the CD 0MD button.
To cancel operation:
Before pressing the CD 0MD button, press the CD Hor MD Hbutton.
To stop recording:
Press the CD Hbutton.
After recording the track number, playback and recording will stop.
It is not possible to pause recording.
Note:
IYou can program a series of tracks and record them. (Page 14)
RECORDING
HH
HH
HAbout monaural long-play mode
When a recording is made in the monaural long-play mode, the length of
therecordingcanbedoublethatofastereorecordingfor thesameamount
of space on the MD. The monaural long-play mode is very useful for
recordingsongsthat wereoriginallyrecorded inmonaural, orforrecording
talk programs.
Press the REC MODE button.
IEach time the button is pressed, the display will switch between the
stereo mode and the monaural long-play mode.
IThis mode cannot be changed while recording.
IThe level meter shows stereo indication even when the mode is the
monaural long-play mode.
IThe recording mode will not change back until you change it manually.
After you have made a recording in the monaural long-play mode, it is
recommended that you return the unit to the stereo mode so that you
won’t forget to do so later.
If recording does not begin:
Number of non-recordable tracks
Recordable track numbers
REC MODE
Stereo mode
Monaural long-play mode
1
1
3
2
34
1
*01-21 98.6.23, 10:09 AM17

18
HH
HH
HRecording desired tracks from a CD onto a
MiniDisc (Track Editing)
You can record one track or a series of several tracks from a CD onto an
MD.
You can select one track and record it. (If the track numbers are not in
succession, you cannot select a series of tracks.)
1Press the CD Hbutton, and load a compact disc.
2Load a recordable MiniDisc.
3Select the track to start recording by the 5or 4button.
IThe selected track number appears.
4Press the TRACK button.
ITo record a single track, skip to step 6.
5Select the track to end recording by pressing the TRACK button.
6Press the CD 0MD button.
IWhen all tracks are recorded, recording automatically stops.
If recording does not begin:
When not all of the tracks on a CD can be recorded, the unit will enter the
recording stand-by mode. To record on only those tracks which can be
recorded, press the CD 0MD button.
To cancel operation:
Before pressing the CD 0MD button, press the CD H or MD H button.
To stop recording:
Press the CD Hbutton.
After recording the track number, playback and recording will stop.
It is not possible to pause recording.
6
2
1
1
4,5
3
3
4
5
Start track number
End track numberSelected tracks
(Continued)
To rerecord:
If you wish to rerecord, you can erase a track that is already recorded,
starting from any point in the old track, to begin a new recording.
Beawarethatwhenyoudothis,allofthetracksandtracknamesthatfollow
the newly recorded track will be erased.
1During playback, press the MD 06 button at the point where you wish
to begin rerecording.
IThe unit will pause.
2Press the IREC button.
IThe "R.ERASE OK?" display will appear.
3Press the ENTER button.
IThe unit will enter the recording stand-by mode.
4Select the recording source and start recording.
*01-21 98.6.23, 10:09 AM18

19
HH
HH
HRecording from the built-in radio onto a MiniDisc
1Tune in the radio station to be recorded.
2Load a recordable MiniDisc.
3Press the IREC button.
IThe unit will enter the recording stand-by mode.
IAutomatic tuning is impossible while in the recording stand-by mode.
4Check the recordable time by pressing the DISPLAY button on the
remote control.
5Press the MD 06 button.
IDuring recording, you cannot change the station.
Note:
IWhen recording from the AM band, put the unit in the recording stand-
by mode. Then, before recording, separate the AM loop antenna from
the main unit, and adjust the radio reception so that the AM station is
tuned in clearly.
To interrupt recording:
Press the MD 06 button during recording.
Press the MD 06 button again to resume recording.
The track number increases.
To record the track number during recording:
Press the IREC button.
To stop recording:
Press the MD Hbutton.
After recording the track number, recording stops.
Notes:
IThe contents of a single recording are recorded under a single track
number as a series of tracks.
IIf you use the monaural extended recording mode, you can make
recordings that are about twice as long as stereo recordings. This is
convenientforrecordingmonaural broadcastsor talkprograms. (Page
17)
(Continued)
2
3
3
5
H
5
4
H
3
4
Number of tracks already recorded
Recordable time
*01-21 98.6.23, 10:09 AM19
Table of contents
Other Sharp Stereo System manuals

Sharp
Sharp CD-ES111H User manual

Sharp
Sharp XL-DV484W User manual

Sharp
Sharp XL-DH10NH User manual

Sharp
Sharp CD-BA1200H User manual

Sharp
Sharp CD-BK3020W User manual

Sharp
Sharp CD-E67 User manual

Sharp
Sharp SD-CX1H(BL) User manual

Sharp
Sharp QT-CD180H User manual

Sharp
Sharp CD-BA3100H User manual

Sharp
Sharp XL-3000W User manual

Sharp
Sharp XL-B514 User manual

Sharp
Sharp GX-68Z User manual

Sharp
Sharp CD-RW5000 User manual

Sharp
Sharp CD-BA1300H User manual

Sharp
Sharp DK-CL3P User manual

Sharp
Sharp XL-UH240H User manual

Sharp
Sharp XL-DH330PH User manual

Sharp
Sharp CL2843S User manual

Sharp
Sharp CD-C1831V User manual

Sharp
Sharp CD-C449W User manual