Shaw SDHmini Series User manual

Model SDHmini
Dewpoint Meter
Instrucon Manual
SDHmini User Manual - Iss 1


Unpacking Your Shaw Moisture Meters SDHmini....................................... 4
General Descripon...................................................................................... 4
Ranges.......................................................................................................... 5
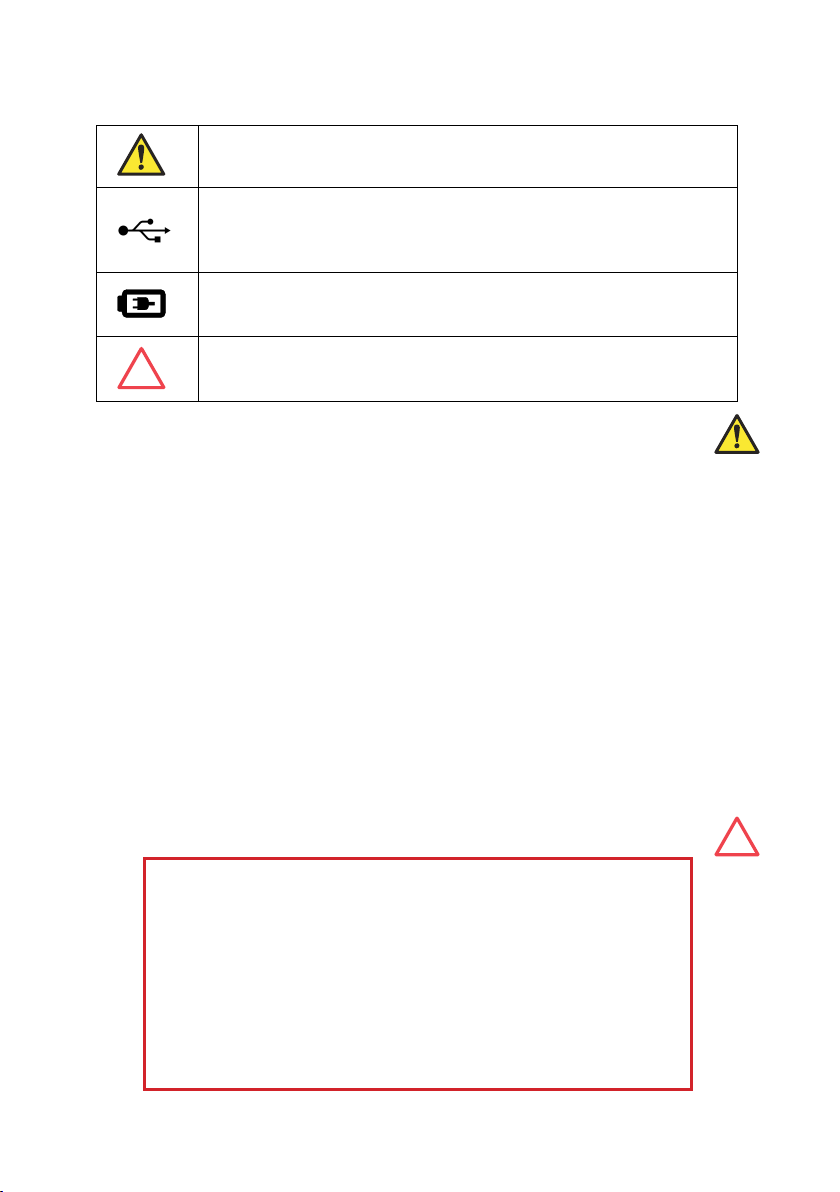
Symbols Table................................................................................................ 6
Lithium-ion Cell - Baery.............................................................................. 6
Pressure Exposure........................................................................................ 6
Installing the Air/Gas Sampling System........................................................ 7
Gases to Avoid.............................................................................................. 7
Piping Installaon Schemac....................................................................... 8
Piping Schemac Component Index........................................................... 9
Purging the Sample Connecon................................................................. 9
Sampling Informaon................................................................................. 10
Sample Connecons................................................................................... 10
Sample Condioning.................................................................................. 10
Normal Operaons..................................................................................... 11
Powering On/O......................................................................................... 11
Graphical Viewing Opons......................................................................... 11
Display Opons........................................................................................... 12
Choice of Units........................................................................................... 12
Calibraon.................................................................................................. 13
Calibraon Checking................................................................................... 13
Auto Calibraon (AutoCal).......................................................................... 14
CalSet.......................................................................................................... 15
Calibraon Notes........................................................................................ 16
Addional Informaon............................................................................... 17
Addional Sensor Sengs.......................................................................... 17
Sensor Type................................................................................................ 17
Selecng Gas Types.................................................................................... 17
Selecng Gas Molecular Weights............................................................... 18
Pressure...................................................................................................... 18
Non Measurement Related Conguraon Funcons................................. 19
Changing the Date...................................................................................... 19
Changing the Time...................................................................................... 19
Changing Internaonal Sengs.................................................................. 20
Hotkeys....................................................................................................... 21
Bluetooth Setup.......................................................................................... 21
Desiccant and Head Seal Replacement....................................................... 23
Temperature............................................................................................... 24
Response Time........................................................................................... 24
Guarantee................................................................................................... 24
Basic Denions......................................................................................... 24
Problem Guide............................................................................................ 25
SDHmini Specicaons............................................................................... 26
SDHmini General Assembly Diagram.......................................................... 27
Index
1.0
1.1
1.2
2.0
2.1
2.2
3.0
3.1
3.2
3.3
4.0
4.1
4.2
4.3
5.0
5.1
5.2
5.3
5.4
6.0
6.1
6.2
6.3
6.4
7.0
7.1
7.2
7.3
7.4
8.0
9.0
9.1
9.2
9.3
10.0
11.0
12.0
13.0
14.0
15.0
16.0
17.0
18.0
19.0
3

1.0 Unpacking Your Shaw Moisture Meters SDHmini
Please examine the SDHmini package for any damage or mishandling. If any
damage is evident please nofy the carrier and the Shaw Moisture Meters
representave from where this unit was purchased.
You should have received (if ordered):
● 1 model SDHmini instrument
● 1 carry case
● 1 Allen key
● 1 instrucon manual
● 1 pressure dewpoint circular calculator
● 1 two metre length of PTFE tubing
● 1 USB charging cable
If anything is missing please contact your distributor immediately.
1.1 General Descripon
The SDHmini is a micro-controller based baery operated dewpoint hygrometer
with state of the art features and enhancements with support of USB and
oponal Bluetooth interfaces for communicang with PC and also support for
thermal printer over Bluetooth (as opon).
The SDHmini is a baery powered instrument. It is a fully self-contained unit
incorporang the moisture sensor, signal condioning circuitry, memory
management, graphics display, membrane keyboard, real me clock, on-board
baery and charger circuit.
The SDHmini operaon is controlled by a user-friendly soware interface
incorporang mulple menus, hot key combinaons, informaon displays and
control funcons.
Available in the following two oerings:
● Basic
● Basic + Bluetooth + Logging
4

The GUI features three main viewing screens, digital, graphical (historical readings
in a scrolling strip chart) and a meter (a tradional moving coil). There is also a
secondary display in the top right which allows display of readings in alternave
units of measurement.
The unit operates with the following 10 language opons: English, German,
French, Spanish, Portuguese, Russian, Italian, Chinese, Japanese and Korean.
A full colour graphics LCD display with 320 x 240 resoluon landscape and a 6 key
input including an on/o facility.
A single USB port allows
● Charging of the baery (Li-ion) when connected to PC or dedicated
power supply
● Uploading of new rmware to the unit
● Uploading of calibraon and setup data from dedicated PC
soware
● Downloading logged data les and real me data from the unit
The displayed units can be changed on both the primary and secondary displays for
the selectable moisture unit e.g. °C, °F, g/m3, ppm(v), ppm(w), ppb and lbs/MMscf.
The inbuilt memory, stores in excess of 150,000 readings, including moisture and
pressure compensated moisture readings with user selectable logging intervals
from ve seconds to one hour and real-me data logging graphical formats. Data is
stored under customer generated le names and stored data les can be reviewed
graphically on the unit. The rechargeable baery has in excess of 150 hours logging
capability on a minimum logging interval and is fully recharged in 12 hours.
1.2 Ranges
SDHmini(r): Range
Purple (P): -100 °C to 0 °C dewpoint, 0 - 6000 PPM
Silver (S): -100 °C to -20 °C dewpoint, 0 - 1000 PPM
Red (R): -80 °C to -20 °C dewpoint, 0 - 1000 PPM and 0 - 10 on TR version
Grey (G): -80 °C to 0 °C dewpoint, 0 - 6000 PPM and 0 - 10 on TR version
Blue (Bl): -80 °C to +20 °C dewpoint, 0 - 23,000 PPM (ManualCal)
5

2.0 Symbols Table
2.1 Lithium-ion Cell - Baery
The SDHmini is powered by a single lithium-ion cell.
The cell is not eld replaceable by the user as it is completely enclosed within
the instrument. However, the cell may be exchanged by an authorised agent
who has received the necessary training, support systems and accreditaon. It is
recommended to only use the USB power supply supplied with the instrument.
It is recommended that the SDHmini be put on charge overnight when the unit is
rst received.
To aain maximum cell life the SDHmini should always be charged at room
temperature. The discharging cell life (hours of use from a fully charged cell) will
reduce when used in cold condions.
2.2 Pressure Exposure
6
Baery Note: Please refer to secon 2.1
Rang of instrument is less than 1 W in operaon. Charging
voltage is 5 V nominal. Charging input is however addionally
protected to Um 250 Vrms.
The symbol indicates that the device contains a baery which
may be charged via the neighbouring connector.
Pressure Note: Please refer to secon 2.2
!
The maximum pressure to which the telescopic measuring
head is exposed should not be more than
0.3 bar, 4 psi
Exposing the measuring head to higher pressures may
damage the instrument and result in injury to the operator
or other personnel in the area.
!

3.0 Installing the Air/Gas Sampling System
The Piping Installaon Schemac diagram (see secon 3.2) shows all components,
which could be used in a dry gas measurement applicaon. Although not all the
items shown will be required for every installaon.
The SDHmini should be placed on a stable surface prior to connecng to the
sample pipework. Care should be taken to ensure that the sample presented
to the SDHmini is not contaminated with any component that will damage,
contaminate or aect in a way that will impair the unit’s accuracy.
The ow rate, although not crical to the sensor measurement, should be low
enough to avoid abrasion to the sensor surface without being so low as to extend
the SDHmini response me to an unacceptable level. In general, a ow rate of
between 2 and 5 litres/min at NTP will give the right balance.
The SDHmini is designed to be operated at atmospheric pressure with a
maximum of 0.3 bar.
3.1 Gases to Avoid
The moisture sensors are suitable for any dierent industrial and research
applicaons. Most gases can be checked for their moisture content with no
need for the calibraon to be altered when changing between dierent gases,
as the sensor operates only with reference to the water vapour content.
There are however, some gases that must be avoided as they are not compable
with the material of construcon of the sensor. Ammonia (NH3), Ozone (O3) and
Chlorine (Cl) must be avoided at all mes, even in small quanes. Hydrogen
Chloride (HCl) also aacks the sensors very quickly. Some, less aggressive acidic
gases such as Sulphur Dioxide (SO2) can be monitored as long as the moisture
content is low, generally less than 100ppm(v). If in doubt, please ask your
supplier.
Sulphur Hexauoride (SF6) has no eect on the sensor. If the gas has been
exposed to arcing, however, it is possible that various acidic species will have
been formed that will corrode the sensor. When tesng SF6that may have been
arced, therefore, an acidity test should be carried out rst; if the gas proves to
be acidic then the moisture test should not be carried out.
7

3.2 Piping Installaon Schemac
8

3.3 Piping Schemac Component Index
Sample Isolaon Valve - This is a recommended item as it allows access
to the sample system without interrupng the main process line.
Sample Tube – This should be stainless steel for dry air or gas
applicaons but copper or carbon steel can be used where weer gases
are to be measured. If any secon of the sample tube must be exible
then PTFE should be used. In most cases, 3 mm OD (⅛”) is sucient as it
provides good system response me with minimum ow. 6 mm OD (¼”)
tube can be used where pressure drops across the 3 mm tube are too
high.
Filter Unit – A lter unit is recommended when the samples are likely
to contain parculate maer. If the air/gas sample contains heavy
hydrocarbon condensate, the lter must be of the coalescing type with a
drain. The lter unit should be posioned as close to the sample point as
praccal.
Pressure Reducon Valve or Pressure Regulator – the sample is
measured at atmospheric pressure requiring that valve 4 is ed to the
system.
Flow Control Valve.
Sample Connecon.
SDHmini.
Flow Indicator – The recommended sample ow is 2 to 5 L/M.
Sample Exhaust – The exhaust is vented to atmosphere or returned to an
atmospheric pressure line.
4.0 Purging the Sample Connecon
Refer to the Piping Installaon Schemac in secon 3.2.
It is advisable to carry out an inial purge of the sample loop before connecng
the SDHmini, in order to avoid the possibility of sensor damage on start-up.
Open the sample isolaon valve (1) slowly, unl there is a small ow of air/gas
at atmospheric pressure from the pressure reducon valve (4) into SDHmini line.
Allow the air/gas to exhaust through the sample connecon (9).
The SDHmini is not ow sensive, however, the sample ow needs to be
enough to purge the sensor head eecvely, so anything less than 1 litre/min
would mean that the instrument would take too long to sele to a stable
1.
2.
3.
4.
5.
6.
7.
8.
9.
9

reading. The ow should not be so high that the gas velocity could physically
damage the sensor or cause back-pressure in the sensor head, so should not
exceed approximately 10 litres/min.
Allow this purge to connue for two minutes to remove any residual moisture
from the sample pipe work and components. Check that no liquid or parculate
contaminaon, which could damage the sensor, is passing through the sample
pipe. Direcng the sample onto a piece of white paper (such as a lter paper)
will make it easier to see any dust or oil mist in the sample.
4.1 Sampling Informaon
Refer to the Piping Installaon Schemac in secon 3.2.
The SDHmini sensor will respond to the water vapour pressure of a gas in
contact with it. It is important to ensure that the gas passing through the
sensor head is the same as the gas being sampled.
4.2 Sample Connecons
The SDHmini is supplied with two connecons: a “r tree” on one side and a
Swagelok compression ng for ¼”, ⅛”, or 6 mm OD pipe (as specied on your
order) on the other. Either can be used as the inlet connecon (6).
PTFE and stainless steel are recommended materials for sample pipes. Some
specialist exible tubing may be suitable as sample pipe but common exible
tubing such as PVC, nylon, polythene or rubber, should not be used, as they are
permeable and water vapour from the atmosphere will diuse through them
into the sample gas.
A 2 m PTFE sample pipe is supplied for use with the “r tree” connecon. The
rst me this is used it is advisable to warm the end that will go over the “r
tree” for a few seconds with a heat source to soen it slightly, which helps to
get a gas ght seal.
4.3 Sample Condioning
The main principle when considering the presentaon of the gas sample to the
SDHmini dewpoint meter is to keep the sample system as simple as possible
and of minimum swept volume, so that it has the least possible inuence on
the gas sample.
10

5.0 Normal Operaons
5.1 Powering On/O
On power up, the SDHmini briey displays a splash
screen showing instrument status, error informaon
and rmware version number.
To turn o the SDHmini press and hold for
ve seconds.
5.2 Graphical Viewing Opons
The start up screen is soon replaced by the normal measurement mode screen
(see below) displaying the current moisture measurement in a variety of views.
The last used or last selected mode will be ulised automacally.
Top Bar
Secondary Display or Measurement Value
Buon Icon Area
These are so keys which are always
visible to assist users in navigang through
the graphical screens.
Top Bar
Baery Status - Bluetooth Status - Time
Viewing Portal
Main display resides here but can also
show alternave Measurement Data,
Informaon Screens, Conguraons and
Logged Data in a variety of formats.
11

5.3 Display Opons
The display can be changed by pressing the
following keys to cycle through all of the
graphical views.
Here is a view starng as a digital number followed by
simulated strip chart and moving coil instruments.
The digital display mode has the benet of showing the moisture measurement
in main choice of engineering units but also a secondary display with perhaps
alternave engineering units. This mode also allows applicaon of pressure
dewpoint to evaluate the measurement in other samples pressures.
5.4 Choice of Units
To choose the engineering units to be displayed, select the units key from
the main digital view.
You will be presented with the following screens to
select engineering units for the main and secondary
displays. You may toggle between adjusng the main
and secondary displays by pressing the key. In normal
measurement mode. The secondary display is the
measurement displayed in the top bar on the right hand side (A). It allows
alternave engineering units or concentraons to be displayed alongside those
chosen in the main display.
12
A

Use the key to move to the
desired measurement type and
press to select it. Pressing
will exit the current screen without
making any further changes.
Here the secondary display is being changed to ppm(v) engineering units.
Please note: when you change
the display to either the moving
coil meter or the strip chart the
secondary engineering units display is
replaced with the primary units (B).
This connues to allow high precision measurement whilst having the benet
of the graphical display.
6.0 Calibraon
6.1 Calibraon Checking
Field calibraons of the SDHmini may be performed periodically, every two to
three months, to ensure accuracy between laboratory calibraons by checking
the span of the instrument and correcng for any deviaon. These funcons
can be used to verify operaon of the SDHmini if conrmaon of an unexpected
result is required.
This may be accomplished by two similar in built calibraon funcons, namely
AutoCal and CalSet.
B
13

6.2 Auto Calibraon (AutoCal)
The AutoCal facility uses the fact that each sensor is designed and
manufactured to give no further increase in response when it reaches its
maximum moisture level. For example a SDHmini with a full scale value of 0
°C dewpoint will read 0 °C dewpoint when exposed to a gas with this moisture
concentraon and will connue to read 0 °C dewpoint as the moisture
concentraon rises above 0 °C dewpoint.
The SDHmini can therefore be adjusted to read 0 °C
dewpoint on any gas with a moisture concentraon
weer than 0 °C dewpoint, ambient air for instance, thus
seng the span to match the original calibraon.
Select AutoCal from the Setup Menu.
Extend the desiccant head nocing that the value of the
full scale moisture level has already been automacally
preselected as a target of 0 °C.
Press .
The SDHmini will display a moving bar unl it assesses
that the sensor has stabilised (up to ten minutes).
The SDHmini will now display the full scale value of the
unit, either -20 °C or 0 °C depending on the sensor range.
14

Close the desiccant head when instructed to do so and
press .
Pressing during the AutoCal aborts the process.
The value present at the start of the aborted AutoCal
process is reinserted.
The SDHmini will return the instrument to normal
measurement mode.
Note: Avoid carrying out the AutoCal procedure on a SDHmini with a full
scale value of 0 °C dewpoint on days when the ambient may be below
this value, for example a dry day when the ambient temperature is below
approximately 12 °C.
6.3 CalSet
The unit may be checked against a known moisture level,
for example from a moisture generator or other reference
standard, such as a chilled mirror hygrometer or a
psychrometer using the funcon CalSet.
Extend the desiccant head and press .
Whether the instrument is being checked against the
measured ambient level or against a known calibraon
standard from a moisture generator, and are
used to set the value accordingly.
Selecng -10 °C for instance involves changing the sign
and number by use of both keys.
The entered CalSet value must not be a pressure
compensated one.
Press when done.
15

The SDHmini will display a moving bar unl it assesses that
the sensor has stabilised (up to 10 minutes).
The full scale value, -10 °C dewpoint, is now displayed.
Press when complete.
Close the desiccant head when instructed to do so and
press .
Pressing during CalSet aborts the
process.
The value present at the start of the
aborted CalSet process is reinserted.
The SDHmini will return to the normal operaonal mode.
6.4 Calibraon Notes
If the instrument fails calibraon, a message will be displayed on the screen
unl acknowledged by the user, e.g.
AutoCal Failed
Sensor Open Circuit
or
AutoCal Failed
Sensor Short Circuit
This will mean replacing the sensor or its interconnecng cable in some cases.
The entered AutoCal value must not be pressure compensated.
16

7.0 Addional Informaon
7.1 Addional Sensor Sengs
On the conguraon screens there exists a collecon of measurement sengs
associated with the sensors and its environment.
7.2 Sensor Type
Here you may view the type of sensor installed in the
SDHmini and its range.
If you receive another sensor type (colour) then you may
perform a eld change of the sensor range as shown in the
following.
Follow the on screen instrucons.
7.3 Selecng Gas Types
17

7.4 Selecng Gas Molecular Weights
8.0 Pressure
This sub-menu has, for both the primary and secondary displays, ve opons
allowing the user to select either atmospheric pressure or one of four pressure
engineering units and applied pressure.
When this funcon is selected, the main and secondary display screens will
display the pressure at which the dewpoint reading is calculated.
The SDHmini requires that a numerical pressure value be entered in the
selected units at the boom of the units selecon secon.
Warning: This funcon is purely an internal calculaon and DOES NOT allow an
elevated pressure to be applied to the measuring head.
18

9.0 Non Measurement Related Conguraon Funcons
9.1 Changing the Date
In order to change the present date press the arrow
key to select the Date funcon from the Conguraon
menu. Press .
Use and to change the date.
Here for example the date is changing from 06/03/15 to 06/04/15.
Press to enter new date or to abort changes.
9.2 Changing the Time
In order to change the present
me press to select the Time
funcon from the Conguraon
menu.
To change the me use and .
Here for example the me is changing from 10:48 to
11:48.
Press to enter new me or to abort changes.
19

9.3 Changing Internaonal Sengs
In order to change the sengs for Language, Date Format
and Numerical Delimiter, use the selecon cursor .
Select Internaonal Sengs from the Conguraon Menu.
To change the Language opon select .
The language choice area is highlighted. A ag of a country
most associated with one of the pre-installed languages
indicates which language is currently selected. The
SDHmini operates with the following 10 language opons:
English, German, French, Spanish, Portuguese, Russian,
Italian, Chinese, Japanese and Korean.
Use the to select the ag required.
And to accept the choice.
The Date Format i.e. DD/MM/YY or MM/DD/YY is also
chosen from within the Internaonal Sengs menu.
And nally, numbers can be presented 123.45 or 123,45.
Note: These sengs are carried through to any data les
and printer outputs where appropriate.
20
This manual suits for next models
5
Table of contents
Other Shaw Measuring Instrument manuals