SHINOLA 5021.D Guide

WATCH OPERATION MANUAL
& WARRANTY BOOK


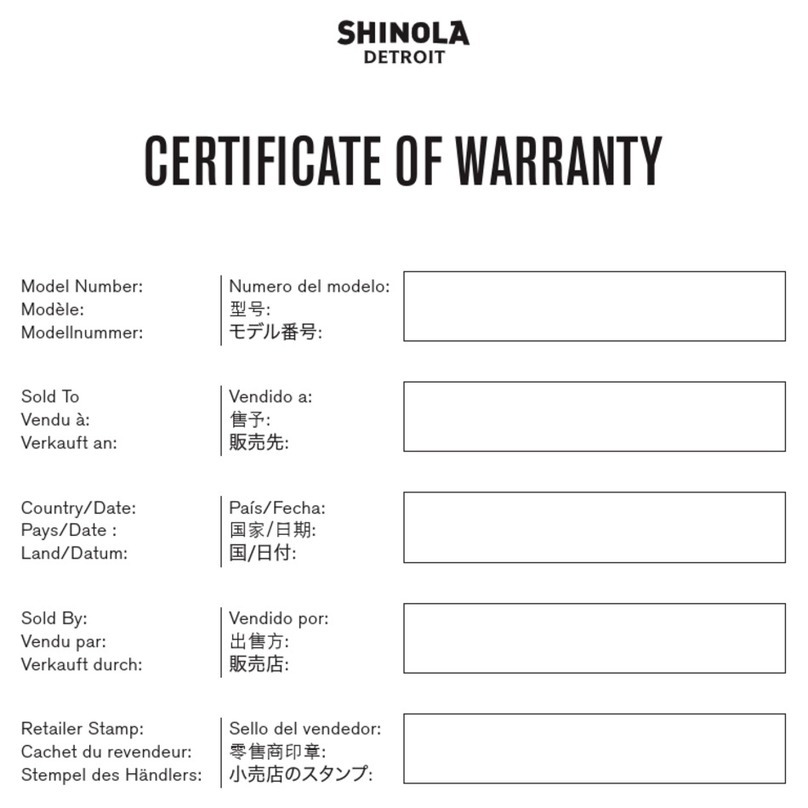
CERTIFICATE OF WARRANTY
Model Number:
Modèle:
Modellnummer:
Sold To
Vendu à:
Verkauft an:
Country/Date:
Pays/Date :
Land/Datum:
Sold By:
Vendu par:
Verkauft durch:
Retailer Stamp:
Cachet du revendeur:
Stempel des Händlers:
Numero del modelo:
型号:
モデル番号:
Vendido a:
售予:
販売先:
País/Fecha:
国家/日期:
国/日付:
Vendido por:
出售方:
販売店:
Sello del vendedor:
零售商印章:
小売店のスタンプ:


English...................................................................................... Pg 04
Français................................................................................Page 26
Deutsch......................................................................................S. 48
Español.................................................................................. Pág. 70
............................................................................................ 92
............................................................................ 114
INDEX
DETROIT, U.S.A

4
As makers of handcrafted watches, bicycles, leather goods & journals,
we believe that products should be built to last, and they should be built
right here in America. Shinola stands for skill at scale, the preservation
of craft, the beauty of industry.
Where American is made.
™
ENGLISH

5
SCREW-DOWN CROWNS
CROWN FUNCTIONALITY
The components of your Shinola watch are made of the finest materials and have
been rigorously inspected to meet our strict criteria. Some Shinola watches feature
a screw-down crown, which adds an extra level of water-tightness. To safeguard
your investment, it is important to understand how this type of crown works:
1To make the crown operational, unscrew it from the
case by turning it counterclockwise until it releases.
•Once released, follow the instructions for setting
the time/date as described in the next sections.
2To reseal the crown, press it in against the case until
the threads engage, and turn clockwise until tight.
WATC H M ODEL S WIT H DAT E I NDIC ATO R
PLEASE NOTE:
•If your watch features a date indicator, the date window might
be in a different position from the one depicted in this manual.
•When performing a quick date setting (as described further under
the sections SETTING THE DATE), the time indicated by your watch should
not be between 9:30 p.m. and 3:00 a.m. This is because as the hands
approach midnight on the watch during its normal operation, gears
begin to engage with the date wheel and lock into place. Manually
setting the date during that particular period of time could possibly
result in damage to the small teeth on the gears.
1
2

6
SINGLE TIME WITH DATE MODELS
SETTING THE TIME
1Pull out the crown to position III.
(The watch stops.)
2Turn the crown until you reach the
correct time.
3Push the crown back into position I.
SETTING THE DATE
1Pull out the crown to position II.
(The watch continues to run.)
2Turn the crown until the correct date appears.
3Push the crown back to position I.
SINGLE TIME MODELS
SETTING THE TIME
1Pull out the crown to position II.
(The watch stops.)
2Turn the crown until you reach the
correct time.
3Push the crown back to position I.
III
3
1
2
II IIII
3
1
2
III
1
2
3

7
II IIII
3
1
2
CHRONOGRAPH MODEL 5021.D
DESCRIPTION OF THE DISPLAY AND CONTROL BUTTONS
Please note:
Before using the chronograph functions,
please ensure that:
-the crown is in position I
(= normal position).
-the two chronograph hands are
precisely at zero position following
activation of push-button B. If the hands
are not precisely at zero, their positions
must be adjusted. (See the chapter
Adjusting the Chronograph Hands to Zero
.)
SETTING THE TIME
1Pull out the crown to position III.
(The watch stops.)
2Turn the crown until you reach the
correct time.
3Push the crown back to position I.
SETTING THE DATE
1Pull out the crown to position II.
(The watch continues to run.)
2Turn the crown until the correct date appears.
3Push the crown back to position I.
III
1
2
3
A
Second hand
Center stop-second
Minute hand
Hour hand
Minute counter
Date
B
I

8
ADJUSTING THE CHRONOGRAPH HANDS TO ZERO
1Pull crown out to position III.
(All two chronograph hands are in
their correct or incorrect zero position.)
2Keep push-buttons Aand Bdepressed
simultaneously for at least 2 seconds.
(The center stop-second rotates by 360°
- corrective mode is activated.)
3Press push-button Ato single step the
center stop-second hand. Press and
hold push-button Ato advance the center
stop-second hand quickly. 3b Press
push-button Bto advance to the next hand.
4Press push-button Ato single step the
minute counter hand. Press and
hold push-button Ato advance the
minute counter hand quickly.
5Return the crown to position I.
BASIC FUNCTION (START / STOP / RESET)
Example
1Start: press push-button A.
2Stop: to stop the timing, press push-button A
once more and read the two chronograph
counters: 20min / 10sec.
3Zero positioning: Press push-button B.
(The two chronograph hands will
be reset to their zero positions.)
II IIII
1
234
5
2
A
B
3b
12
3
A
B

9
*
ACCUMULATED TIMING
Example
1Start: start timing
2Stop: e.g.,15 min. 5 sec. following 1.
3Restart: timing is resumed
4*Stop: e.g.,13 min. 5 sec. following 3.
The accumulated time = 28 min. 10 sec.
5Reset: the three chronograph hands
are returned to their zero positions.
Please note:
* Following 4, the accumulation of the timing can be
continued by pressing push-button A(Restart/Stop, Restart/Stop,…)
INTERMEDIATE OR INTERVAL TIMING
Example
1Start: start timing.
2Display interval:
e.g.,10 min. 10 sec. following 1.
Timing continues in the background.
3Making up the measured time:
the two chronograph hands are quickly
advanced to the ongoing measured time.
4Stop: e.g., 28 min. 10 sec. following 1.
5Reset: the three chronograph hands
are returned to their zero positions.
Please note:
* Following 3, further intervals or intermediates can be
displayed by pressing B(display interval / make up measured time, …)
1
5
234
A
B
235
B
14
A

10
CHRONOGRAPH MODEL 5030.D
DESCRIPTION OF THE DISPLAY AND CONTROL BUTTONS
Please note:
Before using the chronograph functions,
please ensure that:
-the crown is in position I
(= normal position).
-the three chronograph hands are
precisely at zero position following
activation of push-button B. If the hands
are not precisely at zero, their positions
must be adjusted. (See the chapter
Adjusting the Chronograph Hands to Zero
.)
SETTING THE TIME
1Pull out the crown to position III.
(The watch stops.)
2Turn the crown until you reach the
correct time.
3Push the crown back to position I.
SETTING THE DATE
1Pull out the crown to position II.
(The watch continues to run.)
2Turn the crown until the correct date appears.
3Push the crown back to position I.
A
Second hand
Date
Center stop-second
Minute hand
Hour hand
Minute counter
Hour counter
B
III
1
2
3
II IIII
3
1
2
I

11
ADJUSTING THE CHRONOGRAPH HANDS TO ZERO
1Pull crown out to position III.
(All three chronograph hands are in
their correct or incorrect zero position.)
2Keep push-buttons Aand Bdepressed
simultaneously for at least 2 seconds.
(The center stop-second rotates by 360°
- corrective mode is activated.)
3Press push-button Ato single step the
center stop-second hand. Press and
hold push-button Ato advance the center
stop-second hand quickly. 3b Press
push-button Bto advance to the next hand.
4Press push-button Ato single step the hour counter hand.
Press and hold push-button Ato advance the hour counter
hand quickly. 4b Press push-button Bto advance to the next hand.
5Press push-button Ato single step the minute counter hand. Press
and hold push-button Ato advance the minute counter hand quickly.
6Return the crown to position I.
BASIC FUNCTION (START / STOP / RESET)
Example
1Start: press push-button A.
2Stop: to stop the timing, press push-button A
once more and read the three chronograph
counters: 1h / 20min / 10sec.
3Zero positioning: Press push-button B.
(The three chronograph hands will
be reset to their zero positions.)
II IIII
1
2345
6
2
A
B
3b 4b
12
3
A
B

12
*
ACCUMULATED TIMING
Example
1Start: start timing
2Stop: e.g.,15 min. 5 sec. following 1.
3Restart: timing is resumed
4*Stop: e.g.,13 min. 5 sec. following 3.
The accumulated time = 28 min. 10 sec.
5Reset: the three chronograph hands
are returned to their zero positions.
Please note:
* Following 4, the accumulation of the timing can be
continued by pressing push-button A(Restart/Stop, Restart/Stop,…)
INTERMEDIATE OR INTERVAL TIMING
Example
1Start: start timing.
2Display interval:
e.g.,10 min. 10 sec. following 1.
Timing continues in the background.
3Making up the measured time:
the three chronograph hands are quickly
advanced to the ongoing measured time.
4Stop: e.g., 28 min. 10 sec. following 1.
5Reset: the three chronograph hands
are returned to their zero positions.
Please note:
* Following 3, further intervals or intermediates can be
displayed by pressing B(display interval / make up measured time, …)
1
5
234
A
B
235
B
14
A

13
ACCUMULATED TIMING
Example
1Start: start timing
2Stop: e.g.,15 min. 5 sec. following 1.
3Restart: timing is resumed
4*Stop: e.g.,13 min. 5 sec. following 3.
The accumulated time = 28 min. 10 sec.
5Reset: the three chronograph hands
are returned to their zero positions.
Please note:
* Following 4, the accumulation of the timing can be
continued by pressing push-button A(Restart/Stop, Restart/Stop,…)
INTERMEDIATE OR INTERVAL TIMING
Example
1Start: start timing.
2Display interval:
e.g.,10 min. 10 sec. following 1.
Timing continues in the background.
3Making up the measured time:
the three chronograph hands are quickly
advanced to the ongoing measured time.
4Stop: e.g., 28 min. 10 sec. following 1.
5Reset: the three chronograph hands
are returned to their zero positions.
Please note:
* Following 3, further intervals or intermediates can be
displayed by pressing B(display interval / make up measured time, …)
SETTING THE TIME
1Pull out the crown to position III.
(The watch stops.)
2Turn the crown until you reach the
correct time.
3Push the crown back to position I.
SETTING THE DATE
1Pull out the crown to position II.
(The watch continues to run.)
2Turn the crown until the correct date appears.
3Push the crown back to position I.
CHRONOGRAPH MODEL 5050.B
DESCRIPTION OF THE DISPLAY AND CONTROL BUTTONS
Please note:
Before using the chronograph functions,
please ensure that:
-the crown is in position
I
(= normal position).
-the four chronograph hands are
precisely at zero position following
activation of push-button B. If the
hands are not precisely at zero,
their positions must be adjusted.
(See the chapter
Adjusting the
Chronograph Hands to Zero
.)
A
B
I
Second hand
Big date
Center stop-second
Minute hand
Hour hand
Minute counter
Hour counter
1/
10 Second counter
II IIII
3
1
2
II
1
2
3

14
ADJUSTING THE CHRONOGRAPH HANDS TO ZERO
1Pull crown out to position III.
(All four chronograph hands are in
their correct or incorrect zero position.)
2Keep push-buttons Aand Bdepressed
simultaneously for at least 2 seconds.
(The center stop-second rotates by
360° - corrective mode is activated.)
3Press push-button Ato single step the
center stop-second hand. Press and
hold push-button Ato advance the center
stop-second hand quickly. 3b Press
push-button Bto advance to the next hand.
Press push-button Ato single step the 1/10 second counter hand.
Press and hold push-button Ato advance the 1/10 second hand quickly.
4b Press push-button Bto advance to the next hand.
Press push-button Ato single step the minute and the hour counter hands.
Press and hold push-button Ato advance the minute and hour counter hands
quickly. 4b Press push-button Bto advance to the next hand.
Return the crown to position I.
BASIC FUNCTION (START / STOP / RESET)
Example
1Start: Press push-button A.
2Stop: to stop the timing, press push-button A.
once more and read the four chronograph
counters: 4 hr. / 20 min. / 5 sec. / 7⁄10 sec.
3Zero positioning: Press push-button B.
(The four chronograph hands will
be reset to their zero positions.)
1
3
12
A
B
1
2
3
II IIII
1
2345
6
A
2
B
3b4b
6
4
5

15
*
ACCUMULATED TIMING
Example
1Start: start timing.
2Stop: e.g.,15 min. 5 sec. following 1.
3Restart: timing is resumed.
4*Stop: e.g.,10 min. 5 sec. following 3.
The accumulated time = 25 min. 10 sec.
5Reset: The four chronograph hands
are returned to their zero positions.
Please note:
* Following 4, the accumulation of the timing can be
continued by pressing push-button A(Restart/Stop, Restart/Stop,…)
INTERMEDIATE OR INTERVAL TIMING
Example
1Start: start timing.
2Display interval:
e.g.,10 min. 10 sec. following 1.
Timing continues in the background.
3Making up the measured time:
the four chronograph hands are quickly
advanced to the ongoing measured time.
4Stop: (Final time is displayed).
5Reset: The four chronograph hands are
returned to their zero positions.
Please note:
* Following 3, further intervals or intermediates can be
displayed by pressing B(display interval / make up measured time, …)
5
B
1234
A
5
23
B
14
A

16
CHRONOGRAPH MODEL 3540.D
DESCRIPTION OF THE DISPLAY AND CONTROL BUTTONS
Please note:
Before using the chronograph functions,
please ensure that:
-the crown is in position
I
(= normal position).
-the three chronograph hands are
precisely at zero position following
activation of push-button B. If the
hands are not precisely at zero,
their positions must be adjusted.
(See the chapter
Adjusting the
Chronograph Hands to Zero
.)
SETTING THE TIME
1Pull out the crown to position III.
(The watch stops.)
2Turn the crown until you reach the
correct time.
3Push the crown back into position I.
SETTING THE DATE
1Pull out the crown to position II.
(The watch continues to run.)
2Turn the crown anticlockwise until
the correct date appears.
3Push the crown back into position I.
III
1
2
3
II IIII
3
1
2
A
Minute hand
Date
Center stop-second
1/
10 Second counter
(Becomes an hour
counter after 30 minutes)
Hour hand
Minute counter
Second hand B
I

17
ADJUSTING THE CHRONOGRAPH HANDS TO ZERO
1Pull crown out to position III.
(All three chronograph hands are in
their correct or incorrect zero position.)
2Keep push-buttons Aand Bdepressed
simultaneously for at least 2 seconds.
(The center stop-second rotates by 360°
- corrective mode is activated.)
3Press push-button Ato single step the
center stop-second hand. Press and
hold push-button Ato advance the center
stop-second hand quickly. 3b Press
push-button Bto advance to the next hand.
4Press push-button Ato single step the hour counter hand.
Press and hold push-button Ato advance the hour counter
hand quickly. 4b Press push-button Bto advance to the next hand.
5Press push-button Ato single step the minute counter hand. Press
and hold push-button Ato advance the minute counter hand quickly.
6Return the crown to position I.
BASIC FUNCTION (START / STOP / RESET)
Example
1Start: Press push-button A.
2Stop: to stop the timing, press push-button A
once more and read the three chronograph
counters: 4 min. / 38 sec. / 7⁄10 sec.
3Zero positioning: Press push-button B.
(The three chronograph hands will
be reset to their zero positions.)
12
3
A
B
II IIII
1
2345
6
2
A
B
3b 4b

18
*
ACCUMULATED TIMING
Example
1Start: start timing.
2Stop: e.g.,15 min. 5 sec
.
following 1.
3Restart: timing is resumed.
4*Stop: e.g.,13 min. 5 sec. following 3.
The accumulated time = 28 min. 10 sec.
5Reset: The three chronograph hands
are returned to their zero positions.
Please note:
* Following 4, the accumulation of the timing can be
continued by pressing push-button A(Restart/Stop, Restart/Stop,…)
INTERMEDIATE OR INTERVAL TIMING
Example
1Start: start timing.
2Display interval:
e.g.,10 min. 10 sec. following 1.
Timing continues in the background.
3Making up the measured time:
the three chronograph hands are quickly
advanced to the ongoing measured time.
4Stop: e.g., 28 min. 10 sec. following 1.
5Reset: The three chronograph hands are
returned to their zero positions.
Please note:
* Following 3, further intervals or intermediates can be
displayed by pressing B(display interval / make up measured time, …)
1
5
234
A
B
1
2
4
35
A
B
Other manuals for 5021.D
2
Table of contents
Languages:
Other SHINOLA Watch manuals
Popular Watch manuals by other brands

DOMINATORE DEL MARE
DOMINATORE DEL MARE BANDIERA instruction manual
National Electronics & Watch
National Electronics & Watch M11-1656D instruction manual
Kooper
Kooper 2197552 User instructions
Oregon Scientific
Oregon Scientific SL928M user manual
Manutan
Manutan 14292 user guide
Swatch
Swatch Omega 1140 technical information
REED
REED SW600 manual

Alcatel
Alcatel OneTouch GO Watch Safety and use General information, Warranty Troubleshooting
LAIMER
LAIMER RONDA 505.24H instruction manual
Chronos Manufactures
Chronos Manufactures Mathieu Legrand Mille Cailloux instruction manual
iFIT
iFIT IFRW115.0 user manual
WATCHMARK
WATCHMARK WT1 user manual
