shopPOPdisplays 12848 User manual

ASSEMBLY INSTRUCTIONS
READ ALL INSTRUCTIONS BEFORE YOU BEGIN. DO NOT JUMP AHEAD OF ANY STEP.
shopPOPdisplays makes no claim that these assembly instructions cover all details, conditions or variations, or that they cover all possible contingencies in connection with the assembly or installation of
this product. It is the Purchaser's responsibility to ensure that all components of this product are properly assembled and installed in accordance with these instructions. shopPOPdisplays assumes no
obligation or liability on account of any third-party recommendations, opinions or advice as to the assembly or installation of this product.
page
1
of
2
Clear Acrylic U Shape Barrier Shield
PARTS LIST:
*NO TOOLS REQUIRED
*TWO PERSON ASSEMBLY RECOMMENDED
Main Panel Upright
(1 pc)
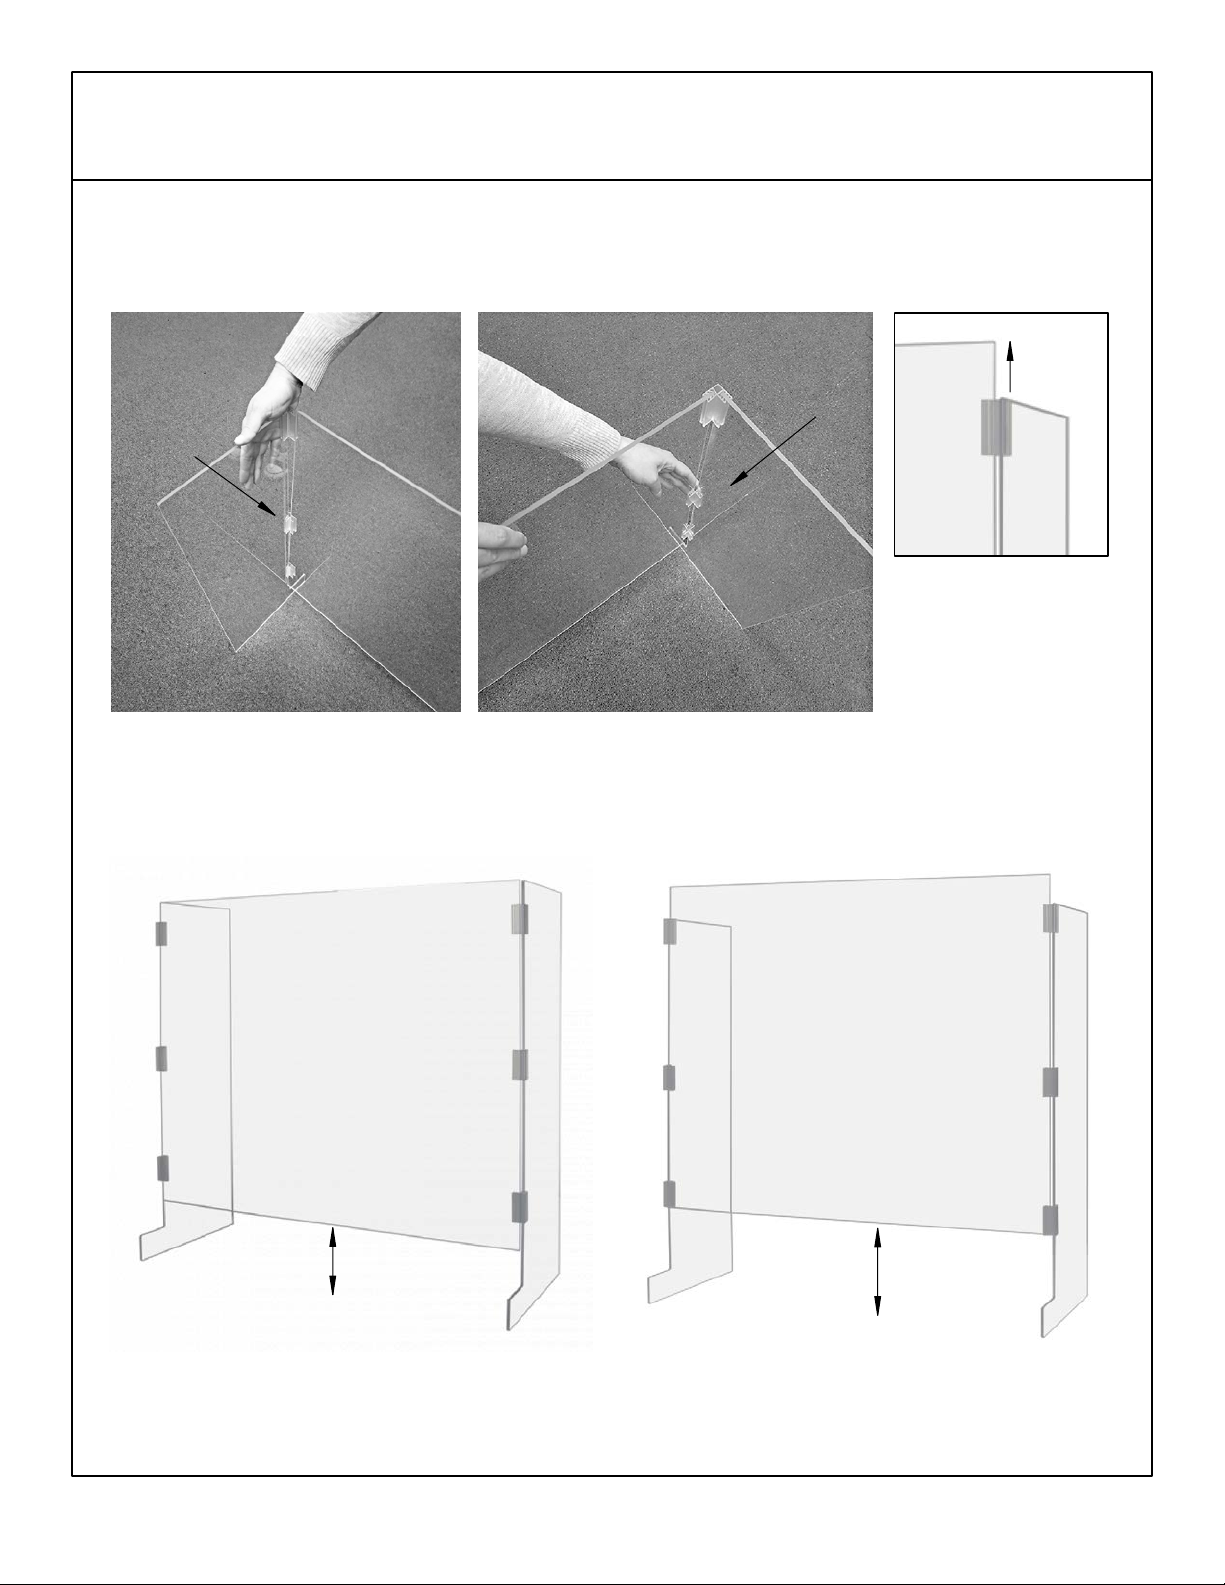
STEP 1:
Peel off the protective plastic film from both sides of Main Panel Upright & Side Panel Uprights.
Side Panel Upright (2 pcs)
STEP 2:
Stand
up one of the
Side Panel
Uprights and
push one of
the 90 Degree
Connectors
onto the front
of the Side
Panel Upright.
STEP 3:
Push
the two other
90 Degree
Connectors
onto Side
Panel Upright,
spacing them
out to the
desired
distance.
Make sure all
90 Degree
Connectors
are facing the
same
direction.
90 Degree
Connector
(6 pcs)
STEP 4:
Repeat STEPS
2 & 3 for the other Side
Panel Upright. The 90
Degree Connectors
should face the
opposite direction of
the other Side Panel
Upright.
ASSEMBLY INSTRUCTIONS
READ ALL INSTRUCTIONS BEFORE YOU BEGIN. DO NOT JUMP AHEAD OF ANY STEP.
shopPOPdisplays makes no claim that these assembly instructions cover all details, conditions or variations, or that they cover all possible contingencies in connection with the assembly or installation of
this product. It is the Purchaser's responsibility to ensure that all components of this product are properly assembled and installed in accordance with these instructions. shopPOPdisplays assumes no
obligation or liability on account of any third-party recommendations, opinions or advice as to the assembly or installation of this product.
page
2
of
2
Clear Acrylic U Shape Barrier Shield
STEP 5:
Push the 90 Degree Connectors from one of the assembled Side Panel Uprights onto one of
the sides of the Main Panel Upright. Make sure top edges of the Side Panel Upright and Main Panel
Upright are flush with each other. Repeat this for the other Side Panel Upright.
STEP 6:
Make sure all of the 90 Degree Connectors are pushed in and fully engaged with all
panels, and the product is rested on a flat surface.
ASSEMBLY COMPLETED
NOTE:
The
Main Panel
can also be connected
2" higher than the Side
Panels to allow for 6"
open space at bottom vs
4" open space at bottom.
Main Panel shown flush with Sides
12848-NS
4" opening
Main Panel shown 2" above Sides
12848 / 12849
6" opening
2"
This manual suits for next models
2
Popular Safety Equipment manuals by other brands

Lanex
Lanex PB-20 instruction manual

SKYLOTEC
SKYLOTEC ANCHOR ROPES Instructions for use

Besto
Besto Buoyancy Aid 50N Instructions for use

TEUFELBERGER
TEUFELBERGER NODUS Manufacturer's information and instructions for use

Troy Lee Designs
Troy Lee Designs Tbone Product owners manual

Innova
Innova Xtirpa Instruction and safety manual

bolle SAFETY
bolle SAFETY B810 quick start guide

SHENZHEN FANHAI SANJIANG ELECTRONICS
SHENZHEN FANHAI SANJIANG ELECTRONICS A9060T instruction manual

Hiltron security
Hiltron security POWER8E Installation and use manual

Salewa
Salewa MTN SPIKE user manual

Hatco
Hatco B-950P installation guide

Sitec
Sitec TX MATIC operating manual


