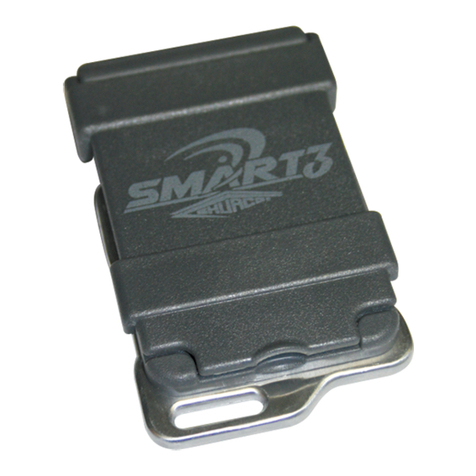
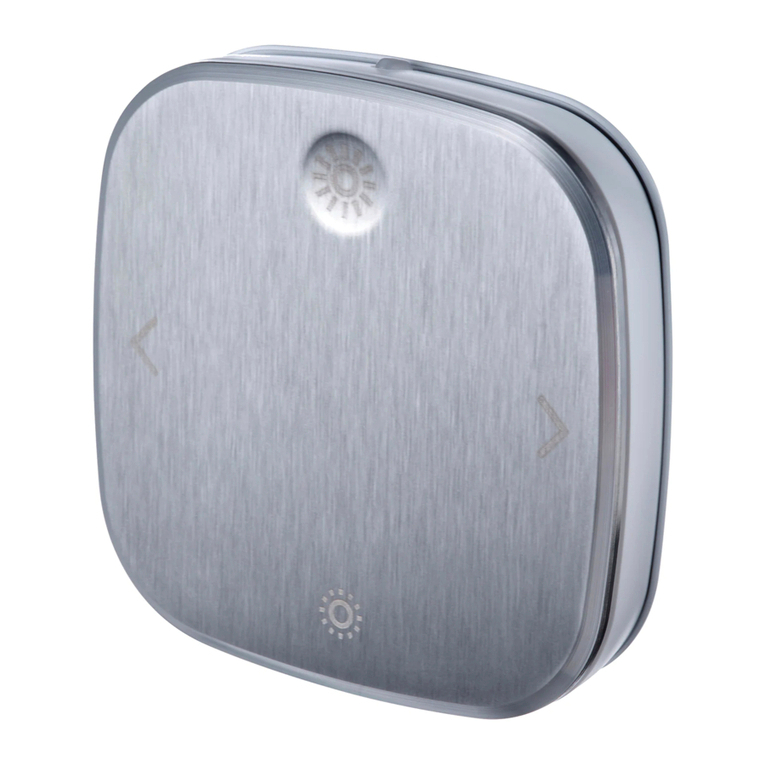
Shurco ShurLink PRO User manual

READ BEFORE INSTALLING
2309 SHUR-LOK STREET • YANKTON, SD 57078-0713
PHONE: 1-800-SHUR-LOK (1-800-474-8756) • FAX: 1-605-665-0501
www.SHURCO.com
SHOP ONLINE: www.SHOPSHURCO.com
Wireless ShurLink PRO™ Remote
P/N 1131495 Rev.A

SHUR-CO®HELP LINE: 1-866-748-7435
P/N 1131495 Rev. A
2
Item Part # Description
1. 1131575 SHURLINK PRO™ Transmitter Remote Kit
(includes remote, cradle and charging cable)
2. 1706751 SHURLINK PRO™ Replacement Cradle
3. 1706836 USB Charging Cable Type A to C
TRANSMITTER REMOTE
CHARGER CRADLE
1
3
2
SHURLINK PRO™ COMPONENTS
NOTICE
Do not power ShurLink™ or any Shur-Co®wireless
system with battery charger alone, as this will likely
cause system abnormalities and/or system malfunc-
tion. Instead, use 12-volt truck/automotive battery
to provide power to system.
!
Wireless ShurLink PRO™ Remote
Components .......................................................................................2
Power Up/Down..................................................................................3
Screen Layout ....................................................................................4
Pair Devices (Introduce remote to Receivers).................................5-6
Standard Operation .......................................................................7-12
Delete Device ...................................................................................12
Standard Operation Dual Output......................................................13
Clear Memory...................................................................................14
ShurLink™ app.................................................................................14
Troubleshooting...........................................................................15-16
TABLE OF CONTENTS

SHUR-CO®HELP LINE: 1-866-748-7435
P/N 1131495 Rev. A Remote & Screen Layout
3
Remote will power up when cover is opened. If cover is already open and remote is off, power up remote by pressing either opera-
tional button. Remote will power down when cover is closed or left open for default three minutes after last button is pushed. You can
adjust the timer by using the ShurLink™ app in the Apple App Store.
POWER UP/DOWN
ALT BUTTON
(Press and hold for 5 seconds
for main menu)
UP ARROW BUTTON
OPERATIONAL BUTTONS
COVER LID
MAIN MENU SCREEN
SELECT BUTTON
DOWN ARROW BUTTON

SHUR-CO®HELP LINE: 1-866-748-7435
P/N 1131495 Rev. A
4
Wireless ShurLink PRO™ Remote
(Each page can operate 10 devices per
page. Active page will be highlighted
in “green” with “black” text. Non-Active
pages will be highlighted in “black” with
“white” text.)
CHANNEL PAGES
SHURLINK™ PRO SCREEN LAYOUT
PAIRING INDICATOR
(Indicator will flash blue
when in pairing mode)
CHANNEL SIGNAL STRENGTH
Red Box with no icon = no device in range
Green Box with icon = Good Signal
Yellow Box with icon = Medium Signal
Red Box with icon = Poor Signal
BATTERY
Green = Full
Yellow = Half
Red = Empty
Charge Icon = Charging
ACTIVE FAULT
INDICATOR
(indicator will flash
yellow when system
fault occurs)
OPERATION STATUS
(indicates progress
when system is
operating in express
mode with travel
stops set)
OPERATION COMMAND
(indicates system
operation)
OPERATION STATUS
(indicates system %
progress when stops
have been set)
OPERATION COMMAND
(indicates system
operation)
CHANNEL DESCRIPTION
(indicates paired
devices)

SHUR-CO®HELP LINE: 1-866-748-7435
P/N 1131495 Rev. A
5
Pair Devices (Introduce Remote to Receivers) - continued
STEP 2:
Arrow to Pair a Device and Press Select.
STEP 3:
Arrow to desired page A, B, C, to pair new device to, then
press Select. Ten devices can be paired to each page.
STEP 1: From home screen on remote, press and hold ALT button
for 5 seconds. The remote menu screen will display.
PAIR DEVICES (INTRODUCE REMOTE TO RECEIVERS)
Each remote and receiver has a unique encryption code to prevent
unauthorized operation. Before remote can operate receiver mod-
ule, they must be paired or introduced.
STEP 4:
Arrow to desired channel,then press Select.
STEP 5A:
Remote is now ready to pair with module. Press opera-
tional button CANCEL to exit pairing mode. Proceed to step 5b to
place receiver into pairing mode.
MENU SCREEN

SHUR-CO®HELP LINE: 1-866-748-7435
P/N 1131495 Rev. A
6
Pair Devices (Introduce Remote to Receivers) - continued
STEP 5B: For receiver cover shown below (tarp, hopper, etc.),
reach programming button near LED light inside gray cover.
Press and hold button beside red LED light for approximately 5
seconds. Release after buzzer sounds and red LED flashes off.
STEP 5C: For Mini Modules shown below and front of standard
receiver covers shown above, press and hold both buttons for
approximately 5 seconds. Release after buzzer sounds.
STEP 7: If you have additional ShurLink™ devices on your trailer
that need to be paired, repeat process for remaining devices.
When you are done, all new devices should show up on Main
Screen of remote within a few seconds after opening cover.
STEP 8: Refasten plastic cover onto receiver assembly (applies
only to receiver shown in step 5b).
NOTICE
If device type is incorrect, call Shur-Co®Help Line.
You can damage system if you operate wrong
device-type receiver.
!
DEVICE TYPE
CAN BE TARP,
HOPPER,
LIGHTS, ETC.
BUTTON A
BUTTON A BUTTON B
BUTTON B
SHURLINK™
MINI-MODULE
WIRES
CONNECTED
TO SOLENOID
RED LED
PROGRAMMING
BUTTON

SHUR-CO®HELP LINE: 1-866-748-7435
P/N 1131495 Rev. A Standard Operation (Express Mode - Motorized Devices)
STEP 1: Press and hold ATL button on PRO remote until menu
screen appears.
NOTE: If additional devices are paired on page B or C, press
ALT button to toggle between pages to show additional
devices.
7
STANDARD OPERATION (EXPRESS MODE)
SET TRAVEL STOPS
When cover is opened, remote will default to Main Screen.
Any paired (introduced) devices on page A will appear on
Main Screen within a few seconds if connected to power and
within range.
NOTE: When devices are paired with remote, they will show
up with default names like Tarp EXP XXX. Rename each
device as you choose (example: TRLR4 or Front Hopper) by
using ShurLink™ App in Apple App Store.
NOTE: Systems with Express labeled on the receiver and
Exp.description on the remote are factory set to run in
express mode during operation. End and Mid stops can be
set for operational display on Pro Remote.
NOTE: System will not operate in EXPRESS MODE unless
encoder wire between motor and control box are connected.
NOTE: Some Shur-Co®products are not compatible with
EXPRESS MODE. If motor does not have encoder wire or
other feedback, system will operate in MOMENTARY only.
Use up/down arrow buttons to highlight device you wish to
operate. In figure below Tarp Exp system is highlighted. Use
operational buttons to control selected device. For motorized
devices, selected device will operate in whatever mode (Man-
ual or Express) you have set as default. See ShurLink™ App
in Apple App store for setting default operating mode.
NOTE: Tarping system ships from factory defaulted to
EXPRESS MODE, for operational display to provide status,
travel stops must be set first.
Tarping systems will also
operate in EXPRESS MODE when operated from buttons on
trailer mounted control module.
NOTE: If system motor does not have an encoder wire, SET
TRAVEL STOPS will not be accepted.
SCREEN LABELS
FOR OPERATIONAL
BUTTONS OF
SELECTED DEVICE
DEVICE STATUS
POSITION INDICATOR
IF STOPS ARE SET
(IF AVAILABLE)
HIGHLIGHTED
ITEM WILL BE
SHADED

SHUR-CO®HELP LINE: 1-866-748-7435
P/N 1131495 Rev. A
Standard Operation (Express Mode - Motorized Devices)
STEP 2: Use down arrow button until Edit a Device is highlighted,
then press Select button.
8
SET TRAVEL STOPS - CONTINUED
STEP 3: Use down arrow button until channel you want to edit is
highlighted. Press Select button. Use operational button CANCEL
to exit or close lid.
STEP 4: Press down arrow until Set Stops on screen is high-
lighted. Press Select button.
Pressing ALT button will return to main screen.
STEP 5: Menu will prompt you to clear existing travel stops by
pressing operational button SELECT. To cancel, press operational
button CANCEL or close lid.
STEP 6: Press operational button CLOSE to move device
(tarp, hopper, door, etc.) to fully closed position. Continue
holding button until motor automatically turns off. Make
sure there are no abnormal conditions that might stop device
from fully closing, like heaped load or ice buildup on trap door.
Verify device (tarp, hopper, door, etc.) is fully closed. Press Select
button to save this position.
NOTE: System will automatically turn off within
approximately one second of tightening on closed side. Do
not attempt to set closed side stop just before point where
system tightens up. During operation, control module will
always look for system to tighten up (partially “stall”) before
system will turn off and display CLOSED.

SHUR-CO®HELP LINE: 1-866-748-7435
P/N 1131495 Rev. A
9
STEP 3: Use Up/Down buttons to locate device. If device is on
page B, or C, use ALT button to change page. Press Select once
device has been highlighted.
STEP 2: Use Up/Down buttons to highlight Edit a Device. Press
Select button.
STEP 7: Press operational button OPEN to move device to
desired open side location. Open stops should be set so device
will stop prior to making contact with any mechanical stop (tarp
stop, hopper door stop, etc.)
Example: Stop tarp roll approximately 3" to 4" from tarp stops.
This also helps with seasonal events that impact the tarp rolling
up. This will save on system wear and tear. Press Select to save
this position.
Standard Operation (Express Mode - Motorized Devices) - continued
SET TRAVEL STOPS - continued
STEP 8: Press operational button ACCEPT to complete Set
Stops procedure if you accept responsibility to operating system
in Express Mode. Press operational button CANCEL or close
lid to cancel.
STEP 1: To delete stops if you do not plan to operate system in
Express Mode with Positional Feedback, press and hold ALT
button for five seconds, Main Menu page will appear.
STEP 4: Use Up/Down buttons to locate Delete all stops. Press
Select button to delete all stops on this device
CLEARING (DELETING) TRAVEL STOPS

SHUR-CO®HELP LINE: 1-866-748-7435
P/N 1131495 Rev. A
10
Standard Operation (Express Mode - Motorized Devices) - continued
STEP 5: To accept clearing travel stops, press ACCEPT on op-
eration button, Press CANCEL operation button or close cover
to revert back to current settings.
CLEARING (DELETING) TRAVEL STOPS
NOTE: System can be operated in Momentary Mode.
Device settings can be found using ShurLink™ iOS app in
Apple App Store.
STANDARD OPERATION
(EXPRESS MODE-MOTORIZED DEVICES)
NOTE: Set travel stops before Express Mode with positional
feedback can be used.
NOTE: Travel stops can only be set on Shur-Co®motors
that have encoder cable, such as 4500 Series HD,
ProTrap®, MaxxTrap™ and SMARTDrive motors.
In Express Mode, simply press and release operational button
labeled Open or Close. If you need to stop an operation before it
reaches travel stop, just press any button or close cover.
NOTE: If tarp system is commanded to operate in EXPRESS
MODE from push-buttons on trailer-mounted receiver
or Mini-Module, remote will only stop system if OPEN or
CLOSE buttons are pressed and device is highlighted on
screen. Remote will not stop system if SELECT or arrow
buttons are pressed or if remote cover is closed.
While motorized device is operating, current position of device
will be displayed on screen. Once motor reaches end of travel,
motor will shut off and screen will show device as fully open
or closed.
NOTE: Many devices (including tarp and standard hopper
controllers) expect system to tighten (or partially “stall”) on
closed side before remote will display CLOSED status.
NOTE: If motor cannot travel to full open or closed position
(due to heaped load or other obstruction), motor will travel
as far as it can and stop automatically. Display will then
show system partially open.
OPEN/CLOSE
LABELS FOR
OPERATIONAL
BUTTONS
OPERATIONAL BUTTONS

SHUR-CO®HELP LINE: 1-866-748-7435
P/N 1131495 Rev. A
11
Standard Operation (Express Mode - Motorized Devices) - continued
STEP 1: From home screen on remote, press and hold ALT button
for 5 seconds. The remote menu screen will display.
SET MID-STOP
STEP 2: Press Arrow Down button to Edit a Device and press
Select button.
NOTE: Mid Stops can be set on express mode enabled
systems Tarp and Hopper, allowing systems to stop mid-
operation for metering materials from a hopper or probing
without fully opening system.
To set Mid Stops, system must have End Stops set for
proper operation.
STEP 3: Press Arrow Down button to choose the channel you
would like to set Mid Stops on. Press operational button to CAN-
CEL,or close lid to cancel.
STEP 4: Press Arrow Down button to Set Mid Stop 1 or Set Mid
Stop 2. Close lid to cancel.
STEP 5: Use operational OPEN or CLOSE button to position
system in desired location to set mid stop. Press Select button
to accept position or ALT button to cancel.
MENU SCREEN

SHUR-CO®HELP LINE: 1-866-748-7435
P/N 1131495 Rev. A
12
STEP 2: Arrow down to highlight device you want to delete and
press SELECT.
STEP 3: Press ACCEPT operation button to permanently delete
device, press CANCEL operation button or close cover to abort
removing device from remote.
STEP 6: Choose direction of operation you would like the stop
to be set in by pressing operational button OPEN or CLOSE.
NOTE: To set secondary mid stop, repeat steps 1 through 7
and choose second set stop option on step 4.
Standard Operation (Express Mode - Motorized Devices) - continued
SET MID-STOP CONTINUED DELETE DEVICE
STEP 7: Screen will display successful stop set. Press operational
key ACCEPT to accept or CANCEL to cancel.
NOTE: As an option to set Mid Stops, move system into
position prior to entering Set Stop option. Press SELECT
without moving system from current position, continue setting
stops from step 6 on.
STEP 1: Press and hold ATL button on PRO remote until menu
screen appears, arrow to Delete a Device and press SELECT.
Any paired device on a remote can be deleted or erased from
remote’s memory.

SHUR-CO®HELP LINE: 1-866-748-7435
P/N 1131495 Rev. A Standard Operation (LiteALL™ Style Dual-Output Devices)
For lights and other dual-output latching devices, press opera-
tional button labeled ON/OFF to toggle output on and off.
For dual-output momentary devices, press and hold operational
button labeled ON/OFF to keep device on. Release button and
device will turn off.
STANDARD OPERATION (DUAL-OUTPUT DE-
VICES: MOMENTARY, LATCHING & HYBRID)
SHURLINK™ DUAL-OUTPUT MINI-MODULES
13
BUTTON A
BUTTON B
BUTTON ABUTTON B
SHURLINK™
MINI-MODULE
SHURLINK™
MINI-MODULE

SHUR-CO®HELP LINE: 1-866-748-7435
P/N 1131495 Rev. A
14
Device App Options
STEP 2: Press and hold operation button ACCEPT for 5 seconds
to clear memory. To abort, press operation button CANCEL.
STEP 1: From any page on remote, press and hold ATL and
SELECT buttons on remote for approximately 5 seconds. A Clear
Memory Screen will appear.
NOTE: Clearing memory permanently deletes any device
that was paired to the remote.
REMOTE CLEAR MEMORY
STEP 1: With ShurLink™ app open and on Configure tab, press
blue refresh button on right side of screen. Place device (Shur-
Link™ receiver or EZR™/PRO remote into pairing mode).
Receiver: Press and hold OPEN and CLOSE buttons on re-
ceiver or device pair button on inside of receiver (refer to page 6
step 5b and 5c for additional information.
EZR™ Remote: Press and hold OPEN and CLOSE buttons at
the same time until light turns solid.
PRO Remote: Press and hold ALT button for 5 seconds until
MAIN MENU screen displays, arrow down to PAIR PHONE and
press SELECT button.
The phone will ask for a Bluetooth Pairing Request in a pop out
window. Choose PAIR to pair your device to your phone.
Refer to ShurLink™ App Manual for additional settings.
You can customize ShurLink™ system devices (such as Receiv-
ers and EZR™/PRO Remotes) by utilizing the ShurLink™ App
available for download on the Apple App Store. Ensure that you
have an iPhone or iPad running on iOS 15 or a later version.
Simply search for “ShurLink” within the Apple app store to find
it.
NOTE: Make sure to return any app remote tokens used
on this device before clearing memory. Tokens will be non-
returnable if this step is not completed.

SHUR-CO®HELP LINE: 1-866-748-7435
P/N 1131495 Rev. A
15
Troubleshooting Guide
PROBLEM: TRY THIS:
The ShurLink™ PRO remote is not
working, the display is totally dead
and is not displaying anything.
1. If the remote lid has been left open, the remote may have been powered down.
Wake the remote up by closing the lid and then re-opening it. Alternatively, you can
wake the remote up by pressing an operational button (Open/Close).
2. The battery may be dead. Place the remote in the charging cradle and open the
lid. Make sure the charging cable is properly connected to the power source and
to the cradle. If the remote works in the cradle, allow the remote to charge.
3. The remote may be damaged. Call Shur-Co’s Help Line.
The ShurLink™ PRO remote is not
working, the display is working, but
the device I want to control is not
listed on the Main screen.
1.
For the device you are trying to control, bring the remote near the receiver. Make
sure the ShurLink™ receiver is connected to power. One way to verify that the re-
ceiver has power is to remove the gray cover on the trailer and check if the red LED
is on and flashing. Flickering LED is normal.
2. Delete the receiver from remote and re-introduce the receiver to the remote. See
sections Delete Device and Pair Device.
3.
The remote or receiver may be damaged. Call Shur-Co’s Help Line.
I have a motorized system, and it is
running backwards.
1. Is the device running backwards when controlled with the remote and the buttons
on the receiver box? Remove the gray cover from the receiver assembly. Swap
the green and yellow wires. Or, use ShurLink™ iOS app to pair motorized system
device and switch polarity in settings on app.
2. Is the device running backwards only with the buttons on the receiver box, and
the remote is operating in correct direction? Swap positions of the push button
switches in the gray cover of the receiver assembly.
I have a motorized system, and it
will run in one direction but not the
other.
1. Remove the gray cover from the receiver assembly. Make sure the green and yel-
low wires are connected to the solenoid and are making good contact.
2. Do the push buttons on the gray cover work in both directions? If so, the remote
may be damaged. Call Shur-Co’s Help Line. If not, got to next step.
3. Clear travel stops (see page 9). Do not reset them. Does system operate in both
directions? If so, travel stops were corrupted. Check encoder wire connections
and reset travel stops. Call Shur-Co’s Help Line if needed. If system still does not
operate in one direction, receiver or solenoid may be damaged. Call Shur-Co’s
Help Line.
Our Advanced Troubleshooting Guide is available on our website: http://www.shurco.com, or call our Help Line: 1-866-748-7435.

SHUR-CO®HELP LINE: 1-866-748-7435
P/N 1131495 Rev. A
16
Troubleshooting Guide
PROBLEM: TRY THIS:
I have a motorized system and:
The system will not run with the
push-button switches on the gray
receiver box; I can hear a click from
the gray cover when I press the but-
tons on the box.
OR
The system is stuttering when I try
to operate it.
1. There may be a bad battery or poor battery connection. Try hooking up power
from a different 12-volt battery and re-test the system.
2. Is a battery charger or power supply being using to power the system? If so, hook
the system/trailer to a truck battery and try again. Battery chargers alone will most
likely cause the system to malfunction.
3. Remove the gray cover from the receiver assembly. Make sure the green and
yellow wires are connected to the solenoid and are making good contact.
4. Check system wiring for corrosion, including any circuit breakers near the truck
battery. If corrosion is present, you may get 12 volts to the receiver, but a motor-
ized system may not function due to the resultant voltage drop in the wiring or
circuit breaker when the Open/Close button is pressed.
5. Check all encoder wires between motor and receiver for cuts. Make sure connec-
tors are connected tightly. Make sure the black encoder wire is always connected
to another black encoder wire at connections. On 4500HD tarping systems, make
sure sealed weatherpack connectors are snap-locked together. There is one
weather connector near the motor and one in the kingpin area.
6. Verify that you have 12 volts at the motor while an operational button is being held.
If you have 12 volts and the motor is not running, there may be a problem with the
motor. If the voltage at the motor drops below 12 volts, check the system wiring
for corrosion. You may also have a bad truck battery. Start the truck and try again.
Call Shur-Co’s Help Line.
7. The receiver or solenoid may be damaged. Call Shur-Co’s Help Line.
I have a motorized system, and it
will not run with the push-button
switches on the gray receiver box;
I can’t hear a click from the gray
cover when I press the buttons on
the box.
1. Remove the gray cover form the receiver assembly. Verify that 12 volts are being
applied to the motor control module in the gray cover of the receiver box.
2. The receiver may be damaged. Call Shur-Co’s Help Line.
I have a motorized system and it is
displaying that it is still slightly open,
but it is actually closed.
1.
Make sure there are no obstructions to the system (heaped loads, ice, etc.).
2. Make sure you hold the Close button long enough for system to tighten on the
closed side.
3.
Reprogram your travels stops. Make sure you do not program the stops while
there are any obstructions in the way (heaped load, ice, etc.). If this problem oc-
curs again, call Shur-Co’s Help Line.
System will not allow Express Mode
operation.
1. Set the travel stops. See section on setting travel stops.
2. If the travel stops can’t be set, check encoder wires for proper connection.
3. Call Shur-Co’s Help Line.
NOTE: Bypass circuit breaker and test system to verify breaker is not corroded inside.
NOTE: Make sure voltmeter reads +12 volts and not -12 volts. Do this while red
voltmeter lead is contacting red wire ring-terminal from module and black voltmeter
lead is contacting black wire ring-terminal from module.
NOTE: For tarp systems, it is normal for the remote to display that it is slightly open
if there is a heaped load. Heaped loads will settle, so be sure to check tarp tension
after driving a short distance. After unloading trailer and closing tarp, remote should
display that it is closed.

SHUR-CO®HELP LINE: 1-866-748-7435
P/N 1131495 Rev. A Notes
17

SHUR-CO®HELP LINE: 1-866-748-7435
P/N 1131495 Rev. A
Notes
18

SHUR-CO®HELP LINE: 1-866-748-7435
P/N 1131495 Rev. A Notes
19

2309 SHUR-LOK STREET • YANKTON, SD 57078-0713
PHONE: 1-800-SHUR-LOK (1-800-474-8756)• FAX: 1-605-665-0501
www.SHURCO.com
Table of contents
Other Shurco Remote Control manuals
Popular Remote Control manuals by other brands
Homematic IP
Homematic IP HmIPW-BRC2 Installating instruction and operating manual
Homematic IP
Homematic IP HmIPW-WRC2-A Instructions and operating manual
Comcast
Comcast Remote with Voice Control user manual
Xantech
Xantech RC68 Plus installation instructions
WiSilica
WiSilica lumos CONTROLS Catron V quick start guide
PROLED
PROLED L513183 user manual
Automotive Data Solutions
Automotive Data Solutions iDatastart TR2310AR owner's manual
Cervis
Cervis 302 Series troubleshooting guide
CaryMart
CaryMart S2DA-DC09 user manual

Rohde & Schwarz
Rohde & Schwarz 1157.3458.02 operating manual
Jøtul
Jøtul GI 160 BF Installation and operating instructions
ETI
ETI GROW ELITE Use and care guide
