manuals.online logo
Brands
  1. Home
  2. •
  3. Brands
  4. •
  5. Siemens
  6. •
  7. Hearing Aid
  8. •
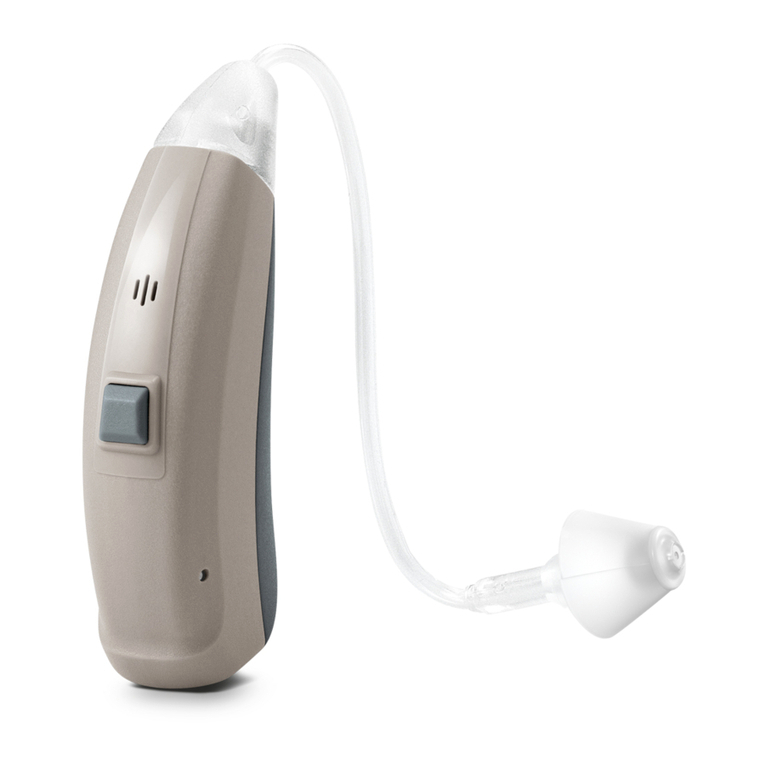
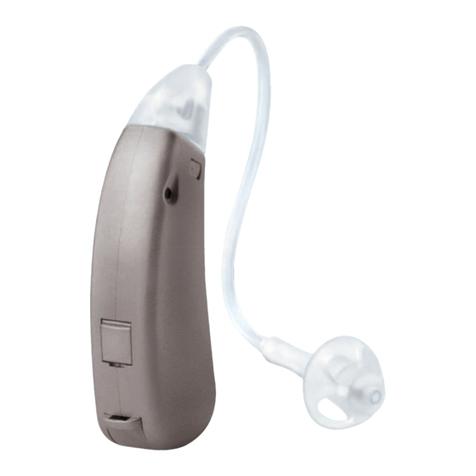
  9. Siemens Teneo S User manual

Siemens Teneo S User manual

Teneo S/S+, M/M+ & HP/HP+
Instructions and guidance
www.bestsound-technology.co.uk
Android and Google play are trademarks of
Google Inc. Apple App store is a trademark
of Apple inc.
Manufactured by Sivantos GmbH under Trademark License of Siemens AG
Based on D00140935 | JN8013 | Pt No: 10935275 | Issue 2 | © 06.2016 Siemens AG
United Kingdom
Sivantos Limited
Platinum House
Sussex Manor Business Park
Gatwick Road, Crawley
West Sussex RH10 9NH
Email: [email protected]
Legal Manufacturer
Sivantos GmbH
Henri-Dunant-Strasse 100
91058 Erlangen
Germany
Phone +49 9131 308 0
www.bestsound-technology.co.uk
Points out a situation that could
lead to serious, moderate, or
minor injuries
Indicates possible property
damage
Advice and tips on how to handle
your device better
It is recommended to familiarise yourself
with your new hearing aids.
With the aids in your hand try using the
controls and note their location on the
aid. This will make it easier for you to feel
and press the controls while wearing the
hearing aids.
CAUTION
Read this user guide thoroughly and
completely and follow the safety
guide supplied with the device(s)
to avoid damage or injury.
To benefit most from your hearing aid, wear it daily and all day long. Especially after
long periods of living with hearing loss, a dedicated hearing training is recommended -
ask your NHS Provider.
Components and names
ૡ
૝
૝
૜
૜
ૠ
ૣ
ૣ
૝
૝
૜
૜
ૠ
ૢ
ૢ
ૣ
ૣ
ૣ
ૣ
Teneo
M
M+
Battery size 13
૞
૝
૝
૜
૜
ૣ
ૣ
ૡ
ૡ
ૢ
ૢ
ૠ
ૠ
ૠ
ૡ
ૣ
ૣ
ૢ
ૢ
1Getting to know your hearing aids
Changing the batteries
૜Open the battery
compartment
૝Remove coloured sticker
from new battery, place
battery in drawer with
+ symbol on battery
+ side up.
Low Battery indicator
uAlways use the right size batteries
Your hearing aid may be programmed to
inform you when the battery should be
replaced for best system performance. You
may hear an intermittent series of beeps
and/or experience low amplification
power or volume.
Change the battery when either of
these occur.
Remove empty batteries immediately and
dispose of according to local regulations
ঔRemember to have your
replacement batteries with
you at all times.
ঔFor certain hearing aid types, a
special battery compartment is
available that cannot be opened
unintentionally. Ask your NHS
Provider for the tamperproof
battery compartment.
Via battery compartment:
u Turning on: Close the battery
compartment. The default volume
and hearing program are set.
uTurning off: Open the battery
compartment to the first catch.
Via remote control:
uFollow the instructions in the remote
control’s user guide. After turning on,
the previously used volume and
hearing program are set.
ঔWhen wearing the hearing aids, an
optional signal canindicate when
an aid is turned on or off.
ঔRemove the batteries if the hearing
aids are not used for several days.
The optional concha lock helps to securely
retain the ear piece in your ear. To position
the concha lock:
u Bend the concha lock and position it
carefully into the bowl of your ear.
Refer to the picture.
Removing
uLift the hearing aid and slide it over
the top of your ear૜.
uHold the tube and pull the ear
piece carefully out૝.
Clean and dry your
hearing aids after
usage.
Read more
in section
“Maintenance
and care”.
CAUTION
Risk of injury!
uIn very rare cases the ear piece
could remain in your ear when
removing the hearing aid. If this
happens, have the ear piece
removed by a medical professional.
Inserting
Your hearing aids have been fine-tuned for
your right and left ear. Coloured markers
indicate the side:
ঔred marker = right ear
ঔblue marker = left ear
To insert the hearing aid:
uHold the tube at the bend that is closer
to the ear piece.
u Carefully push the ear piece in the ear
canal૜.
uTwist it slightly until it sits well.
uOpen and close your mouth to avoid
accumulation of air in the ear canal.
uLift the hearing
aid and slide it
over the top
of your ear૝.
ঔInsertt he right hearing aid
with the right hand and the
left hearing aid with the left
hand.
ঔIf you have problems inserting
the ear piece, use the other
hand to gently pull your
earlobe downwards.
This opens the ear canal and
eases insertion of the ear piece.
CAUTION
Risk of injury!
uInsert the ear piece carefully and
not too deeply into the ear.
૜
૝
Your hearing aids automatically adjust
the volume to the listening situation.
uIf you prefer manual volume adjustment,
press the rocker switch briefly or use a
remote control or smartphone app.
Refer to section “Controls”
for your personal settings.
An optional signal can indicate
the volume change.
2Your Teneo™hearing aid
૜Ear piece (LifeTip)
૝Concha lock (option)
૞Tube (LifeTube)
૟EarHook
ૠMicrophone openings
ૡPush button
ૢRocker switch
ૣBattery compartment
Teneo
S
S+
Battery size 312
Teneo
HP
HP+
Battery size 13
3Batteries
૞Close battery door
uCarefully close the
battery compartment.
If you feel resistance,
the battery is not
inserted correctly.
Do not attempt to close the battery
compartment by force. It can be
damaged.
4Daily use
4aTurning on and off - You have several options to turn your hearing aids on or off.
When you are on the
phone, hold the telephone
receiver slightly above your
ear. The hearing aid and
telephone receiver have
to be aligned.
Turn the receiver slightly
so that the ear is not
completely covered.
If you have problems pressing the
controls of your hearing aids while
wearing them, you can ask your NHS
Provider about a remote control option.
Via push button or rocker switch:
uTurning on or off: Press the push button.
Refer to section “Controls”
for your personal settings.
After turning on, the previously used
volume and hearing program are set.
When the power-on delay is activated, the
hearing aids turn on after a delay of several
seconds. During this time you can insert
the hearing aids without experiencing
unpleasant whistling.
The “power-on delay” can be activated by
your NHS Provider.
You should only remove the protective sticker if you actually use the battery.
Hearing programs change the
characteristics of the sound coming
through the hearing aid. They help you to
select the optimal setup for every listening
situation. An optional signal can indicate
the change of the hearing program.
uTo change the hearing program,
press the push button briefly or
use a remote control.
4bChanging the hearing program
Refer to section “Controls” and to section
“Settings” for your personal settings and for
a list of your hearing programs.
Your NHS Provider can configure
your hearing aids so that they switch
automatically to the audio shoe
program if the audio shoe has been
attached. Read more in section
“Audio input”.
4cOn the phone
Telephone program
You may prefer a certain volume when
using the phone. Ask your NHS Provider
to configure a telephone program.
u Switch to the telephone program
whenever you are on the phone.
Whether a telephone program is
configured for your hearing aid is
listed in section “Settings”.
4dInserting and removing
4fAdjusting the volume
ঔIf you are wearing two hearing aids,
you have to lock or unlock the
controls on each hearing aid
separately.
ঔLocking or unlocking can optionally
be indicated by an acoustic signal.
ঔWhen you turn your hearing aids off
and on again, the key lock remains
in the previously selected state.
To prevent any accidental operation you
can lock the controls. When the controls
are locked, both push button and rocker
switch are disabled.
u To lockthe controls, press the top
of the rocker switch and hold it.
Simultaneously press the push button
on the same hearing aid for 3 seconds.
u To unlockthe controls, press the
bottom of the rocker switch and
hold it. Simultaneously press the
push button on the same hearing
aid for 3 seconds.
Whether this function is configured for your
hearing aids is listed in section “Controls”.
You can control each hearing aid
separately. You can control both hearing
aids simultaneously. Your NHS Provider
has to activate the “e2e wireless” function
if available, enabling both hearing aids to
exchange information or you may be able
to then use either a remote control or the
user controls on either of your aids for the
desired function e.g. volume change.
The control elements of both aids can
meven be set differently – thus offering
you the degree of control you really need.
The controls of your hearing aids can also be
used to change, for example, the tinnitus
noiser level.
Refer to section “Controls”
for your personal settings.
t
it
it
e it
e it
e it
e it
de it
de it
de it
de it
de it
g
de it
g
de it
g
de it
aring
de it
૜
૜
૜
૝
4eLocking the controls (optional)
4gFurther adjustments (optional)
4hUsing two hearing aids
Explanation of symbols
5Audio induction loops
Many telephones as well as public places
like theatres offer the audio signal (music
and speech) via an audio induction loop
With this system, your hearing aids can
directly receive the desired signal – without
distracting noise in the environment.
Ask your NHS Provider to configure a
telecoil program.
uSwitch to the telecoil program whenever
you are in a place with an audio
induction loop.
Whether the telecoil program is
configured for your hearing aid is
listed in section “Controls - Settings”.
6Audio input (FM system)
With an audio input you can connect your
hearing aid to an FM system.
An FM system gathers speech at the voice
source (via a separate microphone) and
transmits the sound directly to the
hearing aid.
This can be useful for adults in difficult
listening situations and for children in
classrooms.
Most FM systems allow for coupling with
audio devices like a MP3 player.
WARNING
Risk of electric shock!
uConnect audio input only to a
device conforming to EN 60065,
for audio, video and other
electronic devices.
To prevent very rare cases of
electric shock:
uUse the audio input only with
battery operated devices or
FM systems.
uFor a more thorough professional cleaning,
take your aids to your NHS Provider.
Cleaning the LifeTubes
If your hearing aids are equipped with
LifeTubes, you can remove cerumen from
the tubes using a special cleaning wire.
This should be done on a regular basis. Ask
your NHS Provider for more information
and for suitable cleaning wires.
uScrew off the tube.
uCarefully insert the cleaning wire into
the tube. Start from the side opposite
to the ear piece adapter.
uPush the cleaning wire all the way
through the tube.
uWipe away any cerumen or debris that is
dislodged from the tube.
uCompletely remove the cleaning wire
from the tube.
uScrew the tube onto the hearing aid.
CAUTION
Risk of damage to ear canal and
ear drum.
uAlways remove the Life Cleaning
Wire from the LifeTube before
reattaching it to your hearing aid.
Storage
uDuring longer periods of non-use, store
your hearing aids with open battery
compartment (and batteries removed)
in a drying system in order to prevent
the penetration of moisture.
Drying
uDry you hearing aids overnight.
uAsk your Hearing Care Professional for
recommended drying products.
Exchanging ear
pieces and tubes
uAsk your NHS Provider to exchange the
LifeTube approximately every 3 to 6
months or sooner if you notice cracks
or other changes.
uAsk your NHS Provider to exchange
LifeTips every 1 to 2 months or
as needed.
uFor exchanging LifeTips, please consult
your NHS Provider.
uFor aids with earhook please clean
regularly. Ask your NHS Provider for
more information.
7Maintenance and care
Your hearing aids are so robust that
they will function reliablyfor years. It is,
however, important that you take care of
your aids and observe a few basic rules,
which will soon become habit.
Cleaning
For hygiene reasons and to maintain
functionality, clean your hearing aids daily.
NOTICE
uDo not put the hearing
aids in water.
Do not put LifeTubes
or LifeTips in water.
uClean your hearing aids with a soft, dry
tissue. Never apply pressure while
cleaning.
uIf your hearing aids are equipped with
LifeTubes.
Refer to section “Cleaning the LifeTubes”
for details.
uAsk your NHS Provider for recommended
cleaning products, special care sets and
further information on how to keep your
hearing aids in good condition.
Telecoil program and
remote control
NOTICE
For aids with wireless connectivity:
When the telecoil program is active, the
remote control may cause a pulsing noise.
uUse the remote control with a distance
greater than 10 cm (4 inches).
Your NHS Provider can configure your
hearing aids so that they switch automat-
ically to the audio shoe program if the
audio shoe has been attached.
If you want to use an audio shoe,
a special battery compartment is
required. Battery compartment with
an audio input is available for
Teneo M/M+ & HP/HP+.
uAsk your NHS Provider to exchange
the battery compartment.
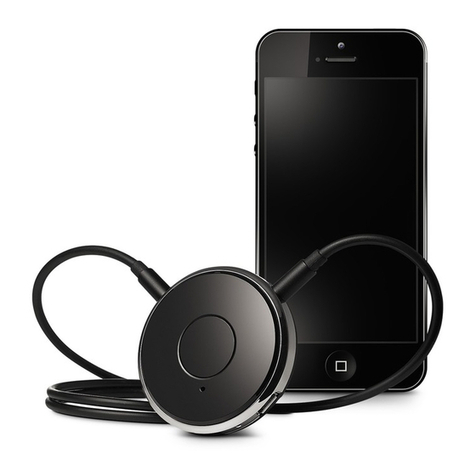
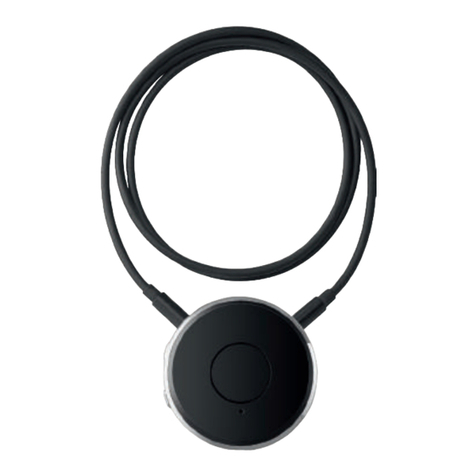
easyTek
Your Teneo + hearing aid can be used
with the easyTek™wireless enhancement
system. easyTek provides a wireless
connection from your Teneo + hearing
aids to your television, mobile phone,
MP3 player and stereo.
easyTek is also an easy-to-use remote
control for your Teneo + hearing aids for
convenient and discreet program and
volume adjustment.
NOTICE
easyTek and easyPocketare additional products to your hearing aid which may be
available to purchase. If you think it would assist you in your day-to-day life talk to
your NHS Provider about how you can obtain an easyTek or easyPocket.
Further information is available on our website www.bestsound-technology.co.uk
or email [email protected]
easyTek easyPocket
easyPocket
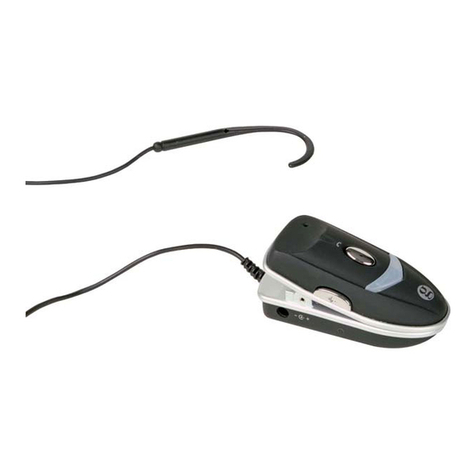
The easyPocket™remote control is
available as an optional accessory
allowing for convenient and discreet
hearing aid adjustment.
It is extremely ergonomic, has an easy-to-
read display and a modern, stylish look.
NOTICE
Use an approved audio shoe only.
Ask your NHS Provider for this
accessory
Attaching and removing
the audio shoe
The audio shoe is integrated into a battery
compartment. To attach or remove the
audio shoe, the battery compartment has
to be exchanged. A special tool is required.
uAsk your NHS Provider to attach or
remove the audio shoe.
You can usually
recognise audio
induction loop
systems by
certain signs.
Function Left Right
 
Program change
Volume up
Volume down
Standby/
turn on
Sound mixer
(audio input)
press briefly, press 2 seconds
Power-on delay enables whistle-
free insertion of hearing aids.
Read more in section
“Turning on and off”.
e2e wireless enables simultaneous
control of both hearing aids.
Read more in section
“Using two hearing aids”.
A telecoil is built into the aid, so it
can connect with audio induction
loops.
Read more in section
“Audio induction loops”.
Teneo S/S+ does not include a
telecoil option.
Remote control
Function Left Right
   
Program up/
down
Volume up/down
Tinnitus noiser
level up/down
Sound balance
Standby/turn on
Sound mixer
(audio input)
press briefly, press 2 seconds,
press 5 seconds
In case of aid failure
uIs the aid switched on?
uIs the battery inserted correctly?
uIs the battery run down?
uIs the battery compartment closed?
uIs the sound opening in the ear mould
clogged with wax?
Troubleshooting
Sound is weak
uIncrease the volume.
uReplace the empty battery.
uClean or exchange the tube
and the ear piece.
Hearing aid emits
whistling sounds
uReinsert the ear piece until it fits
securely.
uDecrease the volume.
uClean or exchange the ear piece.
Sound is distorted
uDecrease the volume.
uReplace the empty battery.
uClean or exchange the tube and
the ear piece.
Hearing aid emits signal tones.
uReplace the empty battery.
Hearing aid does not work
uTurn the hearing aid on.
uGently close the battery door.
uReplace the empty battery.
uMake sure the battery is inserted
correctly.
uPower-on delay is active. Wait several
seconds and check again.
touchControl App™
& easyTek App™
The touchControl App™& easyTek App™
are available to download from the Apple
App store or Google Play store for discreet
and simple hearing aid adjustments.
Search for ‘Siemens touchControl’ or
‘Siemens easyTek’ and download for free.
Teneo + aids are easyTek and easyPocket compatible.
Please note:
easyTek App
requires
easyTek.
8Optional accessories Only for Teneo + models
9Controls
Pushbu tton
With the controls you can, for example,
adjust the volume or switch hearing
programs. Your hearing aids either have
a push button and a rocker switch or a
push button only. The NHS Provider has
assigned your desired functions to the
controls.
Ask your NHS Provider to mark your
controls and their functions on the
following pages.
Control Left Right
Push
button
Rocker
switch
You can also use a remote control.
Rockers witch
Hearing programs
1
2
3
4
Read more in section
“Changing the hearing program”.
Settings
Features
Please see “Components” and “names”
section for your battery size information.
Exchangeable ear pieces
(only with LifeTubes)
Size
LifeTip
open or closed
LifeTip
double
LifeTip
semi-open
NOTICE
uTo avoid environmental pollution,
do not throw batteries into
household waste.
uRecycle or dispose of batteries
according to national regulations
or return them to your NHS
Provider.
uRecycle hearing aids, accessories
and packaging according to
national regulations.
Accessories
Battery size and ear pieces
Function Left Right
Lock / Unlock the controls
Read more in section ”Locking the controls".
Push button and rocker switch
Troubleshooting

This manual suits for next models

3

Other Siemens Hearing Aid manuals

Siemens miniTek User manual

Siemens

Siemens miniTek User manual

Siemens Octiv Custom+ User manual

Siemens

Siemens Octiv Custom+ User manual

Siemens Tek wireless enhancement User manual

Siemens

Siemens Tek wireless enhancement User manual

Siemens MUSIC Pro User manual

Siemens

Siemens MUSIC Pro User manual

Siemens CIELO 2 ACTIVE User manual

Siemens

Siemens CIELO 2 ACTIVE User manual

Siemens BTE series User guide

Siemens

Siemens BTE series User guide

Siemens Orion RIC User manual

Siemens

Siemens Orion RIC User manual

Siemens Octiv S Owner's manual

Siemens

Siemens Octiv S Owner's manual

Siemens ARTIS 2 Custom User manual

Siemens

Siemens ARTIS 2 Custom User manual

Siemens Motion BTE User manual

Siemens

Siemens Motion BTE User manual

Siemens Life 300 BTE User manual

Siemens

Siemens Life 300 BTE User manual

Siemens NITRO Custom User manual

Siemens

Siemens NITRO Custom User manual

Siemens CIELO 2 ACTIVE User manual

Siemens

Siemens CIELO 2 ACTIVE User manual

Siemens Pure User manual

Siemens

Siemens Pure User manual

Siemens Vibe User manual

Siemens

Siemens Vibe User manual

Siemens Ace binax User manual

Siemens

Siemens Ace binax User manual

Siemens Motion 701 BTE User manual

Siemens

Siemens Motion 701 BTE User manual

Siemens ARTIS 2 P User manual

Siemens

Siemens ARTIS 2 P User manual

Siemens NHS Audiology User manual

Siemens

Siemens NHS Audiology User manual

Siemens Life micon User manual

Siemens

Siemens Life micon User manual

Siemens Life User manual

Siemens

Siemens Life User manual

Siemens Motion SX binax User manual

Siemens

Siemens Motion SX binax User manual

Siemens IMPACT Pro L User manual

Siemens

Siemens IMPACT Pro L User manual

Siemens INFINITI Pro User manual

Siemens

Siemens INFINITI Pro User manual

Popular Hearing Aid manuals by other brands

Health & Life HL202 instruction manual

Health & Life

Health & Life HL202 instruction manual

Etymotic Research HD-15 user manual

Etymotic Research

Etymotic Research HD-15 user manual

Phonak Slim L-R user guide

Phonak

Phonak Slim L-R user guide

Widex Daily D-FA User instructions

Widex

Widex Daily D-FA User instructions

Wide Dream D-XP User instructions

Wide

Wide Dream D-XP User instructions

Phonak RemoteMic user guide

Phonak

Phonak RemoteMic user guide

Phonak PicoForte3 Operating lnstructions

Phonak

Phonak PicoForte3 Operating lnstructions

Sound World Solutions Sidekick HD-100 Series user manual

Sound World Solutions

Sound World Solutions Sidekick HD-100 Series user manual

ReSound be 9 user guide

ReSound

ReSound be 9 user guide

SportEar custom edge Manual & warranty

SportEar

SportEar custom edge Manual & warranty

Unitron Moxi FIT user guide

Unitron

Unitron Moxi FIT user guide

NewSound Forte MA 201 user manual

NewSound

NewSound Forte MA 201 user manual

Hydas 1190 instruction manual

Hydas

Hydas 1190 instruction manual

Widex Specsavers Advance 52 Series User instructions

Widex

Widex Specsavers Advance 52 Series User instructions

ALDS MiniBuddyPro instruction manual

ALDS

ALDS MiniBuddyPro instruction manual

GN Resound 6060-DI user guide

GN Resound

GN Resound 6060-DI user guide

Widex Unique U-PA User instructions

Widex

Widex Unique U-PA User instructions

oticon Sumo XP Fittings guide

oticon

oticon Sumo XP Fittings guide

manuals.online logo
manuals.online logoBrands
  • About & Mission
  • Contact us
  • Privacy Policy
  • Terms and Conditions

Copyright 2025 Manuals.Online. All Rights Reserved.