manuals.online logo
Brands
  1. Home
  2. •
  3. Brands
  4. •
  5. Siemens
  6. •
  7. Switch
  8. •
  9. Siemens SIMATIC NET RUGGEDCOM RS900F User manual

Siemens SIMATIC NET RUGGEDCOM RS900F User manual

Edition 02/2020
Installation Manual
SIMATIC NET
Rugged Ethernet Switches
RUGGEDCOM RS900F
https://www.siemens.com
All manuals and user guides at all-guides.com
all-guides.com
SIMATIC NET
Rugged Ethernet Switches
RUGGEDCOM RS900F
Installation Manual
Preface
Introduction 1
Installing the Device 2
Device Management 3
Communication Ports 4
Technical Specifications 5
Certification 6
02/2020
C79000-G8976-1350-04
All manuals and user guides at all-guides.com
Legal Information
Warning Notice System
This manual contains notices you have to observe in order to ensure your personal safety, as well as to prevent
damage to property. The notices referring to your personal safety are highlighted in the manual by a safety
alert symbol, notices referring only to property damage have no safety alert symbol. These notices shown be-
low are graded according to the degree of danger.
DANGER
indicates that death or severe personal injury will result if proper precautions are not taken.
WARNING
indicates that death or severe personal injury may result if proper precautions are not taken.
CAUTION
indicates that minor personal injury can result if proper precautions are not taken.
NOTICE
indicates that property damage can result if proper precautions are not taken.
If more than one degree of danger is present, the warning notice representing the highest degree of danger
will be used. A notice warning of injury to persons with a safety alert symbol may also include a warning relat-
ing to property damage.
Qualified Personnel
The product/system described in this documentation may be operated only by personnel qualified for the
specific task in accordance with the relevant documentation, in particular its warning notices and safety in-
structions. Qualified personnel are those who, based on their training and experience, are capable of identify-
ing risks and avoiding potential hazards when working with these products/systems.
Proper Use of Siemens Products
Note the following:
WARNING
Siemens products may only be used for the applications described in the catalog and in the relevant technical
documentation. If products and components from other manufacturers are used, these must be recommend-
ed or approved by Siemens. Proper transport, storage, installation, assembly, commissioning, operation and
maintenance are required to ensure that the products operate safely and without any problems. The permis-
sible ambient conditions must be complied with. The information in the relevant documentation must be ob-
served.
Trademarks
All names identified by ® are registered trademarks of Siemens AG. The remaining trademarks in this publica-
tion may be trademarks whose use by third parties for their own purposes could violate the rights of the own-
er.
Disclaimer of Liability
We have reviewed the contents of this publication to ensure consistency with the hardware and software de-
scribed. Since variance cannot be precluded entirely, we cannot guarantee full consistency. However, the in-
formation in this publication is reviewed regularly and any necessary corrections are included in subsequent
editions.
Siemens AG
Digital Industry
Process Automation
Postfach 48 48
90026 NÜRNBERG
GERMANY
© 02/2020 Subject to Change Copyright © Siemens 2020
All rights reserved
All manuals and user guides at all-guides.com
Table of Contents
Preface ............................................................................................................................................ v
Related Documents ................................................................................................................. v
Accessing Documentation ....................................................................................................... v
Disclaimer of Liability .............................................................................................................. v
Registered Trademarks ............................................................................................................ v
Training .................................................................................................................................. vi
Customer Support .................................................................................................................. vi
Contacting Siemens ............................................................................................................... vii
1 Introduction ........................................................................................................................... 1
1.1 Feature Highlights ................................................................................................. 1
1.2 Description ............................................................................................................ 2
1.3 Required Tools and Materials ................................................................................. 3
1.4 Decommissioning and Disposal ............................................................................. 3
1.5 Cabling Recommendations .................................................................................... 4
1.5.1 Supported Fiber Optic Cables ................................................................................ 4
1.6 Tamper-Evident Security Seals ............................................................................... 4
2 Installing the Device ............................................................................................................. 7
2.1 Unpacking the Device ........................................................................................... 7
2.2 Installing the Device in Hazardous Locations .......................................................... 8
2.3 Mounting the Device ............................................................................................. 9
2.3.1 Mounting the Device on a DIN Rail ........................................................................ 9
2.3.2 Mounting the Device to a Panel .......................................................................... 11
2.4 Connecting the Failsafe Alarm Relay .................................................................... 12
2.5 Connecting Power ............................................................................................... 13
2.5.1 Connecting High AC/DC Power ............................................................................ 14
2.5.2 Connecting Low DC Power .................................................................................. 16
3 Device Management ........................................................................................................... 19
3.1 Connecting to the Device .................................................................................... 19
3.2 Configuring the Device ........................................................................................ 20
3.3 Resetting the Device ........................................................................................... 20
4 Communication Ports .......................................................................................................... 21
4.1 Copper Ethernet Ports ......................................................................................... 21
4.2 Fiber Optic Ethernet Ports ................................................................................... 23
5 Technical Specifications ...................................................................................................... 25
5.1 Power Supply Specifications ................................................................................ 25
RUGGEDCOM RS900F
Installation Manual, 02/2020, C79000-G8976-1350-04 iii
All manuals and user guides at all-guides.com
Table of Contents
5.2 Failsafe Alarm Relay Specifications ...................................................................... 26
5.3 Supported Networking Standards ........................................................................ 26
5.4 Copper Ethernet Port Specifications ..................................................................... 26
5.5 Fiber Optic Ethernet Port Specifications ............................................................... 27
5.6 Operating Environment ....................................................................................... 27
5.7 Mechanical Specifications .................................................................................... 27
5.8 Dimension Drawings ........................................................................................... 28
6 Certification ......................................................................................................................... 31
6.1 Approvals ............................................................................................................ 31
6.1.1 CSA ..................................................................................................................... 31
6.1.2 CSA/Sira .............................................................................................................. 32
6.1.3 European Union (EU) .......................................................................................... 32
6.1.4 FCC ..................................................................................................................... 33
6.1.5 FDA/CDRH ........................................................................................................... 34
6.1.6 ISED .................................................................................................................... 34
6.1.7 TÜV SÜD ............................................................................................................. 34
6.1.8 RoHS ................................................................................................................... 34
6.1.9 Other Approvals .................................................................................................. 34
6.2 EMC and Environmental Type Tests ..................................................................... 35
iv RUGGEDCOM RS900F
Installation Manual, 02/2020, C79000-G8976-1350-04
All manuals and user guides at all-guides.com
Preface
This guide describes the RUGGEDCOM RS900F. It describes the major features of the
device, installation, commissioning and important technical specifications.
It is intended for use by network technical support personnel who are responsible
for the installation, commissioning and maintenance of the device. It is also recom-
mended for use by network and system planners, system programmers, and line
technicians.
Related Documents
Other documents that may be of interest include:
Document Title Link
RUGGEDCOM ROS Configuration
Manual
https://support.industry.siemens.com/cs/ww/en/view/109757144
Accessing Documentation
The latest user documentation for RUGGEDCOM RS900F is available online at https://-
support.industry.siemens.com . To request or inquire about a user document, con-
tact Siemens Customer Support.
Disclaimer of Liability
Siemens has verified the contents of this document against the hardware and/or soft-
ware described. However, deviations between the product and the documentation
may exist.
Siemens shall not be liable for any errors or omissions contained herein or for conse-
quential damages in connection with the furnishing, performance, or use of this ma-
terial.
The information given in this document is reviewed regularly and any necessary cor-
rections will be included in subsequent editions. We appreciate any suggested im-
provements. We reserve the right to make technical improvements without notice.
Registered Trademarks
RUGGEDCOM ™ and ROS™ are trademarks of Siemens AG.
RUGGEDCOM RS900F
Installation Manual, 02/2020, C79000-G8976-1350-04 v
All manuals and user guides at all-guides.com
all-guides.com
Preface
Training
Other designations in this manual might be trademarks whose use by third parties
for their own purposes would infringe the rights of the owner.
Training
Siemens offers a wide range of educational services ranging from in-house training
of standard courses on networking, Ethernet switches and routers, to on-site cus-
tomized courses tailored to the customer's needs, experience and application.
Siemens' Educational Services team thrives on providing our customers with the es-
sential practical skills to make sure users have the right knowledge and expertise to
understand the various technologies associated with critical communications net-
work infrastructure technologies.
Siemens ' unique mix of IT/Telecommunications expertise combined with domain
knowledge in the utility, transportation and industrial markets, allows Siemens to
provide training specific to the customer's application.
For more information about training services and course availability, visit https://-
www.siemens.com or contact a Siemens Sales representative.
Customer Support
Customer support is available 24 hours, 7 days a week for all Siemens customers.
For technical support or general information, contact Siemens Customer Support
through any of the following methods:
Online
Visit http://www.siemens.com/automation/support-request to submit a
Support Request (SR) or check on the status of an existing SR.
Telephone
Call a local hotline center to submit a Support Request (SR). To locate a lo-
cal hotline center, visit https://w3.siemens.com/aspa_app/?lang=en.
Mobile App
Install the Industry Online Support app by Siemens AG on any Android,
Apple iOS or Windows mobile device and be able to:
• Access Siemens' extensive library of support documentation, includ-
ing FAQs and manuals
• Submit SRs or check on the status of an existing SR
• Contact a local Siemens representative from Sales, Technical Support,
Training, etc.
• Ask questions or share knowledge with fellow Siemens customers
and the support community
vi RUGGEDCOM RS900F
Installation Manual, 02/2020, C79000-G8976-1350-04
All manuals and user guides at all-guides.com
Preface
Contacting Siemens
Contacting Siemens
Address Siemens AG
Industry Sector
300 Applewood Crescent
Concord, Ontario
Canada, L4K 5C7
Telephone Toll-free: 1 888 264 0006
Tel: +1 905 856 5288
Fax: +1 905 856 1995
E-Mail [email protected]
Web https://www.siemens.com
RUGGEDCOM RS900F
Installation Manual, 02/2020, C79000-G8976-1350-04 vii
All manuals and user guides at all-guides.com
Preface
Contacting Siemens
viii RUGGEDCOM RS900F
Installation Manual, 02/2020, C79000-G8976-1350-04
All manuals and user guides at all-guides.com
Introduction 1
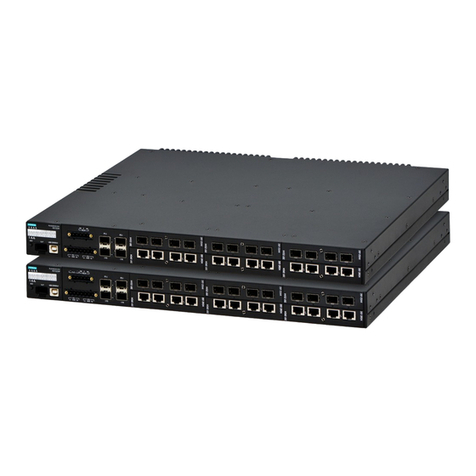
The RUGGEDCOM RS900F is a 9-port utility-grade, fully managed Ethernet switch
specifically designed to operate reliably in electrically harsh and climatically demand-
ing environments.
The RUGGEDCOM RS900F provides a high level of immunity to electromagnetic in-
terference and heavy electrical surges typical of environments found on plant floors
and curb-side traffic control cabinets. An operating temperature range of -40 to 85 °C
(-40 to 185 °F) coupled with hazardous location certification (Class I Division 2), op-
tional conformal coating and a galvanized steel enclosure allows the RUGGEDCOM
RS900F to be placed in almost any location.
The RUGGEDCOM RS900F can be mounted on a DIN rail or panel for efficient use of
cabinet space.
The integrated power supply supports a wide range of voltages (88-300 VDC or
85-264 VAC) for worldwide operability, as well as dual-redundant, reversible polari-
ty, 24 VDC and 48 VDC power supply inputs for high availability applications requir-
ing dual or backup power inputs.
The RUGGEDCOM RS900F 's superior ruggedized design and embedded RUGGEDCOM
Rugged Operating System (ROS) provides superior system reliability and advanced
networking features making it ideally suited for creating Ethernet networks for mis-
sion-critical, real-time, control applications.
1.1 Feature Highlights
Ethernet Ports
• 6 x 10/100Base-TX copper Ethernet ports
• [Optional] Up to 3 x additional 10/100Base-TX copper or 10/100Base-FX fiber op-
tic Ethernet ports
• Multi-mode and single-mode optical transceivers
• Long haul optics allow distances up to 90 km (56 mi)
• Industry standard fiber optical connectors: LC, SC, ST, MTRJ
Rated for Reliability in Harsh Environments
• Immunity to EMI and heavy electrical surges
• Certified for use in explosive environments in accordance with the ATEX directive
• Hazardous Location Certification: Class I Division 2
• -40 to 85 °C (-40 to 185 °F) ambient operating temperature (no fans)
RUGGEDCOM RS900F
Installation Manual, 02/2020, C79000-G8976-1350-04 1
All manuals and user guides at all-guides.com
Introduction
1.2Description
• 20 AWG Galvanized Steel
• DIN or panel mounting options provide secure mechanical reliability
• [Optional] Conformal coated printed circuit boards
Universal Power Supply Options
• Fully integrated power supply
• Universal high-voltage range:
• 125-250 VDC or 100-240 VAC (Hazardous Environments)
• 88-300 VDC or 85-264 VAC (Non-Hazardous Environments)
• Dual low-voltage DC inputs: 24 or 48 VDC
• Terminal blocks for reliable maintenance free connections
• CSA/UL 60950-1 safety approved to 85 °C (185 °F)
1.2 Description
The RUGGEDCOM RS900F features various ports, controls and indicator LEDs on the
front panel for connecting, configuring and troubleshooting the device.
6
2
3
1
5
4
4
7
8
9
1 POWER LED
2 ALARM LED
3 RESET Button
4 [Optional] Copper (10/100Base-TX) or Fiber Optic (100Base-FX) Ethernet Ports
5 Copper (10/100Base-TX) Ethernet Ports
6 RS232 Console Port (Serial)
7 Failsafe Alarm Relay
8 Chassis Ground Connection
2RUGGEDCOM RS900F
Installation Manual, 02/2020, C79000-G8976-1350-04
All manuals and user guides at all-guides.com
all-guides.com
Introduction
1.3Required Tools and Materials
9 Power Supply Terminal Block
Figure1.1 RUGGEDCOM RS900F
POWER LED Illuminates green when power is supplied to the device.
ALARM LED Illuminates red when an alarm condition exists.
Console Port The serial console port is for interfacing directly with the device and
accessing initial management functions. For information about con-
necting to the device via the serial console port, refer to "Connect-
ing to the Device (Page 19)".
RESET Button Shuts down and restarts the device. For more information, refer to
"Resetting the Device (Page 20)".
Communication Ports Communication ports in general receive and transmit data, as well
as provide access to the RUGGEDCOM RUGGEDCOM RS900F Web in-
terface. For more information about the various ports available, re-
fer to "Communication Ports (Page 21)".
Failsafe Alarm Relay Latches to default state when a power disruption or other alarm
condition occurs. For more information, refer to:
•"Connecting the Failsafe Alarm Relay (Page 12)"
•"Failsafe Alarm Relay Specifications (Page 26)"
Power Supply Terminal Blocks Pluggable terminal blocks for connecting one or more power
sources. For more information, refer to "Connecting Power (Page
13)" and "Power Supply Specifications (Page 25)".
1.3 Required Tools and Materials
The following tools and materials are required to install the RUGGEDCOM RS900F:
Tools/Materials Purpose
AC power cord (16 AWG) For connecting power to the device.
Multi-mode and/or single-mode fiber optic cables For connecting the device to a LAN.
CAT-5 Ethernet cables For connecting the device to a LAN.
Flathead screwdriver For mounting the device to a DIN rail.
Phillips screwdriver For mounting the device to a panel.
4 x #6-32 screws For mounting the device to a panel.
1.4 Decommissioning and Disposal
Proper decommissioning and disposal of this device is important to prevent malicious
users from obtaining proprietary information and to protect the environment.
Decommissioning
This device may include sensitive, proprietary data. Before taking the device out of
service, either permanently or for maintenance by a third-party, make sure it has
been fully decommissioned.
RUGGEDCOM RS900F
Installation Manual, 02/2020, C79000-G8976-1350-04 3
All manuals and user guides at all-guides.com
Introduction
1.5Cabling Recommendations
For more information, refer to the associated Configuration Manual.
Recycling and Disposal
For environmentally friendly recycling and disposal of this device and related acces-
sories, contact a facility certified to dispose of waste electrical and electronic equip-
ment. Recycling and disposal must be done in accordance with local regulations.
1.5 Cabling Recommendations
All copper Ethernet ports on RUGGEDCOM products include transient suppression
circuitry to protect against damage from electrical transients and conform with IEC
61850-3 and IEEE 1613 Class I standards. This means that during a transient electri-
cal event, communications errors or interruptions may occur, but recovery is auto-
matic.
Siemens also does not recommend using copper Ethernet ports to interface with de-
vices in the field across distances that could produce high levels of ground potential
rise (i.e. greater than 2500 V), during line-to-ground fault conditions.
1.5.1 Supported Fiber Optic Cables
The following fiber optic cable types are supported under the stated conditions.
Distance (m)Cable Type Wavelength (nm) Modal Band-
width (MHz·km) 100Base-FX 1000Base-SX 10GBase-SR
850 200 — 275 33OM1 (62.5/125)
1300 500 2000 — —
850 500 — 550 82OM2 (50/125)
1300 500 2000 — —
850 1500 — 550 300OM3 (50/125)a
1300 500 2000 — —
850 3500 — 550 400OM4 (50/125)a
1300 500 2000 — —
aLaser optimized.
1.6 Tamper-Evident Security Seals
In compliance with the security requirements of the Federal Information Processing
Standards (FIPS140-2), FIPS-compliant tamper-evident security seals are applied to
potential access points on this device. Security seals provide evidence of unautho-
rized tampering or removal of components.
4RUGGEDCOM RS900F
Installation Manual, 02/2020, C79000-G8976-1350-04
All manuals and user guides at all-guides.com
Introduction
1.6Tamper-Evident Security Seals
NOTICE
Worn, damaged or missing seals must be replaced immediately.
Replacement seals are available for purchase from Siemens. For more information,
contact a Siemens Sales representative.
There are three ways to determine if a security seal has been tampered with:
• The seal is cut or torn
• A pattern is left on the device when the top layer of the seal is removed
• Residue left by the seal is visible on the device under ultra-violet light
For information about the placement of security seals, refer to the RUGGEDCOM
RUGGEDCOM RS900F FIPS 140-2 Non-Proprietary Security Policy [https://support.in-
dustry.siemens.com/cs/ww/en/view/109757984] .
RUGGEDCOM RS900F
Installation Manual, 02/2020, C79000-G8976-1350-04 5
All manuals and user guides at all-guides.com
Introduction
1.6Tamper-Evident Security Seals
6RUGGEDCOM RS900F
Installation Manual, 02/2020, C79000-G8976-1350-04
All manuals and user guides at all-guides.com
Installing the Device 2
The following sections describe how to install the device, including mounting the de-
vice, installing/removing modules, connecting power, and connecting the device to
the network.
DANGER
Electrocution hazard – risk of serious personal injury and/or damage to equip-
ment
Before performing any maintenance tasks, make sure all power to the device has
been disconnected and wait approximately two minutes for any remaining energy
to dissipate.
WARNING
Radiation hazard – risk of serious personal injury
This product contains a laser system and is classified as a Class I LASER PRODUCT.
Use of controls or adjustments or performance of procedures other than those speci-
fied herein may result in hazardous radiation exposure.
IMPORTANT
This product contains no user-serviceable parts. Attempted service by unauthorized
personnel shall render all warranties null and void.
Changes or modifications not expressly approved by Siemens AG could invalidate
specifications, test results, and agency approvals, and void the user's authority to
operate the equipment.
IMPORTANT
This product should be installed in a restricted access location where access can only
be gained by authorized personnel who have been informed of the restrictions and
any precautions that must be taken. Access must only be possible through the use of
a tool, lock and key, or other means of security, and controlled by the authority re-
sponsible for the location.
2.1 Unpacking the Device
When unpacking the device, do the following:
1. Inspect the package for damage before opening it.
2. Visually inspect each item in the package for any physical damage.
RUGGEDCOM RS900F
Installation Manual, 02/2020, C79000-G8976-1350-04 7
All manuals and user guides at all-guides.com
all-guides.com
Installing the Device
2.2Installing the Device in Hazardous Locations
3. Verify all items are included.
NOTICE
If any item is missing or damaged, contact Siemens for assistance.
2.2 Installing the Device in Hazardous Locations
The RUGGEDCOM RS900F is designed to comply with the safety standards for Class I,
Division 2, Zone 2 hazardous locations where concentrations of flammable gases, va-
pors or liquids may be present, as opposed to normal operating environments.
Special Conditions for Safe Use
Installation and use of the device in a hazardous location must meet the following
special conditions for safe use:
• The equipment shall be installed in an enclosure that is considered to be not
accessible in normal operation without the use of a tool providing a degree of
protection of not less than IP54 according to CSA/UL/IEC/EN 60079-0 and CSA/
UL/IEC/EN 60079-15. The enclosure shall have a minimum service temperature
range of -40 to 100 °C (-40 to 212 °F).
• The equipment shall be used in an area of not more than pollution degree 2 as
defined in IEC/EN 60664-1.
• The serial DB9 console port shall only be used in the safe area.
• The equipment must be appropriately connected to safety Earth upon installa-
tion.
Note
For further details of the device's compliance with Class I, Division 2, Zone 2 stan-
dards, refer to "Approvals (Page 31)".
IMPORTANT
Do not disconnect or open equipment unless power has been switched off or the
area is known to be non-hazardous.
IMPORTANT
Débrancher ou ouvrir l'équipment seulement si l'alimnetation a été coupée ou si l'on
sait que la zone ne pose aucun danger.
IMPORTANT
Substitution of the components may impair suitability for Class I, Division 2.
IMPORTANT
Le remplacement de composants pourrait compromettre l'admissibilité à la Classe I,
Division 2.
8RUGGEDCOM RS900F
Installation Manual, 02/2020, C79000-G8976-1350-04
All manuals and user guides at all-guides.com
Installing the Device
2.3Mounting the Device
Sample Hazardous Location Label
The following is an example of the RUGGEDCOM RS900F hazardous location label:
Figure2.1 Compliance Label (Example)
2.3 Mounting the Device
The RUGGEDCOM RS900F is designed for maximum mounting and display flexibility.
It can be equipped with adapters that allow it to be attached to a DIN rail or panel.
IMPORTANT
Heat generated by the device is channeled outwards from the enclosure. As such, it
is recommended that 2.5 cm (1 in) of space be maintained on all open sides of the
device to allow for some convectional airflow.
Forced airflow is not required. However, any increase in airflow will result in a reduc-
tion of ambient temperature and improve the long-term reliability of all equipment
mounted in the rack space.
Note
For detailed dimensions of the device with either DIN rail or panel hardware installed,
refer to "Dimension Drawings (Page 28)".
2.3.1 Mounting the Device on a DIN Rail
The RUGGEDCOM RS900F can be ordered with a DIN rail adapter preinstalled on the
back of the chassis. Use the adapter to mount the device to a standard 35 mm (1.4
in) IEC/EN 60715 or TS35 DIN rail.
RUGGEDCOM RS900F
Installation Manual, 02/2020, C79000-G8976-1350-04 9
All manuals and user guides at all-guides.com
Installing the Device
2.3.1Mounting the Device on a DIN Rail
Mounting the Device
To mount the device to a DIN rail, do the following:
1. Hook the top teeth of the adapter onto the DIN rail.
Note
The adapter features a sliding release with a slot at the bottom for a flathead
screwdriver.
1
2
3
2
1
1
1 DIN Rail
2 DIN Rail Adapter
Figure2.2 Mounting the Device to a DIN Rail
2. Insert a flathead screwdriver into the slot of the sliding release and move it
down.
3. Push the device against the bottom of the DIN rail, then let go of the sliding re-
lease to latch the device.
10 RUGGEDCOM RS900F
Installation Manual, 02/2020, C79000-G8976-1350-04
All manuals and user guides at all-guides.com
Installing the Device
2.3.2Mounting the Device to a Panel
Removing the Device
To remove the device from a DIN rail, do the following:
1. Insert a flathead screwdriver into the slot of the sliding release and move it
down.
1
2
1
1
2
3
1 DIN Rail
2 DIN Rail Adapter
Figure2.3 Removing the Device from a DIN Rail
2. Swing the bottom of the device away from the DIN rail.
3. Lift the device off the DIN rail.
2.3.2 Mounting the Device to a Panel
For panel installations, the RUGGEDCOM RS900F can be equipped with panel
adapters pre-installed on the top and bottom of the chassis. The adapters allow the
device to be attached to a panel using screws.
To mount the device to a panel, do the following:
1. Prepare mounting holes in the panel where the device is to be installed.
RUGGEDCOM RS900F
Installation Manual, 02/2020, C79000-G8976-1350-04 11
All manuals and user guides at all-guides.com

Other Siemens Switch manuals

Siemens SCALANCE XM-400 Instruction sheet

Siemens

Siemens SCALANCE XM-400 Instruction sheet

Siemens RUGGEDCOM RX1501 User manual

Siemens

Siemens RUGGEDCOM RX1501 User manual

Siemens Sivacon S8 User manual

Siemens

Siemens Sivacon S8 User manual

Siemens RUGGEDCOM i803 User manual

Siemens

Siemens RUGGEDCOM i803 User manual

Siemens 3KD 6 Series User manual

Siemens

Siemens 3KD 6 Series User manual

Siemens SIMATIC NET RUGGEDCOM RS920W Technical Document

Siemens

Siemens SIMATIC NET RUGGEDCOM RS920W Technical Document

Siemens 3KC0 2ME00-0AA0 Series User manual

Siemens

Siemens 3KC0 2ME00-0AA0 Series User manual

Siemens SIMATIC NET RUGGEDCOM RS8000A User manual

Siemens

Siemens SIMATIC NET RUGGEDCOM RS8000A User manual

Siemens pointek CLS 100 Administrator guide

Siemens

Siemens pointek CLS 100 Administrator guide

Siemens RUGGEDCOM RS900GP User manual

Siemens

Siemens RUGGEDCOM RS900GP User manual

Siemens SIMATIC NET SCALANCE XF-200G User manual

Siemens

Siemens SIMATIC NET SCALANCE XF-200G User manual

Siemens RUGGEDCOM RS930L User manual

Siemens

Siemens RUGGEDCOM RS930L User manual

Siemens 3KD6-0N Series User manual

Siemens

Siemens 3KD6-0N Series User manual

Siemens S3VA41TDHD User manual

Siemens

Siemens S3VA41TDHD User manual

Siemens SCALANCE X-300EEC Administrator guide

Siemens

Siemens SCALANCE X-300EEC Administrator guide

Siemens 3KF2 F Series User manual

Siemens

Siemens 3KF2 F Series User manual

Siemens RUGGEDCOM RS950G User manual

Siemens

Siemens RUGGEDCOM RS950G User manual

Siemens SIRIUS 3SE6415-1 B0 Series User manual

Siemens

Siemens SIRIUS 3SE6415-1 B0 Series User manual

Siemens SIRIUS 3SE66 CA0 Series User manual

Siemens

Siemens SIRIUS 3SE66 CA0 Series User manual

Siemens 3KE42 User manual

Siemens

Siemens 3KE42 User manual

Siemens SCALANCE MM900 Administrator guide

Siemens

Siemens SCALANCE MM900 Administrator guide

Siemens FDM243H User manual

Siemens

Siemens FDM243H User manual

Siemens SITRANS LVL100 User manual

Siemens

Siemens SITRANS LVL100 User manual

Siemens SITRANS LVL200S User manual

Siemens

Siemens SITRANS LVL200S User manual

Popular Switch manuals by other brands

Eaton NZM3-XAV Instruction leaflet

Eaton

Eaton NZM3-XAV Instruction leaflet

Vivitek NovoConnect NC-X500 quick start guide

Vivitek

Vivitek NovoConnect NC-X500 quick start guide

GESTRA TRS 5-52 installation instructions

GESTRA

GESTRA TRS 5-52 installation instructions

Altinex MX430-101 8x8 user guide

Altinex

Altinex MX430-101 8x8 user guide

COMEPI COND.01 operating instructions

COMEPI

COMEPI COND.01 operating instructions

Kinivo 501BN user manual

Kinivo

Kinivo 501BN user manual

Panasonic S24GPWR Operation manual

Panasonic

Panasonic S24GPWR Operation manual

Cisco Nexus 9236C Hardware installation guide

Cisco

Cisco Nexus 9236C Hardware installation guide

FOR-A MFR-4000 Quick setup guide

FOR-A

FOR-A MFR-4000 Quick setup guide

Hadex D344A quick start guide

Hadex

Hadex D344A quick start guide

GE GEH-4763 installation instructions

GE

GE GEH-4763 installation instructions

ZyXEL Communications GS1920v2 Series user guide

ZyXEL Communications

ZyXEL Communications GS1920v2 Series user guide

Luxart LX944620 Installation

Luxart

Luxart LX944620 Installation

Actron Starter Switch owner's manual

Actron

Actron Starter Switch owner's manual

Extron electronics PVS 405D installation guide

Extron electronics

Extron electronics PVS 405D installation guide

D-Link DE-1824EI user guide

D-Link

D-Link DE-1824EI user guide

steute Ex ZS 80-3G Mounting and wiring instructions

steute

steute Ex ZS 80-3G Mounting and wiring instructions

schmersal AZM300B-ST-1P2P-A-DU manual

schmersal

schmersal AZM300B-ST-1P2P-A-DU manual

manuals.online logo
manuals.online logoBrands
  • About & Mission
  • Contact us
  • Privacy Policy
  • Terms and Conditions

Copyright 2025 Manuals.Online. All Rights Reserved.