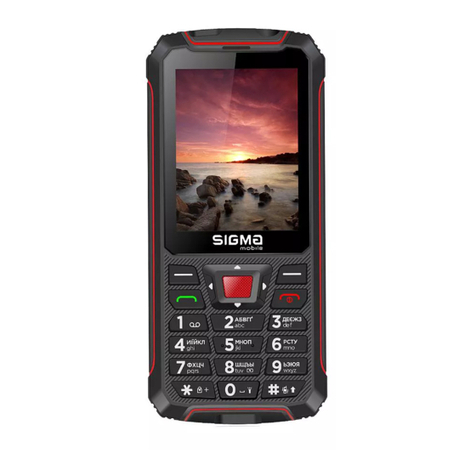
Sigma X-Treme PQ 67 User manual

1
User Manual
Sigma mobile
X-Treme PQ 67
Thank you for purchasing X-Treme PQ 67 mobile
phone.
This User manual contains description of main
functions of mobile phone. The description of functions
may distinguish due to changes in the software and
services provider. The contest of this user manual is
correct. The company reserves the right to change
technical specifications without notice.
1 Key remarks in security techniques
The phone is designed for calling and receiving calls, sending
SMS messages, surfing the Internet (may be unavailable) etc. The
below mentioned instructions are to help you use the phone and
avoid phone malfunction or causing damage to surroundings.
Read carefully the below section and follow instructions. The
phone doesn’t contain hazardous substances.
◆Don’t use mobile phone and don’t charge it’s battery
during thunder on the open air to avoid a lighting strike or other
damage.
◆Keep the battery away from high temperature to avoid
ignition and explosion.
◆Don’t keep the mobile phone, its parts or accessories near
flammable liquids, gases or explosive materials.
◆Follow security requirements. Switch mobile phone off if
using it may cause interference or be dangerous.

2
◆Don’t put the phone to heating devices such as microwave,
hot plate or heater. Phone may explode if overheated.
◆Do not try to open mobile phone's case. Unqualified repair
may cause damage. If phone or any of accessories do not work
properly, please contact the closest authorized service center.
Employees of the center will help you and do the necessary
repair.
◆Use only accessories and charging devices assigned to this
model. Otherwise, there’s a risk of malfunction. The battery
may explode.
◆Please do not short circuit the battery. Accidental short
circuit may occur, if any metal item, e.g coin, clip or pen
connect battery contacts ( metal strips on the
battery). Short circuit may damage the battery.
◆The battery may be charged many times it eventually wears
out. If working time is noticeably shorter, perhaps there is a
need to replace the battery. Don’t use broken USB cable to
charge device.
◆If you use any personal medical devices, please learn
whether the device has sufficient protection from radio
frequencies. Your medic may help you in getting needed
information. Power the phone off in medical institutions if it is
required with inner regulation rules.
◆Don’t use the mobile phone during driving. Follow mobile
phone using recommendations while driving.
◆Keep the phone, all its components and accessories in a
place unavailable for kids and pets. They may damage the
device or accidentally choke with small details.
◆Do not wash the phone during charging. This process can
cause injuries or electric shock. Before using the phone, make
sure that the charger cable is disconnected.

3
◆Do not use potent chemicals, dissolvent or bleaches for
cleaning the phone. Clean it soft cloth, slightly moistened with a
mild soap solution.
◆Do not subject the device under the effect of direct sun.
◆To prevent heavy metals, acids, chemicals leak into water or
ground, utilize battery in recommended way. Juristic
responsibility occurs in case of failure to comply with
legislation.
Obtain utilization procedures information at closest service
center.
WARNING
This phone is protected against dust and water penetration
according to IP68 Standard. This Standard doesn’t state
shock-proof features.
Please, be carefull with USB and audio connector's rubber
caps and follow general rules of safety usage.
Warranty void in case of water penetration due to mechanical
injuries or rubber caps not tightly closed.
2 Phone Appearance and Keys
2.1Phone Appearance
2.1.1 General Information
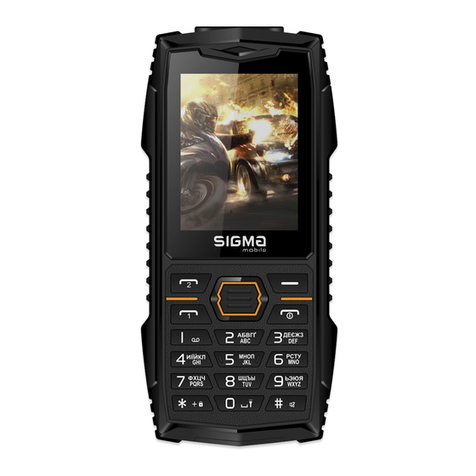
Your device encloses features, such as 2.4 inch Screen, 0.3MP
Camera, Video Player, Audio Player, FM Radio etc. The SIM
card inserted in the slot1 is called Master SIM, and the one in the
slot2 is known as Slave SIM.

4
2.1.2 Device Overview
1
Receiver
11
SMS key
2
Screen
12
Dial/Answer
3
Microphone
13
Volume +/-
4
OK key
14
Speaker
5
Right soft key (RSK)
15
Camera
6
Camera key
16
Side key
7
End/Power key
17
Headset slot
8
Alphanumeric
keypad
18
Torch

5
9
Navigation keys
19
microUSB slot
10
Left soft key (LSK)
2.2 Keys Notes
Keys
Functions
Torch key (LSK)
On or Off torch (press and hold)
Volume key
Adjust volume
Back key
Returns to the upper level, in standby
mode, press the return key to enter the
phone book.
Menu Key
Enter into the entertainment space
Answer key
Answer phone calls from SIM1 card
or SIM2
End/Power key
End or reject the call.
Long press to power off or on
Return to standby menu
OK Key
Press OK to confirm
Enter into the menus of functions
Navigation keys
Arrow keys to indicate the four
directions【↑】【↓】【←】【→】
In the calculator function, press the
middle key to display the results.
Alphanumeric
keys
When dialing, press the corresponding
key to display the corresponding
number.
Under the standby mode, press one or
more number keys in turn, then press
# to quickly find the corresponding
phone number.E.g. press”1””#” to

6
quickly view the first number of SIM
card phone book records.
“*” Key
When dialing, display *, +, P, W
Under the standby mode press LSK
and “*”Key and lock. Press left key
and “*” key to unlock.
Under the state of the input method,
display punctuation.
“#” Key
Under the state of the input method,
can switch to input mode.
When dialing, display “#”
Under the standby mode, long press #
to switch to meeting mode
In the calculator function, input the
decimal point “.”.
3 Start Using
3.1 Install Battery
- After the mobile phone is turned off, use a screwdriver to
unscrew the battery cover and then open the back cover.
- Aim the top of the battery (electrode) at the electrode in the
groove on the back of the phone, press the battery lightly into the
phone.
3.2 Charging
The mobile phone battery is a lithium ion battery, when the
battery power is low, the mobile phone will make a reminder to
you, then you need to charge the mobile phone immediately, if
the battery power exceeds the minimum, the mobile phone will
automatically shut down.
1) Plug one end of the charger into the household power socket,

7
and the other end is inserted into the jack on the lower side of the
mobile phone.
2) When charging the battery, the battery power indicator on the
screen start rolling until the battery is full
3) After the charging is finished, pull out the plug, and the charger
is removed from the power socket.
3.3 Insert SIM Card
The phone supports the same time to insert two SIM cards, the
same installation / removal method.
When the following steps are carried out, make sure that the
phone's power is off, in case of no charge.
- Remove the battery.
- The gold contact of th
e SIM card is
downward, and the
notch of the card
corresponds to the
notch of the card slot,
and the SIM card is put
into the card slot.
Install the battery.
※Remarks:
a) SIM cards and
contacts are easily
damaged by scratching
or bending, so be
careful when using,
inserting, or taking out a SIM card.
b) When not using a mobile phone, please put the SIM card in the
place where children can't get it.

8
c) Please do not make SIM card in contact with static electricity,
dust or water immersion.
d) Before inserting or taking out the SIM card, please turn off the
mobile phone. Otherwise it will damage the memory of SIM card.
※
3.4 Insert T-FLASH Memory Card
It needs to be turned off before the memory card is installed and
removed
- Shut down, remove the battery;
- The thumb nail aims at the half circle gap over the T-Flash card
slot, push the card seat to the right and lift it upward;
- The metal contact of the T-Flash card is downward, and the gap
of the card aims at the gap of the slot, and the T-Flash card is put
into the card slot;
- Press down the card seat and push it to the left to lock.
3.5 Memory Card Catalog Description
My Music:The catalog is used for placing the music in the MP3
format that is played with this phone, the size of music placed is
not limited, the number depends on the capacity of T-Flash card
used (When in the selection of Audio Music (e.g. add music files,
set the alarm clock), the catalog will be automatically created).
Photos:The catalog is used for storing photos using this phone
(the catalog can be automatically created when you take photos).
Videos:This catalog is used for placing video files and images
using this phone (the catalog can be created automatically when
you are recording).
3.6 Power ON/OFF
Make sure the battery has been installed:
1) Switch on the phone, long press the end key until the opening
screen backlight, the phone displays boot animation. After

9
switching on, the phone will automatically search the system.
2) Switch off the phone, long press the end key until the phone
displays shundown animation.
3) Some SIM cards are protected by the PIN Code: if appearance
of inputting PIN code tips, please input the PIN code, and then
press the middle key to determine.
※Remarks:
New account SIM card, PIN code is provided by the network
operator. After entering the error continuously 3 times, SIM card
will automatically lock.
If there is a phone unlock password prompt, please input the lock
password, and then press the middle key to choose < OK >.※
4 Dialed and Received Calls
4.1 Dialed Calls
When dialing, please input the area code and the phone
number in the standby screen. Click the left key to store the
number.
After inputting the number, click the dial key to dial the
number. If the phone has this number in the phone book, it will
show the corresponding users.
Only in the GSM system, even if the phone is locked, the
phone does not have a SIM card or phone can not be registered to
the main system, it still can make an emergency call.
※Remarks:
As with any mobile phone, due to the network coverage or the
transmission of wireless signals, does not necessarily support the
characteristics of the mobile phone, some networks do not even
support 112 emergency call service .Therefore, should not
completely depend on the mobile phone for especially critical
communications (such as emergency medical care). Please

10
consult the local network operators and check.※
4.2 Dialed Calls
When you have a call, the phone will send a corresponding
prompt. If the network is supported, the phone screen will display
the caller's name or number (depending on whether your phone
book has the information of this caller or not).
Missed calls will be displayed on the screen to remind. For
missed calls, can click the detail function key to check the
relevant records of this call, or click the dial key to dial the phone
directly..
The phone supports dual card dual standby single pass, when
there is a call, whether it is a single card / dual card status,
pressing the dial key can answer the call. Press the right key to
select "Mute", switch on or off the microphone of the phone, to
prevent the other side to hear your voice.
※Remarks:
To answer the call, do not start the call transfer function.※
4.3 Hands-free Calls
You can also easily call people in driving or distant places,
starting the hands-free call function will play the sound of
speaking from the phone loudspeaker. In the calling status, press
the middle key to play the sound of speaking from the phone
loudspeaker. Close the hands-free call, press the middle key again
to listen to the sound of speaking in the receiver.
※Remarks:
Because the speaker's volume may be very high, so please do not
place the phone near the ear when using the speaker.※
4.4 Call Waiting
If the network supports the call waiting function and you start it,
you will hear the call waiting tone when talking on the phone.
Pressing the dial key can directly answer the new call, pressing

11
the end key will hang up the new call, only keep the current cal.
4.5 Calling Options
When talking on the phone, press the left key to follow: Hold,
Ending single call, New call, Phone book, Call history,
Messaging, Switch to video call,Sound recorder,Calling
background,DTMF.
5 Message
Message services allow you to read, write, send and receive
texts and pictures, sounds and video messages.
"1" or "2" logo on the back of the message means SIM card 1 or
2. This phone supports to send text messages which the number
of characters is more than a single message limited. The message
that the number of characters exceeds the limit (Cyrillic
characters more than 70, English characters more than 160) will
be sent as two or more chain messages, up to four. In the upper
right of the screen, you can see the message length indicator, the
number of characters which can be inputted and have been
inputted in the message displayed. For example, 20/536 means
the message will be sent as an ordinary text message, and has
inputted the 20 characters.
5.1 Message Creation
When the screen does not display an icon of the unread message
status, it indicates that you receive new SMS, in the inbox you
can access all the messages which have been received. If you turn
on the receiving prompt tone, the phone will also make a prompt
tone to prompt you to view SMS. If your inbox is full, you can't
receive new messages. At this time the standby screen prompts
that the inbox is full, after deleting the SMS, you can continue
receiving new SMS. This function is used to edit the new SMS.

12
Clicking the "options" can add pictures, sounds, videos, and
subjects and send as MMS.
5.2 Message Settings
5.2.1 SMS
This function is used to set up various parameters of SMS. Select
"SIM Card 1 Message Settings", or "SIM Card 2 Message
Settings":
Profile Settings
- Display four profiles after determining to enter:
- “Mode One” setting includes options:
Profile name: Determine entry, edit display name.
SMSC address: This function is used to store the SMS center
number (please consult your network operator). Only after SMS
center number is set you can send SMS.
- “Profile Two, Three, Four” setting is the same as “Profile
One”.
General Settings
Can set parameters in sending SMS status.
-Delivery reports: Under starting this function, after the
transmission of SMS, you will be notified of the
success or failure of delivering SMS in a text message.
-Reply path: When setting the other side’s reply
messages, use the message center number you specify.
Press the left key to select or cancel.
Memory Status: Display the percentage of SIM card and SMS
status.
Preferred Storage: Select the priority storage location of SMS,
SIM card or mobile phone.
5.2.2 MMS
This function is used to set the parameters of MMS.
Data account : choose different servers to send and receive

13
MMS. Select SIM card 1 or 2, select data account.
Common settings
-Edit settings: Whether selecting edit mode is restricted,
whether MMS images need to be reduced, whether to
open the best play time, whether to close the signature
function.
-Send settings: Set the parameters of sending MMS,
including: the period of use, return of sending, read of
sending, priority, interval time and time of sending.
-Retrieval settings: Set parameters of receiving MMS,
including: the main network immediate/ rejection/
delay setting, roaming network as with main network /
delay/ rejection, send reading reports, allow sending
reports.
-Preferred storage: Select priority storage location of
MMS, memory card or mobile phone.
-Memory status: Display used memory, storage space,
and usage rate.
6 Contacts
The contacts lets you store the common names and phone
numbers in the SIM card or the phone, when calling, you can
avoid the trouble of carrying the address book, or when going out
without pen and paper, you can record the desired phone numbers.
The "1" or "2" logo on the right side of the contacts is on behalf
of the contacts stored in SIM card 1 or 2. The contacts without
logos are on behalf of the contacts stores in the phone. Find a
contact record using the first letter of name phonetic or English.
If you want to find the name of "Zhang San", enter "Z", when the
title bar below the screen shows "Z", it will automatically retrieve
to the name list of the beginning of"Z".

14
6.1 Add New Contact
- This function is used to add a new phone number and its related
information to the selected phone book.
- Select “Add New Contact”, enter. Select the storage location in
the phone book: to SIM 1,SIM 2 and the phone.
Select the storage location, enter to record edit menu, input the
name, phone number.
※Remarks:
Only select to store the number in the phone can input the above
content, if you choose to store in the SIM card, you can only input
the name and a default phone number.※
Phonebook Settings
Setting the parameters of contacts.
Preferred Storage: Set the default priority storage location of
contacts, you can choose to include: SIM card 1, SIM card 2 and
mobile phone.
Speed dial: In order to facilitate the users to dial, the phone
provides the speed dial function, you can set up to 8 speed dials.
After a phone number is set to speed dial, in the standby statue,
long press the corresponding number key "2~9" to dial out the
corresponding phone number. To use this feature, you must firstly
set the status to open.
After selecting "speed dial list" and determining, display the
dial list. Display the corresponding number keys "2~9" = the
name of the phone record, the numbers without being set to speed
dial are displayed as "2~9 < blank >". Press the middle key to edit
or delete the numbers.
My Number: Edit and send my number.
Extra Number: This function is used to store the fixed dialing
numbers in SIM card 1, SIM card 2.
Memory Status: Display used storage and total storage of SIM

15
1, SIM 2, the phone.
Copy Contacts: Select copy methods, press the left key and
determine to copy all records in SIM card 1, SIM card 2 and all
records in the phone each other. If the phone book storage of SIM
card 1, SIM card 2 or the phone is full, the screen will appear
prompt information.
Move Contacts: Select move methods, press the left key and
determine to move all records in SIM card 1, SIM card 2 and all
records in the phone each other. If the phone book storage of SIM
card 1, SIM card 2 or the phone is full, the screen will appear
prompt information.
Delete All Contacts: The screen displays all locations which can
be removed: Delete all contacts after selecting from the SIM card
2, the SIM card 1, the phone.
7 Call Center
This function automatically records the recent dialed, received or
missed phone numbers, and carries all kinds of operations on
these numbers.
7.1 Call history
The "1" or "2" logo on the right side of each call record is on
behalf of the call records of the SIM card 1 or 2. It can display
missed calls, dialed calls, received calls and all calls. Pressing the
left key can perform operations on numbers: examine, dial, send
a message, store to your phone book, add to the blacklist, before
dialing, edit, delete, delete all, advanced options and the other
operations.
7.2 Call Settings
7.2.1 SIM Card 1 Call Settings
7.2.1.1 Call Waiting
It’s used to set that the phone makes a prompt tone to prompt a

16
new call in the course of calling. Turn on this function, in the call
process, if there is a new call, the network will notify the phone
to make a corresponding prompt tone, you can decide whether to
answer the new call. If this function is closed, when a new call,
the phone will not make the tone, the caller will hear a busy signal
(if you open the call transfer function, the call is automatically
transferred to another phone). You can turn on, close or inquire
the call waiting function.
7.2.1.2Call divert
This function can transfer all received calls to the other specified
phone numbers. When you can not answer the call, you can turn
on this function.
7.2.1.3Call barring
The function is used for setting the phone to dialing or answering
calls optionally. Setting the function needs to input the limit
password provided by the network operator.
7.2.1.4 Line Switching
Line switching is a network service. If your SIM card supports
and opens one card dual number function, you can select the line
1 or line 2 to call; If without the application of one card dual
number service, select "line 1" for the normal use of
dialing/receiving calls, selecting "line 2" cannot dial calls. This
menu item will not be available when the SIM card does not
support this service.
7.2.2 SIM Card 1 Call Settings
As with “SIM Card 1 Call Settings”
7.2.3 Advanced Settings
7.2.3.1 White lists
After setting the number of white list, calls whose numbers are
not in the white list can not be got through. The function can be
opened or closed.

17
7.2.3.2 Auto redial
After opening this function, when fail to dial, it will be redialed
and do not need to dial manually.
7.2.3.3 Calling background
After opening , it can be switched to background sounds under
variety of circumstances in the call.
7.2.3.4 Call time reminder
Open this function, then in the call process, there will be a voice
of prompting call time. You can choose one prompt, or cycle
prompt.
7.2.3.5 Auto quick end
If opening the function to the limit of time, in the call process, the
call will be automatically disconnected when the limit is reached.
7.2.3.6 Reject by SMS
After opening, in the call interface you can indirectly reject and
reply the call number with SMS.
7.2.3.7 Connection Notice
Open this function, and there is a prompt tone after the call is got
through.
7.2.3.8 Answer Mode
Select any key to receive or automatic answer in the headset mode.
8 Multimedia
8.1 Camcorder
Camera function provides you with the convenience of
collecting photos, you can reduce the trouble of traveling with a
camera, you can also lift the regret that you forget to bring a
camera in some places, shoot when you want to shoot. Video
recorder function is used for recording sound films.
After entering, the camera starts to work, a preview of the
object to be shot appears in the screen.

18
Shortcut Key Operation:
- Press the middle key to take photos, and then pressing the left
key can select the current photo forwarded "As multimedia
message””Via Bluetooth” or “Delete";
- Press up/down arrow key to switch to camera and video function;
- Press left/right arrow key to adjust EV value;
After taking photos, the photos will be automatically
named.JPG format file. Video files will be automatically
named.3GP format files and saved by the phone.
8.2 Image Viewer
Show the image list, press the left key to enter < option >, to view
the photos, image information, browse style, send, use as, rename,
delete, sort by, delete all files, storage.
8.3 Video Player
This function is used to play video files. When the play list is
empty, firstly choose the storage location, and then choose to play
the film file. Show the animation video list on the mobile phone,
select a video file, press the middle key to select < play >, play
the current video file, press the right key to end play and return to
the list. Support AVI/MP4/3GP format files.
8.4 Audio Player
Play sound files stored in the memory card or phone.
After entering the play interface, press icon / to play/stop,
press left and right navigation key to choose the previous one or
the after one (icon / ) music file.
8.5 Sound Recorder
The function provides personalized voice recording, and can
set the sound recorded successfully as the prompt tone of
incoming calls and SMS, also can be used in the media player.
Select sound recorder and enter, press the left key and enter <

19
option >, select "New record", begin recording, the screen
displays the prompt information of recording time during the
recording, press the left key to pause recording, and then press
the left key to resume recording. Press the right key to stop
recording sound, can be determined to save this recording, and
return to the list of recordings. Recorded sound files are stored
as .Amr format by default.
8.6 FM Radio
After entering the menu, the phone will display the frequency of
broadcast channel searched or defaulted. At this time you can use
the left / right arrow key to select the interested channel for
listening to the broadcast channel, adjust the volume by pressing
the key*/# or side key. When listening to the radio. You also can
press the down arrow key to stop playing, press the right key to
exit the radio.
Note: Before using the FM radio, connect the wired headset.
9 Settings
Settings mean some common functions in the phone.
9.1 Dual SIM settings
You can choose SIM card 1 or SIM card 2 or the two card to open
in mode settings.
9.2 Phone Settings
9.2.1 Time and Date
Set the time and date of the phone.
9.2.2 Schedule Power On/Off
It is used to set schedule power on/off of the phone. When the
system time reaches to the predetermine value, the phone will
open or close automatically.
9.2.3 Phone Language
You can choose the current used language of the phone.

20
9.2.4 Pref. Input Method
Choose the default input method when inputting characters.
Set parameters displayed in the screen under the standby statue.
9.2.5 Dedicated Keys
Set the menu function items entered quickly by pressing the
up/down/left/right under the standby mode. Select the dedicated
navigation function key, such as "up key", enter the list of alarm
clocks. You can set "down key", "left key", "right key" in the
same way.
9.2.6 Auto Update Time
After opening the function, the system will update time
automatically in accordance with the network time.
9.2.7 Flight Mode
No need to switch off the phone during the flight, you still can
use part of non communication functions in the phone. At the
same time the communication function of the phone will end
automatically, and not affect the normal aircraft navigation.
9.2.8 Misc. Settings
Set LCD backlight and length of time.
9.3 Network Settings
This function is used to set the method of searching for network
and new network. Select SIM card 1, or SIM card 2, determine
the entry.
Network selection: Set the network search parameters:
New search : Start searching.
Select network: Search network, find and display all networks
of the site.
Select mode: Set “Automatic” or “Manual” mode. Auto mode,
the mobile phone is automatically connected to the first available
network when roaming. Manual mode, browse all available
networks, then you can manually select.
Other Sigma Cell Phone manuals

Sigma
Sigma X-style 33 Steel User manual

Sigma
Sigma X-style 35 User manual

Sigma
Sigma X-treme PQ51 User manual

Sigma
Sigma X-style 17 User manual

Sigma
Sigma 2-5 User manual

Sigma
Sigma X-Treme PQ 68 Netphone User manual

Sigma
Sigma X-treme PQ28 User manual

Sigma
Sigma X-style 24 User manual

Sigma
Sigma X-treme IO68 User manual

Sigma
Sigma Comfort 50 SOLO User manual

Sigma
Sigma Comfort 50 Mini 4 User manual
Sigma
Sigma X-style 241 User manual

Sigma
Sigma X-STYLE 36 POINT User manual

Sigma
Sigma X-style 351 User manual

Sigma
Sigma X-treme DR68 User manual

Sigma
Sigma X-Style S5501 User manual

Sigma
Sigma x-treme PQ24 User manual

Sigma
Sigma Comfort 50 User manual

Sigma
Sigma X-treme IO68 User manual
Sigma
Sigma X-style 31 User manual