manuals.online logo
Brands
  1. Home
  2. •
  3. Brands
  4. •
  5. Sigtronics
  6. •
  7. Intercom System
  8. •
  9. Sigtronics SDB-800 User manual

Sigtronics SDB-800 User manual

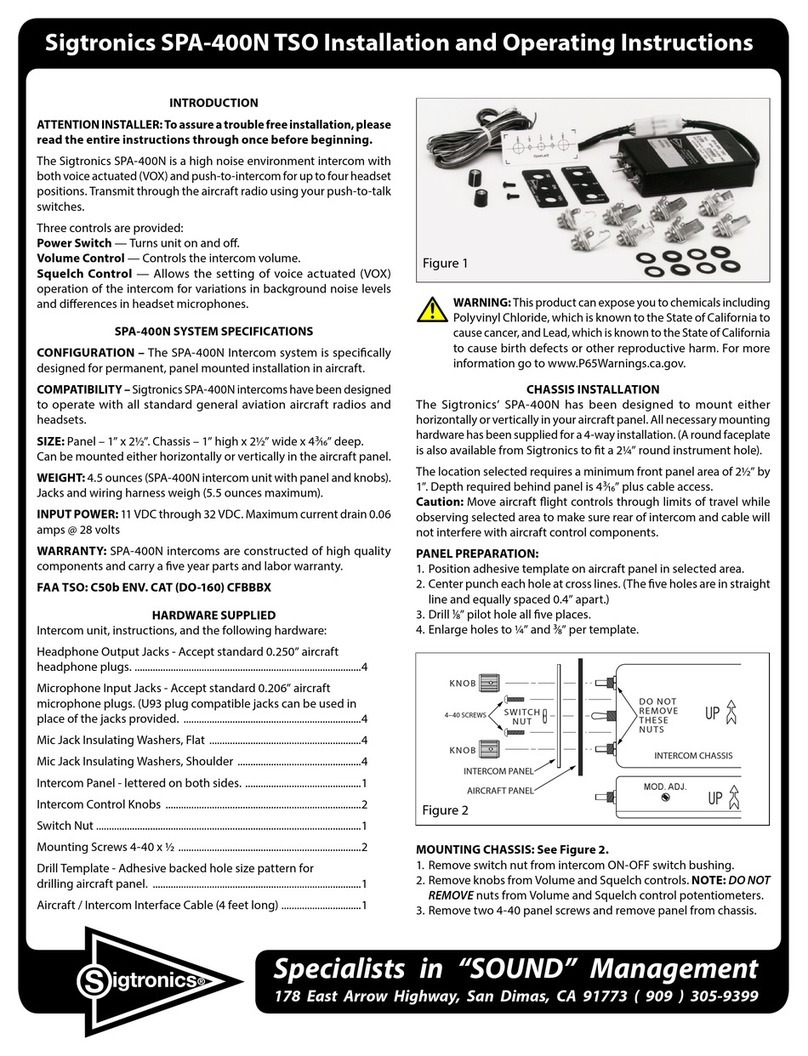
Sigtronics SDB-800 Installation and Operating Instructions
Specialists in “SOUND” Management
178 East Arrow Highway, San Dimas, CA 91773 ( 909 ) 305-9399
The Model SDB-800 is an intercom system specically designed
for permanent installation in aircraft using dual (separate) audio
buss’ systems (i.e. aircraft with two audio panels.) The SDB-800
allows both pilots, operating separate radios, the convenience of
voice activated inter cabin communication while operating their
respective radio systems independently. Optional passenger
connections allow up to six “intercom only” positions.
The system consists of two modied SPA-400 units with their
own operating controls and radio interface. An interconnect line
allows intercom communication between the two units yet keeps
the two VHF audio systems separate. When transmitting through
their respective radios, each side will hear the other’s transmission
unless transmitting simultaneously. Radio transmission is also
possible through either unit even when the units are “OFF.”
The SDB-800 may also be used as a dual intercom system in
aircraft without dual audio panels. This is convenient where it
is desired to have separate conversations between pilots and
passengers.
GENERAL FEATURES AND SPECIFICATIONS
Voice Activated: Allows “hands free” intercommunication
between pilot(s) and passengers. Start speaking and the
intercom instantly turns on to relay your message clearly to the
other headsets; stop talking and it turns o to reduce background
noise. There is no need to raise your voice or turn your head
anymore!
Transmit Capability: Both pilot and co-pilot can transmit to
air trac control via push-to-talk switches and headset boom
microphones. The intercom function is automatically disabled
during transmitting, so that only the voice of the person
transmitting can be heard.
Radio Monitoring Capability: Radio output can be heard
whether intercom power switch is “ON”or“OFF.”
Compatibility: All Sigtronics’intercoms operate with all standard
aircraft headsets.
Fail safe: Provides ability to transmit through aircraft radio even
if the intercoms are “OFF.”
Weight: 4.5 ounces each (main chassis with panel and knobs.)
Jacks and wiring harness for four headset positions weigh 5.5
ounces.
Size of each unit: Panels - 1” x 2.5”. Chassis - 4” deep, 2.5” wide,
1” thick. They can be mounted either horizontally or vertically in
the aircraft panel.
Input Power: 12V through 28 VDC. Maximum current drain for
both units is 1/10 amp. (0.1A).
Distortion: Less than 1% total harmonic distortion.
Environmental: Meets requirements of TSO-C50b.
Warranty:The SDB-800 is constructed of high quality components
and carries a one year parts and labor warranty.
A Voice Activated Intercom System for Aircraft with Dual Audio Panels!
CHASSIS INSTALLATION
The Sigtronics’Model SDB-800 consists of two complete units.
Figure 4 shows that each unit is completely independent from
the other except for power, ground, and the yellow wire. Each
half of the SDB-800 is designed to mount either horizontally
or vertically in your aircraft panel. All necessary mounting
hardware is supplied for 2-way through 8-way installation.
Hardware Supplied:
Eight Headphone Output Jacks - Accept standard .250”aircraft
headphone plug.
Eight Microphone Input Jacks - Accept standard .206” aircraft
microphone plugs (i.e. carbon, amplied dynamic or electret).
(U93 plug compatible jacks can be used in place of the jacks
provided).
Mike Jack Insulating Washers: 8 shoulder and 8 at.
Two SDB-800 intercom panels lettered on both sides.
Control Knobs (4), Switch Nuts (2) 4-40 Screws (4)
Two drill templates: Hole size pattern for drilling aircraft panel.
Two Aircraft / Intercom interface cables (4 feet long)
UNIT PLACEMENT
For ease of operation we recommend that you place the
pilot’s SDB unit on the pilot’s side of the aircraft panel and
the copilot’s unit should be placed on his side. This eliminates
any confusion about which half of the SDB-800 system each
pilot has to operate. Also, the location selected for each SDB
unit requires a minimum front panel area of 2-1/2”by 1- 1/16”.
Depth required behind panel is 4- 3/16”plus cable access.
CAUTION: Move aircraft ight controls through limits of travel
to make sure rear of intercoms and cables will not interfere with
aircraft control components.
PANEL PREPARATION:
1. Position adhesive template on aircraft panel in selected
areas.
2. Center punch each hole at cross lines. (The ve holes are in
a straight line and are equally spaced 0.4” apart).
3. Drill 1/8” pilot hole all ve places.
4. Enlarge holes to 1/4”and 3/8”per template.
5. Repeat above for the other SDB unit
MOUNTING CHASSIS: See Figure 2
1. Remove nut from SDB unit ON-OFF switch bushing.
2. Remove the 4-40 screws on either side of switch.
3. Remove Volume and Squelch control knobs. NOTE: DO
NOT REMOVE nuts from Volume and Squelch control
potentiometers.
4. Insert SDB unit from rear of aircraft panel with appropriate
arrow pointing upwards.
5. Install panel and lightly thread nut on to ON-OFF switch.
Nuts and washers on Volume and Squelch controls should
t inside the 3/8” diameter holes.
6. Install two 4-40 screws through holes in intercom panel.
Tighten ON-OFF switch nut.
7. Install knobs on Volume (VOL) and Squelch (SQ) control
shafts using .050” Allen wrench.
8. Repeat for other SDB unit.
MOUNTING HEADPHONE AND MICROPHONE JACKS
1. Locate mounting areas. (One mike and one headphone
jack for each headset). Again, make sure the jacks will not
interfere with aircraft control components.
2. Drill 3/8” diameter holes for headphone jacks and install.
3. Drill 1/2” diameter holes for mike jacks and install with
insulating washers supplied. (See Figure 3).
NOTE: If the aircraft already has pilot headset jacks, they can
be used for the intercoms, but they must be rewired as follows:
Mike Jack:
1. Remove any existing wires from the tip, ring, and barrel
connections.
2. Connect the intercom white / black wire to the ring terminal.
3. Connect one end of a ground wire to the barrel terminal of
the mike jack and connect the other end to Point A.
4. Install insulating washers as necessary if the barrel of the
mike jack is mounted in metal. These are not necessary for
function, however they reduce the possibilities of ground
loop induced noise.
For the headphone jack: add the appropriate blue wire to
the tip terminal. No need to remove existing wires on the
headphone jack.
INTERCOM
PANEL
4–40 SCREWS
SWITCH
NUT
INTERCOM
DO NOT REMOVE
THESE NUTS
KNOB
KNOB
AIRCRAFT
PANEL
FIGURE 2
SHOULDER
WASHER
FL AT
INSULATED
WASHER
FL AT
METAL
WASHER
NUT
AIRCRAFT
PANEL
RING
BARREL
TIP
FIGURE 3
WIRING INSTRUCTIONS
Figure 4 andTable 1 show how to make the wiring connections.
If you need longer wire lengths, use good quality hook-up wire,
22 gauge or larger. Shielded audio wire can be used, however,
it is not necessary. This can simplify the wiring process.
*1. The blue wire from Pin 3 must be connected to the aircraft
radio headphone output - NOT the speaker output.
*2. Connect all intercom mike jack grounds to a single aircraft
chassis ground point - Point“A”- See Figure 4. (Use the black
washers supplied to insulate intercom mike jacks from
aircraft chassis ground).”
*3. Do NOT connect transmit switches to white (key) wire.
*4. Red wire may be connected to either 12V (I 4V) or 24V (28V)
power source. No switching or adjustments are necessary
to operate from either source.
*5. Tan wires (pins 8 and 9) and white / orange wires (pin 10)
are only used on installations that require extra intercom
positions.
**NOTE: Use this intercom central grounding point so that no unwanted
electrical noise, such as alternator whine or strobe noise, will be induced into
the intercom system through the grounds. Each intercom mike jack barrel
should be insulated from ground and connected back to Point ”A” on its
individual ground wire. Similarly, both intercom ground wires (pin 4) and the
push-to-talk switch grounds should be connected back to Point “A”. It is not
necessary, however, to connect the headphone jack barrels to Point “A”. They
can be grounded where you mount them or some place nearby.
Table 1
Pin Wire Color Function Connection
1 White / Black Pilot Mic Input Ring Terminal of Pilot Intercom Mic Jack
2 White / Red Pilot Transmit Switch Input Pilot Transmit Switch (PTT) (Switch to Ground to Transmit)
3 Blue *1 Headphone–Radio & Intercom Output Radio Headphone Output & Intercom Headphone Jacks
4 Black **2 Intercom Central Grounding Point Aircraft Chassis Ground
5White *3 Radio Transmit Key Control Output Tip Terminal of A/C Hand Mic Jack or Key Input of Audio Panel
6Brown Transmit Mic Audio Output Ring Terminal of A/C Hand Mic Jack or Mic Input of Audio Panel
7Red *4 12 thorough 24 VDC Power Input Intercom Circuit Breaker
8Tan *5 Passenger Mic Input Ring Terminal of Passenger Intercom Mic Jack
9Tan *5 Passenger Mic Input Ring Terminal of Passenger Intercom Mic Jack
10 White / Blue No Connection
11 White / Orange Passenger Mic Input Ring Terminal of Passenger Intercom Mic Jack
12 Yellow Bidirectional Intercom Link To Other Intercom Yellow Wire
* See Wiring Instructions
INTERCOM
CIRCUIT
BREAKER
(1 AMP)
AIRCRAFT CHASSIS GROUND
SDB-800
INSTALLATION
SCHEMATIC
FIGURE 4
PILOT'S
AIRCRAFT RADIO
BUSS
CO-PILOT'S
AIRCRAFT RADIO
BUSS
PILOT'S
MIC
JACK
CO-PILOT'S
MIC
JACK
PILOT'S
HDPH
JACK
CO-PILOT'S
HDPH
JACK
MIC AUDIO
MIC KEY
HDPH AUDIO
MIC AUDIO
MIC KEY
HDPH AUDIO
TIP
BARREL
RING
BARREL
TIP
TO
(12) YELLOW
(3) BLUE
(5) WHITE
(6) BROWN
(7) RED
(4) BLACK
PILOT'S
ICS
CO-PILOT'S
ICS
PILOT'S
PTT
SWITCH
CO-PILOT'S
PTT
SWITCH
( INTERCOM
CENTRAL
GROUND
POINT )
(2) WHITE/RED
(10) WHITE/BLUE, N.C.
TO
(11) WHITE/ORANGE
(8) TAN
RING BARREL
TIP
TIP
BARREL
RING
TIP
BARREL
RING
(9) TAN
PASSENGER
MIC JACKS
PASSENGER
MIC JACKS
PASSENGER
HDPH JACKS
PASSENGER
HDPH JACKS
TO
TO
TO
A
A
TIP
TIP
TIP
BARREL
BARREL
BARREL
TIP
TIP
TIP
BARREL
BARREL
BARREL
RING
RING
RING
TIP
TIP
TIP
BARREL
BARREL
BARREL
A
A
TO
TO
TO
(11) WHITE/ORANGE
(9) TAN
(8) TAN
(4) BLACK
(7) RED
(3) BLUE
(5) WHITE
(6) BROWN
(12) YELLOW
(1) WHITE/BLACK
A
TIP TIP RING
BARREL
BARREL
(1) WHITE/BLACK
(10) WHITE/BLUE, N.C.
(2) WHITE/RED
A
A
TO
A
A
A
TO
A
FINAL CHECK-OUT AND ADJUSTMENTS
After installing the units, again check that the SDB chassis, jacks,
and wiring harnesses are clear of all aircraft operating controls and
cause no interference with them. Check out the SDB unit functions
by following the instructions:
1. Plug in all the headsets mike and phone plugs into the respective
intercom jacks. Put on headset/s and position the boom mike close
to the mouth, as is the practice with a hand-held mike. Voice clarity
is best when mike is at one side of the mouth and 1/4” from the lips.
2. To assure that the aircraft radios, pilot’s headsets, and PTT switches
are functioning properly, turn both SDB units’ ON/OFF switches to
“OFF” position. Set both audio panels to “Headphone” position,
then turn on the aircraft radios as usual, and verify that the pilot
and co-pilot can hear the radios and can transmit using their
respective push-to-talk switches and headsets. Aircraft radios
and both audio panels should operate exactly as they did before
the SDB-800 system was installed. Aircraft radios reception should
also be heard in the passenger headsets (if applicable). Intercom
functions will not work when both units are turned OFF.
3. Turn both pilot and co-pilot SDB units to the ON position. Turn
the squelch controls of both units to full clock-wise position.
Set both unit’s volume controls to mid position. Verify that all
headset positions can now intercom to each other, including the
passengers, if used.
4. Verify that with both SDB units ON, both pilots can independently
operate the aircraft radios. (Check that the pilot can transmit and
receive properly on the radios selected on the pilot’s audio panel.
Do a similar check on the co-pilot’s side.
5. Radio / Tower Transmit Check: If there is over-modulation (garbled)
or weak transmissions over the aircraft radio, an appropriate
adjustment can be made. There is a small, square, adjustable
trimmer potentiometer inside each of the two SDB units. These
adjust the mike outputs to the aircraft radios. It is accessible
through a hole in the side of each case and is marked “Mod. Adj.”
It can be adjusted with a screwdriver. Clockwise rotation increases
the output level to the aircraft radio mike input. Counter-clockwise
rotation decreases modulation level.
This adjustment sometimes needs to be made after initial installation
of the intercom or if a new radio is installed at a later date. (The output
is set for unity gain at Sigtronics). If adjustment is necessary, it should
be done one at a time. For example, rst set the pilot’s Mod. Adj. After
the pilot’s side is set satisfactorily then adjust the co-pilot’s unit.
This concludes the system check-out. Refer to the following operating
instructions for proper use and other operating modes of the
Sigtronics SDB-800 intercom system.
OPERATING INSTRUCTIONS
The Sigtronics’ SDB-800 is a voice actuated intercom for dual audio
buss’ aircraft with “transmit through the aircraft radio capability”
using your push-to-talk switches. Each intercom has three controls.
Power Switch - Turns unit on and o and switches the pilot’s mike
direct to the radio in the “o” position.
Volume Control - Controls the intercom volume.
Squelch Control - Controls the threshold of amplier turn-on. This
adjusts for variations in background noise found in dierent aircraft.
Each system will function as an independent intercom with pilot and
co-pilot having their own ON/OFF switch. When both intercoms are
ON, pilot, co-pilot, and 6 passengers (if used) can intercom. Also, when
either pilot or co-pilot transmit over the radio, they will hear each
other. If both transmit simultaneously, neither will hear the other. The
purpose of this feature is to allow independent VHF communication.
Transmitting is also possible with the intercom OFF.
CAUTION - As is standard practice with all aircraft avionics equipment,
be sure that the aircraft radio master switch is OFF when you start up
the aircraft engine.
INTERCOM OPERATION
A. First set both SDB ON/OFF switches to the “ON” position.
B. Turn both SDB unit volume controls to the 9 o’clock position
and both squelch controls all the way up (clockwise). Notice the
intercom is now continually activated and you should be able to
talk between headsets.
C. To adjust the intercom squelch controls for voice activated
operation (VOX), it is helpful to have some background noise
present. It may also be necessary to turn up the intercom volume
controls. Turn both intercom squelch controls all the way counter
clockwise. Now, without speaking, rotate one of the squelch
controls clockwise until you hear the background noise in your
headset. Next, using the same control, rotate counter clockwise
small, incremental amounts until the background noise disappears.
(This procedure is necessary because the squelch is a “fast on, slow
o” system). The squelch control is now set on that intercom unit.
D. Adjust the other intercom squelch control similarly by turning
it clockwise until you hear background noise. Rotate counter
clockwise incremental amounts until the background noise
disappears. Small adjustments may be necessary if aircraft
background noise changes signicantly - such as from idle to
maximum power.
RADIO TRANSIT MODE
Because of the dual intercom design of the SDB-800, transmitting
from both pilot and co-pilot positions is possible simultaneously
and one-at-a-time. Each pilot selects the radio he wishes to use via
his audio panel. When he presses his PTT switch, his headset mike
is routed through the intercom to the radio he selected. Only his
mike will be live. The microphone of any passengers connected to
the pilot’s side of the SDB-800 system will be muted when the pilot
transmits. Similarly, when the co-pilot transmits, only the co-pilot’s
mike signal will go out on the radio selected by the co-pilot. When
transmitting, the pilots will hear their own voice via the aircraft radio
side-tone return. If the radio does not provide transmit side-tone, then
they will not hear their voice. (A minor modication to the SDB unit
will enable it to simulate side-tone).
RADIO MONITORING
Radio monitoring is automatic. The radio monitor circuit is always
active; even with SDB unit power switch OFF. Each pilot will only hear
the radio selected by his respective audio panel.
SOLO FLIGHTS
The intercoms may be turned o during solo ights. The pilot will
still hear the aircraft radio, since this circuit is always active, and may
transmit to ATC via his push-to-talk switch.
BACK-UP (Fail safe)
If a problem is suspected in the intercom, simply turn it o. You will still
receive the aircraft radio(s) as normal and will be able to transmit from
the pilot’s position. You may also use the hand mike, however, the SDB
unit should be turned o and you should unplug your boom mike
from the mike jack. (Leave headphone plugged in for radio reception)
7-30-2021 sdb-800.pdf

Other Sigtronics Intercom System manuals

Sigtronics SCI-S6 User manual

Sigtronics

Sigtronics SCI-S6 User manual

Sigtronics UltraSound US-LAC4-A User manual

Sigtronics

Sigtronics UltraSound US-LAC4-A User manual

Sigtronics SCI-4 User manual

Sigtronics

Sigtronics SCI-4 User manual

Sigtronics RES-2 User manual

Sigtronics

Sigtronics RES-2 User manual

Sigtronics SPA-600N User manual

Sigtronics

Sigtronics SPA-600N User manual

Sigtronics US-12S User manual

Sigtronics

Sigtronics US-12S User manual

Sigtronics UltraSound US-LAC4 User manual

Sigtronics

Sigtronics UltraSound US-LAC4 User manual

Sigtronics Sport 200S User manual

Sigtronics

Sigtronics Sport 200S User manual

Sigtronics SPA-4S User manual

Sigtronics

Sigtronics SPA-4S User manual

Sigtronics SPA-400 User manual

Sigtronics

Sigtronics SPA-400 User manual

Sigtronics Sport 200 User manual

Sigtronics

Sigtronics Sport 200 User manual

Sigtronics SPA-600 User manual

Sigtronics

Sigtronics SPA-600 User manual

Sigtronics SPA-600 User manual

Sigtronics

Sigtronics SPA-600 User manual

Sigtronics SPA-600N User manual

Sigtronics

Sigtronics SPA-600N User manual

Sigtronics UT-12D User manual

Sigtronics

Sigtronics UT-12D User manual

Sigtronics SPA-4S User manual

Sigtronics

Sigtronics SPA-4S User manual

Sigtronics SCI-S4 User manual

Sigtronics

Sigtronics SCI-S4 User manual

Sigtronics SPA-600 User manual

Sigtronics

Sigtronics SPA-600 User manual

Sigtronics SPA-4S User manual

Sigtronics

Sigtronics SPA-4S User manual

Sigtronics UT-4D User manual

Sigtronics

Sigtronics UT-4D User manual

Sigtronics SPA-400 User manual

Sigtronics

Sigtronics SPA-400 User manual

Sigtronics Sport 200 User manual

Sigtronics

Sigtronics Sport 200 User manual

Sigtronics Transcom II User manual

Sigtronics

Sigtronics Transcom II User manual

Sigtronics SPA-400N User manual

Sigtronics

Sigtronics SPA-400N User manual

Popular Intercom System manuals by other brands

SImx CHM0155 installation instructions

SImx

SImx CHM0155 installation instructions

Commend SIP-WS 211V DA Short Reference

Commend

Commend SIP-WS 211V DA Short Reference

urmet domus Signo 1740/95 user manual

urmet domus

urmet domus Signo 1740/95 user manual

Intelligent Home MR9L user manual

Intelligent Home

Intelligent Home MR9L user manual

Comelit Magis  6402E Technical manual

Comelit

Comelit Magis 6402E Technical manual

RTS WMS300 Technical data

RTS

RTS WMS300 Technical data

golmar PE295/1 instruction manual

golmar

golmar PE295/1 instruction manual

XtendLan DPM-IP700 quick start guide

XtendLan

XtendLan DPM-IP700 quick start guide

Oracle FRONTDOOR OFD-614 manual

Oracle

Oracle FRONTDOOR OFD-614 manual

Fermax Placa Milo Installation and Usage Guide

Fermax

Fermax Placa Milo Installation and Usage Guide

AES GSM-3AB user manual

AES

AES GSM-3AB user manual

Elite Security Products Enterview 5 instructions

Elite Security Products

Elite Security Products Enterview 5 instructions

IPS EggBell instruction manual

IPS

IPS EggBell instruction manual

Panasonic VL-SVN511 Series installation guide

Panasonic

Panasonic VL-SVN511 Series installation guide

Sonetics SON104 Installation & operation manual

Sonetics

Sonetics SON104 Installation & operation manual

Aiphone Kc-1hrd installation manual

Aiphone

Aiphone Kc-1hrd installation manual

Aiphone IP-EWST instructions

Aiphone

Aiphone IP-EWST instructions

Guinaz A2410 installation guide

Guinaz

Guinaz A2410 installation guide

manuals.online logo
manuals.online logoBrands
  • About & Mission
  • Contact us
  • Privacy Policy
  • Terms and Conditions

Copyright 2025 Manuals.Online. All Rights Reserved.