manuals.online logo
Brands
  1. Home
  2. •
  3. Brands
  4. •
  5. Simer
  6. •
  7. Water Pump
  8. •
  9. Simer OD6601G Series User manual

Simer OD6601G Series User manual

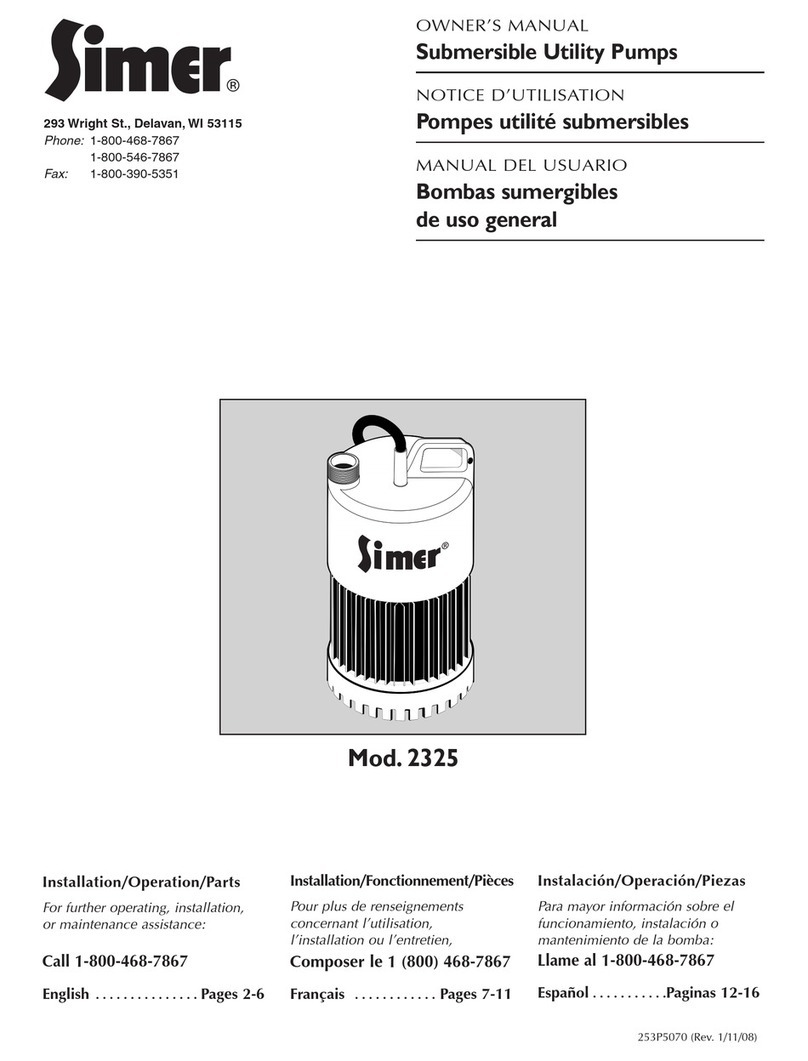
OWNER’S MANUAL
Submersible Utility Pumps
Installation/Operation/Parts
For further operating, installation,
or maintenance assistance:
Call 1-800-468-7867
©2002 PRINTED IN U.S.A. 1000000514 (Rev. 4/9/02)
.3
®
®
293 Wright St., Delavan, WI 53115
Phone: 1-800-468-7867
1-800-546-7867
Fax: 1-800-390-5351
Web Site: http://www.simerpump.com
Models OD6601G, OD6601UK,
OD6601CH, 2533, 2533SH
Safety 2
For parts or assistance, call Simer Customer Service at 1-800-468-7867 / 1-800-546-7867
READ AND FOLLOW
SAFETY INSTRUCTIONS!
Carefully read and follow all safety instructions in this
manual and on pump.
This is the safety alert symbol. When you see this
symbol on your pump or in this manual, look for
one of the following signal words and be alert to the
potential for personal injury.
warns about hazards that will cause serious
personal injury, death or major property damage if
ignored.
warns about hazards that can cause serious
personal injury, death or major property damage if
ignored.
warns about hazards that will or can cause
minor personal injury or property damage if ignored.
The label NOTICE indicates special instructions which
are important but not related to hazards.
Keep safety labels in good condition.
Replace missing or damaged safety labels.
DESCRIPTION
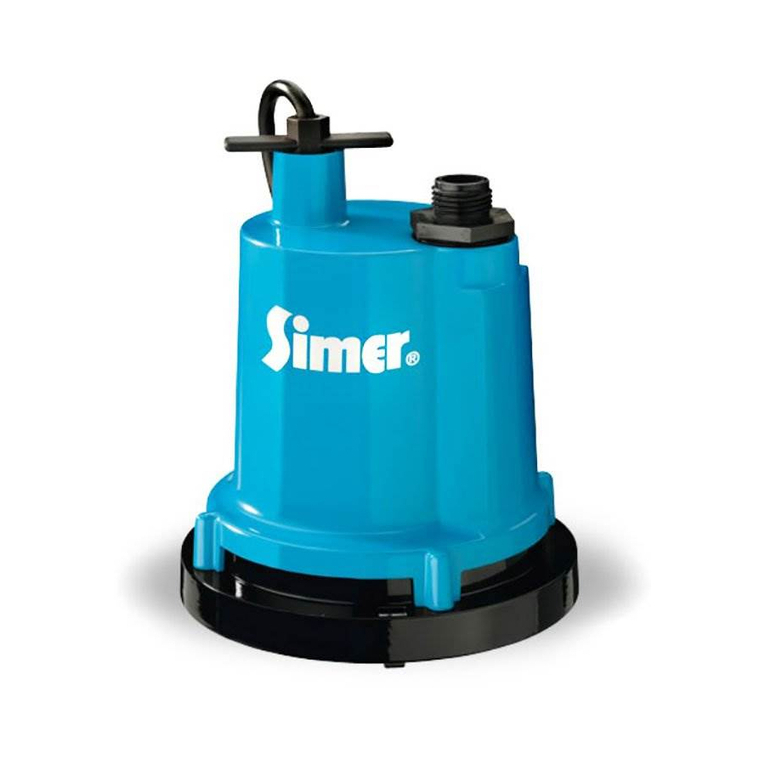
These Submersible Utility Pumps are designed for drain-
ing water from basement floors, stock tanks, window
wells, boats, flat roofs and cisterns. The units are
equipped with a 3-prong grounding-type power cord. The
shaded-pole motors are oil filled and sealed for cooler
operation. The sleeve bearings on the motor shaft never
need lubrication. Automatic reset thermal protection.
SPECIFICATIONS
Power supply required .......................220-240V, 50 HZ.
Motor duty...................................................continuous*
Liquid Temp. Range .................. Less Than 120°F (50°C)
Individual Branch Circuit Required (min.).........15 Amps
Discharge .....................................................1-1/4" BSPT
*NOTICE: For continuous operation, the pump must be
submerged to prevent the motor from overheating.
Risk of fire or explosion. Do not use in
explosive atmospheres. Pump water only with this pump.
ELECTRICAL & SWITCH
SPECIFICATIONS
PERFORMANCE
SIMER warrants to the original consumer purchaser (“Purchaser”) of its products
that they are free from defects in material or workmanship.
If within twelve (12) months from the date of the original consumer purchase
any such product shall prove to be defective, it shall be repaired or replaced at
SIMER’s option, subject to the terms and conditions set forth below. Your origi-
nal receipt of purchase is required to determine warranty eligibility.
Exceptions to the Twelve (12) Month Warranty
Five (5) Year Warranty:
If within five (5) years from original consumer purchase any Pre-Charge water
system tank shall prove to be defective, it shall be repaired or replaced at
SIMER’s option, subject to the terms and conditions set forth below.
General Terms and Conditions
Purchaser must pay all labor and shipping charges necessary to replace product
covered by this warranty. This warranty shall not apply to acts of God, nor shall
it apply to products which, in the sole judgement of SIMER, have been subject
to negligence, abuse, accident, misapplication, tampering, alteration; nor due
to improper installation, operation, maintenance or storage; nor to other than
normal application, use or service, including but not limited to, operational fail-
ures caused by corrosion, rust or other foreign materials in the system, or oper-
ation at pressures in excess of recommended maximums.
Requests for service under this warranty shall be made by returning the defec-
tive product to the Retail outlet or to SIMER as soon as possible after the dis-
covery of any alleged defect. SIMER will subsequently take corrective action as
promptly as reasonably possible. No requests for service under this warranty
will be accepted if received more than 30 days after the term of the warranty.
This warranty sets forth SIMER’s sole obligation and purchaser’s exclusive rem-
edy for defective products.
SIMER SHALL NOT BE LIABLE FOR ANY CONSEQUENTIAL, INCIDENTAL, OR
CONTINGENT DAMAGES WHATSOEVER.
THE FOREGOING WARRANTIES ARE EXCLUSIVE AND IN LIEU OF ALL
OTHER EXPRESS WARRANTIES. IMPLIED WARRANTIES, INCLUDING BUT
NOT LIMITED TO THE IMPLIED WARRANTIES OF MERCHANTABILITY AND
FITNESS FOR A PARTICULAR PURPOSE, SHALL NOT EXTEND BEYOND THE
DURATION OF THE APPLICABLE EXPRESS WARRANTIES PROVIDED HEREIN.
Some states do not allow the exclusion or limitation of incidental or conse-
quential damages or limitations on how long an implied warranty lasts, so the
above limitations or exclusions may not apply to you. This warranty gives you
specific legal rights and you may also have other rights which vary from state
to state.
Simer Limited Warranty
SIMER • 293 Wright St. • Delavan, WI U.S.A. 53115
Phone: 1-800-468-7867 / 1-800-546-7867 • Fax: 1-800-390-5351
GPH (LPH) AT TOTAL FEET (M)
0 5 10 1520
Series (0) (1.5m) (3m) (4.6m) (6.1m)
CAPACITY GALLONS(L)/Minute
OD6601 18.5 14.5 10.5 5.5 1
2533 (70) (55) (40) (21) (4)
Motor Individual
Motor Full Load Branch Circuit
Series HP Amps Req. (Amps)
OD6601 1/6 3.5 15
2533 1/6 3.5 15
For parts or assistance, call Simer Customer Service at 1-800-468-7867 / 1-800-546-7867
General Information / Installation 3
GENERAL SAFETY INFORMATION
Electrically powered utility pumps normally give many
years of trouble-free service when correctly installed,
maintained, and used. See the “Troubleshooting Chart”
in this manual for information about common utility
pump problems and remedies. For more information,
see your retailer, or call Simer customer service at
1-800-468-7867 or 1-800-546-7867.
1. Know the pump application, limitations, and poten-
tial hazards.
2. Do not use in water where fish are present.
3. Disconnect the power before servicing.
4. Release all the pressure within the system before ser-
vicing any component.
5. Drain all the water from the system before servicing.
6. Secure the discharge line before starting the pump.
An unsecured discharge line will whip, possibly
causing personal injury and/or property damage.
7. Check hoses for a weak or worn condition before each
use, making certain that all connections are secure.
8. Periodically inspect the pump and the system com-
ponents. Keep free of debris and foreign objects.
Perform routine maintenance as required.
9. Provide a means of pressure relief for pumps whose
discharge line can be shut-off or obstructed.
10.Personal Safety:
a. Wear safety glasses at all times when working
with pumps.
b. Keep work area clean, uncluttered and properly
lighted – replace all unused tools and equipment.
c. Keep visitors at a safe distance from work area.
d. Make workshop child-proof – with padlocks, mas-
ter switches, and by removing starter keys.
11. When wiring an electrically driven pump, follow all
of the electrical and safety codes that apply.
12.This equipment is only for use on 230 volt (single
phase) and is equipped with an approved 3-conductor
cord and 3-prong, grounding-type plug.
Hazardous voltage. Can shock, burn or
cause death. To reduce the risk of electric shock,
pull the plug before servicing. This pump has not
been investigated for use in swimming pool areas.
The pump is supplied with a grounding conductor
and grounding-type attachment plug. Be sure it is
connected only to a properly grounded grounding-
type receptacle.
Where a 2-prong wall receptacle is encountered, it
must be replaced with properly grounded 3-prong
receptacle installed in accordance with the codes
and ordinances that apply.
Do not walk on a wet area until all power has been
turned off. If the shut-off box is in the basement, call
the electric company or hydro authority to shutoff
the service to house, or call your local fire depart-
ment for instructions. Failure to follow this warning
can result in a fatal electrical shock.
Do not lift the pump by the power cord.
13.All wiring should be performed by a qualified
electrician.
14.Make certain the power source conforms to the
requirements of your equipment.
15.Protect the electrical cord from sharp objects, hot sur-
faces, oils, and chemicals. Avoid kinking the cord.
Replace or repair damaged or worn cords immediately.
16.Do not touch an operating motor. Modern motors
are designed to operate at high temperatures.
17.Do not handle the pump or the pump motor, or
change fuses with wet hands or when standing on
wet or damp surface, or in water.
INSTALLATION
1. Set the pump on a hard surface in at least 2 inches
of water.
2. Connect the discharge line with the fittings provided.
3. The pump should not be installed on clay, dirt, mud
or sand surfaces. Although the pump will usually
pass small particles suspended in water, clean the
area to be pumped of small stones and gravel which
could clog the pump.
*NOTICE: Grass, mud, sand or pea gravel can clog the
pump and reduce it’s performance. Keep the pump inlet
screen clean.
4. To reduce motor noise and vibrations when using
rigid pipe, a short length of rubber hose (e.g. radiator
hose) can be connected into the discharge line near
the pump using suitable clamps.
5. Power Supply: These pumps are designed for
220-240 V., 50 Hz., operation and require a mini-
mum 15 amp individual branch circuit. The pumps
are supplied with a 3-wire cord with grounding-type
plug.
Hazardous voltage. Can shock, burn or
cause death. Pump should always be electrically
grounded to a suitable electrical ground such as a
grounded water pipe or a properly grounded metallic
raceway, or ground wire system. Do not cut off the
round ground pin.
6. If the pump discharge line is exposed to an outside
sub-freezing atmosphere, the portion of line exposed
must be installed so any water remaining in the pipe
will drain to the outfall by gravity. Failure to do this
can cause the water trapped in the discharge to
freeze which could result in damage to the pump.
7. Check the system operation by observing the pump
operation through one complete cycle.
Risk of flooding. Failure to make this
operational check may lead to improper operation,
premature failure, and flooding.
For parts or assistance, call Simer Customer Service at 1-800-468-7867 / 1-800-546-7867
TROUBLESHOOTING
Operation / Troubleshooting / Repair Parts 4
OPERATION
Hazardous voltage. Can shock, burn or
cause death. Do not handle a pump or pump motor with
wet hands or when standing on wet or damp surface, or
in water.
Before attempting to check why a unit has stopped oper-
ating, disconnect power from the unit.
1. The shaft seal depends on water for lubrication and
cooling. Do not operate the pump unless it is
submerged in water as the seal may be damaged if
allowed to run dry.
2. The pumps will not remove all water. On a flat sur-
face the pumps will pump down to within 1/8”
(3.1mm) of the pumping surface.
NOTICE: For continuous operation, the pump must
be submerged to prevent the motor from overheating.
Afully submerged pump is preferred for proper cool-
ing when a pump runs continuously.
3. These pumps are equipped with an anti-airlock hole.
Keep this port clean to ensure proper functioning. See
the Exploded View for the location of the port.
SYMPTOM PROBABLE CAUSE(S) CORRECTIVE ACTION
Pump won’t start or run. Pump is not plugged in. Check and see if pump is plugged in to a proper outlet.
Blown fuse. If blown, replace with fuse of proper size.
Low line voltage. If voltage under recommended minimum, check size of
wiring from main switch on property. If OK, contact power
company or hydro authority.
Defective motor. Replace the pump.
Pump operates but Restricted discharge Remove the pump and clean pump and piping.
delivers little or no water. (obstacle or ice in piping).
Restricted intake. Remove the pump and clean out the intake screen.
Low line voltage. The voltage is under the recommended minimum. Check the
size of the wiring from the main switch on the property. If
OK, contact the power company or hydro authority.
Worn parts or plugged impeller. Replace the pump.
1
2
6
8
9
Anti-Airlock
Hole
9
7
3
4
5
2533-01
Key Part Description Qty. OD6601G-01 OD6601CH-01 OD6601UK-01 2533SH-01
1Power Cord 1 PS17-133 PS17-132 PS17-135 PS17-134
2Cord Connector 1 PS17-46P PS17-46P PS17-46P PS17-46P
3Screw, Handle Ring 1 670-639 670-639 670-639 670-639
4Handle Ring 1 383-148 383-148 383-148 383-148
5Washer, Handle Ring 1 854-347 854-347 854-347 854-347
6Clamp 1 188-028 188-028 188-028 188-028
7Cover, Motor Assembly 1 ** ** ** **
8Inlet Screen 1 667-016 667-016 667-016 667-016
9Screws, Screen 3 670-793 670-793 670-793 670-793
10 Adapter 1 007-021 007-021 007-021 007-021
** If the motor fails, replace the entire pump.

Other manuals for OD6601G Series

1

This manual suits for next models

4

Other Simer Water Pump manuals

Simer BW85 Series User manual

Simer

Simer BW85 Series User manual

Simer SIMER 2961 User manual

Simer

Simer SIMER 2961 User manual

Simer 5905E Setup guide

Simer

Simer 5905E Setup guide

Simer 2300-04 User manual

Simer

Simer 2300-04 User manual

Simer 2380 User manual

Simer

Simer 2380 User manual

Simer PLUMBER'S CLASSIC 1/2HP CAST 3997 User manual

Simer

Simer PLUMBER'S CLASSIC 1/2HP CAST 3997 User manual

Simer 2430 User manual

Simer

Simer 2430 User manual

Simer 2883 User manual

Simer

Simer 2883 User manual

Simer 2944RP User manual

Simer

Simer 2944RP User manual

Simer 3205C User manual

Simer

Simer 3205C User manual

Simer SIMER 3884 User manual

Simer

Simer SIMER 3884 User manual

Simer SIMER 2961 User manual

Simer

Simer SIMER 2961 User manual

Simer 2805E-02 User manual

Simer

Simer 2805E-02 User manual

Simer 2920 User manual

Simer

Simer 2920 User manual

Simer Ace-In-The-Hole A5000 User manual

Simer

Simer Ace-In-The-Hole A5000 User manual

Simer 2935B User manual

Simer

Simer 2935B User manual

Simer 5020B User manual

Simer

Simer 5020B User manual

Simer 2975PC User manual

Simer

Simer 2975PC User manual

Simer 3415P User manual

Simer

Simer 3415P User manual

Simer 11652 User manual

Simer

Simer 11652 User manual

Simer 4185 User manual

Simer

Simer 4185 User manual

Simer Mini-Vac M40-01 User manual

Simer

Simer Mini-Vac M40-01 User manual

Simer PROFESSIONAL 5965-01 User manual

Simer

Simer PROFESSIONAL 5965-01 User manual

Simer 5020B-04 User manual

Simer

Simer 5020B-04 User manual

Popular Water Pump manuals by other brands

RODEX RDX8803 instruction manual

RODEX

RODEX RDX8803 instruction manual

Grundfos MAGNA3 25-100 (N) instructions

Grundfos

Grundfos MAGNA3 25-100 (N) instructions

Torpedo SA033M Installation and maintenance manual

Torpedo

Torpedo SA033M Installation and maintenance manual

Pfeiffer Vacuum HiPace 1800 operating instructions

Pfeiffer Vacuum

Pfeiffer Vacuum HiPace 1800 operating instructions

RKI Instruments 35-3001-NS-03 Operator's manual

RKI Instruments

RKI Instruments 35-3001-NS-03 Operator's manual

esotec Napoli operating manual

esotec

esotec Napoli operating manual

Cheonsei KEMPION PDS Series instruction manual

Cheonsei

Cheonsei KEMPION PDS Series instruction manual

Grundfos DMB Series manual

Grundfos

Grundfos DMB Series manual

Sanwa Hydrotech MEK Series instruction manual

Sanwa Hydrotech

Sanwa Hydrotech MEK Series instruction manual

PHCC ST1033 Instruction manual & safety warnings

PHCC

PHCC ST1033 Instruction manual & safety warnings

Wilo Rexa CUT Installation and operating instructions

Wilo

Wilo Rexa CUT Installation and operating instructions

Grundfos PS.G instructions

Grundfos

Grundfos PS.G instructions

Polaris TBM 150 MH Series Installation, operation and maintenance manual

Polaris

Polaris TBM 150 MH Series Installation, operation and maintenance manual

Johnson Pump Bilge Mate instruction manual

Johnson Pump

Johnson Pump Bilge Mate instruction manual

Kobelt 7012 Series Owner's Operation, Installation & Maintenance Manual

Kobelt

Kobelt 7012 Series Owner's Operation, Installation & Maintenance Manual

Stac PF Operating and maintenance manual

Stac

Stac PF Operating and maintenance manual

Graco 115 VAC EGP instruction manual

Graco

Graco 115 VAC EGP instruction manual

Zoeller 132 installation instructions

Zoeller

Zoeller 132 installation instructions

manuals.online logo
manuals.online logoBrands
  • About & Mission
  • Contact us
  • Privacy Policy
  • Terms and Conditions

Copyright 2025 Manuals.Online. All Rights Reserved.