Simplex 4100-3115 XALIC Installation guide

4100-3115 XALIC
Installation and Programming Guide
© 2005- 2011 SimplexGrinnell LP. All rights reserved.
Specifications and other information shown were current as of publication and are subject to change without notice.
Simplex and the Simplex logo are trademarks of Tyco International Ltd. and its affiliates and are used under license.
579-513
Rev. D
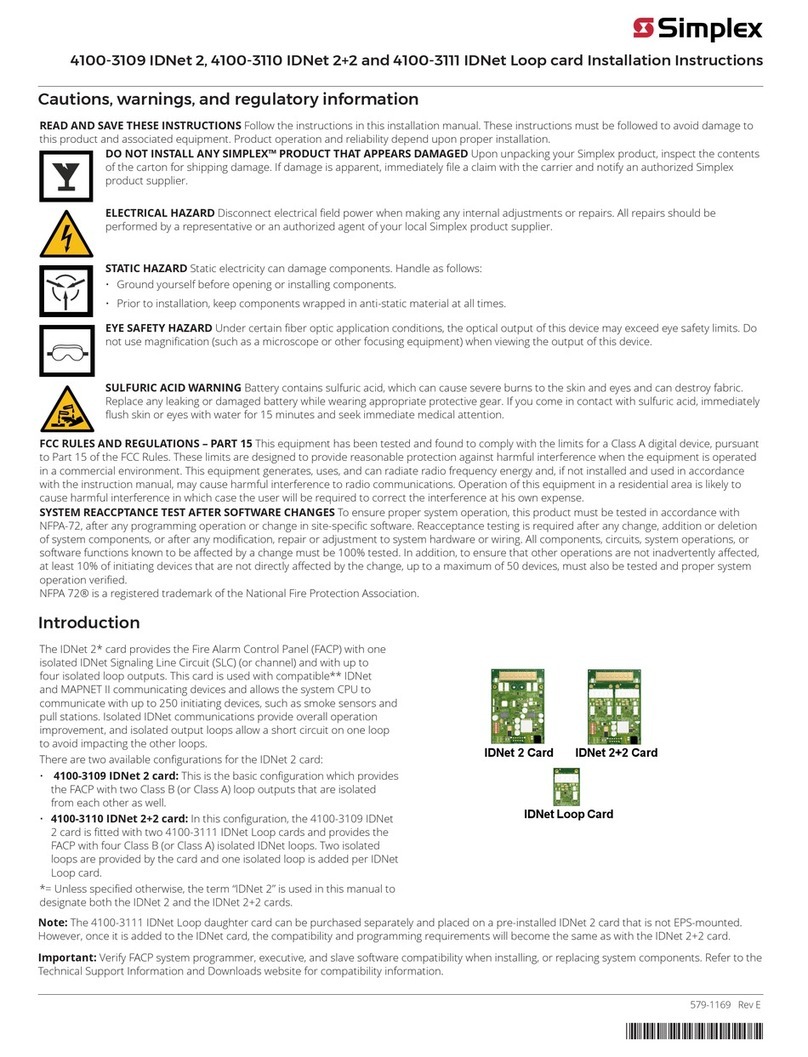
This publication describes installing and programming the 4100-3115 XA Loop Interface Card
(XALIC). This card allows a 4100U or a 4100ES Fire Alarm Control Panel (FACP) to function as
either the XA Loop Master or as an XA Loop Slave.
This card is compatible with a 4100U FACP or a 4100ES FACP.
This publication discusses the following topics:
Topic See Page #
Cautions and Warnings 2
Overview and Specifications 3
Hardware Configuration 6
Hardware Installation 10
Connecting to the XA Loop 12
Programming the FACP as XA Loop Master 16
Programming FACP as an XA Loop Slave 20
FACP XA Loop Slave Application Example 26
FACP XA Loop Master Application Example 29
Introduction
In this Publication
firealarmresources.com

2
Cautions and
Warnings
READ AND SAVE THESE INSTRUCTIONS- Follow the instructions in this installation
manual. These instructions must be followed to avoid damage to this product and associated
equipment. Product operation and reliability depend upon proper installation.
DO NOT INSTALL ANY SIMPLEX® PRODUCT THAT APPEARS DAMAGED- Upon
unpacking your Simplex product, inspect the contents of the carton for shipping damage. If
damage is apparent, immediately file a claim with the carrier and notify an authorized
Simplex product supplier.
ELECTRICAL HAZARD - Disconnect electrical field power when making any internal adjust-
ments or repairs. All repairs should be performed by a representative or authorized agent of
your local Simplex product supplier.
EYE SAFETY HAZARD - Under certain fiber optic application conditions, the optical output
of this device may exceed eye safety limits. Do not use magnification (such as a microscope
or other focusing equipment) when viewing the output of this device.
STATIC HAZARD - Static electricity can damage components. Handle as follows:
Ground yourself before opening or installing components.
Prior to installation, keep components wrapped in anti-static material at all times.
FCC RULES AND REGULATIONS – PART 15 - This equipment has been tested and found to
comply with the limits for a Class A digital device pursuant to Part 15 of the FCC Rules.
These limits are designed to provide reasonable protection against harmful interference when
the equipment is operated in a commercial environment. This equipment generates, uses, and
can radiate radio frequency energy and, if not installed and used in accordance with the
instruction manual, may cause harmful interference to radio communications. Operation of
this equipment in a residential area is likely to cause harmful interference in which case the
user will be required to correct the interference at his own expense.
SYSTEM REACCEPTANCE TEST AFTER SOFTWARE CHANGES -To ensure
proper system operation, this product must be tested in accordance with NFPA 72® after any
programming operation or change in site-specific software. Reacceptance testing is required
after any change, addition or deletion of system components, or after any modification, repair
or adjustment to system hardware or wiring.
All components, circuits, system operations, or software functions, known to be affected by a
change, must be 100% tested. In addition, to ensure that other operations are not
inadvertently affected, at least 10% of initiating devices that are not directly affected by the
change, up to a maximum of 50 devices, must also be tested and proper system operation
verified.
NFPA 72® is a registered trademark of the National Fire Protection Association
Cautions and Warnings
firealarmresources.com

3
The XA loop is a three- or four-wire Autocall
®
communication channel, consisting of one master
and one or more slaves. The XA Loop Interface Card (XALIC) connects the FACP to the XA
loop, and allows the FACP to function as either the XA loop master or as an XA loop slave.
FACP XA Loop Master. In this case, the FACP replaces an existing Autocall head end.
When operating as the XA loop master, the FACP can issue ON/OFF control commands to
XA devices, and monitor the alarm, trouble, and normal status of all XA devices on the loop.
FACP XA Loop Slave. Devices attached to the FACP can be either of the following.
XALIC Status Points. Custom control is used to pass the FACP point status changes to
the Autocall head end via the XA devices represented by the XALIC.
XALIC Control Points. This type of point works in a similar manner. Custom control on
the FACP monitors the state of the XALIC points and performs specific functions (signal
silence, alarm reset, etc.) when the Autocall head end turns a specific XALIC point on or
off.
The XALIC card, shown in Figure 1, contains the following major components.
Table 1. XALIC Components
Component Description
Connectors
and
Terminal Blocks
TB3 connects the XALIC to the XA loop. 18-position terminal block consists of two separate
sets of terminals, one for master operation and one for slave operation.
P4 (PDI Connector), a 10-pin connector located on the reverse side of the PCB. Used for
connecting to the FACP’s Power Distribution Interface (PDI).
TB1 (RUI Connector), a 3-position terminal block used for connecting Style 4 RUI.
TB2 (AUX Power Connection), used for connecting the XALIC to an auxiliary power supply.
Jumpers and Switches
P1 and P2 (Power Source Jumpers) select the power source (System Power Supply or
Auxiliary Power Supply) used by the XALIC.
P3 (Earth Detect Jumper) used to connect/disconnect the Earth detect circuitry.
SW1 sets XA loop options (3- or 4-wire loop), scan rate, master/slave operation.
SW2 (Address Dip Switch) configures the FACP’s address used by the XALIC card. Address
set via dipswitch must match address programmed via the FACP programmer.
LEDs
LED 1. XA Loop Status
OFF -- Normal
Steady ON – XA Loop Channel Failure
Single Blink – XA Loop Wiring Fault
LED 2 4100 Communication Status. OFF indicates the card is communication normally.
ON indicates a trouble condition with the communication channel between the
XALIC and the FACP.
LED 3. Supervision. Flashes once every XA loop polling cycle (XA loop master only).
Continued on next page
Overview and Specifications
Overview
XALIC Components
firealarmresources.com

4
Figure 1. Location of Major XALIC Components
Continued on next page
Overview and Specifications,
Continued
XALIC Components
ON | OFF
4-WIRE | 3-WIRE
SLAVE | MASTER
256 | 257
BAUD ON = 9600
BAUD
MSB
LSB
ADDRESS:
OFF = SELECTED
|REF A |SIG A |CMD A |CLK A |SHLD |REF B |SIG B |CMD B |CLK B|
| SHLD| REF | SIG | CMD | CLK
MASTERSLAVE CLASS A CLASS B
|RUI+|RUI-|SHLD| |AUX+|AUX-|
JUMPERS RIGHTFOR
SIGNAL POWER
JUMPERS LEFT FOR
AUX POWER
SW1
SW2
TB3
XA Loop Field Wiring
Terminal Block (TB3)
Baud/Address
Dip Switch (SW2)
Comm Trouble LED
(LED2)
XA Loop Trouble
LED (LED1)
XA Loop Polling
LED (LED3)
PDI Connector (P4)
(on reverse side)
RUI Style 4
Connection (TB1)
AUX Power Connection
(TB2)
Power Source Jumpers
(P1,P2) (default position 1-2)
Earth Detect Jumper
(P3)
XA Loop
Options (SW1)
firealarmresources.com

5
Table 2. Specifications
Category Attribute Specification
XA Line
Interface Card
Current Draw – XA
Loop Master 570 mA @ 24 VDC, maximum
Current Draw – XA
Loop Slave 70 mA @ 24 VDC
Power
Nominal 24 VDC from FACP. When power is
provided through the AUX + and AUX –
terminals, the power must be provided by a
power supply that is UL-listed for fire protective
signaling use.
XA Loop
Max. Resistance 100 per wire
Max. Capacitance 1.5 f wire-to-wire
1.5 f wire-to-shield
Normal Supervision
Current 500 mA
Maximum Alarm
Current 500 mA
Voltage/Frequency 24 VAC / 250 Hz
Max. Number of
Addresses per Loop 255
Environmental Temperature 0C (32F) to 49C (120F), inclusive
Humidity Up to 93% relative humidity (non-condensing)
@ 32C (90F)
Overview and Specifications,
Continued
Specifications
firealarmresources.com

6
The XALIC card address is set via DIP switch SW2, which is a bank of eight switches. From left
to right (see Figure 2, below) these switches are designated as SW2-1 through SW2-8. The
function of these switches is as follows:
SW2-1. This switch sets the baud rate for the internal FACP communications line
running between the card and the FACP CPU. Set this switch to ON.
SW2-2 through SW2-8. These switches set the card address. Refer to Table 3 for a
complete list of the switch settings for all of the possible card addresses.
Note: You must set these switches to the value assigned to the card by the FACP
Programmer.
1
8
7
6
5
4
3
2
Figure 2. DIP Switch SW2
Continued on next page
Hardware Configuration
Setting DIP Switch
SW2, XALIC Card
Address
ON
OFF
DIP Switches SW2-2 through SW2-8
set the Card Address. Figure 2
shows an Address of 3.
4100 Comm. Baud Rate.
Switch (SW2-1)
Must Be Set to ON
firealarmresources.com

7
Table 3. XALIC Addresses
Continued on next page
Hardware Configuration,
Continued
Setting DIP Switch
SW2, XALIC Card
Address
Address SW 1-2 SW 1-3 SW 1-4 SW 1-5 SW 1-6 SW 1-7 SW 1-8 Address SW 1-2 SW 1-3 SW 1-4 SW 1-5 SW 1-6 SW 1-7 SW 1-8
1 ON ON ON ON ON ON OFF 61 ON OFF OFF OFF OFF ON OFF
2 ON ON ON ON ON OFF ON 62 ON OFF OFF OFF OFF OFF ON
3 ON ON ON ON ON OFF OFF 63 ON OFF OFF OFF OFF OFF OFF
4 ON ON ON ON OFF ON ON 64 OFF ON ON ON ON ON ON
5 ON ON ON ON OFF ON OFF 65 OFF ON ON ON ON ON OFF
6 ON ON ON ON OFF OFF ON 66 OFF ON ON ON ON OFF ON
7 ON ON ON ON OFF OFF OFF 67 OFF ON ON ON ON OFF OFF
8 ON ON ON OFF ON ON ON 68 OFF ON ON ON OFF ON ON
9 ON ON ON OFF ON ON OFF 69 OFF ON ON ON OFF ON OFF
10 ON ON ON OFF ON OFF ON 70 OFF ON ON ON OFF OFF ON
11 ON ON ON OFF ON OFF OFF 71 OFF ON ON ON OFF OFF OFF
12 ON ON ON OFF OFF ON ON 72 OFF ON ON OFF ON ON ON
13 ON ON ON OFF OFF ON OFF 73 OFF ON ON OFF ON ON OFF
14 ON ON ON OFF OFF OFF ON 74 OFF ON ON OFF ON OFF ON
15 ON ON ON OFF OFF OFF OFF 75 OFF ON ON OFF ON OFF OFF
16 ON ON OFF ON ON ON ON 76 OFF ON ON OFF OFF ON ON
17 ON ON OFF ON ON ON OFF 77 OFF ON ON OFF OFF ON OFF
18 ON ON OFF ON ON OFF ON 78 OFF ON ON OFF OFF OFF ON
19 ON ON OFF ON ON OFF OFF 79 OFF ON ON OFF OFF OFF OFF
20 ON ON OFF ON OFF ON ON 80 OFF ON OFF ON ON ON ON
21 ON ON OFF ON OFF ON OFF 81 OFF ON OFF ON ON ON OFF
22 ON ON OFF ON OFF OFF ON 82 OFF ON OFF ON ON OFF ON
23 ON ON OFF ON OFF OFF OFF 83 OFF ON OFF ON ON OFF OFF
24 ON ON OFF OFF ON ON ON 84 OFF ON OFF ON OFF ON ON
25 ON ON OFF OFF ON ON OFF 85 OFF ON OFF ON OFF ON OFF
26 ON ON OFF OFF ON OFF ON 86 OFF ON OFF ON OFF OFF ON
27 ON ON OFF OFF ON OFF OFF 87 OFF ON OFF ON OFF OFF OFF
28 ON ON OFF OFF OFF ON ON 88 OFF ON OFF OFF ON ON ON
29 ON ON OFF OFF OFF ON OFF 89 OFF ON OFF OFF ON ON OFF
30 ON ON OFF OFF OFF OFF ON 90 OFF ON OFF OFF ON OFF ON
31 ON ON OFF OFF OFF OFF OFF 91 OFF ON OFF OFF ON OFF OFF
32 ON OFF ON ON ON ON ON 92 OFF ON OFF OFF OFF ON ON
33 ON OFF ON ON ON ON OFF 93 OFF ON OFF OFF OFF ON OFF
34 ON OFF ON ON ON OFF ON 94 OFF ON OFF OFF OFF OFF ON
35 ON OFF ON ON ON OFF OFF 95 OFF ON OFF OFF OFF OFF OFF
36 ON OFF ON ON OFF ON ON 96 OFF OFF ON ON ON ON ON
37 ON OFF ON ON OFF ON OFF 97 OFF OFF ON ON ON ON OFF
38 ON OFF ON ON OFF OFF ON 98 OFF OFF ON ON ON OFF ON
39 ON OFF ON ON OFF OFF OFF 99 OFF OFF ON ON ON OFF OFF
40 ON OFF ON OFF ON ON ON 100 OFF OFF ON ON OFF ON ON
41 ON OFF ON OFF ON ON OFF 101 OFF OFF ON ON OFF ON OFF
42 ON OFF ON OFF ON OFF ON 102 OFF OFF ON ON OFF OFF ON
43 ON OFF ON OFF ON OFF OFF 103 OFF OFF ON ON OFF OFF OFF
44 ON OFF ON OFF OFF ON ON 104 OFF OFF ON OFF ON ON ON
45 ON OFF ON OFF OFF ON OFF 105 OFF OFF ON OFF ON ON OFF
46 ON OFF ON OFF OFF OFF ON 106 OFF OFF ON OFF ON OFF ON
47 ON OFF ON OFF OFF OFF OFF 107 OFF OFF ON OFF ON OFF OFF
48 ON OFF OFF ON ON ON ON 108 OFF OFF ON OFF OFF ON ON
49 ON OFF OFF ON ON ON OFF 109 OFF OFF ON OFF OFF ON OFF
50 ON OFF OFF ON ON OFF ON 110 OFF OFF ON OFF OFF OFF ON
51 ON OFF OFF ON ON OFF OFF 111 OFF OFF ON OFF OFF OFF OFF
52 ON OFF OFF ON OFF ON ON 112 OFF OFF OFF ON ON ON ON
53 ON OFF OFF ON OFF ON OFF 113 OFF OFF OFF ON ON ON OFF
54 ON OFF OFF ON OFF OFF ON 114 OFF OFF OFF ON ON OFF ON
55 ON OFF OFF ON OFF OFF OFF 115 OFF OFF OFF ON ON OFF OFF
56 ON OFF OFF OFF ON ON ON 116 OFF OFF OFF ON OFF ON ON
57 ON OFF OFF OFF ON ON OFF 117 OFF OFF OFF ON OFF ON OFF
58 ON OFF OFF OFF ON OFF ON 118 OFF OFF OFF ON OFF OFF ON
59 ON OFF OFF OFF ON OFF OFF 119 OFF OFF OFF ON OFF OFF OFF
60 ON OFF OFF OFF OFF ON ON
firealarmresources.com

8
SW1 is a four-position switch used to select the following operational characteristics. See figure
below for an illustration of the switch.
Three Wire / Four Wire (SW1-1). This switch selects whether the XALIC is connected to
a three-wire or four-wire loop. ON equals three-wire; OFF equals four-wire. (When
operating in three-wire mode, the command line is absent.) Three-wire can only be selected if
no XA output-type devices are connected to the loop.
Master / Slave Operation (SW1-2). This switch selects whether the XALIC is operating
as the master or slave. ON equals master; OFF equals slave.
Scan Rate (SW1-3). This switch selects the number of clock pulses in a complete scan of
the XA loop. ON equals 256 pulses; OFF equals 257 pulses. Set this switch to 256 pulses for
all Autocall panels except the AL1500 and AC-II which require the 257-pulse setting.
1 2 3 4
OnOff
Figure 3. Location of SW1
Jumpers P1 and P2 select the power and ground source for the XALIC. Set these jumpers as
follows, depending on whether you are connecting AUX power or Signal Power (via PDI) to the
XALIC.
Signal Power. Place Jumpers P1 and P2 in the rightmost positions (covering pins 1 and 2)
to select the Signal Power as the power and ground source for the XALIC. When these
jumpers are installed in this manner, the XALIC receives both power and ground via the PDI.
AUX Power. Place Jumpers P1 and P2 in the leftmost positions (covering pins 2 and 3) to
select AUX power as the power and ground source for the XALIC. When these jumpers are
installed in this manner, the XALIC receives both power and ground via the AUX power
source.
3 2 1
Jumpers Right
for Signal Power
Jumpers Left
for AUX Power
Figure 4. Location of Jumpers P1 and P2
Continued on next page
Hardware Configuration,
Continued
Setting XA Loop
Options (SW1)
Setting Power and
Ground Jumpers
SW1
P2
P1
firealarmresources.com

9
The setting of Jumper P3 determines whether the XALIC card detects and reports Earth faults to
the FACP. Earth Detect should only be enabled when the XALIC card is configured as the XA
Loop Master. Disable Earth Detect if the XALIC is being configured as an XA Loop Slave.
To enable Earth Detect, place the jumper in positions 1-2. To disable Earth Detect, place the
jumper in positions 2-3.
P3
Install Jumper on pins 1 and 2
for Earth Detect (XA Loop
Master Only). Install Jumper on
pins 2 and 3 for XA Loop Slave
Operation
1
2
3
Figure 5. Location of P3
Hardware Configuration,
Continued
Setting Jumper P3,
Earth Detect
firealarmresources.com

10
This section describes installing the XALIC in the following three situations:
Expansion Bay Contains XPS, RPS, or expansion SPS and Backbox Contains TIC or Master
Controller.
Expansion Bay Does Not Contain XPS, RPS, or expansion SPS but Backbox Contains TIC or
Master Controller.
Backbox does not have PDI or XPS, RPS or expansion SPS.
If the expansion bay in which the XALIC is installed contains an XPS, RPS, or an expansion SPS
and the backbox contains a Transponder Interface Card (TIC) or Master Controller, the XALIC
can receive both power and communication via the PDI. No connections to the XALIC’s RUI or
AUX Power connectors are required.
Important Note: The power supply (XPS, RPS, SPS) must be located in the same expansion
bay as the XALIC.
The XALIC has a form factor of 4” x 10” (101 x 254 mm), and requires a full-length slot in an
expansion chassis. Locate an available slot for the card and use the PDI connector (P4) on the
backside of the XALIC card to connect to one of the PDI connectors on the lower row, as shown
in the figure below. Secure the card to the Expansion Chassis using the supplied hardware.
Note: Jumper P1 and Jumper P2 must be installed in the rightmost positions (pins 1-2).
This is the default position. Refer back to Figure 4 for the location of these
jumpers.
Figure 6. Mounting to the Power Distribution Interface
If the expansion bay in which the XALIC is installed does not contain an XPS, RPS, or expansion
SPS, but the backbox contains either a TIC or Master Controller, the XALIC cannot receive power
via the PDI but it can use the PDI to communicate with the TIC or Master Controller. In this
situation, the XALIC must be wired to an AUX Power source that is UL-listed for fire protective
signaling use.
Continued on next page
Hardware Installation
Overview
Expansion Bay
Contains XPS, RPS
or SPS and Backbox
Contains TIC or
Master Controller
Expansion Bay Does
Not Contain XPS,
RPS, or SPS But
Backbox Contains
Master Controller or
TIC
XALIC
STANDOFFS
#6 SCREWS
WASHERS
PDI CONNECTOR
(reverse side)
PDI
SCREW
RETAINERS
firealarmresources.com

11
The XALIC has a form factor of 4” x 10” (101 x 254 mm), and requires a full-length slot in an
expansion chassis. Locate an available slot for the card and use the PDI connector (P4) on the
backside of the XALIC card to connect to one of the PDI connectors on the lower row, as shown
in Figure 6 above. Secure the card to the Expansion Chassis using the supplied hardware.
Place Jumpers P1 and P2 in the leftmost position and connect the XALIC to the Aux power source
as shown in the figure below.
|RUI+|RUI-|SHLD| |AUX+|AUX-| JUMPERS RIGHT FOR
SIGNAL POWER
JUMPERS LEFT FOR
AUX POWER
TB1 TB2
P2
P1
1
1
AUX PWR NOMINAL 24VDC
(18VDC-33VDC)
Figure 7. Connecting to AUX Power
If the XALIC is installed in a backbox that contains neither a power supply (XPS, RPS, or
expansion SPS) or a PDI, it requires power from an Aux Power source and must be connected via
its RUI terminals to a TIC or Master Controller in another backbox. Aux power and RUI wiring is
supervised and power-limited. Aux power must come from either the FACP, or from a regulated,
power-limited supply that is UL-listed for Fire Protective Signaling Use.
The XALIC has a form factor of 4” x 10” (101 x 254 mm), and requires a full-length slot in an
expansion chassis. Secure the card to the backbox using the hardware supplied with the card.
Place Jumpers P1 and P2 in the leftmost position and connect the XALIC to the Aux power source
as shown in the figure below. Connect the RUI terminals on the card to the RUI terminals on a
TIC or Master Controller in a separate backbox.
3 2 1
Jumpers Right
for Signal Power
Jumpers Left
for AUX Power
RUI+ RUI- SHLD AUX-AUX+
Shield
AUX Power (18-33 VDC)
TB1 TB2
Figure 8. Connecting to AUX Power and RUI
Continued on next page
Hardware Installation,
Continued
Expansion Bay Does
Not Contain XPS,
RPS, or SPS But
Backbox Contains
Master Controller or
TIC
Backbox Does Not
Contain XPS, RPS,
or SPS, and does
not Contain PDI
Note: In this configuration, the
XALIC receives internal Panel
communications from the PDI. Do
not wire RUI communications to
TB1.
Note: When the XALIC is installed in this
manner, the XA loop devices shall not be
programmed as inputs that serve as
initiating devices for preaction/deluge
service, if the Panel is so configured.
Wiring is supervised and
power limited
Note: AUX power must be
provided by the Panel or
power-limited power supply
UL-listed for fire protective
signaling use.
All wiring is supervised
and power-limited.
Note: AUX power
must be provided by
the Panel or power-
limited power supply
UL-listed for fire
protective signaling
use.
firealarmresources.com

12
XA DEVICES REF CLK
CMDSIGREF CLK
CMDSIGREF CLK
CMDSIG
SHIELDSHIELD
12 AWG (3.309 mm
2
)
to
18 AWG (0.8231 mm
2
)
Non-Power Limited
XA Loop Wiring
TB3
SHLD
SLAVE
SW2 ON | OFF
4-WIRE | 3-WIRE
SLAVE | MASTER
256 | 257
MASTER
CLASS A CLASS B
REF
SIG
CMD
CLK
REF A
SIG A
CMD A
CLK A
SHLD
REF B
SIG B
CMD B
CLK B
Wire must be 12 AWG (3.309 mm
2
) to 18 AWG (0.8231 mm
2
), non-power limited. Wiring must
test free of all grounds. Wire as follows:
1. Route wire from the CLK B, CMD B, SIG B, REF B and SHLD outputs of the XALIC card
to the appropriate inputs on a XA Loop device.
2. Route wire from the first XA Loop device to the next one. Repeat for each appliance.
3. Route wire from the last XA Loop device to the CLK A, CMD A, SIG A, REF A and SHLD
inputs on TB3 of the XALIC.
Note: Class A wiring is required if any of the XA loop devices are intended to serve as
initiating devices that initiate a preaction/deluge function.
Figure 9. Class A Wiring, XALIC Configured as an XA Loop Master
Continued on next page
Connecting to the XA Loop
Class A Wiring –
XALIC Configured
as XA Loop Master
firealarmresources.com

13
XA DEVICES
REF CLK
CMDSIGREF CLK
CMDSIGREF CLK
CMDSIG
Non-Power Limited
End-of-Line
Supervision Device
XA Loop Wiring
Shield
TB3
SHLD
SLAVE
SW2 ON | OFF
4-WIRE | 3-WIRE
SLAVE | MASTER
256 | 257
MASTER
CLASS A CLASS B
REF
SIG
CMD
CLK
REF A
SIG A
CMD A
CLK A
SHLD
REF B
SIG B
CMD B
CLK B
12 AWG (3.309 mm
2
)
to
18 AWG (0.8231 mm
2
)
To connect the XA Loop Interface Card (XALIC) to devices using Class B wiring, do the
following.
1. On TB3 jumper REF A to REF B, SIG A to SIG B, CMD A to CMD B and CLK A to CLK
B. If the jumper is absent a XA Loop Wiring fault will be indicated.
2. Route wire from the CLK B, CMD B, SIG B, REF B and SHLD outputs of the XALIC card
to the appropriate inputs on a XA Loop device.
3. Route wire from the first XA Loop device to the next one. Repeat for each appliance.
4. Connect an End-of-Line Supervisory device at the end of the XA Loop.
Note: This configuration shall not be used if the FACP is providing preaction/deluge
service.
Figure 10. Class B Wiring, XALIC Configured as XA Loop Master
Continued on next page
Connecting to the XA Loop,
Continued
Class B Wiring –
XALIC Configured
as XA Loop Master
firealarmresources.com

14
XA Loop Wiring
Non-Power Limited
From previous XA Device /
XA Master To next XA Device
TB3
Shield
Shield
SHLD
SLAVE
SW2 ON | OFF
4-WIRE | 3-WIRE
SLAVE | MASTER
256 | 257
MASTER
CLASS A CLASS B
REF
SIG
CMD
CLK
REF A
SIG A
CMD A
CLK A
SHLD
REF B
SIG B
CMD B
CLK B
12 AWG (3.309 mm
2
)
to
18 AWG (0.8231 mm
2
)
To connect the XA Loop Interface Card (XALIC) as a Slave on the XA Loop, do the following.
1. Route CLK, CMD, SIG, REF and SHLD from the previous XA Device / XA Master to TB3
on the XALIC card. From TB3, Route CLK, CMD, SIG, REF and SHLD to next XA device.
Note: TB3 positions 10-11, 12-13, 14-15, 16-17 are internally connected.
Figure 11. XALIC Configured as XA Loop Slave
Connecting to the XA Loop,
Continued
Wiring -- XALIC
Configured as XA
Loop Slave
firealarmresources.com

15
REF
CLK
CMD
SIG REF
CLK
CMD
SIG
PROTECTED
EQUIPMENT
ORANGE
GRAY
YELLOW
GRAY
ORANGE
YELLOW
ORANGE
GRAY
YELLOW
GRAY
2081-9044
Protector
VIOLET
BROWN
VIOLET
BROWN
VIOLET
BROWN
GREEN
GREEN
GREEN
INDOORS OUTDOORS INDOORS
TO THE ORANGE
AND YELLOW LEADS
OF ANOTHER 2081-9044
2081-9044
Protector
2081-9044
Protector
SHIELD
SHIELD
SHIELD
All wiring that leaves a building requires overvoltage protection. Install the Module 2081-9044
whenever wire enter or exits a building. Refer to Figure 12 for Overvoltage Protection wiring.
Refer to the 2081-9044 Overvoltage Protector Installation Instructions (574-832) for specific
details regarding the installation of the 2081-9044 modules.
For each installed pair of 2081-9044 modules, the maximum wiring resistance is reduced by
6 ohms, and the wire-to-wire resistance & wire-to-shield capacitance are reduced by 0.012uF.
With 2081-9044 modules installed, the maximum number of addresses occupied by XA loop
devices (1, 2, 4, or 8 pt. input-output, output only, or input only) is limited to 200 based upon
current limitations. There is no address limitation for Data Gathering Panels (DGPs). In Class B
installations, this limitation only applies to devices after the 2081-9044 connection to the head-end
panel. In Class A installations, limitations apply for the entire loop.
The following example describes a system in which the addresses occupied by1, 2, 4, or 8 pt. XA
Loop devices is limited to 200 while a DGP occupies the remaining addresses without regard to
the 200-device limit. Example: There are 150 addresses occupied by input only devices (1, 2, 4,
or 8 pt.); 50 addresses occupied by output only devices (1, 2, 4, or 8 pt.); and 105 addresses
occupied by a DGP.
Figure 12. Overvoltage Protection Wiring for 4-Wire XA Loop
Connecting to the XA Loop,
Continued
Overvoltage
Protection Wiring for
XA Loop
Note: The above diagram shows wiring for a 4-Wire XA Loop. A 3-Wire XA Loop
is wired the same except that there is one less 2081-9044 Protector because the
Command line is not present
firealarmresources.com

16
This section describes programming the FACP to function as the head end (master) for a loop of
XA devices connected to the FACP through the XALIC card. When functioning as the head end,
the FACP can monitor the status of all devices and can turn XA output devices on or off.
When programming the FACP as the head end, keep the following guidelines in mind.
XALIC points are logical points used to control and monitor physical XA devices.
The FACP can monitor up to 255 XA devices and control up to 255 XA devices. Since a
FACP IDNet channel (each XALIC corresponds to a channel) can only support 250 devices,
the following FACP multipoint device types must be assigned to XALIC points to achieve
the 255 point limit.
TRIAM. Assign this device type to an address within the range 1 through 245 when the
corresponding XA device is an input or input/output device. Each TRIAM point consists
of two subpoints, one that can be used as an output and one that can be used as an input.
RIAM. Assign this device type to an address within the range 1 through 245 when the
corresponding XA device is an output-only device. (XA output-only devices must be at
address 245 or below.)
MLPTIO. Assign this device type to points 246 through 250. These devices support 6
subpoints (for each device, only four subpoints are used).
Program only XALIC addresses that have a corresponding XA device. The XALIC card
performs a configuration check to determine that a corresponding XA device is present at the
programmed XALIC address. If no XA Device is present, an open circuit device trouble is
generated for that device. (Note: the XALIC is unable to detect missing output-only
devices.)
You can determine which XALIC points map to which XA devices by looking at the XALIC
point name. The number in the middle of the XALIC point name corresponds to the number
of the XA device on the connected XA loop.
Figure 13. Interpreting XALIC Point Names
Continued on next page
Programming the FACP as XA Loop Master
Overview and
Guidelines
M2-2-1 X:2(where Xis the XA
loop number)
Examine the XALIC Point name. The middle
number (2 in this case) corresponds to the
similarly numbered XA device on the connected
loop.
firealarmresources.com

17
XA output-only devices must be at address 245 or below. Any XA output-only devices on
the loop with an address above 245 must be readdressed before programming.
You must account for all XA devices in the FACP programming. XA devices that are
unprogrammed (for example, XALIC point three is not programmed, but a device exists on
the XA loop with an address of three) will cause an extra device trouble.
XA devices report three status conditions, whereas FACP IDNet devices report four status
conditions. The XA device status conditions map to IDNet conditions as follows.
Table 4. Mapping of XA Device Status and IDNet Status
XA Loop Device Status FACP IDNet Status
Normal Normal
Alarm Abnormal (current limited)
Trouble Open Circuit
N/A Short Circuit
Because XA loop devices do not report a short circuit condition, it is not possible to support
the WSO or WSC FACP point types. Do not assign these point types to a FACP XALIC
point.
The Point Type you assign to the XALIC address determines the function of the point. For
example, if you assign a FIRE point type, an alarm condition occurs if the state of the XA
address goes abnormal. Likewise, if you assign a UTILITY point type to the address, the
state of the XALIC address is either ON or OFF.
Follow these steps to program XALIC points.
1. Add the XALIC Card to the job. See the corresponding chapter in the ES Panel
Programmer’s Manual (574-849) for information on doing this.
2. Click on the Hardware Tab. Expand the Unit/Box/Bay icons containing the XALIC card.
Double click on the XALIC card icon and choose the Point Editing tab, as shown in the
screen example below.
3. Examine the Point Name field and identify the name of the point you want to edit. Before the
Device Type is programmed, the Point Name will have a 0 in the subpoint (last) field. (M2-5-
0, for example). Remember that the number in the middle corresponds to the XA Device
number on the Autocall side.
4. Click on the point name and then click on the Device Type drop down list box and select the
appropriate device type, as follows:
Points 1-245. Select the TRIAM device type if the corresponding XA device is an
input/output device. Select the RIAM device type if the XA device is an output only
device.
Points 246-255. Select the MLPTIO device type. (Output-only devices are not allowed
within this address range.)
After you select the Device Type, the screen updates to display the subpoints.
Continued on next page
Programming the FACP as XA Loop Master,
Continued
Overview and
Guidelines
Programming FACP
XALIC Points
firealarmresources.com

18
Figure 14. Programming Points
5. Click on the appropriate subpoint and define its point type, as follows. (The subpoint device
type is permanently set.)
Points 1-245. If the device type is TRIAM (i.e., the XA device is an input/output
device), then the first subpoint is used for the output and the second point is used for the
input. Click on the Point Type drop down list and choose one of the available point
types.
If the device type is RIAM (i.e., the XA device is an output-only device), click on the
subpoint and then click on the Point Type drop down list box and choose the output point
type.
Refer to 574-849 for point type definitions
Points 246 – 255. Devices in this address range must use the MLPTIO device type.
MLPTIO subpoints map to XA devices as listed in Table 5 below: Output-only devices
cannot be assigned to this address range.
Click on the subpoint and then click on the Point Type drop down list box and choose the
appropriate input or output point type.
Refer to in 574-849 for point type definitions
Continued on next page
Programming the FACP as XA Loop Master,
Continued
Programming FACP
XALIC Points
firealarmresources.com

19
Table 5. MLPTIO Device Type Address Mapping
FACP
IDNet
Address Subpoint to XA Device Mapping
246 Subpoint 1 is the input and subpoint 5 is the output for XA Device 246
246 Subpoint 2 is the input and subpoint 6 is the output for XA Device 247
247 Subpoint 1 is the input and subpoint 5 is the output for XA Device 248.
247 Subpoint 2 is the input and subpoint 6 is the output for XA Device 249.
248 Subpoint 1 is the input and subpoint 5 is the output for XA Device 250.
248 Subpoint 2 is the input and subpoint 6 is the output for XA Device 251.
249 Subpoint 1 is the input and subpoint 5 is the output for XA Device 252.
249 Subpoint 2 is the input and subpoint 6 is the output for XA Device 253.
250 Subpoint 1 is the input and subpoint 5 is the output for XA Device 254.
250 Subpoint 2 is the input and subpoint 6 is the output for XA Device 255.
Programming the FACP as XA Loop Master,
Continued
Programming FACP
XALIC Points
firealarmresources.com

20
The Autocall head end can control physical or logical points on the FACP, allowing the head end
to perform a range of functions on the FACP such as on/off, system reset, signal silence, etc.
These types of points are called Control points. See “Programming Control Points” in this
section for more information.
The FACP’s XALIC can also be configured to report status to the Autocall head end for up to 250
FACP devices. These types of points are called Status Points. See “Programming Status Points”
in this section for more information.
Note: When the FACP functions as a slave to the Autocall panel, it is different than most
master/slave situations. The FACP continues to monitor and control all devices that are
not associated with an XALIC point and can operate completely independent of the
Autocall panel.
A Control Point is a logical input point on the FACP XALIC card that serves as a trigger for a
FACP Custom Control equation (for example, reset, silence, LED annunciation, NAC signaling,
etc.). Each control point on the FACP corresponds to a physical or logical output point on the
Autocall head end. When the head end turns on the output point, the corresponding FACP XALIC
input turns on, and the FACP custom control equations execute.
Each FACP XALIC Control Point address consists of three parts: the MAPNET
®
channel
number, the XA Loop Device Number, and the Subpoint. The MAPNET channel number is
automatically assigned to the XALIC card at installation time. It can be any number between 1
and 30 and is always preceded by an M. The XALIC Device Number is a number between 1 and
250. It corresponds directly to the matching XA device address on the AUTOCCALL side of the
loop. The Subpoint used with a control point is always 1.
M2-5-1 7:5
4100U
MAPNET
Channel #
4100U XA Card
Device #
Subpoint 1
Output Point 5
XA Loop 7
Figure 15. Mapping XALIC Point Names to XA Loop Devices (4100U Shown)
Use the three-step process detailed below to program a control point.
Step 1. Identify and Map Addresses.
Before programming Control Points, it may be helpful to list the XALIC control points and the
Autocall device numbers, along with the function of the point or device, in a spreadsheet format.
Table 6. Example: Mapping Control Points
Autocall XA Output Functions FACP Control Point and Function
7:1 Output Point turns on when
Signal Silence occurs. M2-1-1 When M2-1-1 goes abnormal,
execute Custom Control to
perform Signal Silence
7:2 Output Point M2-2-2
Program FACP LED to turn
on when M2-2-2 turns on.
Continued on next page
Programming FACP as an XA Loop Slave
Overview
Programming
Control Points
firealarmresources.com
Table of contents
Other Simplex Computer Hardware manuals

Simplex
Simplex XSIG User manual

Simplex
Simplex XPS User manual

Simplex
Simplex 4001-9813 User manual

Simplex
Simplex SafeLINC 4120 User manual

Simplex
Simplex 4100-5124 User manual

Simplex
Simplex 4100-3101 User manual

Simplex
Simplex 4100-5116 User manual

Simplex
Simplex 4100-3109 IDNet 2 User manual

Simplex
Simplex Aval PKW1100 User manual