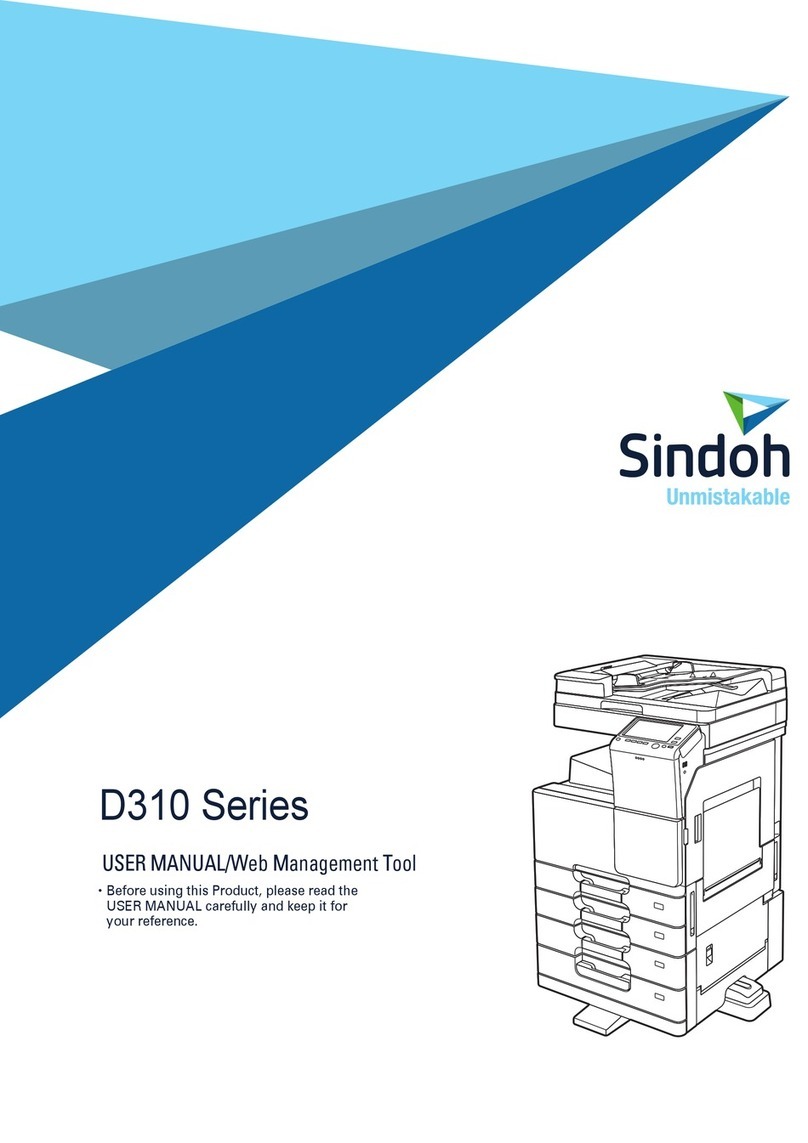
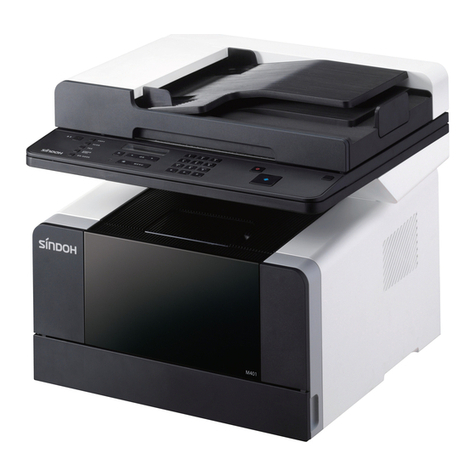
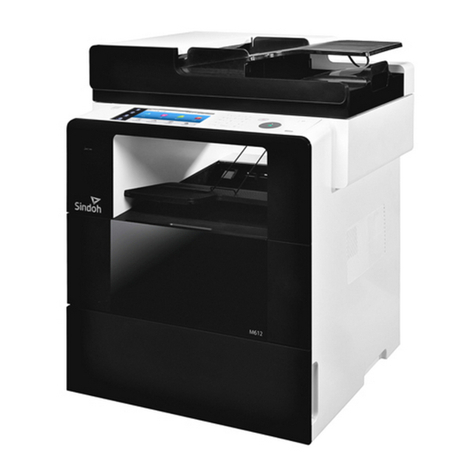
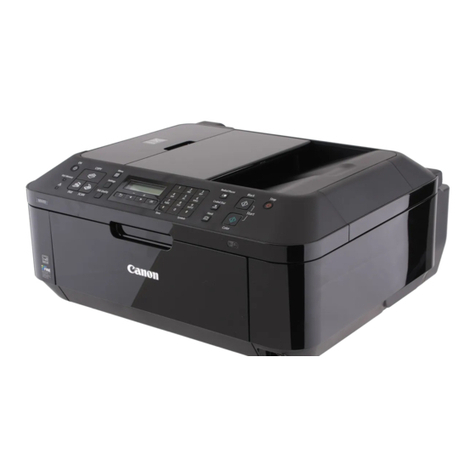
Sindoh M402 Series User manual

User Manual
The product warranty is attached to the user manual.
Read the User Manual before operating the product,
and keep the manual at a convenient place near the product.
M402/M403 Series

Safety Instructions
Directly plug the power cord in the receptacle on the wall. Do not use extension cord.
If the power cable or plug is worn or damaged, pull out the power plug.
In order to prevent electric shock or exposure to laser radiation (in case of a laser device),
do not remove the cover or screw which is not stated in the user manual.
Turn off power and pull out the power plug in the following situations;
- If something is spilled on the device
- When considering the service or repair request on the device
- When the device cover is damaged
In case of a device using toner, do not burn the spilled toner or the waste toner.
If a toner particle is exposed to the screen, it may be ignited.
In case of disposal, contact our company’s seller use the proper collection place.
In case of not using the product for a long time or when leaving the office after business
hours, turn off the power. Otherwise, it may cause an abrupt fire accident.
Protect the device from a humid or wet condition including rain, snow, and so on.
Pull the power cord off from the receptacle on the wall before moving the device.
Be careful not to damage the power cord while the device is being moved.
Be sure not to pull the cable when pulling the power cord off from the wall receptacle.
Be sure to pull out with the plug.
Be sure not to have a clip, a staple, or another small metal object fell inside the device.
Be careful of a safety accident when servicing the inside of the device including the
removal of paper jam, cleaning of the inside of the device, and so on.
In case of the device using toner, keep the toner and the toner container in the place
where cannot be reached by a child.
Do not dispose of the device or consumables in the place treating household waste.
In case of disposal, contact our company’s seller use the proper collection place.
The inside of the device may be very hot. Do not touch the part with the “Careful! Very
Hot!” label attached or the spot around the part. Otherwise, it may cause burn.
Our company’s product conforms to the quality standards and performance.
It is recommended to use only the genuine parts possibly purchased from an authorized
distributor.

Really thank you for purchasing our product.
In this user manual, it contains how to use the device correctly and how to repair the
devivice simply are described in details to maintain the product in optimal state at all
times andcontribute to the rationalization and effciency of the office work of your
company.
Carefully read the user manual before using the device and keep oit close at hand.
In order to use the device safely and correctly, be sure to read the caution on the
safe use before using it.
Before Use
Prohibition and Limitation on Duplication
1. The details of the user manual can be changed without a prior notice.
Our company is not responsible for the direct and/or indirect loss or damages
caused by results of handling or operating the product in any case and for the
results occurring from user’s negligence.
2. The act of duplicating or printing a bill, revenue stamp, bond, share certificate,
bank draft, check, passport, and driver’s license distributed at home and abroad
is prohibited according to a law.
3. The copyrighted literary works such as books, cores, figures, maps, drawings,
and photos can be duplicated and used for personal use or household use and
within the same scope. In other cases, it is prohibited according to a law.
4. The above details present only a part of the applicable laws and regulations.
The details of the law are not stated as they are. Our company is not responsible
for correctness and completeness. Receive a legal consulting service to check if
the duplication or printing of an object is legal.

Contents
ⅰ
Contents
Before Use
1. Introduction
1
2. How to Read this User Manual 2
Symbols ---------------------------------- 2
3. Safety Information 3
4. Notice 5
5. Precautions 8
Install the device ----------------------------- 8
M402/M403 Series ---------------------------- 8
Move the device ------------------------------ 9
6. Handling Consumables 10
7. Precautions in Using the Device 11
8. Ventilation 12
9. Disposal of Batteries 13
Chapter 1. Preparation for Using the Device
1. Specifications 1-2
2. Major Functions 1-3
Copy ------------------------------------ 1-3
Basic Copy --------------------------------- 1-3
Multiple Sheet Copy ---------------------------- 1-3
Combined Copy ------------------------------ 1-3
ID/Card/OHP Copy ---------------------------- 1-3

Scanner ---------------------------------- 1-3
Scanning from the PC -------------------------- 1-3
Scan from the Device Body ----------------------- 1-3
Printer ----------------------------------- 1-3
Printing from the PC --------------------------- 1-3
Printing from the USB Memory---------------------- 1-4
Fax ------------------------------------- 1-4
Basic Fax ---------------------------------- 1-4
Advanced Fax ------------------------------- 1-4
3. Device Overview 1-5
The Name and Function of Each Part (Front) ------------- 1-5
The Name and Function of Each Part (Back) ------------- 1-6
The Name and Function of Each Part (Functional Part) ------- 1-7
4. Control Panel 1-8
Lamps ----------------------------------- 1-8
Buttons ----------------------------------- 1-8
5. Power Switch and Energy Saver Mode 1-11
Power Switch ------------------------------- 1-11
Energy Saver Mode ---------------------------- 1-11
6. Unpacking 1-13
7. Cartridge Preparation 1-14
8. Cartridge Installation 1-16
9. Print Paper Loading 1-17
Loading ---------------------------------- 1-17
Load to the Multipurpose Tray ---------------------- 1-20
Installation of the Paper Support -------------------- 1-22
Contents
ⅱ

Contents
ⅲ
10. Original 1-24
Supported Original Type ------------------------- 1-23
ADF ------------------------------------- 1-23
Exposure Glass ------------------------------ 1-23
11. Original Placing 1-24
Placing the Original on the ADF --------------------- 1-24
Placing the Document on the Exposure Glass ------------- 1-26
12. Installation of the Optional Tray 2 1-27
Installation of the Device on the Tray 2 ----------------- 1-28
13. Cable Connection 1-29
USB Cable Connection -------------------------- 1-29
Network Cable Connection ------------------------ 1-29
Wi-Fi Connection (Option) ----------------------- 1-30
14. MFP Driver Installation 1-32
Update of Options Available for the MFP Driver ------------ 1-32
15. MFP Setting Check 1-34
Switch On --------------------------------- 1-34
System Report Printing -------------------------- 1-34
Network Report Print --------------------------- 1-35
16. Tray Specifications 1-36
17. Paper 1-37
Automatic Feeding ---------------------------- 1-37
Feeding Order ------------------------------- 1-37
18. Certificate 1-38
Environment-Friendly Product --------------------- 1-38
Energy Saving Mark ---------------------------- 1-38

19. InstallationandOperationInformation 1-39
DriverCDandManual -------------------------- 1-39
QuickGuideandManual------------------------- 1-39
Website----------------------------------- 1-39
Chapter2.Copy
1. Copy 2-2
Basic Operation ------------------------------- 2-2
CopySettingTable ----------------------------
2-2
DetailedDescriptionofCopySettings ----------------- 2-3
ChangingBasicCopySettings --------------------- 2-5
2. BasicCopy 2-6
Paper/Original Size Selection------------------------- 2-6
CopyModeandDensity ------------------------- 2-7
Darkness/Brightness/Contrast/BackgroundRemove --------- 2-7
Reduction/EnlargementSetting--------------------- 2-8
AutoScale--------------------------------- 2-8
CustomScale(Zoom) -------------------------- 2-8
3. AdvancedCopy 2-10
CombinedCopy ----------------------------- 2-10
Setting----------------------------------- 2-10
ID/Card/OHPCopy ---------------------------- 2-11
ID/CardCopy ------------------------------- 2-11
OHPCopy --------------------------------- 2-12
Duplex ----------------------------------- 2-12
Howtomake2-sidedcopies---------------------- 2-12
ReductionofA3toA4 -------------------------- 2-13
PreparationforA3DocumentScanning ---------------- 2-13
ⅳ
Contents

Chapter 3. Scanner, Printer and Fax
1. Driver Installation 3-2
Update of Options Available for the MFP Driver ------------ 3-2
For Windows Users ---------------------------- 3-2
2. Scan with the PC 3-4
Scan with the PC ----------------------------- 3-4
3. DLT Document Scan 3-8
Preparation for DLT Document Scan ------------------ 3-8
4. Scan from the MFP 3-9
Scan with the USB Memory ----------------------- 3-9
E-mail the Scanned File ------------------------ 3-10
E-mail Server Setting -------------------------- 3-10
Alphanumeric Pad ---------------------------- 3-11
Send the Scanned Image to the FTP Directly ------------- 3-12
Scan Setting Table ---------------------------- 3-14
Detailed Description of Scan Settings ----------------- 3-14
5. Print from the PC 3-15
Print ------------------------------------- 3-15
Canceling Print Jobs --------------------------- 3-15
Cancel with the Button on the Control Panel ------------- 3-15
Cancel from the My Computer --------------------- 3-15
6. Change Print Settings of the MFP Driver 3-17
Entering the Basic Print Setting --------------------- 3-17
For Windows Users ---------------------------- 3-17
Help ------------------------------------- 3-17
Advanced Functions in Each Tab -------------------- 3-18
Functions in the Print Setting Tab -------------------- 3-18
Paper Tab --------------------------------- 3-22
ⅴ
Contents

Advanced Tab ------------------------------- 3-25
Print Quality Tab ------------------------------ 3-33
7. Print with the USB Memory 3-36
Preparation for Print with the USB Memory --------------- 3-36
8. Basic Fax 3-37
Default Setting Change -------------------------- 3-37
Basic Operation ------------------------------ 3-37
9. Advanced Fax 3-40
Broadcast Tx -------------------------------- 3-40
Polling Tx ---------------------------------- 3-41
Delay Tx ---------------------------------- 3-42
DLT Tx ----------------------------------- 3-42
On-Hook Dial ------------------------------- 3-43
10. Fax from the PC 3-44
Chapter 4. Settings of Each Function
1. Setting with the Web Image Monitor 4-2
2. Paper 4-3
Paper Setting ------------------------------- 4-3
Paper Setting Table ---------------------------- 4-3
Detailed Description of Paper Settings ----------------- 4-4
3. Copy 4-5
Setting ----------------------------------- 4-5
Copy Setting Table ---------------------------- 4-5
Detailed Description of Copy Settings ----------------- 4-6
ⅵ
Contents

4. Scan 4-8
Setting ----------------------------------- 4-8
Scan Setting Table ---------------------------- 4-8
Detailed Description of Scan Settings ----------------- 4-9
5. Print Settings 4-10
Setting ----------------------------------- 4-10
Print Setting Table----------------------------- 4-10
Detailed Description of Print Settings ------------------ 4-10
6. General Settings 4-11
General Setting Table --------------------------- 4-11
Detailed Description of General Settings ---------------- 4-11
Reset to Factory Settings------------------------- 4-11
System Report Printing -------------------------- 4-12
Network Report Printing ------------------------- 4-12
Error Log and Sample Page Printing ------------------ 4-12
Fax TCR Report Printing ------------------------- 4-13
Fax Tx/Rx Report Printing ------------------------ 4-13
Memory File List Printing ------------------------- 4-13
Reports Table ------------------------------- 4-14
7. Fax 4-15
Setting ----------------------------------- 4-15
Fax Setting Table ----------------------------- 4-15
Detailed Description of Generals -------------------- 4-15
General Table ------------------------------- 4-16
Station ID --------------------------------- 4-16
Station Number ------------------------------ 4-16
Date/Time --------------------------------- 4-17
ECM ------------------------------------ 4-17
Line Monitor -------------------------------- 4-17
Volume ----------------------------------- 4-18
Contents
ⅶ

DetailedDescriptionofPendingFaxJobs--------------- 4-18
SpeedDialSavingandEditing---------------------- 4-18
AddressBook ------------------------------- 4-19
Receiver’sNumberSavingandEditing----------------- 4-19
DetailedDescriptionofGroupDial ------------------- 4-20
DetailedDescriptionofTxSettings------------------- 4-20
TxSettingsTable----------------------------- 4-20
OriginalSize -------------------------------- 4-21
Resolution--------------------------------- 4-21
ImageType -------------------------------- 4-21
Lighter/Darker------------------------------- 4-22
DialPrefix --------------------------------- 4-22
Auto.Redial-------------------------------- 4-23
TTI------------------------------------- 4-23
ConfidentialTx ------------------------------ 4-24
MemoryFBTimeout --------------------------- 4-24
OnhookFBTimeout --------------------------- 4-24
RxSettings -------------------------------- 4-25
RxSettings -------------------------------- 4-25
FaxForward-------------------------------- 4-25
ConfidentialRx ------------------------------ 4-25
No.OfRings ------------------------------- 4-26
AutoReduction------------------------------ 4-26
DetailedDescriptionofReports--------------------- 4-26
ReportsSettingTable -------------------------- 4-26
TCRReport -------------------------------- 4-26
Tx/RxReports------------------------------- 4-28
8. NetworkSetting 4-29
NetworkSettingTable -------------------------- 4-29
DetailedDescriptionofNetworkSettings---------------- 4-30
WiredNetworkSetting -------------------------- 4-33
ⅷ
Contents

WirelessNetworkSetting------------------------- 4-35
WirelessNetworkConnection ---------------------- 4-35
IPAddressSetting ---------------------------- 4-38
9. DeviceRemoteMonitor/Control 4-40
HowtoUseDeviceMonitor ----------------------- 4-40
AutoEmailAlert------------------------------ 4-43
Chapter5.MaintenanceandTroubleshooting
1. MaintenanceofConsumables 5-2
StatusofConsumables-------------------------- 5-2
2. MFPMaintenance 5-3
SavingConsumables--------------------------- 5-3
OrderingConsumables-------------------------- 5-3
CartridgeOrdering ---------------------------- 5-3
CartridgeStoraging---------------------------- 5-4
3. ConsumablesChange 5-5
TonerCartridge ------------------------------ 5-5
DrumCartridge ------------------------------ 5-5
TonerCartridgeReplacement ---------------------- 5-6
Replacement-------------------------------- 5-6
DrumCartridgeReplacement ---------------------- 5-9
ADFPadReplacement-------------------------- 5-13
4. Cleaning 5-15
OuterSurfaceCleaning-------------------------- 5-15
ScannerAreaCleaning-------------------------- 5-15
ADF,Flatbed,FlatbedCover,andPadCleaning ----------- 5-16
ADFCleaning------------------------------- 5-16
ADFPadCleaning ---------------------------- 5-16
Contents
ix

PrinterAreaCleaning--------------------------- 5-18
5. UnderstandingofMessages 5-19
6. PaperJamRemoval 5-23
PaperJam--------------------------------- 5-23
PaperJamLocationIndicatedbytheErrorCode ----------- 5-27
7. PaperJamRemoval 5-28
PaperJamLocationIndicatedbytheErrorCode ----------- 5-28
104/105PaperJam(UndertheCartridge) --------------- 5-29
106PaperJam(BackFeederCover)------------------ 5-30
RemovalofThejammedpaperVisibleFromTheFlatbed------- 5-30
RemovalofthejammedpaperInvisibleFromTheFlatbed------ 5-31
107PaperJam(UndertheDevice,2-SidedPaperJam)------- 5-32
101PaperJam(Tray1)-------------------------- 5-33
102PaperJam(Tray2)-------------------------- 5-34
103PaperJam(MPT)--------------------------- 5-35
8. Troubleshooting 5-36
TheDeviceDoesNotWork------------------------ 5-36
CannotSendtheFax(OnlyfortheM401) --------------- 5-38
CannotReceivetheFax ------------------------- 5-39
ImageQualityProblem-------------------------- 5-40
NetworkProblem ----------------------------- 5-42
9. PowerShutdown 5-43
PowerShutdown ----------------------------- 5-43
OperationWhilePowerIsOff ---------------------- 5-43
MemoryBackup------------------------------ 5-43
10. BasicPrinterTroubleshooting 5-44
ControlPanelTroubleshooting---------------------- 5-44
DeviceTroubleshooting-------------------------- 5-44
DeviceQualityTroubleshooting --------------------- 5-47
x
Contents

Tray2Troubleshooting-------------------------- 5-51
11. WhentheProblemIsNotResolved 5-52
OtherTroubleshooting -------------------------- 5-52
CustomerSupport----------------------------- 5-52
Chapter6.Appendix
1. Specifications 6-2
MainBodySpecifications ------------------------ 6-2
CopySpecifications---------------------------- 6-3
FaxSpecifications ---------------------------- 6-3
ScannerSpecifications-------------------------- 6-3
PrinterSpecifications--------------------------- 6-4
ADF------------------------------------- 6-4
Tray2(Option) ------------------------------ 6-5
xi
Contents

1
Before Use
1. Introduction
The user manual provides detailed explanation and precautions on the operation and usage of the
device.
Read the manual carefully before operating the device for user safety and convenience.
Keep the user manual nearby to find it promptly.
Important
- The descriptions of the user manual can be modified without a prior notice.
The company is not responsible for any indirect, special, supplementary, and resultant
damages caused by the device handling and operation.
Duplication or printing to produce an illegal duplicate is prohibited.
Generally, the duplication or printing of bills, revenue stamps, bonds, share certificates,
bank drafts, checks, passports, driver’s licenses, and so on is prohibited in the local law.
The above list is just an example. The details of the above list are not all.
The company is not responsible for whether the above list is the total or correct list.
Receive the local legal counseling if it is questionable about whether the duplication or
printing of an object is legal.
Note
- The features of the user manual may be a bit different from those of the actual device.
Some options may not be usable in a certain country.
Inquire of the local sales representative of the user about the above matter.
A unit can be optional depending on the user’s country.
Inquire of the authorized local service depot about the matter.
- A special type may not be used in a certain country.
Inquire of the local sales representative for further details.
- The two types of size display methods are used in the user manual.
The meter version is applied to the device.

2
Before Use
2. How to Read this User Manual
Symbols
The user manual uses following symbols:
Warning
Important safety instruction is introduced.
Not obeying the instruction may cause a serious injury or death.
Be sure to read it. Refer to the caution on the safe use of the device.
Caution
Important safety instruction is introduced.
Not obeying the instruction may cause a minor injury or damage on property Equipment.
Be sure to read it. Refer to the caution on the safe use of the device.
Important
The cautions on the use of the device, the wrong feed of paper, the damage of the original copy,
and the damage of data are explained. Be sure to read it.
The symbol represents the prior information needed before operation.
Note
This symbol represents the description on the function of the device and the action on user
errors.
Reference
The symbol is located in the end of the paragraph, representing the place where the relevant
details are.
[ ]
It represents the message or menu displayed in the device LCD display window.
【 】
It represents the name of each function key displayed in the device control panel and the
`display window.

3
Before Use
3. Safety Information
Plug the power cord to the wall outlet which is near the device, which is easily accessible and
properly grounded. Do not use or store the device in the wet or humid environment.
Caution Danger of Injury
- The product uses laser. The control, adjustment, or execution of the procedure not stated in
the document may cause exposure to harmful electromagnetic wave.
The product uses a printing media heating method so that gas may be emitted from paper
due to heating. In order to prevent the emission of harmful gas, the section addressing the
details on the selection of printing media in the operating instructions should be
understood.
Caution High Temperature on the Surface
- The inside of the device may be hot. Let the surface cooled down to prevent the damage
caused by a hot part. Touch it later on.
Caution Damage of Injury
- Follow below instructions to prevent personal injuries or device damage before moving
the device. Switch off the device and then unplug the power cord. Remove all cords and
cables from the device before moving it. Do not lift the optional feeder and device at the
same time. Lift the device first, and then use both side handles to lift the feeder. Use only
the power cord provided with this device or the one approved by the manufacturer.
Caution Danger of Electric Shock
- In case of accessing the system board or installing a memory option device after installing
the device, do the work after turning off the device and unplugging the power cord.
If another device is connected to the printer, turn off another device and separate the
cable connected to the printer.
Caution Danger of Electric Shock
- The design test of the product was passed and approved by using the component meeting
the strict international safety standards. The safety function of a part may not be clear.
The corresponding manufacturer is not responsible for the usage of another replacement
part.

4
Before Use
Caution Danger of Injury
- Do not twist or bend the power cord, step on it, or put a heavy object on it. Be careful not
to have the power cord stripped off or overloaded. Do not have the power cord get jammed
into the gap of an object such as furniture or a wall. The misuse of the power cord may
cause fire or electric shock.
Check the power cord regularly. Unplug the power cord from the receptacle for inspection.
Inquire of the service specialist about the service or repair problem not stated in the user
manual
Caution Danger of Electric Shock
- When cleaning the outside of the Devices, disconnect the power cord from the receptacle
and all the cables connected to the prevent electric shock.
Caution Danger Laser Safety
- The Center of Devices and Radiological Health (CDRH) prohibits the repair of laser-based
optical units in the field. The optical housing unit can only be repaired in a factory or
at a location with the requisite equipment. The laser subsystem is replaceable in the field
by a qualified Customer Engineer. The laser chassis is not repairable in the field.
Customer engineers are therefore directed to return all chassis and laser subsystems to
the factory or service depot when replacement of the optical subsystem is required.

5
Before Use
4. Notice
NoiseLevel
Followings are measured according to ISO 7779 and determined to meet ISO 9296. Some
modes may not be available in your device.
1 m average sound pressure (dBA)
Printing 49dBA
Copying 53dBA
Standing by < 30dBA
Temperature
Operating Temperature 15.6 C~32.2 C
Shipping and Storage Temperature -40.0 C~60.0 C
DisposaloftheDevice
Do not dispose the device and Consumables in the same as normal garbage. For disposal
and recycling, contact your dealer.
LaserNotice
This machine is certified in the U.S. to conform to the requirements of DHHS21 CFR Subchapter
J for Class 1 laser products, and elsewhere is certified as a Class 1 laser product conforming
to the requirements of IEC 60825-1. Class 1 laser products are not considered to be hazardous.
This machine uses two AIGaAs laser diodes with a wave length of 770~800 nm and an output of
15mW. The laser system and machine are designed so there is never any human access to laser
radiation above a Class 1 level during normal operation, user maintenance or prescribed service
condition.
Class 1 Laser Product

6
Before Use
PowerConsumption
Power Consumption of the Product
The below table shows power consumption. Some modes may not be available in your device.
Mode Description Power Consumption
(W)
Printing The device is printing paper with electric input data. < 540W
Stand-by The device is standing by. < 85W
Power Saving The device is in the power-saving mode. < 6W
Off The device is off with its power plug plugged. < 0.05W
Above power consumption is the hourly average value.
Instant power consumption can be much higher than the average value.
Energy Saver Mode
The device is designed for the energy saver mode.
The energy saver mode is the EPA sleep mode. In the energy saver mode that the device enters
while it is not used for a certain period of time, it reduces power consumption.
By default, the time to activate the energy saver mode is factory-set to 3 minutes.
In the configuration mode, you can change the Energy Saver Mode time to 1 ~ 240 minutes.
If the energy saver mode time is low, you can save energy but the device responses slowly.
If the energy saver mode time is high, the device responses fast but more energy is used.
Deactivated Mode
Even in the deactivated mode, the device consumes power. To stop power consumption fully,
unplug the power cord
Total Energy Usage
It would be useful to calculate the Total energy usage of the device.
Since the electricity bill is charge by watt, to calculate energy use, you have to multiply time
spent in each mode with power consumption.
Total energy usage is the sum of energy use in each mode.
Wireless LAN Specification
This device may be affected by electromagnetic interference. So, it cannot be used for life
saving service.
This manual suits for next models
1
Table of contents
Other Sindoh All In One Printer manuals
