Slide Extended Vent Clamps In Replace End Cap
PUSH
Dash
Vent
Louver
Foot
Vent Vent
Dash Dash
HOOKED
TILT
ADJUSTMENT
HOLES
1 2 3
Mount the Magnetic Mount Antenna
Choose the best location for the antenna considering your vehicle type. Refer to the antenna
placement tips and cautions in the User Guide beginning on page 24.
•Sedan or Coupe: We recommend mounting the antenna justabove either the front windshield
or the back window.
•Pickup Truck: We recommend mounting the antenna just abovethe front windshield.
•Convertible: We recommend mounting the antenna at the leading edge of the trunk.
•SUV: We recommend mounting the antenna at the rear of the roof.
CAUTION! STOP and read the more specificinstructions in the User Guide for all
types of vehicles — or get someone who knowsvehicles to help — if you don’t
understand what to do. You might accidentally do damage to your vehicle.
Feed the antenna wire under the rubber molding around the front or rear
windshield, and into the seal around the trunk or door. For a convertible, the cable
can be routed directly into the trunk.
TIP! Use a tool like a blunt plastic putty knife,a credit card, a plastic knife, or a
similar blunt tool to help hide wires along the windshield trim.
Hide the Magnetic Mount Antenna Cable Inside the Vehicle
The best place to hide your antenna cabledepends on your type of vehicle.
When the antenna is mounted at the rear of the vehicle, it’s usually easiest to run
the cable from the rear to the front toward the radio by routing the cable along the
interior trim where it meets the carpet, gently pushing it behind the edges ofthe
trim. Bring the cable out from the trim and route it under the carpet toward the
dashboard.
When the antenna is mounted at the front of the vehicle, bring the cable into the
rubber weather stripping around the door to the bottom ofthe door opening. Bring
the cable out of the weather stripping and route it under the carpettoward the
dashboard.
Coil any excess cablein a hidden location, such as under the carpet, keeping it
away from any vehiclepedals or controls. Secure the excess cable with wire ties.
Plug the antenna into the silver ANT connection on the rear ofthe dock.
TIP! Avoid damaging or compromisingthe window, door, and trunk seals.
TIP! For morehelp, refer to the detailed antenna cable routing instructions for
your type of vehicle, in the UserGuide beginning on page 27.
AUDIO ANT PWR FM
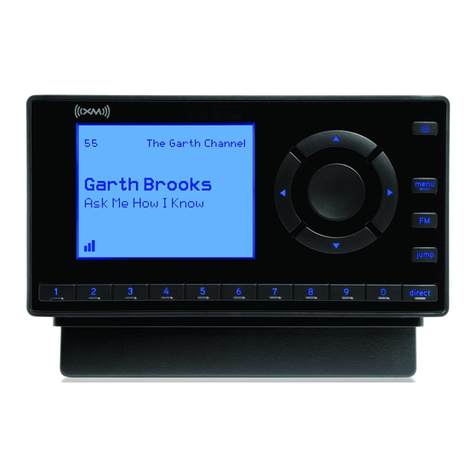
Decide How to Connect
You will listen to
XpressRCi
through your vehicle’sstereo system or FM radio. First,
XpressRCi
must be receiving the XM
signal. Ensure your vehicle is outside with the antenna having a clear viewof the sky. Your audio connectionoptions are:
• Best: Use the Aux In Cable if your vehicle’s stereo system has
an auxiliary input connection. Plugone end of the cable into the
greenAUDIO connector on the PowerConnectVehicleDock and
the other end into the vehicle stereosystem’s auxiliary input jack.
Set thestereosystem toplay from theauxiliaryinput source.
• Better: Use a Cassette Adapter if yourvehicle has a built-in
cassette player. Cassette Adapters aresold separately. Plug
the Cassette Adapterinto the greenAUDIO connector on the
PowerConnect Vehicle Dock.Insert the Cassette Adapterinto
the vehicle’s cassette deck. Set thestereo system to play from
the cassette source.
• Good:Use the PowerConnect featurein the XpressRCi. PowerConnect plays the audio through yourvehicle’sFM radio.
When youhave finished step 4 (below), you’ll firstneed to find anavailable FMchannel in yourarea, and thenyou
need toensure that theXpressRCiandyour vehicle’s FM radioare tuned to thesame available FM channel. (Step 5)
• Best: Usean FM Direct Adapter (FMDA) if none of the above threeaudio connection options works in your
vehicle.The FMDA needs to be installed by a professional installer and directly connectsthe XpressRCito your
vehicle’s FM radio.
TIP! Refer to your vehicle’s owners manual to find the location of the auxiliary input jack, or consult the vehicle
dealer.To learn more about purchasing a CassetteAdapter or FMDA, check with the retailer where you bought your
XpressRCior go to xmradio.com/accessories.
Audio Quality GOOD BETTER BEST
PowerConnect
CassetteAdapter
Aux In Cable
FMDirect Adapter (FMDA)
AUDIO ANT PWR FM
AUDIO ANT PWR FM
Connect the PowerConnect Power Adapter
Insertthe PowerConnect Power Adapter into your vehicle’s cigarette lighter or power
adapter socket. Thenplug it into the redPWR connectoron the rear ofthe dock.
Attach the Dock to the Mount
and the Radio to the Dock
Attach the PowerConnectVehicle Dock
to the mount that you selected. Utilize
the wire guide at the rear of the dock to
help organize the wire and cables, and
make your installation neater.
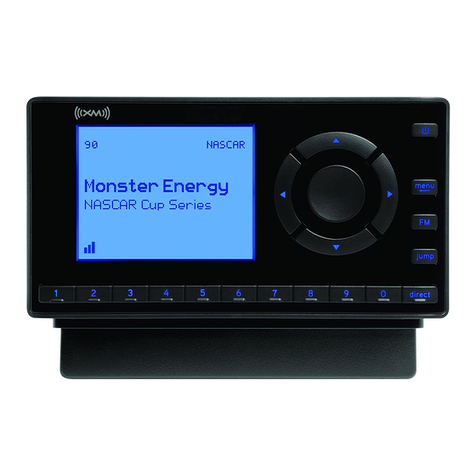
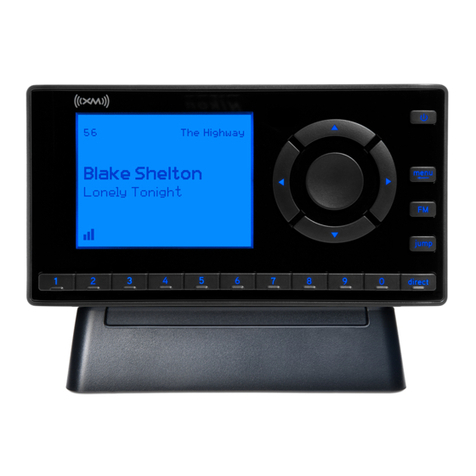
Place the XpressRCiinto the dock. Your
XpressRCishould turn on automatically
when it is plugged in and receiving
power. If it does not, press the Power
button to turn it On.
Wire Guide
AUDIO ANT PWR FM
If you have connected the audio in step 3 using the Aux In Cable or Cassette Adapter, continue with step 6.
Tune the XpressRCiand Vehicle FM Radio to the Same FM Channel
1 Find an Available FM Channel in Your Area
An available FM channel is one that’s not being used by an FM radio station in your area. When you tune
your FM radio to an available channel, you should only hear static or silence – not talk or music. We
recommend one of the following methods to findan available FM channel:
a Use the SIRIUS | XM FM Channel Finder at www.xmradio.com/fmchannel. Go to the website and
enter your zip code. The Channel Finder will suggest a listof available FM channels in your area. For
convenience, write downor print out the list.
OR
b Manually tune through your local FM channels on your vehicle’s FM radio. Locate and create a list of
channels that aren’t being used by any FM radiostation. Write down the list. Once you have created
your list of available FM channels, youwill need to find the one that provides the best match for
XpressRCi.
TIP! You’ll need to use the ‘Manual’ tune functionon your vehicle’sFM radio to tune throughevery FM channel one-by-one.
Turnon your vehicle’sFM radio. Start at 88.1 and use the ‘Manual’tune function on your vehicle’s FM radio to tune through
each FM channelone-by-one (88.1 followed by 88.3 etc.) to locatechannels that aren’t being usedby a local FM radio
station.Write down each FM channelthat has only static or silence onit, until you reach 107.9.
2 Tune your Vehicle’s FM Radio
a Pick the first FM channel on your list.
b Turn on your vehicle’s FM radio (if youhave not already done so) and tune it to this FM channel.
3 Turn the XpressRCi’s FM Transmitter On.
a Press menu.
b Press the Select button to select Vehicle Mode.
c Press the Select button to select FM Transmitter which will turn yellow.
d Turn the Control knob clockwise to display On and press the Select button.
4 Tune the XpressRCiand the Vehicle FM Radio to the Same FM Channel.
a If you are still in the Vehicle Mode menu option with FM Transmitter
turned On, skip to step c. If not, press menu.
b Press the Select button to select Vehicle Mode.
c Turn the Control knob toscroll to and highlight FM Channels. Press the
Select button.
d Turn the Control knob toscroll to and highlight storage location FM-2 and
press the Select button.
e From the list ofFM channels displayed, turn the Control knob to highlight
the available FM channel you found in step 1, and press the Select button.
f Press the Select button to select Start Using.
g The selected FM channel will be confirmed on the display screen,and the X pressRCiwill tune to
that FM channel.
h You should hear XM through your vehicle’s radio when XpressRCiis tuned to channel 1. If you are
satisfied with the sound quality, you’re done.
5 You May Need to Try Other FM Channels on Your List
If the chosen FM channel doesn’t work well for you,work down the list of FM channels until you find
one that allows you to hear XM clearly. Each time, you will need to tune your vehicle’s FM radioand
XpressRCito the same FM channel.
95.9
MATCH FM CHANNELS
Activate Your Service
Beforeyou can enjoy Commercial-Free Music, plus Sports, News, Talk& Entertainment, you needto activate your
XpressRCi.
1 Make sure your XpressRCiisproperly installed, turned on, and receiving the XM signal so that you
can hear the audio on channel 1.
2 Make a note of your XM Radio ID. You can find it:
•On channel 0 (zero)
•On a label on the bottom of the gift box
•On the label on the back of your XpressRCi
NOTE! The XM Radio ID does not use the letters I, O, S, or F.
3 Activate your service:
•Online: Go towww.xmradio.com and click on “ACTIVATE RADIO”
in the top right corner
OR
•By phone: Call 1-800-XM-RADIO (1-800-967-2346)
4 When your service is activated, yourXpressRCiwill receive all channels
to which you have subscribed. At this time, if you turn the Control knob,
you can scroll and tune other channels. Activation usually takes 10 to
15 minutes, but may take up to an hour. We recommend that your radio
remain on until activated.
TIP! If the signal reception
is low, check to seeif the
antenna’s view ofthe sky
is blocked by a tree, a
building, a bridge, or by
anything on the vehicle
roof such as a roof rackor
luggage container,etc.
Adjust until you are
receiving a good signal.
Tocheck the signal, press
menu, turn the Control
knob to scroll to and
highlight Signal Indicator.
Press the Select button to
display the Signal
Indicator screen.
