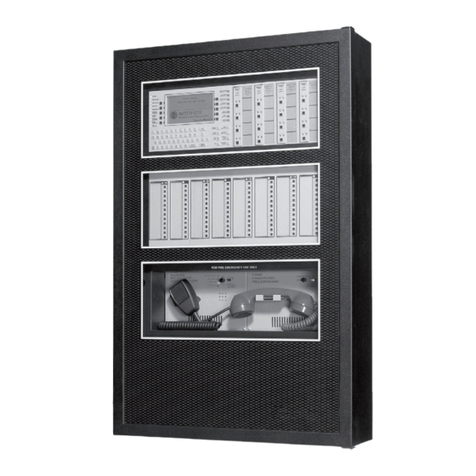
Siterwell GS690 Manual

1
Document NO.: RD-690-39-001 Version: A Date:2017.12.30
GS690
ADDRESSABLE FIRE ALARM CONTROL PANEL
INSTALLATION AND SERVICE MANUAL

2
Document NO.: RD-690-39-001 Version: A Date:2017.12.30
Product execution standard:UL864,Tenth Edition
Cautions and Warnings
READ AND SAVE THESE INSTRUCTIONS. Follow the instructions in this installation manual. These
instructions must be followed to avoid damage to this product and associated equipment. Product operation
and reliability depends upon proper installation.
DO NOT INSTALL ANY PRODUCT THAT APPEARS DAMAGED. Upon unpacking your equipment, inspect the
contents of the carton for shipping damage. If damage is apparent, immediately file a claim with the carrier.
ELECTRICAL HAZARD - Disconnect electrical field power when making any internal adjustments or repairs.
Servicing should be performed by qualified personnel.
Avoid Electrostatic Damage
STATIC HAZARD - Static electricity can damage sensitive electronic components. Therefore, the following precautions must be followed:
• G
round yourself with a proper wrist strap before opening or handling any circuits or components
.
• Prior to installation, keep components wrapped in anti-static wrapper at all times.
Radio Interference Caution
RADIO FREQUENCY ENERGY - This equipment generates, uses, and can radiate radio frequency energy and if not
installed and used in accordance with the instruction manual, may cause interference to radio
communications. It has been tested and found to comply with the limits for a Class A computing device
pursuant to Subpart J of Part 15 of FCC Rules, which are designed to provide reasonable protection against
such interference when operated in a commercial environment. Operation of this equipment in a residential
area may cause interference in which case the user at his own expense will be required to take whatever
measures may be required to correct the interference.
Software and hardware changes and required system reacceptance
SYSTEM REACCEPTANCE TEST AFTER SOFTWARE CHANGES -Reacceptance testing is required after any change,
addition or deletion of system components, or after any modification, repair or adjustment to system hardware or wiring.
All components, circuits, system operations, or software functions known to be affected by a change must be 100% tested. In
addition, to ensure that other operations are not inadvertently affected, at least 10% of initiating devices that are not directly
affected by the change, up to a maximum of 50 devices, must also be tested and proper system operation verified.
Copyright © 2018 SITERWELL ELECTRONICS CO.,LTD LIMITED. No portion of this manual may
be copied, reproduced in any form, modified or quoted without the written permission of
copyright holder.
This product will not be perfected and upgraded regularly. SITERWELL ELECTRONICS CO.,LTD LIMITED. Reserves the
right to revise this manual without prior notice.

3
Document NO.: RD-690-39-001 Version: A Date:2017.12.30
Table of Contents
1. PRECAUTIONS FOR USE.....................................................................................................................................................6
1.1
Alarm System Limitations
................................................................................................. 6
2. INTRODUCTION......................................................................................................................................................................8
2.1
Feature
............................................................................................................................... 8
2.2
Factory Default Settings
.................................................................................................... 9
2.3
Specifications
.................................................................................................................... 9
2.4
Controls and Indicators
................................................................................................... 11
2.4.1
Controls Keys:
......................................................................................................................................11
2.4.2
Indications
..............................................................................................................................................12
2.5
Main Board
....................................................................................................................... 14
2.5.1
General
....................................................................................................................................................14
2.5.2
Analog Addressable Loop(s)
.............................................................................................................15
2.5.3
Non-addressable Audio Alarm Devices
..........................................................................................16
2.5.4
Auxiliary Fire Relay Outputs
..............................................................................................................16
2.5.5
Fault Relay Output
...............................................................................................................................16
2.5.6
PC connection (reserved)
...................................................................................................................17
2.5.7
Auxiliary Supply Output
......................................................................................................................17
2.6
Power Supply
................................................................................................................... 17
2.7
Reset
................................................................................................................................ 17
2.8
Mechanical Construction
................................................................................................ 17
2.9
Circuits not used
............................................................................................................. 19
3. INSTALLATION .....................................................................................................................................................................20
3.1
Installation Precaution
.................................................................................................... 20
3.2
Tools and Equipment
...................................................................................................... 20
3.3
Panel Mounting
................................................................................................................ 20
3.4
Wiring fix in Box
.............................................................................................................. 21
3.5
Panel Wiring
..................................................................................................................... 22
3.5.1
Primary Power source (AC) and Earth Ground Connections
....................................................22
3.5.2
Standby Power Source (Batteries)
...................................................................................................22
3.6
Master Board
.................................................................................................................... 23
3.6.1
RS485
(Not Connected) .......................................................................................................................23
3.6.2
Relay
........................................................................................................................................................24
3.6.3
Auxiliary Power
.....................................................................................................................................24

4
Document NO.: RD-690-39-001 Version: A Date:2017.12.30
3.6.4
NAC
..........................................................................................................................................................24
3.6.5
Addressable Loops
..............................................................................................................................25
4. PROGRAMMING ...................................................................................................................................................................26
4.1
General Comments
.......................................................................................................... 26
4.2
Programming Instruction
................................................................................................ 26
4.3
Program Menu
................................................................................................................. 33
4.3.1
Review Historic Log (Menu Item 1-1)
...............................................................................................34
4.3.2
Zones - Disable and Assign
...............................................................................................................34
4.3.3
In Grp - Disable and Assign
...............................................................................................................36
4.3.4
Out Grp - Disable and Assign
............................................................................................................37
4.3.5
Device set-up
.........................................................................................................................................38
4.3.6
Other Device Option
............................................................................................................................40
4.3.7
Monitor device counts & test
.............................................................................................................41
4.3.8
General
....................................................................................................................................................41
4.3.9
Special Features
...................................................................................................................................43
4.3.10
Other Features
......................................................................................................................................44
4.4 Access Level
.................................................................................................................................. 47
4.4.1
Common Level...........................................................................................................................................47
4.4.2
User Level
..............................................................................................................................................47
4.4.2
Admin Level
...........................................................................................................................................48
4.4.3
Engineer Level
......................................................................................................................................48
5CONDITIONS..........................................................................................................................................................................49
5.1 Alarm Condition
............................................................................................................................. 49
5.2
Actions During the Alarm Condition
............................................................................... 49
5.2.1
Fire Investigation
..................................................................................................................................49
5.2.2
Audio/Visual Alarm Device Silence/Activation
.............................................................................50
5.2.3
Delays Active Override
.......................................................................................................................50
5.3 Fault Condition
............................................................................................................................... 50
5.4
Actions During the Fault Condition
................................................................................ 50
5.4.1
Fault Investigation
................................................................................................................................50
5.4.2
Multiple Devices in Fault
....................................................................................................................50
5.5 Disabled Condition
........................................................................................................................ 51
5.5.1
NAC Disablement
.................................................................................................................................51
5.5.2
Zone Disablement
................................................................................................................................51

5
Document NO.: RD-690-39-001 Version: A Date:2017.12.30
5.5.3
Loop Disablement
................................................................................................................................51
5.6 Test Condition................................................................................................................................ 51
5.6.1
Indicator Test
.........................................................................................................................................52
5.6.2
System Reset
.........................................................................................................................................52
6
TROUBLE SHOOTING GUIDES
.........................................................................................................................................52
7
SERVICE
.................................................................................................................................................................................53
7.1
Installation/Replacement
................................................................................................. 53
7.1.1
Installation/Replacement of PCB:
....................................................................................................53
7.1.2
Installation/Replacement of Power adapter:
..................................................................................53
7.1.3
Installation/Replacement of Power Battery:
..................................................................................54
7.1.4
Installation/Replacement of FUSE:
..................................................................................................55
7.2
Service Functions
............................................................................................................ 56
7.3
Inspections
....................................................................................................................... 56
7.4
Tests
................................................................................................................................. 56
7.4.1
6 Monthly Tests
.....................................................................................................................................56
7.4.2
Annual Tests
..........................................................................................................................................57
7.5
Preventive Maintenance
.................................................................................................. 57
8
WIRE REQUIREMENTS
........................................................................................................................................................57
9
BATTERY CALCULATION
...................................................................................................................................................58

6
Document NO.: RD-690-39-001 Version: A Date:2017.12.30
The GS690 addressable control and indicating panel forms the central part of a fire detection and alarm system. The
panel is available with 1 or 2 addressable loops and is easy to install and operate. A central microprocessor delivers
reliable operation and requires minimum maintenance.
The GS690 control and indicating panel is compatible with SITERWELL addressable detectors and other devices, such
as manual pull stations and audio/visual alarm devices. They are suitable for small and medium-sized buildings.
This Manual provides installers with instructions to install, use and service the GS690 control and indicating panel using
revision 1.0 operating firmware.
1. PRECAUTIONS FOR USE
1.1 Alarm System Limitations
An automatic fire alarm system–typically made up of smoke detectors, heat detectors, manual pull stations, audible and
visual warning devices, and a fire alarm control with remote notification capability–can provide early warning of a
developing fire. Such a system, however, does not assure protection against property damage or loss of life resulting
from afire. The Manufacturer recommends that smoke and/or heat detectors be located throughout a protected premise
following the recommendations of the current edition of the National Fire Protection Association Standard 72 (NFPA 72),
manufacturer's recommendations, State and local codes, and the recommendations contained in the Guide for Proper
Use of System Smoke Detectors, available for free download from the National Electrical Manufacturers Association,
NEMA web site at https://www.nema.org/Standards/Pages/Guide-for-Proper-Use-of-System-Smoke-Detectors.aspx A
study by the Federal Emergency Management Agency (an agency of the United States government) indicated that
smoke detectors may not go off in as many as 35% of all fires. While fire alarm systems are designed to provide early
warning against fire, they do not guarantee warning or protection against fire. A fire alarm system may not provide timely
or adequate warning, or simply may not function, for a variety of reasons:
Smoke detectors may not sense fire where smoke cannot reach the detectors such as in chimneys, in or behind walls,
on roofs, or on the other side of closed doors. Smoke detectors also may not sense a fire on another level or floor of a
building. Asecond-floor detector, for example, may not sense a first-floor or basement fire.
Heat detectors do not sense particles of combustion and alarm only when heat on their sensors increases at a
predetermined rate or reaches a predetermined level. Rate-of-rise heat detectors may be subject to reduced sensitivity
over time. For this reason, the rate-of-rise feature of each detector should be tested at least once per year by a qualified
fire protection specialist. Heat detectors are designed to protect property, not life.
Smoke detectors must be installed in the same room as the control panel and in rooms used by the system for the
connection of alarm transmission wiring, communications, signaling, and/or power. If detectors are not so located, a
developing fire may damage the alarm system, crippling its ability to report a fire.
Audible warning devices such as bells may not alert people if these devices are located on the other side of closed or
partly open doors or are located on another floor of a building. Any warning device may fail to alert people with a
disability or those who have recently consumed drugs, alcohol or medication.
Please note that:
Strobes can, under certain circumstances, cause seizures in people with conditions such as epilepsy.
Studies have shown that certain people, even when they hear a fire alarm signal, do not respond or comprehend the
meaning of the signal. It is the property owner's responsibility to conduct fire drills and other training exercise to make
people aware of fire alarm signals and instruct them on the proper reaction to alarm signals.
In rare instances, the sounding of a warning device can cause temporary or permanent hearing loss.

7
Document NO.: RD-690-39-001 Version: A Date:2017.12.30
The most common cause
of fire alarm malfunction is inadequate maintenance. To keep the entire fire alarm system in
excellent working order, ongoing maintenance is required per the manufacturer's recommendations, and UL and NFPA
standards. At a minimum, the requirements of NFPA 72 shall be followed. Environments with large amounts of dust, dirt
or high air velocity require more frequent maintenance. A maintenance agreement should be arranged through the local
manufacturer's RE / DD / UM 3 / AVANI V 1.0- 01 representative. Maintenance should be scheduled monthly or as
required by National and/or local fire codes and should be performed by authorized professional fire alarm installers
only. Adequate written records of all inspections should be kept.
This system
meets NFPA requirements for indoor dry operation at 0-49°C/32-120°F and at a relative humidity of 93 ±2%
RH (non-condensing) at 32 ±2°C/90 ±3°F. However, the useful life of the system's standby batteries and the electronic
components may be adversely affected by extreme temperature ranges and humidity. Therefore, it is recommended that
this system and all peripherals be installed in an environment with a nominal room temperature of 15-27°C/60-80°F.
Verify that wire sizes are adequate
for all initiating and indicating device loops. Refer to manual Specifications section
for maximum allowable I.R. drop from the specified device voltage. Like all solid state electronic devices, this system
may operate erratically or can be damaged when subjected to lightning-induced transients. Although no system is
completely immune from lightning transients and interferences, proper grounding will reduce susceptibility. Overhead or
outside aerial wiring is not recommended, due to an increased susceptibility to nearby lightning strikes. Consult with the
Technical Services Department if any problems are anticipated or encountered.
Do not tighten screw terminals
more than 9 in-lbs. Over-tightening may damage threads, resulting in reduced terminal
contact pressure and difficulty with screw terminal removal.
This system contains static-sensitive components.
Always ground yourself with a proper wrist strap before handling any circuits so that static charges are removed from the
body. Use static-suppressive packaging to protect electronic assemblies removed from the unit.
Follow the instructions
in the installation, operating, and programming manuals. These instructions must be followed to
avoid damage to the control panel and associated equipment. FACP operation and reliability depend upon proper
installation by authorized personnel.

8
Document NO.: RD-690-39-001 Version: A Date:2017.12.30
2. INTRODUCTION
2.1
Feature
The GS690 includes features that provide a flexible solution for small and medium-sized buildings. The equipment
is easy to install and quick to configure and use. A reliable microprocessor delivers trouble-free operation,
lowering service costs and increasing up-time.
Features:
32 bit processor ARM Cortex-M3
High contrast backlit LCD provides 4 rows of 40 characters for device and system status
Separate individual detection zone fire LED indicators
Automatic device detection on start-up
Automatic device type-code verification
4 Access Levels
Real Time Clock
4000 event history log
Day/night mode configurable
Manual activation of alarm devices
Supervised auxiliary DC 24 V output (Only use to provide power for Strobes/Horns)
2 programmable non-addressable alarm output circuits
2 unmonitored relay contacts for Fire Alarm Condition outputs
1 unmonitored relay contact for Fault Condition output
Surface mounting enclosure
Supports up to 64 Repeater Panels (reserved)
LOOP:
Single loop only, single loop expandable to 2-loop, or2-loops
127 addressable devices per loop
40 configurable zones
64 configurable input groups
64 configurable output groups
32 addressable audio/visual alarm devices per loop (10.Internal auxiliary DC 24V output)
Class A or Class B wiring (Only Class B when connected with Strobes/Horns)
Network options:
RS485 Communication interface(reserved)
USB 2.0 Interface for PC Connectivity(reserved)
Ethernet interface for computer communication(reserved)
Circuits are Not Used:
5V/GND/OUT
GND/EV
GND/REM

9
Document NO.: RD-690-39-001 Version: A Date:2017.12.30
2.2
Factory Default Settings
This control and indicating equipment is supplied ready to operate as a standard addressable control panel. Optional
functions and their configuration are described in following sections.
The default settings are as follows:
All alarm Zones enabled
All Input groups enabled
All Output groups enabled
All Detection Zone definitions will be cleared (no devices assigned)
All Input groups definitions will be cleared (no devices assigned)
All Output groups definitions will be cleared (no devices assigned)
Alarm Zone device delay settings will be cleared
Alarm Output groups delay settings will be cleared
User access to all programming functions will be denied
The analog loop is enabled
All initiating devices are enabled
The event log will be cleared
The “power on” count will be set to 0
The default installation mode
Information about installed devices and their types will be cleared
2.3
Specifications
Power Supply
Operating voltage
AC(110~220)V,50/60Hz
Mains supply Current Limit
2.1A
Mains supply fuse
4A/AC 250V slow blow(20mm)
Power supply
Standby battery maximum capacity (2xDC 12V)
12Ah
Maximum battery current draw
1.2A@maximum operating temperature
Charging Circuit
28V,±2% Nominal
Battery fuse
1A resettable(electronic fuse)
Battery fault threshold voltage
< DC 20V
Quiescent current
100mA @ DC28.5V
Addressable Loops
Addressable loops
2
Number of connected devices per loop
127
Loop current(max)
100mA @40ohms(max) @24V DC per loop
Loop monitoring
Open, short-circuit and Ground
Power Limited
Audio Alarms
Configurable audio alarm groups(max)
7

10
Document NO.: RD-690-39-001 Version: A Date:2017.12.30
Non-addressable audio alarm device driver
220mA (Line Drop: 2.4V) (Total)
Non-addressable audio alarm end-of-line resistor
10KΩ
Alarm zone monitoring
Open , Ground, and short-circuit
Power Limited
Alarm zone voltage(max)
DC 24V
Current Rating for Regulated, mA
22
Current Rating for Special Applications, mA
220
Alarm zone fuse
1A resettable(electronic fuse)
24-Aux Output (Use to power Strobes/Horns Only)
Nominal output voltage, Vdc
24
Recorded Voltage range for compatibility, V
17.2-27.7
Maximum circuit output current, A
1.35
Supervised and synchronized
Power Limited
Current Rating for Regulated, A
0.135 (max 1 NAC device)
Current Rating for Special Applications, A
1.35 (max 10 NAC devices)
Max line Impedance (ohms)
2 (per loop)
Ancillary Outputs
Number of programmable output relays
3(Power factor 1)
Ancillary fire C/O relay
2x(1.0A@DC30V)
Ancillary Inputs
Evacuation start/stop
Non-latching, voltage-free
Miscellaneous
Terminal Wiring
28 -14AWG (0.5~+1.6)mm2
Operating temperature
(0~+49)℃
Operating humidity
(0~93)%RH, Non-condensing
Storage temperature
(-25~+80)℃
Storage humidity
(0~98)%RH, Non-condensing
Dimensions(LxWxH)
440x354x140.5mm
Weight (excluding batteries)
≤9.0kg
Ground Fault Impedance value
0 ohm.

11
Document NO.: RD-690-39-001 Version: A Date:2017.12.30
2.4
Controls and Indicators
Figure –1
2.4.1
Controls Keys:
SILENCED/ALARM
Key:
Activate the NACs and audio/visual alarm devices regardless of system status.
Silence alarm SILENCED/ALARM LED will illuminate when devices are active.
Activation of this key is a memory event when used as alarm silence.
This function is user or Admin password protected.
RESET Key:
Resets the fire detection and alarm system after silence in alarm condition.
Key operation is a memory event when operated to reset the system.
User or Admin password protected.
MENU Key:
To enter or exit menu mode or return the previous menu. Under normal conditions, pressing the menu key will
display enter password within 10s, after entering the password with the NUMBER keys, press ENTER key to
confirm. Entering the correct password enables the menu mode, an incorrect password will revert to the default
display. Once in menu mode subsequent pressing of the menu within 10s. Enables access to additional functions
based on password access level.

12
Document NO.: RD-690-39-001 Version: A Date:2017.12.30
CURSOR KEYS:
To move the cursor point in the LCD as required.
DISABLED Key:
To review the queue of disable items step by step or quickly. The disable item list includes the status of Zone
groups, in groups, out groups, loops, devices on two loops, NACs. An event in the queue will be displayed for 10s,
after which the LCD will revert to the default display.
ENTER Key:
To confirm the current operation.
ACK. Key:
To silence internal buzzer in alarm condition or fault condition.
This operation is recorded as memory as an event when operated to silence the internal buzzer.
User or Admin password protected.
TEST Key:
Illuminates all LEDs, LCD segments and activates the inner buzzer.
NUMBER Key:
These keys are used for entering password, date or time, etc.
FIRE Key:
The FIRE LED will flash if an input device is reporting a fire. Pressing the button will sequentially display the queue
of fire events step by step or quickly. Once the queue has been reviewed, the FIRE led will be on steady. If a new
event occurs, the LED will begin to flash. An event in the queue will be displayed for 10s, after which time the LCD
will display the first alarm event.
PREALARM Key:
The PREALARM LED will flash if a device is reaching the alarm threshold level. Pressing the button will
sequentially display the queue of pre-alarm events step by step or quickly. Once the queue has been reviewed,
the PREALARM led will be on steady. If a new event occurs, the LED will begin to flash. An event in the queue will
be displayed for 10s, after which time the LCD will display the first pre-alarm event or the first fire event if a Fire
Condition exists or the first fault event if a Fault Condition exists.
FAULT Key:
The FAULT LED will flash if an input device is reporting a fault. Pressing the button will sequentially display the
queue of fault events step by step or quickly. Once the queue has been reviewed, the FAULT LED will be on
steady. If a new event occurs, the LED will begin to flash again. An event in the queue will be displayed for 10s,
after which time the LCD will display the first fault event or the first fire event if a Fire Condition exists.
2.4.2
Indications
2.4.2.1 LCD Indication
The 40X4 Characters LCD is mainly used for programming of the panel. It also displays all events along with the LED
indication except system fault.
2.4.2.2 Internal Buzzer
An internal buzzer provides separate and distinct sounds for alarm and fault conditions:
Alarm -- Continuous
Fault -- pulse 0.5sec ON and 5sec OFF

13
Document NO.: RD-690-39-001 Version: A Date:2017.12.30
2.4.2.3 Common Indication
FAULT Yellow
Indicates a Fault Condition. The LED will flash with un-acknowledged faults and will be on steady when acknowledged.
(Fault information will be displayed on the LCD, and depending on the source of the fault, the corresponding indicator
will flash.)
FIRE Red
Indicates the Alarm Condition. The LED will flash with un-acknowledged alarms and will be on steady when
acknowledged. (Alarm zone information will be displayed on the FIRE indicators. Alarm device information will be
displayed on the LCD.)
SYSTEM FAULT Yellow
Indicates an operating system software execution fault. The LED will illuminate concurrently the Fault LED will
illuminate and internal buzzer will continuously sound.
SYSTEM ON Green
Indicates the system is in working mode. The LED will flash in the INSTALLATION MODE and be steady on during the
ACTIVE MODE.
MAINS ON Green
Indicates the status of the primary power source. The LED flashing indicates that the primary source voltage is low,
steady illumination indicates that primary source is at full power extinguished indicates that the primary source is
unavailable (Fault information will be displayed on the LCD).
BATTERY ON Green
Indicates the status of standby source. The LED flashing indicates that the standby source voltage is low, steady
illumination indicates that standby source is fully charged and extinguished indicating that the standby source is
unavailable (discharged). (Fault information will be displayed on the LCD)
CHARGER FAULT Yellow
Indicates status of the charger circuit condition. The LED illuminating indicates that the charger circuit trouble,
extinguished is normal status l. (Fault information will be displayed on the LCD)
EARTH FAULT Yellow
Indicates a ground fault. The LED illuminating indicates a ground fault or that the ground reference is disconnected.
Normal status is extinguished. (Fault information will be displayed on the LCD)
BUZZER Yellow
Indicates the status of internal buzzer. The LED flashing indicates the internal buzzer pulsing alarm and illuminating
indicates the inner buzzer continuous alarm.
DISABLED Yellow
Indicates a disabled condition. The LED illuminating indicates that disabled condition is present on the system.
Extinguished indicates no disablements on the system.

14
Document NO.: RD-690-39-001 Version: A Date:2017.12.30
TEST Yellow
Indicates test mode. The LED illuminating indicates that system is in test mode and testing communication to devices.
PRE-ALARM Yellow
Indicates a device is reaching the alarm threshold level. The LED will flash with un-acknowledged alarms and be on
Steady when acknowledged. (Pre-alarm information will be displayed on the LCD.)
NIGHT MODE Yellow
The LED illuminating indicates that it is operating in the Night Mode. When extinguish edit is operating in the Day Mode.
NAC FAULT Yellow
Indicates status of Notification Appliances Circuits. The LED will flash with un-acknowledged faults and be on steady
when acknowledged. (NAC fault information will be displayed on the LCD)
SILENCED/ALARM Yellow
Indicates the status of alarm circuit. The LED illuminating indicates that audio/visual alarm devices is activated。
2.4.2.4 Zone Group Indication
FIRE ZONERED
Indicates the Alarm Condition within a specific detection zone. The LED will flash with un-acknowledged alarms and be
on steady when acknowledged. (Zone information will be displayed on the LCD)
2.5
Main Board
2.5.1
General
The main circuit board provides system control and visual indication control and contains the system microcontroller,
programming part (USB-2.0) and non-volatile memory for system events storages. The main circuit board is used for
the critical functions like programmable logic and timing functions and non-critical functions, like customer zone and
device messages.
The visual display board consists of a series LED’s for common indication of power, alarm, and fault. The display board
has 40 X 4 characters LCD, which describes system information with real time clock and enables the user to easily
program the system options. It also contains the matrix touch key pad, which enables the user access.
The LCD, indicator and key are installed in front of the motherboard. Connectors are installed on the back of the
motherboard and at the top.
The rear of the motherboard has a connector for an optional single-loop expansion daughter board. When fitted, the
GS690 has 2 loops for up to 254 field devices. Most components are located on the rear of the motherboard, including
the internal sounder.

15
Document NO.: RD-690-39-001 Version: A Date:2017.12.30
Figure –2
2.5.2
Analog Addressable Loop(s)
Analog loop 1 and loop2 provides connection to all the analogue addressable devices and loop-powered audio/visual
alarms. Typical devices include smoke, heat detectors and manual call points, and input/output modules. If the loops is
not correctly installed (outgoing and incoming connections) the control and indicating equipment will not be able to
monitor open-and short-circuit conditions of the wiring.
Figure –3

16
Document NO.: RD-690-39-001 Version: A Date:2017.12.30
2.5.3
Non-addressable Audio Alarm Devices
Two alarm output circuits (NAC1 and NAC2) are provided for non-addressable audio alarm devices, including bells.
These should not be confused with addressable audio/visual alarms, which are connected directly to, and powered
from the addressable loop.
The maximum combined output current is 220 mA. All audio alarm devices must be voltage polarity sensitive.
Non-polarized alarm devices will indicate a Fault Condition. The alarm zone circuits are protected against short-circuit.
An electronic fuse will reset when the short circuit is removed and the control panel is reset.
The audio/visual alarm device circuits are monitored for open-and short-circuit conditions. If no devices are installed, a
10kΩresistor (P/N: Reol) should be fitted to the NAC1 and NAC2 terminals to prevent a Fault condition Being
Reported by the control and indicating equipment.
Figure –4
The total current should not exceed the power rating of the control and indicating equipment. Refer to the
Technical Specifications.
2.5.4
Auxiliary Fire Relay Outputs
Two voltage-free change-over relay outputs are activated in the Alarm Condition (unless specifically disabled). The
outputs are labeled RLY1 and RLY2. The outputs are not supervised.
Figure –5
2.5.5
Fault Relay Output
A single auxiliary voltage-free normally-closed fault output relay is provided. The relay is normally energized and opens
in the Fault Condition. The output is not supervised.
Figure –6

17
Document NO.: RD-690-39-001 Version: A Date:2017.12.30
2.5.6
PC connection (reserved)
An RS-485 connector is provided to connect the control and indicating equipment to the serial port of the PC. The
connection enableds the downloading of configuration data, including device descriptors.
Figure –9
2.5.7
Auxiliary Supply Output
DC24V @1.35 A is available to supply power to strobes/horns only. The output is supervised and short-circuit protected
by an electronic fuse, which resets when the short-circuit is cleared and the panel is reset.
Figure –10
2.6
Power Supply
A switch-mode power supply is fitted to the rear of the enclosure, behind the main board. The power supply supplies
DC28V to the main board. The power supply from the main board. Red and black flying leads from the main board are
used to connect to the battery positive and negative terminals.
2.7
Reset
One reset can be made.
A system reset is performed by pressing the RESET button and initiates a warm restart. During the reset, power is
removed from the addressable loop for 12s. Power is re-applied for 20s prior to loop polling commencing.
2.8
Mechanical Construction
GS690 shell is made of cold rolled steel plate, the size is 440 * 354 * 140.5 mm, the shell consists of three parts,
respectively, for the former in the shell, shell and pan, former shell: open a display window, middle size: 200 * 200 mm
cover panel adopt PC material, the shell: with PET material in front of the thin film button, the back is equipped with the
mainboard, is the core of the whole system, pan: equipped with 100 w drive and current and over current protector,
provision is provided for 2* 12 v / 12 ah battery, the upper shell left side includes two Φ 32 mm conduit connection
knockouts to facilitate field wiring connections.

18
Document NO.: RD-690-39-001 Version: A Date:2017.12.30
Figure –11
Figure –12

19
Document NO.: RD-690-39-001 Version: A Date:2017.12.30
Figure –13
Caution:The power limited and non-power limited circuit wiring must remain separated in the cabinet. All power
limited circuit wiring must remain at least 0.25inch (6.35mm) away from any other non- power limited circuit wiring and
non-power limited circuit wiring must enter and exit the cabinet through different knockouts and/or conduits.
2.9
Circuits not used
See the following Figure 14, the marked parts are not used now.
Figure –14
NOT USED
NOT USED
NOT USED
NOT USED
NOT USED

20
Document NO.: RD-690-39-001 Version: A Date:2017.12.30
3. INSTALLATION
3.1
Installation Precaution
Electrical hazard:
disconnect power from equipment prior to making any internal adjustments. This
equipment must have an Earth connection. Prior to installation, keep components wrapped in anti-static
material at all times.
FRAGILE:
Inspect the equipment prior to installation. Do not install the equipment if damage is
apparent. If damaged, return to the supplier.
ELECTROSTATIC HAZARD:
This is sensitive electronic equipment. Apply safe ant-static practices
when handling this equipment.
Disconnect AC power and batteries
prior to removing or inserting circuit boards. Failure to do so
can damage circuits.
Remove all electronic assemblies
prior to any drilling, filing, reaming, or punching of the
enclosure. When possible, make all cable entries from the sides or rear. Before making modifications,
verify that they will not interfere with battery, transformer, and printed circuit board location.
Follow the instructions
in the installation, operating, and programming manuals. These instructions
must be followed to avoid damage to the control panel and associated equipment. FACP operation and
reliability depend upon proper installation by authorized personnel.
Like all solid-state electronic devices,
this system may operate erratically or can be damaged when
subjected to lightning-induced transients. Although no system is completely immune from lightning
transients and interferences, proper grounding will reduce susceptibility. Overhead or outside aerial wiring
is not recommended, due to an increased susceptibility to nearby lightning strikes. Consult with the
Technical Services Department if any problems are anticipated or encountered.
Remove all electronic assemblies
prior to any drilling, filing, reaming, or punching of the enclosure. When possible,
make all cable entries from the sides or rear. Before making modifications, verify that they will not interfere with battery,
transformer, and printed circuit board location.
Do not tighten screw terminals
more than 1.0168 N-m. Over-tightening may damage threads, resulting in reduced
terminal contact pressure and difficulty with screw terminal removal.
All connection lines installations must meet local, national laws, regulations and requirements of electrical and
construction regulations.
3.2
Tools and Equipment
Before commencing installation, ensure all equipment and tools to mount and connect the equipment are available, such
as drills, mounting screws, cables and ladders.
3.3
Panel Mounting
When installation of all the cables has been completed, clean the interior of the enclosure ensuring all masonry debris and
drilling swords are removed.
Table of contents
Popular Control Panel manuals by other brands
WAMGROUP
WAMGROUP SEPCOM SIP BED Easy Assembly and main instructions for use and maintenance

Balboa
Balboa ML700 user guide
Milestone pro
Milestone pro MP-WP6-IP user manual
ArtiVisuals
ArtiVisuals Mix-iT.ATEM user guide
Symetrix
Symetrix ARC-3 quick start guide
Cermate Technologies
Cermate Technologies IT400 Series installation guide
