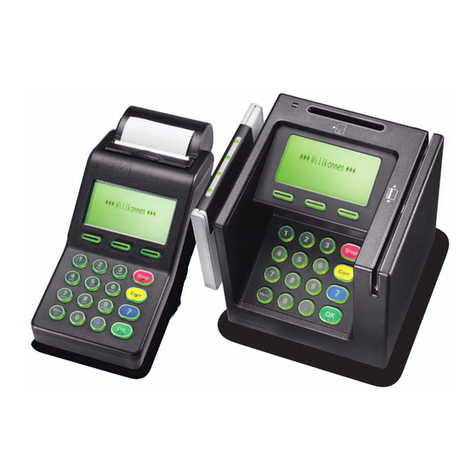
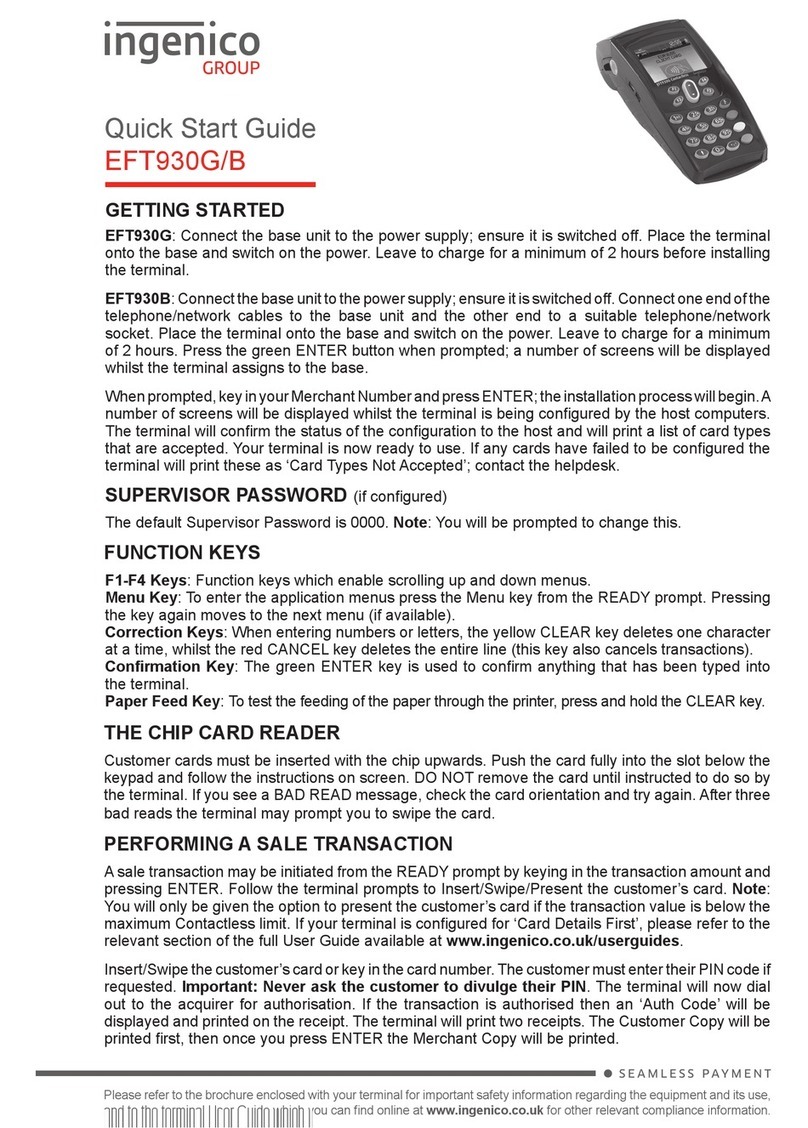
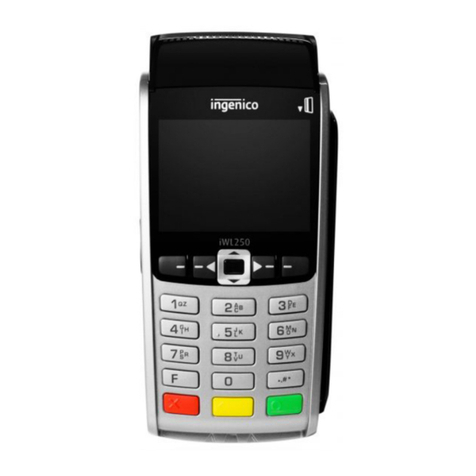
SIX yomani AUTONOM User manual

User guide
yomani AUTONOM
yomani COMPACT
yomani PINPAD

22
1 Security requirements 3
1.1 Electromagnetic compatibility 3
1.2 Where wireless technologies are used 3
2 Product info 5
2.1 Customer terminal 5
2.2 Cash register terminal (yomani AUTONOM) 6
2.3 Abbreviations/Information 7
2.4 Payment procedure with ep2 8
2.5 Technical information 8
3 Start-up 9
3.1 Installation 9
3.2 Conguration/Initialization 10
4 Menu tree (illustration) 11
4.1 Main menu 11
4.2 Transactions 12
5 Transactions 13
5.1 Purchase 13
5.2 Purchaseauthorizedperphone 18
5.3 Cancellation 19
5.4 Credit 20
5.5 Additional transactions 21
6 Balances 22
6.1 Start user shift/end user shift, daily closing, data transmission 22
7 Queries (totals), settings 23
8 Setup 24
9 Maintenance and handling 25
9.1 Identifying and solving errors 25
9.2 Changing the paper roll 26
Table of contents

3
1 Security requirements
1.1 Electromagnetic compatibility
When connecting additional or other compo-
nents the “Electromagnetic Compatibility Direc-
tive” (EMC) must be adhered to.
Hearing aids
Under certain circumstances, terminals can
cause some hearing aids to malfunction. Con-
tact the dealer/manufacturer of your hearing aid.
Other medical equipment
If you use a medical device, please contact the
manufacturer to determine whether it is suf-
ciently protected against electromagnetic
waves. If necessary, your attending physician
could be helpful in obtaining this information.
Equipment is often used in hospitals, medical
ofcesandotherfacilitieswhichishighlysensi-
tive to external electromagnetic waves. Do not
use the terminal in such locations.
Aeroplanes
To avoid interfering with the communication
systems, do not use the terminal during the
ight.Onlyactivatetheterminalontheground
with permission from the ground personnel.
Potentially explosive areas
Do not use the terminal in explosive zones or
areas bearing signs with “Switch off sending/
receiving devices”. Do not use the terminal in
such potentially explosive locations.
Appropriately marked locations
Follow instructions and do not use the terminal
in locations with obvious signs and instructions
prohibiting such use.
While driving
Radio frequencies can interfere with electronic
systems in vehicles, such as car radios or secu-
rity devices, etc.
Vehicles equipped with airbags
An enormous force is released when airbags are
activated. Therefore, do not place the terminal in
the area above the airbag or in the space in which
the airbag could deploy. Terminals that are
improperly installed can cause serious injury
upon deployment of an airbag.
Electronic devices
Most morn electronic devices, such as those
used in hospitals and vehicles, are protected
against radio frequencies. However, this is not
the case with all electronic devices. Do not use
your terminal in the proximity of medical equip-
ment without obtaining prior permission.
Heart pacemaker/other medical devices
Terminals can affect the functioning of implanted
heart pacemakers and other medically implanted
devices. Patients with a heart pacemaker should
be informed that the use of terminals in the
immediate vicinity of a pacemaker can lead to
malfunctions. Do not pass the terminal over the
pacemaker. The risk of a malfunction however, is
minor if a minimum distance of 15 cm between
the terminal and the pacemaker is maintained. If
you suspect that malfunctions are occurring, put
the terminal aside. If necessary, consult your car-
diologist. If other medical devices are used in or
on the body, then the equipment manufacturer
should be consulted as to whether such devices
aresufcientlyprotectedagainstradiofrequency
signals. Do not use the terminal where the devices
are implanted.
1.2 Where wireless technologies are used

4
Every effort has been made to ensure that the information in
this document is complete and exact at the date of printing.
Further developments in the eld of electronic payment trafc
and technological progress could result in changes that might
deviate from the description in this user guide.
Consequently, SIX Payment Services Ltd accepts no responsi-
bility for the information provided in the operating instructions
being current, complete or correct. Furthermore, to the extent
permitted under the relevant legal provisions, SIXPayment
Services Ltd accepts no responsibility in connection with the
operating instructions.
The menu navigation on the terminal has been designed to
be self-explanatory, making this document necessary only in
case of emergency.
The latest version of the user guide, together with any updates,
can be found on our homepage at:
www.six-payment-services.com

5
2 Product info
2.1 Customer terminal
Thermal printer (yomani COMPACT only)
Chip reader
For chip cards.
Magnetic strip reader
For cards with magnetic strips.
Display
The next step to be taken is always shown on
the display.
Navigation buttons
You can use these three buttons to navigate
throughthemenu(up/down/conrm).
<OK> button
Allentriesmustbeconrmedusingthe<OK>
button.
<CORR> button
Incorrect entries can be corrected using the
<CORR>button.
<STOP> button
Active procedures can be stopped using this
button.
Contactless reader (RFID)
For contactless paying.

6
2.2 Cash register terminal (yomani AUTONOM)
Thermal printer
Screen
The next step to be taken is always shown on
the screen.
Navigation buttons
You can use these buttons to move up and down
in the menu.
<STOP> button
Active procedures can be stopped using this
button.
<CORR> button
Incorrect entries can be corrected using the
<CORR>button.
<OK> button
Allentriesmustbeconrmedusingthe<OK>
button.

7
Cards with a chip Cards which store the information needed for electronic payment on a chip
must be inserted in a chip reader, depending on the terminal model. If the
terminal is equipped with a motor reader, then the card is automatically
drawn in and read.
Cards with a
contactless chip
Cards that have a chip featuring a contactless function can be held up to
contactless readers to speed up the payment process.
Cards with a
magnetic stripe
Cards which store the information needed for electronic payment on a mag-
netic stripe must be pulled through the swipe reader, depending on the
terminal model. If the terminal is equipped with a motor reader, then the
card is automatically drawn in and read.
CC Computer center
CCC Credit card company
CLP Contactless payment
CrC Credit cards
CVC/CVV
CardVericationCode/CardVericationValuenumberusedtoidentifythecard.
DCC Dynamic Currency Conversion. Foreign cardholders can pay in their domestic
currency.
EFT/POS Electronic Funds Transfer at the Point Of Sale
EMV GlobalspecicationsfromEurocard,MasterCardandVisabasedonachip
card.
ep2 <EFT/POS2000>,SwissstandardbasedontheEMVstandardinelectronic
paymenttrafc.
GPRS
General Packet Radio Service (GPRS) is a packet-oriented transmission
servicethatisusedintheeldofmobiletelephonesystems.
GSM Global Standard for Mobile Communications
Online transaction An online transaction is always directly authorised at the CCC.
Ofinetransaction Anofinetransactionisauthorisedininterdependencewiththecardand
terminal risk management (e.g. if the amount of the previous transactions is
lessthanthecardlimitoriftheamountislessthantheterminaloorlimit
on the card, etc.).
PF PostFinance(Switzerland)
PIN PersonalIdenticationNumber
PIN-based
transaction
For a PIN-based transaction, the customer must enter his/her PIN at the
point of sale during the payment process.
PW Password
PUK PersonalUnblockingKey
RFID radio-frequencyidentication
SPS SIX Payment Services Ltd
TIP Tip
Trm Terminal
Trx Transaction
WLAN A Wireless Local Area Network is a “wireless” local radio network, which
generallyreferstoastandardwithintheIEEE802.11family.
2.3 Abbreviations/Information

8
The payment process at the point of sale is stan-
dardised for all cards with ep2. A variety of card
types are in circulation today.
Payment functions
ep2 offers a full range of transaction modes and
functions. The transactions activated on your
terminal are determined by the settings in the
service centre as global parameters and by the
individual card processors.
e.g. Tip:
This transaction type is often used in the hotel
and restaurant industry. In the retail business,
however, it is unnecessary.
– Depending on the payment function and
credit card processor, different minimum/
maximum amounts, day limits, etc. can be
dened.
– Functions are described in general in the
sections that follow. Please note that
some transaction modes and functions
may be inactive on your terminal.
Caution for ofine transactions!
Ofine transactions are stored in the security
section of your terminal and submitted to the
card processor by means of the daily closing.
This can be carried out manually by the terminal
operator or automatically.
Should the security section of the device be
defective, intentionally damaged or stolen,
the transactions that have not been stored
will be lost.
For this reason, we recommend that you:
– Meticulously retain all sales slips.
– Carry out a daily closing every day or more
often.
– Always carry out a daily closing before
making installation changes, etc.
– Always carry out a daily closing for antici-
pated longer absences from the business.
– A closing must be carried out for seasonal
operations, at the end of the season.
2.4 Payment procedure with ep2
Operating temperature
0°Cto50°C
Humidity (not condensing)
20%to85%
Power supply via power supply unit
100 –250VAC,47– 63Hz
Power supply through USB
(except for yomani XR)
5V,500mA
Storage
–20°Cto70°C
2.5 Technical information

9
3 Start-up
3.1 Installation
– Position the device at its intended location
– Connect the device.
Always plug in the power supply last!
– Cable:
!Only the original cables delivered with the
product should be used.
The terminal starts up und reports with an acous-
tic signal when it is ready to operate.
Customer terminal
Cash register terminal (yomani AUTONOM)
Completed installation
Port for NFC antenna
(for contactless paying)
Serial RS-232 port
USB port
yomani XR PINPAD and COMPACT only
Ethernet/LAN port
Cable guides
Power supply port
Customer terminal port

10
First initialisation
The yomani will generally already have been
commissioned by the SIX production facility.
Additional instructions are provided to you in the
“Congurationinstructionsforyomani”delivered
along with the terminal.
Subsequent initialisation
Should it be necessary to re-initialise a device
for any reason, proceed as outlined on page 24.
3.2 Conguration/Initialization
Key
The following symbols are used in the descrip-
tions in this document.
..............
Function selection by choosing the corresponding number or using the
cursorandthe<OK>button.
Insert card.
Depending on the card type, it must be inserted in the chip card reader,
held up to the contactless reader or pulled through the magnetic swipe
reader.
Remove card.
Sales slip printout.
Request the customer’s signature.
Processing and/or communication.
Manual entry of the card data.
Press function button.

11
Main menu
Toenterthemenutreebelow,pressthe<STOP>button.
▲ Access only with your password. You can nd this on the
conguration sheet delivered with your terminal.
4 Menu tree (illustration)
4.1 Main menu
■Access only for service technicians.
* This function may not be activated depending on the CCC.
Balances
<1> Begin shift
<2> End user shift
<3> Daily closing
<4> Transmit. trx data
Queries
<1> Shift counter
<2> Daily counter
<3> Trx log info
<4> Print DCC rates*
<5> Print last ticket
Settings
<1> Trm lanuage
▲ <4> Service PW
<7> Keypad tones
Setup
<1> Conguration
<2> Initialisation
<3> SW Update
■ <4> Trm reset
<5> Info
<6> Print. cong.
■ <8> Print HW Info
<9> System
<1> Transactions
<2> Balances
<3> Queries
<4> Settings
▲ <5> Setup

12
4.2 Transactions
▲ Access only with your password. You can nd this on the
conguration sheet delivered with your terminal.
Transactions <1> Purchase
<2> Purch. phone auth.
▲<3> Reversal
▲<4> Credit
<5> Reservation
<6> Purchase reserv.
<7> Purchase w. Cashback
<8> Cash advance
<9> Purch. mail order
<10> Other transact. Other transactions
<1> Phone ordered
<2> Purch. forced acc.
<3> Reserv. adjustm.
<4> Conf. Phone auth.
<5> Mobile Voucher
<6> Mobile Coupon
<7> GiftCard/VM
<8> Cancel Reserv.

13
Cashier handling
1. Press “1”. “Purchase” will be activated. 1: Purchase
2.* If the “foreign currency” function is activated on your terminal,
you must select the desired currency.
* Menu only appears if 2 or more currencies are activated.
<Currency>
3. Enter the amount and confirm with <OK>.
The amount must be separated with a decimal point. For amounts below
CHF/EUR 1.00, a zero “0” must be entered first (e.g., CHF/EUR 0.55).
Amount
3a
(DCC)1
If the cardholder prefers to make a transaction in CHF/EUR,
this can be selected with the “CHF/EUR” function button.
4. Proceed with card processing as detailed on pages 16 and 17,
or enter manually as detailed on page 14.
5 Transactions
5.1 Purchase
<1> Purchase
The purchase is the most common transaction
typeinelectronicpaymenttrafc.
– Depending on the CCC, minimum/maximum
amounts, day limits, etc. may vary.
– The “manual recording of card data” and “sub-
sequent cancellation” functions are either acti-
vated or deactivated, depending on the CCC.
– yomani COMPACT: If a transaction is not suc-
cessful, then you will hear three short, acous-
tic signals that repeat every 2 seconds. This
prompts the customer to give the terminal to
the cashier. The reason for the problem is
displayed by pressing on the special signals
function button.
1 This menu item is only shown if DCC is activated. The terminal automatically recognizes if the card is one that is in a DCC-capa-
ble foreign currency and automatically chooses DCC. Otherwise, the transaction will be processed in CHF/EUR. If the cardholder
prefers to make a transaction in CHF/EUR, this can be selected with the “CHF/EUR” function button. As soon as the card has
been read in, CHF/EUR can no longer be selected!
Sample sales slip: Certaineldsmaydifferaccordingtothepurchasetype.
COMPANY EXAMPLE
EXAMPLE STREET 88
1234 EXAMPLE
Purchase
Processing company
XXXX 123456 1234
DD.MM.YYYY HH.MM.SS
Trm-Id: 12345678
Akt-Id: 00000001
AID: A99999999999
Trx. Seq-Nr.: 12345
Trx. Ref-No: 99999999999
Aut. Code: 123456
EPF: ABC123ABC123ABC
Total-EFT CHF: 123.45
Your company data, which will be printed out on
the sales slip.
Transaction date.
Transaction time.
Transaction information for unambiguous identi-
cationofthetransaction.
Amount

14
yomani AUTONOM/yomani COMPACT
1.* If the “foreign currency” function is activated on your terminal, you must
select the desired currency.
* Menu appears only if two or more currencies are activated.
<Currency>
2. Enter the amount and confirm with <OK>.
The amount must be separated with a decimal point.
For amounts below CHF/EUR 1.00, a zero “0.” must be entered first.
Amount
3. Press the “Manual” button for manual recording.
4. Enter the card number and press <OK>. Card number
5. Enter the card expiry date and confirm with <OK>. Expiry date
6. Enter the CVC2 respectively CVV2 and confirm with <OK>.
Tip! For cards without a CVC, press <OK> without entering the CVC.
CVC2/CVV2
if present
7. Payment is recorded and authorised online, if this function is activated.
8. A sales slip is printed out.
The sales slip must be signed by the customer.
9. If a copy is desired →press 1.
If no copy is desired →press 2.
If no button is pressed, the copy will be automatically printed out after
10seconds.
1 : Copy
or
2 : No copy
Cashier: Manual card data entry
Should a credit card be unreadable, the card
data can be entered manually.
To do so, you need the card number, the expiry
date, and for newer cards, the CVC/CVV (Card
VericationCode/CardVericationValue).This
3-digit code is printed on the reverse side of the
card (the last three numbers).
After you have chosen the transaction mode and
conrmedthisbypressing<OK>,manualentry
can be activated using the corresponding func-
tion button.

15
Example:
Credit card
5404 3521 4589 5038
09-09
John Example
Reverse side of card
1234 567
Card number
Expiry date
CVC2/CVV2
yomani PINPAD
1. Enter the transaction on the cash register as usual.
2. On the customer terminal, press the <Corr> and <Menu> buttons in quick succession within half
a second.
3. A request to enter the card details manually will be shown on the yomani screen.

16
Customer handling: Card without PIN
1. The amount is shown.
2. Depending on the card type, it must be inserted in the chip card reader,
held up to the contactless reader or pulled through the magnetic swipe
reader. If the customer uses the wrong reader for his or her card, that
person is instructed to use the proper reader.
2a
(TIP)1
If the TIP function is activated, after the original amount is confirmed,
the option of entering a tip is also offered and confirmed by pressing <OK>.
If the guest does not wish to give a tip, he/she can continue without
entering an amount by pressing <OK>.
Tip:
2b
(DCC)2
The customer chooses whether he or she wants to pay with DCC or in the
local currency.
1. CHF 100.00
33.66RUE.2
Choice?
ex. rate
:1
.463486
3. The amount is shown. Confirm the amount with <OK>.
4. Payment is recorded and authorized online if necessary.
5. Remove the card.
6. The sales slip is printed out.
The sales slip must be signed by the customer.
7. If a copy is desired →press 1.
If no copy is desired →press 2.
If no button is pressed, the copy will be automatically printed out
after 10 seconds.
1 : Copy
or
2 : No copy
1 This menu item is only shown if TIP is activated. This function is only activated for hotels and restaurants by the card organiza-
tions. In addition to the adjustments in the payment procedure, this modification also has an impact upon the payment receipt
and the daily closing printout.
2 This menu item is only shown if DCC is activated. The terminal automatically recognizes if the card is one that is in a DCC-capa-
ble foreign currency and automatically chooses DCC. Otherwise, the transaction will be processed in CHF/EUR. If the cardholder
prefers to make a transaction in CHF/EUR, this can be selected with the “CHF/EUR” function button. As soon as the card has
been read in, CHF/EUR can no longer be selected!
After the cashier enters the amount, the cus-
tomer is prompted by the terminal to use his or
her card.
Depending on the card type, the two following
procedures are possible:
– Customer handling: card without PIN.
– Customer handling: card with PIN (see p. 17).

17
1This menu item is only shown if TIP is activated. This function is only activated for hotels and restaurants by the card organi-
zations. In addition to the adjustments in the payment procedure, this modification also has an impact upon the payment receipt
and the daily closing printout.
2 This menu item is only shown if DCC is activated. The terminal automatically recognizes if the card is one that is in a DCC-capa-
ble foreign currency and automatically chooses DCC. Otherwise, the transaction will be processed in CHF/EUR. If the cardholder
prefers to make a transaction in CHF/EUR, this can be selected with the “CHF/EUR” function button. As soon as the card has
been read in, CHF/EUR can no longer be selected!
3Generally, customers need do nothing further for a contactless payment below CHF 40 (~ EUR 35).
Customer handling: Card with PIN
1. The amount is shown.
2. Depending on the card type, it must be inserted in the chip card reader,
held up to the contactless reader or pulled through the magnetic swipe
reader. If the customer uses the wrong reader for his or her card, that
person is instructed to use the proper reader.
2a
(TIP)1
If the TIP function is activated, after the original amount is confirmed,
the option of entering a tip is also offered and confirmed by pressing <OK>.
If the guest does not wish to give a tip, he/she can continue without
entering an amount by pressing <OK>.
Tip:
2b
(DCC)2
The customer chooses whether he or she wants to pay with DCC or in the
local currency.
1. CHF 100.00
33.66RUE.2
Choice?
ex. rate
:1
.463486
3.
(CLP)3
The total is displayed and the customer is requested to enter the PIN code
(4- to 6-digit) and to confirm with <OK>. If the amount is incorrect, the
transaction can be aborted using <STOP>. Timeout: The process will be
aborted if the processing does not occur within 30 seconds.
<PIN>
4. Payment is recorded and authorized online if necessary.
5. Remove the card.
6. The sales slip is printed out.
The sales slip must be signed by the customer.
7. If a copy is desired →press 1.
If no copy is desired →press 2.
If no button is pressed, the copy will be automatically printed out
after 10 seconds.
1 : Copy
or
2 : No copy

18
Cashier handling
1. Press “2”. The “Phone authorized” function is activated. 2: Phone authorized
2.* If the “foreign currency” function is activated on this terminal, then the
desired currency must be select.
* Menu only appears if 2 or more currencies are activated.
<Currency>
3. Enter the amount and confirm with <OK>. The amount must
be separated with a decimal point. For amounts below CHF/EUR 1.00,
a zero “0” must be entered first (e.g., CHF/EUR 0.55).
Amount
3a
(DCC)1
If the cardholder prefers to make a transaction in CHF/EUR,
this can be selected with the “CHF/EUR” function button.
4. Enter the authorization code and confirm with <OK>. Authorization code
5. Card handling according to pages 16 and 17, or page 14 for manual entry.
1 This menu item is only shown if DCC is activated. The terminal automatically recognizes if the card is one that is in a DCC-capa-
ble foreign currency and automatically chooses DCC. Otherwise, the transaction will be processed in CHF/EUR. If the cardholder
prefers to make a transaction in CHF/EUR, this can be selected with the “CHF/EUR” function button. As soon as the card has
been read in, CHF/EUR can no longer be selected!
5.2 Purchase authorized per phone
<2> Phone authorised
This purchase mode is used when the authorisa-
tion cannot be made automatically. The authori-
sation code is issued by a CCC representative by
telephone. With the function “Phone authorised”,
the transaction will be recorded later.

19
<3> Cancellation
The purchase which has just been made can be
cancelled using the “Cancellation” function.
– With some CCC’s this function may not be
activated.
– If a daily closing or shift-end has been carried
out in the meantime, or if the data has been
transmitted, then cancellation is no longer
possible.
5.3 Cancellation
Cashier handling
1. Press “3” to activate the “Cancellation” function. 3: Cancellation
2. Enter the terminal’s password and confirm with <OK>.
(See configuration sheet for the password.)
Password
3. The amount of the last transaction is shown. If the amount of the last
transaction is correct, then confirm this by pressing the <OK> button.
4. Cancellation is recorded and, if necessary, authorised online.
5. A sales slip is printed out.
6. If a copy is desired →press 1.
If no copy is desired →press 2.
If no button is pressed, the copy will be automatically printed out after
10seconds.
1 : Copy
or
2 : No copy

20
Cashier handling
1. Press “4”. “Credit” will be activated. 4 : Credit
2. Enter the password and confirm with <OK>.
(See the configuration sheet for the password)
Password
3.* If the “foreign currency” function is activated on this terminal, then the
desired currency must be selected.
* Menu only appears if 2 or more currencies are activated.
<Currency>
4. Enter the amount and confirm with <OK>. The amount must be separated
with a decimal point. For amounts below CHF/EUR 1.00, a zero “0” must
be entered first (e.g., CHF/EUR 0.55).
Amount
4a
(DCC)
If DCC is activated, then the date of the original transaction must also
be entered.
Orig. Trx date
(YYYYMMDD)
5. The amount is shown and the card requested.
6. Card handling according to pages 16 and 17, or page 14 for
manual entry.
The cashier signs the sales slip!
5.4 Credit
<4> Credit
A purchase that has been made can be corrected
using the “Credit” function. This is used if a can-
cellation is no longer possible.
This manual suits for next models
2
Table of contents
Other SIX Payment Terminal manuals
