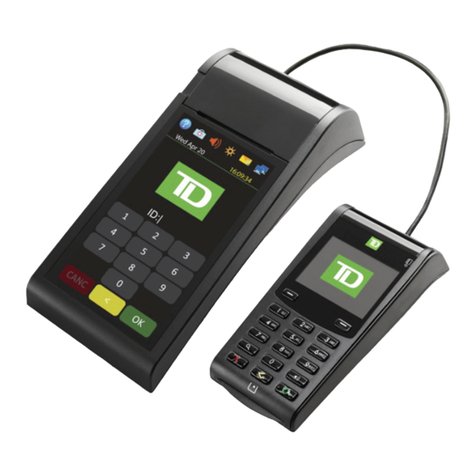
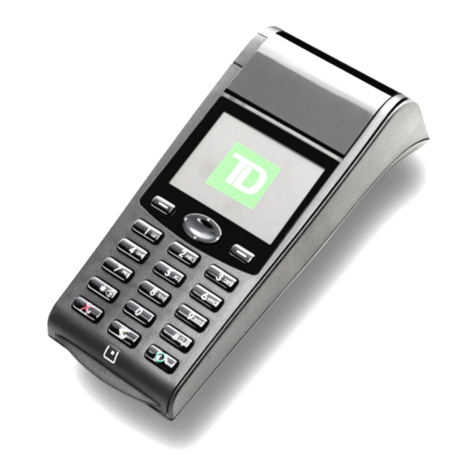
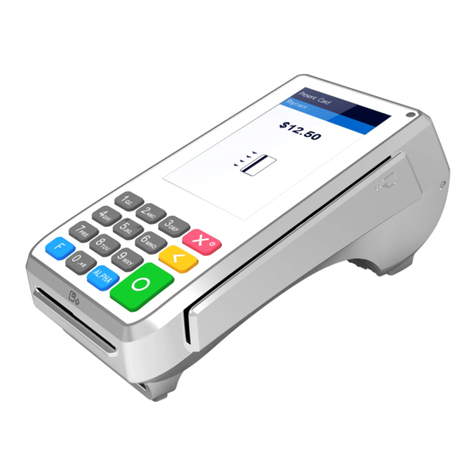
TD iWL252 User manual

TD iWL252 / 255
Quick Start Guide
For the:
• TD iWL252 (Bluetooth)
• TD iWL255 (3G Wireless)

COPYRIGHT ©2016 by The Toronto-Dominion Bank
This publication is conidential and proprietary to The Toronto-Dominion Bank and is intended solely for the use of
Merchant customers of TD Merchant Solutions. This publication may not be reproduced or distributed, in whole or in part,
for any other purpose without the written permission of an authorized representative of The Toronto-Dominion Bank.
The Bluetooth® word mark and logos are registered trademarks owned by Bluetooth SIG, Inc. and any use of such
marks by TD is under license. Other trademarks and trade names are those of their respective owners.
NOTICE
The Toronto-Dominion Bank reserves the right to make changes to speciications at any time and without notice.
The Toronto-Dominion Bank assumes no responsibility for the use by the Merchant customers of the information
furnished in this publication, including without limitation for infringements of intellectual property rights or other
rights of third parties resulting from its use.
MERCHANT INFORMATION
Merchant Name ...........................................
Merchant Number ..........................................

i
Contents
About this Guide ......................................................................1
Welcome kit contents ............................................................................. 1
The TD iWL252 / 255 Solution..................................................1
The terminals...........................................................................................2
Default shortcut keys ......................................................................................2
Accessibility features ......................................................................................3
Changing the paper roll .................................................................................3
Screens....................................................................................................3
Idle screen (TD iWL252) ..................................................................................3
Idle screen (TD iWL255) ..................................................................................4
Main menu screen ...........................................................................................5
Admin menu screen ........................................................................................5
The Bluetooth Base .................................................................................5
Ports ...................................................................................................................5
Communication options.................................................................................6
Cardholder Privacy and Security ...........................................6
Terminal security ....................................................................................6
Fraud prevention.....................................................................................6
Manually entered credit card numbers .......................................................7
Call for authorization ...................................................................................... 7
Financial Transactions............................................................ 7
Accepted card types...............................................................................8
PINpad transactions ...............................................................................8
Sale (credit card) ....................................................................................8
Sale (debit card)......................................................................................9
Sale (phone or mail).............................................................................. 10
Force post (sale or phone / mail) .......................................................... 11
Void......................................................................................................... 11
Transaction recall ................................................................................. 12
Return .................................................................................................... 13
Receipts ................................................................................................. 13
Reprinting receipts ........................................................................................ 13
Receipt examples .......................................................................................... 14
Business Day Functions ........................................................ 16
Performing a day close......................................................................... 16
Coniguration .........................................................................17
Changing the terminal communication method (TD iWL252).............17
More features and functionality............................................................17

ii
Reporting ............................................................................... 18
Business day reports............................................................................. 18
Batch reports......................................................................................... 18
Customized reports............................................................................... 19
EMV reports ........................................................................................... 19
Troubleshooting ....................................................................20
What problems can I easily resolve?................................................... 20
Why don’t I see a connection icon on the Idle screen?....................... 21
What is the signal strength? ................................................................. 21
What can interfere with Bluetooth connectivity? .....................................22
What can interfere with 3G connectivity? .................................................22
Why isn’t my terminal charging?..........................................................22
What do I do if there’s a power outage? ....................................................23
Reference............................................................................... 24
Maintaining the terminal ......................................................................24
Storing the terminal..............................................................................24
Entering letters and special characters...............................................24

1
About this Guide
This Guide provides an introduction to your TD iWL252 / 255 solution, hardware functionality,
performing inancial transactions, administration features and troubleshooting. For further
information regarding its use and available features, please review our online documentation
at www.tdmerchantsolutions.com/posresources.
Welcome kit contents
We are pleased to provide Merchants new to TD Merchant Solutions with the included
Welcome Kit from. The enclosed information was prepared with you in mind, and
includes the following:
• Paper rolls for the terminal
• Cleaning card and instructions
• Card acceptance decals (Visa®, MasterCard®, Discover®, American Express®,
Interac® Direct Payment, etc.)
• Information to help you protect your business and customers from fraud
The TD iWL252 / 255 Solution
The terminal is solely for you, the Merchant. You will use the terminal to initiate transactions
for customer’s using credit or debit cards. Depending on your settings, some card types
may not be accepted by your terminal.
The two terminals look virtually identical and have very similar functionality. There is an
easy way to determine which one you are using.
TD iWL252 and Bluetooth® base
This terminal is the short range wireless
version. It connects wirelessly to the
Bluetooth charging base.
TD iWL255
This terminal is the long range wireless
version. It connects to the mobile phone
network.
B
20066573
06/04/2016
20:57
B
20066573
06/04/2016
20:57

2
The terminals
1. Paper chamber lap
2. Function keys
The / F1 and / F4 keys
can be used as shortcuts and to
select onscreen options. See
below for more information.
3. Navigation keys
Use the arrow keys to navigate
the screens and menus.
4. Command keys
/ Cancel
/ Correction or Paper advance
/ OK and shortcut to the
Main Menu screen.
5. Card readers
a) Insert chipped cards
b) Swipe cards
c) Contactless cards
Default shortcut keys
To access a speciic menu or function, use the following shortcuts:
Transaction Key
Sale (default) / F1
Pre-Auth Initiation (default) / F2
Navigation / scroll key
Pre-Auth Completion (default) / F3
Phone / Mail Sale (default) / F4
Main Menu / OK
Admin Menu / Admin
Reprint last receipt / 0
Advance paper / Correction
B
20066573
06/04/2016
20:57
1
5a
3
22
4
5b
5c

3
Accessibility features
The TD iWL252/255 has numerous accessibility features which relect TD’s commitment
to our customers. It has such features as:
• An adjustable key stroke sound when a key is pressed
• An adjustable screen brightness to create visual contrast
• A raised identiier on the:
• 5key,
• Cancel key,
• Correction key, and
• OK key
Changing the paper roll
1. Gently pull up on the paper chamber panel along the top of terminal and
remove the old paper roll.
2. Unwrap a new paper roll and place it in the paper chamber so that the loose
end of the paper feeds up from under the paper roll towards you.
3. Press down on the panel until it clicks shut and ensure there is a enough paper
sticking out from the chamber that it touches the top of the terminal screen.
4. Press Correction to advance the paper to ensure it is loaded properly.
Screens
Idle screen (TD iWL252)
The default screen is called the Idle screen.
On it there are numerous important icons.
They are, left to right:
1. Lock (security)
The lock icon will be closed or
open. If the lock is open, do not use
this terminal and contact the TD
Merchant Solutions Help Desk to
report it has been tampered with.
2. Bluetooth connection icons
The terminal’s Bluetooth
connection is indicated by a
group of icons:
B
Terminal is connected to the
Bluetooth base but not
responding.
B
20066573
06/04/2016
20:57
1 2 3

4
B
Terminal is searching for connection.
B
Terminal is connected to the Bluetooth base.
Indicates the terminal Bluetooth signal strength.
The number under these icons is the associated Bluetooth base serial number.
Indicates whether the terminal is connected to the network. It will be one
of two colours: green (connected) or white (disconnected).
3. Power
The battery icon in the top-right corner indicates that the terminal battery level.
When the lightning bolt appears on top of the battery, it means it is charging.
Idle screen (TD iWL255)
The default screen is called the Idle
screen. On it there are numerous important
icons. They are, left to right:
1. Wireless connection icons
The terminal’s wireless connection
is indicated by a group of icons:
Indicates the terminal 3G
wireless signal strength.
Indicates whether the
terminal is connected to the
3G wireless network. It will be
one of two colours: green
(connected) or grey
(disconnected).
Lock (security)
The lock icon will be closed or open. If the lock is open, do not use this terminal and
contact the TD Merchant Solutions Help Desk to report that it has been tampered with.
2. Power
The battery icon in the top-right corner indicates that the terminal battery level.
When the lightning bolt appears on top of the battery, it means it is charging.
3G 06/04/2016
20:57
302880
3G
1 2
3G

5
Main menu screen
From the Idle screen, press OK and the Main
Menu screen appears. The Main Menu screen
displays the following transactions:
• Return
• Void
• Force Post
• Phone / Mail Sale
Admin menu screen
From the Idle screen, press Admin key and the
Admin Menu screen appears. It displays the
following options:
• Logon / Logo
• Business Day Menu
• Trans Recall Menu
• Setup Menu
• Reprint Menu
• Maintenance
• Other Functions
The Bluetooth Base
The Bluetooth base is only used with the TD
iWL252. It acts as a connection to the payment
network and as a short range wireless base for
your TD iWL252 terminal. This base also acts
as a charging station for the terminal.
Ports
The base has four ports on the back but
you are only using the network adapter
port and the power port:
1. Ethernet port
2. Power port
MAIN MENU
TD APP
1 - Return
2 - Void
3 - Force Post
4 - Phone / Mail Sale
10:52
05/04/2014
B
20066573
06/04/2016
20:57
ADMIN MENU
1 - Logon / Logoff
2 - Business Day Menu
3 - Trans Recall Menu
4 - Setup Menu
10:52
05/04/2014
TD APP
B
20066573
06/04/2016
20:57
1 2

6
If you use a dial up connection, there is a panel on the bottom of the base that you can
open and plug your phone line into.
Communication options
The TD iWL252 solution oers two options for communications: dial-up or Ethernet. You
can set this however you wish to suit your existing place of business’ setup.
Cardholder Privacy and Security
Please refer to the Cardholder Privacy sheet in your Merchant welcome kit. It contains
important information about your responsibilities to your customers and their personal
and transaction information.
Terminal security
It is the Merchant’s responsibility to secure the terminal, any user IDs or passwords and to
prevent unauthorized use. In any event the Merchant will be liable for any unauthorized
use of the terminal or any user IDs or passwords. There are three user security settings:
• No security (Default)
No access restriction to the terminal functionality listed below.
• Medium Security
Access is restricted to certain features by a supervisor or manager ID and password.
• High Security
Access is restricted to certain features by a manager ID and password.
The following functions can be individually protected:
• End of Day
• Manual Account #
• Batch Reports
• B.Day reports
• Customized Reports
• Batch Close
• Recent Error Report
Fraud prevention
Please refer to the How to Help Prevent Fraud pamphlet in your Merchant welcome kit.
You can also reduce fraudulent transactions on your terminal by enabling:
If you want to change the security level of your terminal, please contact TD Merchant
Solutions Help Desk at 18003631163.

7
Manually entered credit card numbers
This is the ability to manually enter a credit card number into the terminal for a purchase
transaction when a customer is performing a card-not-present purchase.
Transaction type Default settings
Manually entering a credit card number on the terminal
This is the ability to manually enter a credit card number into the
terminal for a purchase transaction when a customer is
performing a card-present purchase.
Protected by
supervisor ID and
password
Mail order / Telephone order purchase
This is the ability to manually enter a credit card number into the
terminal for a purchase transaction when a customer is
performing a card-not-present purchase.
Disabled
Force post purchase
This is the ability to perform a transaction with a manually
entered authorization number versus the transaction being
authorized automatically through the terminal.
Disabled
Call for authorization
You can enable/disable call for authorization transactions.
Financial Transactions
The terminals can perform the following transactions:
• Sale (purchase)
• Phone / Mail sale
• Force post
• Return (refund)
• Void
• Partial authorization
• Pre-authorization*
* These optional transactions and others, such as cashback and tips, are covered in our
online documentation at www.tdmerchantsolutions.com/posresources.
We understand that the default settings that come with this terminal may not fully meet
your businesses’ needs. Should you wish to amend these default settings, please contact
the TD Merchant Solutions Help Desk at 18003631163 to learn about your options.

8
Accepted card types
Your terminal(s) will accept whatever cards you indicated when you signed your contract with
TD Merchant Solutions. If you wish to adjust your accepted card list, please call the TD
Merchant Solutions Help Desk at 18003631163.
PINpad transactions
When a PINpad is connected to the terminal the customer will use it exclusively to enter
and information and make selections. For the transactions in this document we show
the customer PINpad key options. If you only have a terminal, the customer will also use
the terminal to enter information.
Sale (credit card)
1. Press F1.
2. Enter the total dollar amount for the sale and press OK.
3. If you have tips enabled you will see the following steps.
Tip (optional)
a) Customer conirms the dollar amount and presses Yes or No.
b) Customer enters/selects the tip amount/option and presses OK.
c) Customer conirms the dollar amount and presses Accept or Change.
4. Perform one of the following payment methods: Insert,Swipe,Contactless or
Manual Entry.
Contactless
a) The customer taps their contactless-enabled credit card on the contactless
card reader.
b) Ask the customer if they would like a receipt: Yes or No.
c) The screen shows that authorization number, the transaction total and
the receipts print if requested.
Insert card
a) The customer inserts their credit card.
b) The customer enters their PIN and presses OK.
c) The screen shows that authorization number, the transaction total and
the receipts print.
• Depending on your security settings, you may be required to enter a supervisor ID
and password to proceed with any transaction.
• Press 0on the terminal to reprint the most recent customer receipt.
• If the receipt has a signature line on it, the customer must sign it.
The customer may be required to swipe or insert their card in some cases.

9
Swipe card
a) The customer swipes their credit card.
b) Verify the card info with what is on the terminal screen and press OK.
c) The screen shows that authorization number, the transaction total and
the receipts print. The customer must sign the signature ield on the
merchant copy.
Manually enter card
a) Enter the account number and press OK.
b) Enter the expiry date and press OK.
c) A manual imprint of the credit card is required. Make the imprint and
press OK.
d) Enter the three or four-digit CVD number and press OK. This number is
generally located on the back of the credit card. This is can be an
optional step depending on your settings.
e) Indicate if the card was present for the transaction: Yes or No. The
customer must sign the signature ield on the merchant copy.
5. If the payment type used has insuicient funds to pay the entire sale amount you
may see the following:
Partial authorization (optional)
a) The receipt will print showing how much was applied to the sale.
b) The screen shows a balance owed.
c) The customer decides the how they will pay the balance (Cash or Card).
If the customer selects card, follow the appropriate steps for the selected
card type: credit or debit.
6. The screen shows that authorization number, the transaction total and the
receipts print.
If the cardholder signature ield appears on the merchant copy of the receipt,
the customer must sign it.
Sale (debit card)
1. Press F1.
2. Enter the dollar amount and press OK.
3. If you have tips enabled you will see the following steps.
Tip (optional)
a) Customer conirms the dollar amount and presses Yes or No.
b) Customer enters/selects the tip amount/option and presses OK.
If the customer selects cash the transaction will end. Ensure that you
receive the correct cash amount for the balance of the transaction.

10
c) Customer conirms the dollar amount and presses Accept or Change.
4. Perform one of the following payment methods: Insert / Swipe or Contactless.
Contactless
a) The customer taps their contactless-enabled debit card.
b) Ask the customer if they would like a receipt: Yes or No.
Insert / swipe card
a) The customer selects the account to use: CHQ or SAV.
b) The customer enters their PIN and presses OK.
5. If you have cashback enabled you will see the following steps.
Cashback (optional)
a) Customer conirms if they want cashback or not: YES or NO.
b) Customer enters / selects the cashback amount/option and presses OK.
c) Customer conirms the new total amount: Accept or Change.
6. The screen shows that authorization number, the transaction total and the
receipts print.
If the cardholder signature ield appears on the merchant copy of the receipt,
the customer must sign it.
Sale (phone or mail)
1. Press F4 Phone / Mail Sale.
2. Enter the dollar amount and press OK.
3. Enter the account number and press OK.
4. Enter the expiry date and press OK.
5. Indicate the order type; a phone or a mail order.
6. If it is a phone order, enter the three or four-digit CVD number and press OK.
7. The screen shows that authorization number, the transaction total and the receipts print.
The customer may be required to swipe or insert their card in some cases.
• These instructions are used for sales where the card is not present. If the card is
present at sale, see Credit card sale. If you use the incorrect sale transaction you
could incur extra charges.
• There are risks performing transactions when the credit card is not present. Ensure
that you perform all of the available security checks for phone / mail sale.

11
Force post (sale or phone / mail)
This option is only used when you can’t process a credit card sale normally through the
network whether due to communication problem or that the force post is requested via
the terminal.
1. Press OK Force Post Force Sale or Force Ph/Mail.
2. Enter the dollar amount and press OK.
3. Perform one of the following payment methods for the credit card in question: Swipe
(only for Sale transactions) or Manual entry.
Swipe
a) Verify the card info with what is on the screen and press OK. Go to step 4.
Manual entry
a) Enter the account number and press OK.
b) Enter the expiry date and press OK.
c) A manual imprint of the credit card is required. Make the imprint and press OK.
d) Enter the CVD number and press OK. Go to step 4.
4. Then enter the authorization number and press OK.
5. The screen shows that authorization number, the transaction total and the receipts
print. The customer must sign the signature ield on the merchant copy for a force
post sale transaction.
Void
This transaction is used to correct a previously entered transaction from the terminal in the
current, open business day. You can also use Transaction Recall to recall and cancel/void a
transaction based on information other than the trace number.
1. Press OK Void.
Enter the trace number for the transaction to be voided and press OK. If you
are voiding a debit transaction you will need the card that it was performed on.
2. Verify that this is the correct transaction: Void or Back. If you select back, you
can enter a new trace number to void.
3. The voided transaction receipts print.
Before you perform this transaction you must call the TD Merchant Help Desk at
18003631163 and receive an authorization number.
If you have closed the business day that the transaction was performed in, you can only
perform a return. The option to void the transaction is no longer available.

12
Transaction recall
This option recalls a transaction so that you can view or void it for any transactions that
were performed in the current open batch. If a day close has been completed you can
only recall transactions after the last day close or batch close. Pre-authorization transactions
are covered in our online documentation at www.tdmerchantsolutions.com/posresources.
1. Press the Admin key Trans Recall Menu.
2. Select one of the following options:
by Detail
This recalls the details all of transactions in the open batch.
a) Scroll to the desired transaction and press F4. Go to step 3.
by Amount
This recalls any transaction for the entered dollar amount in the open batch.
a) Enter the dollar amount and press OK.
b) If more than one transaction appears, select the desired one and press F4.
Go to step 3.
by Account # (credit cards only)
This recalls any transaction for the entered card account number in the open batch.
a) Swipe the credit card or enter the card account number and press OK.
b) Select the transaction and press F4. Go to step 3.
by Invoice #
This recalls the transaction for the entered invoice number.
a) Enter the invoice number that you want to recall and press OK. Go to step 3.
by Trace #
This only recalls the transaction connected to the trace number in the open batch.
a) Enter the trace number that you want to recall and press OK. Go to step 3.
3. Verify that the it is the correct transaction information on the screen and do
one of the following:
a) Select Void to cancel the transaction and the voided receipts print.
b) Select Back to select a dierent transaction.
c) Press Cancel to exit the screen.

13
Return
You can only perform a return on a transaction that has already been submitted for reimbursement.
1. Press OK Return.
2. Enter the dollar amount and press OK.
3. Customer conirms the dollar amount and presses Yes or No.
4. Perform one of the following: Insert ,Swipe or Manual entry the card in question.
Insert credit card
a) Verify the card info with what is on the screen and press OK.
b) The customer may be required to enter their PIN. Go to step 5.
Swipe credit card
a) Verify the card info with what is on the screen and press OK. Go to step 5.
Manually enter credit card
a) Enter the account number and press OK.
b) Enter the expiry date and press OK. This is four digits in length.
c) Indicate if the return is for a phone / mail sale: Yes or No. Go to step 5.
Insert / swipe debit card
a) The customer selects the account to use: CHQ or SAV.
b) The customer enters their PIN and presses OK. Go to step 5.
5. The screen shows that authorization number, the transaction total and the receipts print.
Receipts
Each transaction has a dierent receipt and most of the information is purely for record
keeping. There is important information that you need to be aware of to ensure that your
transactions have completed correctly.
Reprinting receipts
1. Press the Admin key Reprint Menu and select a reprint option.
2. To reprint the last receipt, select which copy you want to reprint (Merchant,
Customer or Both) and press OK.
3. The receipt reprints and is noted as a duplicate.
OR
2. To reprint a previous receipt, select one of the following options:
Debit returns are disabled by default. If you wish to activate debit returns on your terminal
please call the TD Merchant Solutions Help Desk at 18003631163.

14
All
a) Scroll through the available receipts, select the desired one and press OK.
Go to step 3.
Invoice #
a) Enter the invoice number and press OK. Go to step 3.
Account #
a) Swipe the card or enter the account number and press OK. Go to step 3.
Approval Code
a) Enter the approval code and OK. Go to step 3.
3. Select which receipt to reprint (Merchant, Customer or Both) and press OK.
4. The receipt reprints and is noted as a duplicate.
Receipt examples
Transaction type
COnline chip card transaction RF Contactless transaction
CN Chip card No Signature
Required transaction
SSwiped mag card transaction
CO O-line chip card transaction SC Swiped chip card fall back transaction
MManually entered mag card
transaction
SN Swiped No Signature Required
transaction
MC Manually entered fall back of a chip
card transaction
Card type
AM American Express MC MasterCard
DP Debit VI Visa
DS Discover/Diner
Important information
Trace # The trace number associated with the transaction
Inv # The invoice number associated with the transaction.
Auth # The authorization number associated with the transaction
Signature The card issuer determines when a signatures is required for a transaction
so ensure that the client signs these receipts.
Approved Always ensure that the transaction was approved as it could be DECLINED.

15
Merchant Name
Address
City, Province
Merchant Number
Terminal ID
SALE
06-16-2016 12:41:02
A
cct # 455763******1632 S
Card Type VI
Name: nnnnnnn
Trace # 010103
Inv # 109
Auth #089090 RRN 001003099
Sale $9.00
TOTAL $9.00
+++++++++++++++++++++++
00 APPROVED-THANK YOU
+++++++++++++++++++++++
Retain this copy for your
records
Merchant copy
ADVERTISEMENT LINE 1
ADVERTISEMENT LINE 2
ADVERTISEMENT LINE 3
ADVERTISEMENT LINE 4
ADVERTISEMENT LINE 5
ADVERTISEMENT LINE 6
ADVERTISEMENT LINE 7
ADVERTISEMENT LINE 8
ADVERTISEMENT LINE 9
Credit Card Debit Card
Merchant Name
Address
City, Province
Merchant Number
Terminal ID
SALE
06-16-2016 12:41:02
Acct # 476173******0010 C
Card Type DP
Name: nnnnnnnnn
A00000000980840
Trace # 060072
Inv # 124
Auth #008635 RRN 001003099
TVR 8000048000 TSI 6800
TC 98952D8874F69BD1
Sale $25.00
TOTAL $25.00
+++++++++++++++++++++++
00 APPROVED-THANK YOU
+++++++++++++++++++++++
Retain this copy for your
records
Merchant copy
ADVERTISEMENT LINE 1
ADVERTISEMENT LINE 2
ADVERTISEMENT LINE 3
ADVERTISEMENT LINE 4
ADVERTISEMENT LINE 5
ADVERTISEMENT LINE 6

16
Business Day Functions
Performing a day close
You have a deadline to perform a day close. This is called your balancing window and it is
set on the system. If your day close is done before your balancing window ends, you’ll
receive same or next business day deposit for credit and debit card totals. Otherwise, they
will be forwarded to the next business day.
1. Press the Admin key Business Day Menu End of Day.
2. Conirm that you want to close the business day: Yes or No.
3. The end of day reports print.
4. The terminal reboots.
You must close your business day on each terminal in order to maintain accurate records
and balance your accounts. Closing the business day is important as it:
• Sends any stored transactions (SAFs).
• Closes all open batches.
• Prints selected reports.
• Checks for mail, and downloads.
• Downloads available updates.
• Starts a new business day on the terminal by opening a new batch.
A day close is automatically performed on your terminal every three to ive business
days if one isn’t performed sooner by you.
• If a lot of transactions have been conducted during the day, or you are
using a dial-up connection, this process may take a while.
• Once the process is started, ensure no one interrupts it by processing
any transactions, pressing any buttons or disconnecting your Internet
service on the terminal in question.
A batch is a group of transactions that you must submit to the issuer to accept in
order for you to be paid. Once you close the batch or perform and end of day, these
transactions are sent to the issuer for settlement and then they will deposit the funds
into your account.
Other manuals for iWL252
3
This manual suits for next models
1
Table of contents
Other TD Payment Terminal manuals
