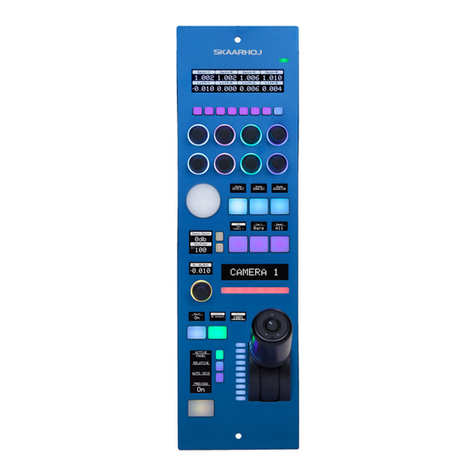
SKAARHOJ RC-SK5 User manual

Contents
Introduction 4
What’s In the Box 4
Overview 4
System Configuration 5
Setup 5
Power 5
Setup 5
Identifying the IP Address 5
Logging into the RC-SK5 Web UI 6
Update the Software 7
Configurations 8
Discovering Cameras 8
Adding Cameras Manually 10
Managing Cameras 13
Manage Projects 14
Customizing the Settings 15
Undo 17
More information 18
Simulator 18
Access the Control Panel via the Web UI 18
The Standard Config 19
Introduction 19
RC-SK5 & Frame Shot Pro 41
Overview of Benefits 42
Network Connected 42
Setup 42
Visual Presets 43
Functional Description 44
Persistent Thumbnail Storage 45
Side By Side 45
Extended Camera Selector 46
Customizing User Buttons 46
RC-SK5 Pro License 49
Overview of Benefits 49
Control Any Camera and Device 49
Preset Labels 51
More Configurations 52
Tally and Routing Triggers 52
Advanced Customization 54

Introduction
What’s In the Box
1 x RC-SK5 Controller
1 x 12V DC Power Supply including power plug
for EU, UK and US
Overview
This user guide is suitable for the following
models
-RC-SK5
-RC-SK5 Pro License
-Frame Shot Pro - Red Edition

System Configuration
Setup
•Connecting the Control Panel: Use a Cat6 cable (or higher grade) to connect the RC-SK5 control panel
to a Power over Ethernet (PoE) capable ethernet switch.
•Camera Connection: Connect your Canon cameras to the same ethernet switch to ensure network
integration.
Power
•DC Power Adapter: Only use the DC power adapter provided with the RC-SK5 controller. Substituting
with a different DC power adapter may lead to malfunctions or damage.
•PoE Power Supply:
•If powering the controller via PoE, confirm that the network switch is PoE-enabled and adheres to the
48V IEEE 802.3af standard.
•Ensure that your PoE source has a sufficient power budget. Inadequate power will prevent the
controller from functioning correctly.
•Power Consumption: The controller's power consumption is less than 9 Watts.
Setup
Identifying the IP Address
•Finding the IP Address: Once the cameras and the RC-SK5 are connected to the same network, the
IP address of the RC-SK5 will typically be displayed on its screen.
•Accessing the Controller: To access the RC-SK5, enter the displayed IP address into a web browser
from any computer on the same network.
•Troubleshooting IP Issues: If the IP address is not displayed, please consult the SKAARHOJ "Getting
Started" guide for troubleshooting tips. Note that the RC-SK5 is configured to connect to a network
with an active DHCP server. Without DHCP, it may not correctly obtain an IP address.

Logging into the RC-SK5 Web UI
•Accessing the Login Page: Navigate to the IP address in your web browser.
•Accepting the Agreement: You will first need to read and accept the "End-User License and Product
Support Agreement for Canon RC-SK5™, Reactor™, and the Blue Pill Platform™".
• Entering Login Credentials:
• Username: admin
• Password: skaarhoj
•Security Recommendation: If you are operating the RC-SK5 on an insecure network, it is strongly
recommended to change the default username and password. This can be done in the Settings tab.
After logging in, you will be directed to the Home screen of Reactor, where most configuration settings
can be managed.

Update the Software
We advise you to promptly updating the software on your RC-SK5. The process is straightforward and can
be done via the Packages tab. Please follow these steps:
•Internet Connection Check: Ensure that the RC-SK5 is connected to the internet. A green tower icon
in the upper right corner indicates an active internet connection.
•Performing an Update: If there are available updates for any package, you will see a green "Update
to..." button next to the respective package. Click this button to automatically download and install the
update for that package.
• Manual Update Process: In instances where the RC-SK5 is not connected to the internet, visit https://
devices.skaarhoj.com/ to download the necessary packages. Use the "Upload and Install Package"
button on the RC-SK5 to manually install these packages.
In addition, check for a newer version of the skaarOS operating system by going to the Settings tab and
clicking the orange Update button.

Configurations
The Reactor Home screen is where you initiate the setup for the RC-SK5. Your screen should resemble the
following view:
The dropdown menu labeled "RC-SK5 - Standard Config" is where you choose the operational setup for
your RC-SK5. This manual details the functionality of this particular configuration. In the standard RC-SK5
version, this is the default configuration, with the only other option being the configuration that
incorporates Frame Shot Pro. Be aware that switching configurations from this dropdown will erase any
customizations like added cameras. It is advised to only change configurations if you have a specific
reason.
Discovering Cameras
In the Reactor Home screen, click the square "+" icon located to the right of the blue "Camera Selector"
button to open the Select Device dialog. Use the "Discover Devices" option to find your Canon cameras,
which should appear in the list if they are connected and the network is set up correctly.

Click "Install" for each camera you want to add to RC-SK5, holding down Shift to select multiple cameras
simultaneously.
After adding your cameras, they will receive a unique Device ID. For some models, like the EOS-C300, you
may need to enter additional details like username and password, as indicated in the Devices tab on the
right side of the Home Screen.

Adding Cameras Manually
If your cameras are not automatically discovered, you have the option to select them manually. Click on
"Add Device Manually" to view a list of all supported Canon cameras. In this manual selection process,
you will need to enter details such as the IP address for each camera.
Cameras can also be added using the "Add Device" button found in the Devices tab. When a device is
added this way, it connects to the RC-SK5, but it isn't automatically included in the camera selector.
Cameras are only added to the selector when listed next to the blue "Camera Selector" button. This
approach allows for flexible design of the camera selector, including the option to exclude certain
cameras or to add the same camera multiple times, such as making it appear on multiple pages of the RC-
SK5.
To include cameras in the Camera Selector that are already present in the Device list, simply choose the
"From Device Collection" tab in the "Select Devices to Add" dialog.

The screenshot below illustrates a scenario where multiple cameras are added. The CR-N100 and CR-
N700 are connected, while the EOS-C300 requires a password and the CR-X300 is pending IP address
assignment. Additionally, 10 cameras have been integrated into the controller's camera selector.

On the controller, the cameras selector would look like this on the first page:
The second page would look like this:

Managing Cameras
To reorganize your cameras, drag and drop them within the grid to the right of the blue Camera Selector
button. For editing details like the IP address or to remove a camera, right-click on the respective camera
icon.
Manage your cameras in list format by clicking the Camera Selector button; here, you can adjust the order
as displayed on the RC-SK5. Muting a camera will hide it from the selector, leaving its button blank, while
editing the Camera Name will update the button's label on the displays.
The Device Number, corresponding to the Device ID from the Device List, should remain unchanged, as
it's a unique identifier for each camera. The Device Config is a preset value determining sub-configuration
for the cameras and is particularly relevant when using an RC-SK5 Pro License to manage a diverse
camera setup; the standard version typically offers only one option.
The Color field allows for the color-coding of camera selector buttons for easy identification: as seen in
the examples, the first two cameras are marked in blue, the next two in cyan, with the remaining using the
default warm white color.

Manage Projects
Clicking the "Manage Projects" button opens a dialog where new projects can be created. Each project
encompasses the configuration of panels, devices, and settings. This feature allows you to set up projects
for different locations, enabling easy portability of the RC-SK5 and quick application in various contexts.
For this and many more features in Reactor, please consult the general guides on SKAARHOJ's products
where you will find more details.

Customizing the Settings
The RC-SK5 features 20 menu pages for configuring the four encoders, customizable via the
Configuration tab. Configuring the settings pages gives you a preview of the extensive customization
available with the RC-SK5 Pro License, which offers unlimited configuration options.
With the standard version of the RC-SK5, changes to settings are restricted to the menu pages. These can
be accessed directly on the RC-SK5 or selected through the menu selector at the bottom of the
configuration screen.
In the provided example, when the Home menu is selected and the first encoder on the left, labeled
'Shooting Mode,' is activated, the Inspector tab on the right displays the behavior details of this control. It
is set to adjust the "Shooting Mode" parameter using a "Change by step" template, allowing it to cycle
through available options as the knob is turned. Other knobs are configured to function similarly.
By clicking the white arrow in the upper right corner of the Inspector tab, you can return to the overview
of all available parameters for all cameras that have been added.

We suggest activating the gray toggle labeled "Group by device core" in the upper right corner. This
setting ensures that the parameters automatically apply to the camera currently selected on the controller,
rather than being fixed to a specific camera as listed above.
In the example below, we change the behavior for the Shooting Mode knob to Metering Mode instead.
Selecting this behavior results in an instant change in the display:

Undo
In the Configuration section, the ability to revert to a previous state can be crucial if unexpected changes
occur. On the right side of the menu bar, above the Controller Tab, you'll find Undo and Redo buttons
accompanied by a history overview. Additionally, pay attention to the question mark icon; it provides
guidance on navigating the canvas within the Configuration section.
On the left side, the icon resembling a game controller activates the Simulation Mode within the
Configuration section. In Simulation Mode, clicking on any hardware component will simulate pressing it
on the actual panel, rather than opening the component for editing in the Inspector tab.

More information
For detailed guidance on configuring your RC-SK5, please refer to SKAARHOJ's comprehensive resources
on Reactor and configuration techniques. It's important to note that the standard RC-SK5 has limited
configuration capabilities. Many options and features seen in other resources, which may currently seem
unavailable, can be unlocked for your RC-SK5 with the purchase of the RC-SK5 Pro License.
Simulator
Access the Control Panel via the Web UI
The RC-SK5 includes a Simulator tab, which is a straightforward, web browser-based tool that fully
simulates the physical controller. This feature allows for online interaction and testing of the controller's
functionalities.

The Standard Config
Introduction
In the subsequent pages, you will find a comprehensive description of the functions for every knob and
menu item in the default configuration of the RC-SK5.

SKAARHOJ RC-SK5 PTZ Controller Functional Overview
This is an overview of the SKAARHOJ RC-SK5, a sophisticated PTZ camera controller. Upon powering up, the
controller defaults to this main interface, providing a user-friendly and visually clear overview of the primary functions
and settings. The layout is thoughtfully designed to facilitate quick access to essential controls and information. It
prominently displays the status of connected cameras, including their current operational modes and settings. Key
features like pan, tilt, and zoom adjustments are readily accessible from the control panel, ensuring seamless
operation for users. Interactive elements are strategically placed for ergonomic ease, allowing operators to efficiently
navigate through various control layers and settings. The design is a blend of functionality and simplicity, making it
ideal for both novice and experienced users in various broadcasting and AV scenarios.
30-34: Camera Selector: Select individual or multiple cameras for control. Multiple selection is enabled by pressing and
holding a button. The camera selector buttons will display tally colors corresponding to the tally settings configured in the
cameras.
Table of contents
Other SKAARHOJ Controllers manuals


