7
• Always ensure that the cutting mechanism is in good
working order (have worn or damaged parts replaced)
• Keep all nuts, bolts and screws tight to be sure that the
tool is in a safe working condition
DURING USE
• Only mow with sucient daylight or with appropriate
articial lighting
• Do not tilt the tool when starting or switching on the
motor, except if the tool has to be tilted for starting in
long grass (in this case, do not tilt it more than absolutely
necessary and tilt only the part which is away from the
operator); always ensure that both hands are in the
operating position before returning the tool to the ground
• Ensure that the cutting blade is at a complete standstill
when tilting the tool for crossing surfaces other than
grass and when transporting it to and from the area to be
mowed
• Mow across the face of slopes (never up and down)
• Be extremely careful when changing direction on slopes
• Never pick up or carry the lawn mower while the motor
is running
• Never use the tool when handle cord is damaged, have it
replaced by a qualied person
AFTER USE
• Store the tool indoors in a dry and locked-up place, out
of reach of children
-store the battery pack separately from the tool
Only use the following batteries and chargers with this
tool
-SKIL battery: BY5197E-03 BY5196E-03
-SKIL charger: SC5358E-01 QC5360E-01 QC5359E-00
• Do not use the battery when damaged; it should be
replaced
• Do not disassemble the battery
• Do not expose tool/battery to rain
• Permitted ambient temperature (tool/charger/battery):
-when charging 0...+45°C
-during operation –20...+50°C
-during storage –20...+50°C
EXPLANATION OF SYMBOLS ON TOOL
3Read the instruction manual before use
4Do not dispose of electric tools and batteries together
with household waste material
5 Beware of sharp blades, after switching o the tool the
blade continues to rotate for a few seconds, switch
o and remove safety key from tool before cleaning/
maintenance.
6Pay attention to the risk of injury caused by ying
debris (keep bystanders a safe distance away from work
area)
7Wear protective glasses and hearing protection
8Do not expose tool to rain
9Guaranteed sound power level
USE
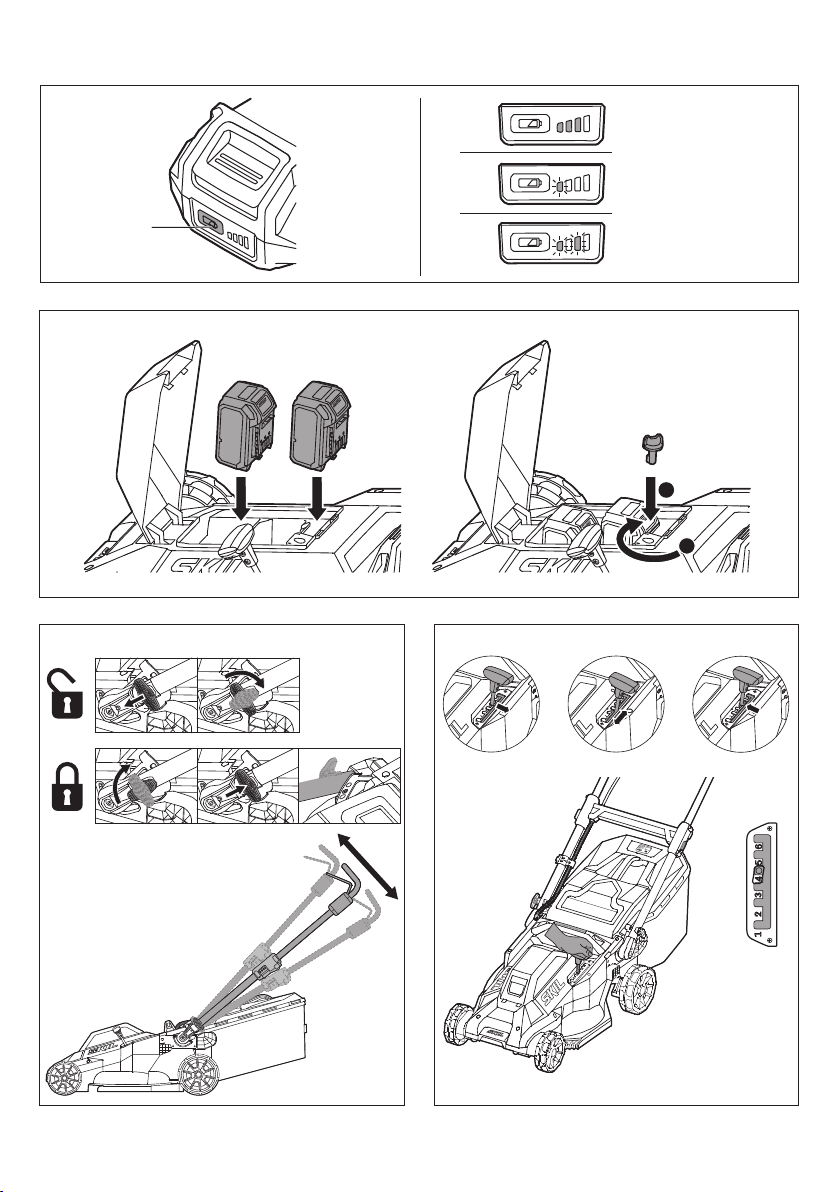
• Charging battery
! read the safety warnings and instructions
provided with the charger
• Removing/installing the battery ea
-2 battery packs need to be installed
• Removing/installing safety key eb
INTRODUCTION
• This tool is intended for domestic lawn mowing only
• This tool is not intended for professional use
• Check whether the packaging contains all parts as
illustrated in drawing 1
• When parts are missing or damaged, please contact your
dealer
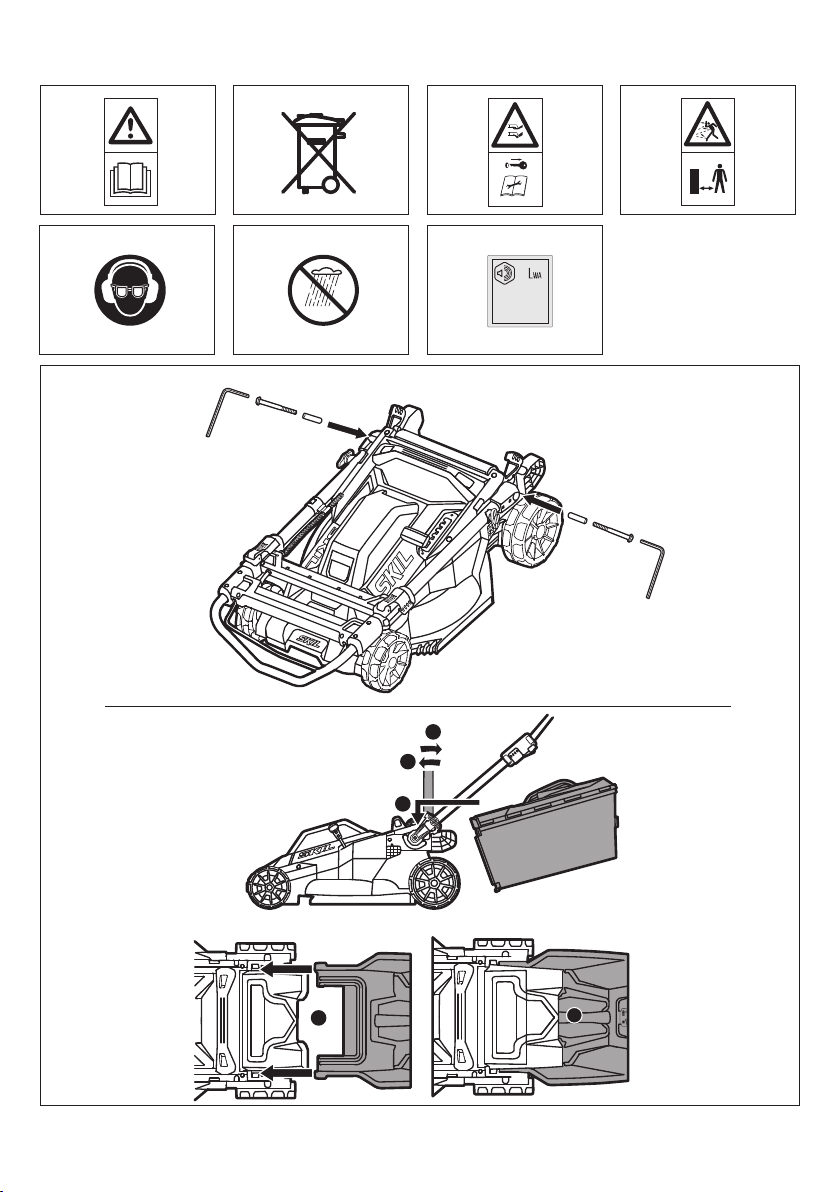
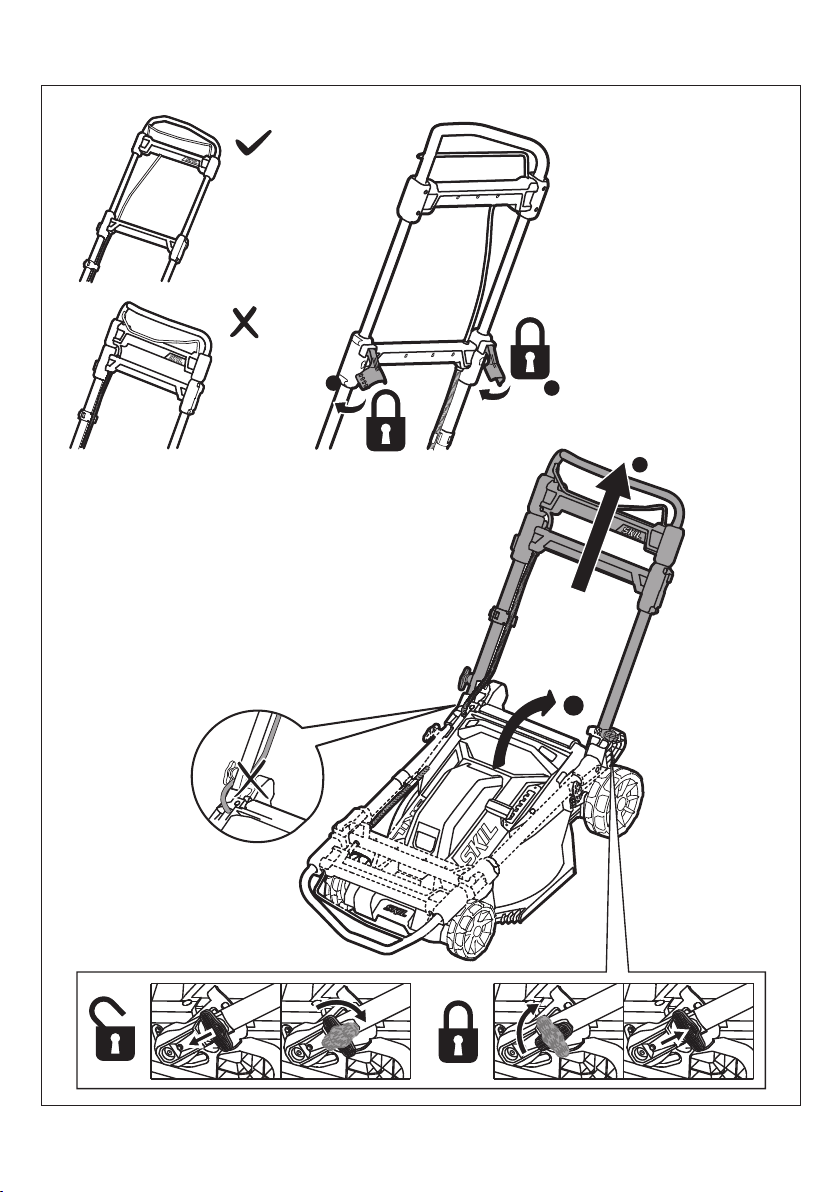
• Assembly instructions q
-the sequence of the numbers appearing in the drawing
corresponds with the sequence of the steps to be
followed for assembling the lawn mower
• Read this instruction manual carefully before use
and save it for future reference 3
SAFETY
GENERAL
• Never allow children, persons with reduced physical,
sensory or mental capabilities or lack of experience and
knowledge or people unfamiliar with these instructions to
use the machine
• Store idle power tools out of reach of children and do
not allow persons unfamiliar with the mower or these
instructions to operate the mower
• Avoid operating the mower on wet lawns
• The user is responsible for accidents or hazards
occurring to other people or their property
• Never operate the tool with a defective rear guard or
defective grass box
• When operating the tool without grass box, ensure
that the rear guard is in closed position (risk of injury
caused by rotating cutting blade)
• Always switch o the tool, remove battery pack, and
ensure that all moving parts have come to a complete
standstill
-whenever leaving the tool unattended
-before clearing jammed material
-before checking, cleaning or working on the tool
-after striking a foreign object
-whenever the tool starts vibrating abnormally
PERSONAL SAFETY
• Do not operate the tool when barefoot or wearing open
sandals; always wear sturdy shoes and long trousers
• Be familiar with the controls and the proper use of the
tool
• Never mow in the direct vicinity of persons (especially
children) and animals
• Always keep hands and feet away from rotating
parts
• Keep away from the discharge opening at all times
• Switch on the motor according to instructions and with
feet well away from the cutting blade
• Operate the mower at a walking pace only (do not run)
• Keep proper footing on slopes and do not mow extremely
steep slopes
• Be extremely careful when moving backwards or pulling
the mower towards you
BEFORE USE
• Check the functioning of the tool before each use and,
in case of a defect, have it repaired immediately by a
qualied person; never open the tool yourself
• Thoroughly inspect the area where the mower is to be
used and remove all hard objects which could be caught
up and thrown by the cutting mechanism