manuals.online logo
Brands
  1. Home
  2. •
  3. Brands
  4. •
  5. SkyCaddie
  6. •
  7. GPS
  8. •
  9. SkyCaddie LX5 User manual

SkyCaddie LX5 User manual

USER GUIDE
2
FOR PRODUCT VIDEOS, PLEASE VISIT WWW.SKYCADDIE.COM/MYLX5
WARRANTY VOID IF OPENED
ANY AND ALL WARRANTIES ARE INVALID ONCE OPENED OR AFTER ANY TAMPERING WITH SCREWS OR SEALS
IMPORTANT NOTICE
Read carefully the SkyCaddie LX5 Product Information Guide before use of the SkyCaddie LX5. Failure to read and
follow the Product Information Guide may cause serious injury or death.
The SkyCaddie LX5 specications and functionality are constantly evolving, and we may update or change them in
whole or in part, without notice to you. Such updates may be required for you to use new functionality, access new
courses or features, or continue to access and use existing courses and features. The courses and features available
for use on the SkyCaddie LX5 change from time to time, and not all courses or features previously offered will be
available. Some features require an annual subscription.
The software in the SkyCaddie LX5 is licensed and not sold to you, and is subject to the End User License Agreement
set forth in the SkyCaddie LX5 Product Information Guide.
3
1.0 Power On/Off........................................................... 5
2.0 Product Setup .......................................................... 5
2.1 Charging Your SkyCaddie SX400 ................... 5
2.2 Registering Your SkyCaddie SX400 ............... 9
3.0 Navigation .............................................................. 10
4.0 Playing Golf ............................................................ 10
4.1 (A) Selecting A Course To Play ...................... 10
(B) Updating A Golf Course With Wi- ........ 11
(C) Updating A New Course To Your SX400 .. 12
4.2 Changing Golf Views ..................................... 14
(A) Round Options .......................................... 15
4.3 Features Of Interactive HoleVue .................. 18
4.4 Features Of IntelliGreen®.............................. 19
4.5 IntelliGreen®Pro ............................................ 20
4.6 Target (Hazards, Carries And Layups) ......... 20
4.7 Front, Center And Back Screen (Basic View)... 21
4.8 The Digital Scorecard ..................................... 21
4.9 Intelligent Automation ................................... 22
4.10 Reviewing Saved Rounds ............................. 22
5.0 SkyCaddie SX400 Settings ...................................... 23
5.1 Account Settings.............................................. 23
5.2 Golf Settings .................................................... 23
5.3 System Settings............................................... 24
5.4 Versions ............................................................ 25
Appendix A Helpful Hints ............................................... 26
Appendix B Target Descriptions.................................... 29
Appendix C Battery Life.................................................. 30
TABLE OF CONTENTS
4
FOR PRODUCT VIDEOS, PLEASE VISIT WWW.SKYCADDIE.COM/MYLX5
PRODUCT OVERVIEW
SLEEP
POWER ON/OFF
MENU
Double Tap
Screen
to Wake
Heart Rate
Monitor
Charging Port
ESN
12
6
9
3
05
10
15
20
25
30
35
40
45
50
55
FRI 22
90%
5
30-DAY COMPLIMENTARY COURSE MAP TRIAL
Your SkyCaddie LX5 comes preloaded with over 35,000 of SkyGolf’s ground-veried, error-corrected maps for unmatched
accuracy to provide you with precise yardages to all critical targets, on a 30-day trial basis. Your complimentary 30-day trial
period will begin with your rst round of golf. After 30 days, access to course
data requires a registration for either a ‘no annual fee’ option which will provide limited front, center, back information or a
nominally priced membership plan which will provide full course data and cloud storage.
If a SkyCaddie membership card is included with your promotional packaging, you can redeem it during the registration pro-
cess (use the Apply Prepaid Membership Card option).
This plan gives your SkyCaddie LX5 worldwide access to SkyCaddie’s Advanced Feature Course Maps, which includes SkyCad-
die’s proprietary Intelli-Green® Technology and distances to up to 40 TrueGround Targets per hole.
SkyGolf membership plans have no hidden fees or variable charges. Through this minimal annual investment, you have ac-
cess to SkyCaddie’s highly accurate and proprietary course map database, software updates, post-round game analysis, and
many more member benets and rewards. For more information go to www.skygolf.com/plans/plansoverview.
SkyGolf Memberships Offer Much More Than Just a Better Golf Game!
6
FOR PRODUCT VIDEOS, PLEASE VISIT WWW.SKYCADDIE.COM/MYLX5
EXTENDED WARRANTY
When registering your SkyCaddie LX5, you will be given the option of purchasing an Extended Warranty if you reside in the
United States or Canada. This will extend the standard 6-month manufacturer’s limited warranty to a
12-month warranty against defects in materials and workmanship. Terms and conditions are listed online at
www.skygolf.com
CUSTOMER SERVICE
SkyGolf is committed to providing the highest level of customer support. To view the latest version of this guide or to access
additional information including product FAQs or to chat with a customer service representative, please visit
www.skygolf.com and click on Support at www.skygolf.com/mylx5
7
HOW TO TURN ON / OFF YOUR SKYCADDIE LX5
• To turn on, press and hold top button. LX5 will advance through start up sequence
• To turn off, press and hold top button.
• Or, press menu button, >menu > scroll down to ‘Turn Off’ – and conrm turn off
How to wake up LX5 Screen:
In order to conserve battery, the LX5 screen will DIM to dark when
not in use. To wake up screen either press top right button or
double tap the screen.
Auto Dim Settings can be changed in the menu:
Menu>Settings> System>Auto Dim> 10 sec, 15sec, 20, 30 or Never.
Choosing NEVER will reduce battery life signicantly
8
FOR PRODUCT VIDEOS, PLEASE VISIT WWW.SKYCADDIE.COM/MYLX5
CLEAN THE CHARGING PORT ON YOUR SKYCADDIE LX5
Make sure the charging port on your SkyCaddie LX5 and the magnetic charging connector on the USB charging cable are
clean and dry. You can wipe off sweat, dust, or grass with a clean, dry cloth or towel, but in some instances your SkyCaddie
LX5 may require additional cleaning. To remove tarnish or built-up grime on the gold contacts, follow these steps:
Cleaning the charging port on the back of your SkyCaddie LX5
Step 1: Moisten a clean cotton Q-Tip™ swab with isopropyl
alcohol. Use only enough alcohol to moisten the Q-Tip™
swab—do not soak the swab.
Step 2: Scrub the four gold contact points on the underside
of the SkyCaddie LX5’s face.
Important: Scrub only the contact points. Using
isopropyl alcohol on other parts may damage your LX5.
Step 3: Continue scrubbing the contact points with clean,
alcohol-moistened Q-Tip™ swabs until the swabs no longer
pick up any debris and the contact points are shiny.
Heart Rate
Monitor
Charging Port
ESN
9
ACTIVATING AND REGISTERING YOUR SKYCADDIE® LX5
There are two ways to register your SkyCaddie LX5:
• Via Bluetooth® on your smart device
• Via CaddieSync® Express on your computer
Activate Your SkyCaddie LX5 via Bluetooth®and SkyGolf 360 Mobile app.
1. Using your smart device, go to the Google PlayTM Store or the Apple® App StoreSM to download the SkyGolf 360TM
Mobile App.
2. Log in with your username and password or create an account.
IMPORTANT: To complete the registration process, you will need to pair your SkyCaddie LX5 with the SkyGolf 360 app.
The pairing instructions are listed below.
Bluetooth Pairing: To pair your SkyCaddie LX5 with SkyGolf 360:
1. Press and hold the MENU button until the Menu opens.
2. Select SETTINGS and press the OK button.
3. Select BLUETOOTH.
4. Select SYNC NOW.
10
FOR PRODUCT VIDEOS, PLEASE VISIT WWW.SKYCADDIE.COM/MYLX5
5. The LX5 will turn on Bluetooth and it will go to the “Pair Ready” screen.
6. In the SkyGolf 360 mobile app, press the SYNC icon and follow the on-screen instructions to complete pairing
process.
Activate your SkyCaddie LX5 via the enclosed USB cable
1. On your LX5, go to MENU>SYNC>USB.
2. On your computer, go to www.MySkyCaddie.com and follow the onscreen directions.
3. Either enter the ESN (Electronic Serial Number) found on the back of the LX5, or on your SkyCaddie LX5, select
CODE in the Main Menu to display your unique 8-character Access Code.
4. To complete activation, the website will ask you to log into your SkyGolf account or to create a user account,
should you not yet have one.
5. Follow the onscreen prompts to complete registration and activation of your SkyCaddie LX5
11
CHARGING YOUR SKYCADDIE LX5
Please fully charge your LX5 before rst use. Prior to
charging or recharging, make sure the charging con-
tacts and surrounding areas on your LX5 are dry and
free of any dirt or debris to ensure proper electrical
contact and to prevent corrosion.
Use the enclosed magnetic clip/ USB cable to charge
the SkyCadie LX5.
1. Align the magnetic clip on the back of the
LX5 as shown
2. Insert the USB Plug into a USB port on
your computer, or a SkyCaddie wall charger
(optional accessory)
3. If connected correctly, CHARGE screen will
display. When fully charged, 100% Charge
will appear on screen
Heart Rate Monitor
Attach charger from the right
Charging Port
12
FOR PRODUCT VIDEOS, PLEASE VISIT WWW.SKYCADDIE.COM/MYLX5
NAVIGATION
The screen of your SkyCaddie LX5 responds to several gestures:
Tap gesture Slide gestureDrag gesture
MENUS AND PLAYING GOLF
Time: Displays the watch face and time. At any time, you can change watch face by press and hold the time screen. It will
reduce in size and then you can scroll left or right to choose another watch face.
To change watch face - Press and hold screen watch display will reduce in size and now you and swipe right for a different
watch face design
13
Scroll to the right to see
smart phone notications.
Scroll the left to see ‘Today’s’ tness tracking – Steps, Miles and BPM.
Scroll down from this menu to see yesterday’s steps and tness goals
Hear Rate Monitor:
• Turn on/off HRM. NOTE: we recommend turning it on, check heart rate and turn off. Leaving the HRM on
continually will deplete battery more rapidly when in use
• Heart rate monitor may not work on all Skin Tones
Setting the Time: Go to Menu, then Settings, then Time and Set time. Conrm GMT setting example - 6hours. Conrm
time zone example Central America. Conrm time and scroll to adjust as needed. Finally, conrm date and scroll to
adjust as needed. When complete touch back arrow to exit menu.
14
FOR PRODUCT VIDEOS, PLEASE VISIT WWW.SKYCADDIE.COM/MYLX5
Golf:
Resume a round, start a new round, access Demo course, view saved rounds and access Golf Settings.
Golf Settings Menu:
• Units: change yards to meters
• Targets At: set the distance you want to start seeing targets off the tee box
• Green At: set the distance that you want the green to show. Or auto appear or auto show
• Tee Gender: choose your gender for correct tee box
• Auto Hole: on or off – will auto advance to next hole if ON
• Default view: HoleVue or Front, Center, Back – will change which view you want to see rst for each hole
Sync:
Choose either USB or Bluetooth sync here. This will initialize the LX5 to be discoverable. You will need to sync when
doing the following actions:
1. Activating and registering your LX5
2. Syncing a score to SkyGolf 360
3. Renewing your membership plan
4. Updating or adding golf courses to your LX5
15
Alarms:
Here you will nd access to set up to 10 different alarms.
Stopwatch:
Lap timer
Timer:
Here you can set timers for up to 59 hours in length
Settings:
• Time: set the time here
• Fitness:
- Units of measurement can be changed from Miles to Kilometers
- Step Goal: set daily goals
• Golf (as above menu)
• Bluetooth
- Turn on/off
- Pair/Unpair
16
FOR PRODUCT VIDEOS, PLEASE VISIT WWW.SKYCADDIE.COM/MYLX5
• System:
NOTE: changing these default settings may reduce battery time.
o Backlight: Low, Medium. High
o Auto Dim: dimming can be changed here.
o Auto Wake
o Vibrate – on or only for alarms
o Language – change language here
o Diagnostics – submit logs or clear
o Reset – courses, time, factory
Info
• Account – registered users name, ESN, membership, expiration date
• Versions – ESN, OS version, App Version, Golf Version, Map Pack, WIFI/ MAC, BLE MAC
• GPS – search screen will provide GPS information
Turn off
The LX5 can be turned off here
17
PLAYING GOLF WITH THE LX5
Top Tip: To familiarize yourself with the screens of the LX5, use the DEMO course in GOLF MENU. This can
be accessed without GPS mode turned on and you will be press icons, pan, zoom in and out, score and get
yourself ready to play golf. MENU >GOLF >DEMO
A GPS signal is required to use the GOLF features on your LX5. To acquire a GPS signal, ensure you are outside and allow the
LX5 to have a clear view of the sky. We recommend that you start with a fully charged battery as the GOLF features use more
battery.
Starting a New Round
When at the golf course:
1. Press MENU button until the Menu list appears.
2. Choose GOLF
3. Choose NEW Round
4. The LX5 will turn on the GPS and auto-search for nearby courses.
5. When the search is completed, a list of nearby courses will display.
6. Select the course you want to play
18
FOR PRODUCT VIDEOS, PLEASE VISIT WWW.SKYCADDIE.COM/MYLX5
Customizing your Golf Settings:
To get to golf settings: Menu> Golf > Settings:
Here you nd menu options to do the following:
• Units: change yards to meters
• Targets At: set the distance you want to start seeing targets off the tee box
• Green At: set the distance that you want the green to show. Or auto appear or auto show
• Tee Gender: Men or Ladies
• Auto Hole: on or off – will auto advance to next hole if ON
• Default view: HoleVue or FCB – will change which view you want to see rst for each hole
Changing Golf Views on the LX5:
To change golf views on your LX5, go to Menu> Golf >Default View:
Here you nd two options:
• FCB: Defaults to standard front/center/back screen
• HoleVue: Defaults to HoleVue/IntelliGreen map view
19
Navigation from Default Golf View screen:
FCB HoleVue
20
FOR PRODUCT VIDEOS, PLEASE VISIT WWW.SKYCADDIE.COM/MYLX5
Golf Screen Icons:
ZOOM
NAVIGATION
INTELLIGREEN
MARK DISTANCE
PAR OF HOLE
DISTANCE TO
FAIRWAY TARGET
DISTANCE TO MIDDLE OF
GREEN FROM FAIRWAY TARGET
TARGET CURSOR
(can be moved to any position on fairway)
RANGE RINGS

Other manuals for LX5

3

Other SkyCaddie GPS manuals

SkyCaddie SG2.5Lite User manual

SkyCaddie

SkyCaddie SG2.5Lite User manual

SkyCaddie SkyCaddie SGX Operator's manual

SkyCaddie

SkyCaddie SkyCaddie SGX Operator's manual

SkyCaddie SX500 User manual

SkyCaddie

SkyCaddie SX500 User manual

SkyCaddie SkyCaddie SGX User manual

SkyCaddie

SkyCaddie SkyCaddie SGX User manual

SkyCaddie SkyCaddie SGX User manual

SkyCaddie

SkyCaddie SkyCaddie SGX User manual

SkyCaddie SkyCaddie SGX User manual

SkyCaddie

SkyCaddie SkyCaddie SGX User manual

SkyCaddie BREEZE User manual

SkyCaddie

SkyCaddie BREEZE User manual

SkyCaddie SX400 User manual

SkyCaddie

SkyCaddie SX400 User manual

SkyCaddie TOUCH Installation and operation manual

SkyCaddie

SkyCaddie TOUCH Installation and operation manual

SkyCaddie SX550 User manual

SkyCaddie

SkyCaddie SX550 User manual

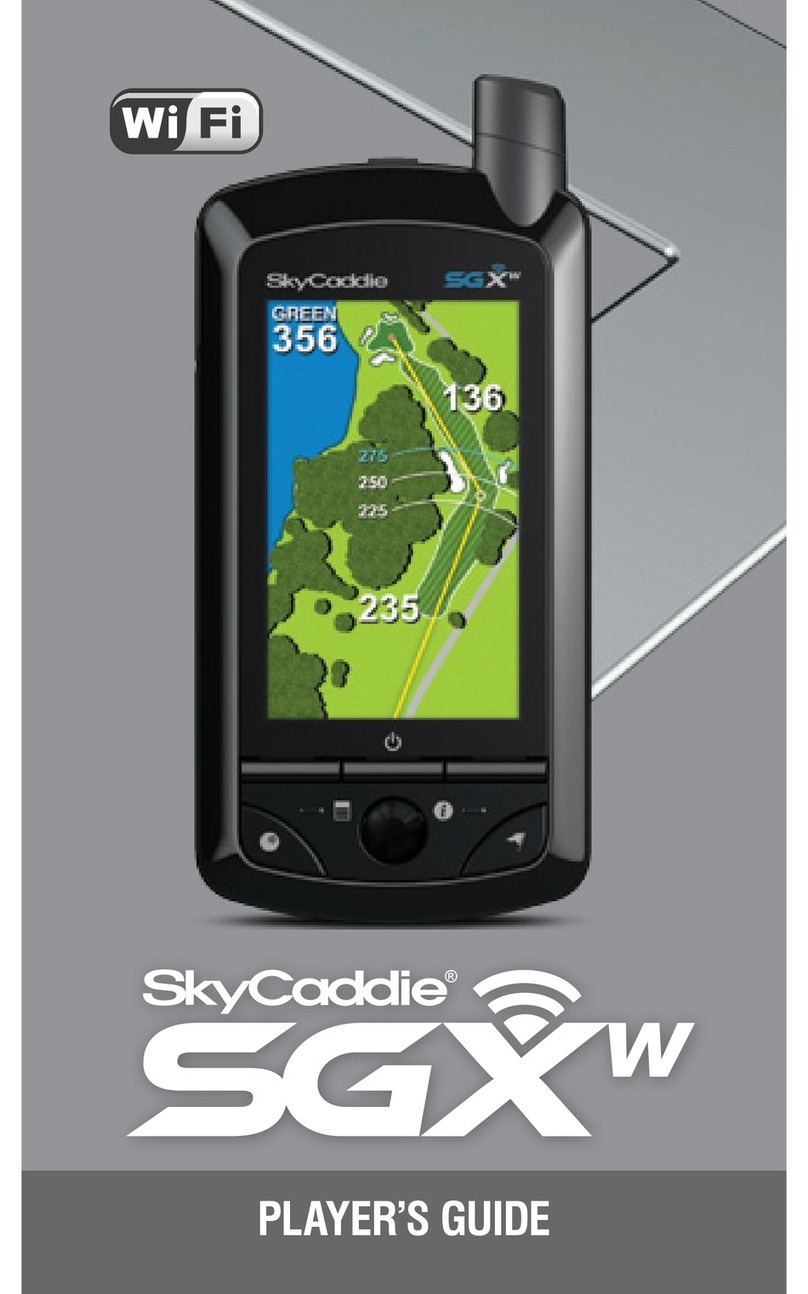
SkyCaddie SGXw Operator's manual

SkyCaddie

SkyCaddie SGXw Operator's manual

SkyCaddie SkyCaddie SGX User manual

SkyCaddie

SkyCaddie SkyCaddie SGX User manual

SkyCaddie TOUCH User manual

SkyCaddie

SkyCaddie TOUCH User manual

SkyCaddie Aire User manual

SkyCaddie

SkyCaddie Aire User manual

SkyCaddie LX5 User manual

SkyCaddie

SkyCaddie LX5 User manual

SkyCaddie TOUCH User manual

SkyCaddie

SkyCaddie TOUCH User manual

SkyCaddie BREEZE User manual

SkyCaddie

SkyCaddie BREEZE User manual

SkyCaddie SkyCaddie SGX User manual

SkyCaddie

SkyCaddie SkyCaddie SGX User manual
Popular GPS manuals by other brands

Expresso Satellite Navigation WR62 manual

Expresso Satellite Navigation

Expresso Satellite Navigation WR62 manual

AvMap GeoPilot plus user manual

AvMap

AvMap GeoPilot plus user manual

bca TRACKER DTS user manual

bca

bca TRACKER DTS user manual

Garmin GPSMAP 192C owner's manual

Garmin

Garmin GPSMAP 192C owner's manual

MERCARI LONE WORKER ALARMS NZ Start guide

MERCARI

MERCARI LONE WORKER ALARMS NZ Start guide

Japan Radio Co. JLR-7900 instruction manual

Japan Radio Co.

Japan Radio Co. JLR-7900 instruction manual

HEX here3 manual

HEX

HEX here3 manual

Garmin Etrex Legend - GPS Receiver Basics

Garmin

Garmin Etrex Legend - GPS Receiver Basics

MARLINK IRITRACK Assembly instructions

MARLINK

MARLINK IRITRACK Assembly instructions

CNCOTE CT-V3 quick start guide

CNCOTE

CNCOTE CT-V3 quick start guide

Polaris RIDE COMMAND+ user guide

Polaris

Polaris RIDE COMMAND+ user guide

Cobra 5400 Pro manual

Cobra

Cobra 5400 Pro manual

Micron Prime Pod Hardware guide

Micron

Micron Prime Pod Hardware guide

MICODUS MP80G user manual

MICODUS

MICODUS MP80G user manual

amber connect Amber Insight C450 quick start guide

amber connect

amber connect Amber Insight C450 quick start guide

Verizon Visirun B1N installation manual

Verizon

Verizon Visirun B1N installation manual

amber connect Amber Power C210 quick start guide

amber connect

amber connect Amber Power C210 quick start guide

Kenwood DNX571TR instruction manual

Kenwood

Kenwood DNX571TR instruction manual

manuals.online logo
manuals.online logoBrands
  • About & Mission
  • Contact us
  • Privacy Policy
  • Terms and Conditions

Copyright 2025 Manuals.Online. All Rights Reserved.