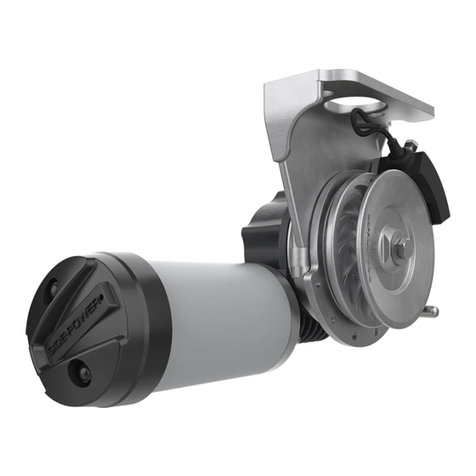
Sleipner MAXI 31 User manual

SLEIPNER MOTOR AS
P.O. Box 519
N-1612 Fredrikstad
Norway
www.sleipnergroup.com
DOCUMENT ID:
REVISION:
DATE:
LANGUAGE:
Installation Guide
For DC Electric Windlass Models
MAXI 31, 32, 34D, 34G, 40, 43, 44
EN
I M
2 916
8
2022

22 916 82022
-
MAXI 31 & 32 & 34 & 40 & 43 & 44
MC_0317
For MAXI windlass systems
Sleipner MAXI windlasses are a generic term for Sleipner windlass with 1000 or 1500 W, 12 or 24V. Some of the models are suitable for mounting
stern, some on the bow and some both stern and bow. Sleipner MAXI is intended for boats larger than approx. 25 feet. These windlasses are true
free-fall windlasses, it means that the anchor falls out and down to the bottom immediately after the switch to “drop anchor” (down) has been
pressed. It is the anchor’s weight on the outside of the anchor bracket that determines how quickly it falls out. It is therefore important to avoid
unnecessary friction between the ropes and hull, rolls or rope guides.
The installer must read this document to ensure necessary familiarity with the product before installation.
Instructions in this document cannot be guaranteed to comply with all international and national regulations. It is the responsibility of the
installer to follow all applicable international and national regulations when installing Sleipner products.
The recommendations given in this document are guidelines ONLY, and Sleipner strongly recommends that advice is obtained from a person
familiar with the particular vessel and applicable regulations.
This document contains general installation instructions intended to support experienced installers. If you are not skilled in this type of work,
please contact professional installers for assistance.
If required by local regulation, electrical work must be done by a licensed professional.
Appropriate health and safety procedures must be followed during installation.
Faulty installation of Sleipner products will render all warranties given by Sleipner Motor AS.
MC_0038
Responsibility of the Installer
MC_0440
General Installation Considerations and Precautions Guidelines
Sleipner Motor AS
P.O. Box 519, Arne Svendsensgt. 6-8
N-1612 Fredrikstad, Norway
MC_0020
Contents
Products
31-12110 - Maxi 31 windlass, 1000W, 12V
31-24115 - Maxi 31 windlass, 1500W, 24V
32-12110 - Maxi 32 windlass, 1000W, 12V
32-24115 - Maxi 32 windlass, 1500W, 24V
32-C-12110 - Maxi 32-C windlass, 1000W, 12V
32-C-12110V - Side-Power Engbo Maxi 32-C
32-C-24115 - Maxi 32-C windlass, 1500W, 24V
34-3G-12110 - Maxi 34-G windlass, 1000W, 12V, port side
34-3G-24115 - Maxi 34-G windlass, 1500W, 24V, port side
34-4G-12110 - Maxi 34-G windlass, 1000W, 12V, starboard
34-4G-24115 - Maxi 34-G windlass, 1500W, 24V, starboard
40-12110 - Maxi 40 windlass, 1000W, 12V
40-24115 - Maxi 40 windlass, 1500W, 24V
43-12110 - Maxi 43 windlass, 1000W 12V, port side
43-24115 - Maxi 43 windlass, 1500W 24V, port side
43-C-12110 - Sleipner windlass Maxi 43-C
43-C-24115 - Side-Power Engbo Maxi 43-C
44-12110 - Maxi 44 windlass, 1000W 12V, starboard
44-24115 - Maxi 44 windlass, 1500W 24V, starboard
Installation Manual
Responsibility of the Installer................................................................................................................................................................... 3
General Installation Considerations and Precautions Guidelines ........................................................................................................... 3
Windlass Measurements ................................................................................................................................................................. 4 - 6
Windlass Specications ........................................................................................................................................................................ 7
Installation Preparation .................................................................................................................................................................... 8 - 9
Anchor Brackets .................................................................................................................................................................................... 10
Windlass Installation MAXI 31.............................................................................................................................................................. 11
Windlass Installation MAXI 32............................................................................................................................................................... 12
Windlass Installation MAXI 32 Box........................................................................................................................................................ 13
Windlass Installation MAXI 34-G........................................................................................................................................................... 14
Windlass Installation MAXI 34-D ........................................................................................................................................................... 15
Windlass Installation MAXI 40............................................................................................................................................................... 16
Windlass Installation MAXI 43/44.......................................................................................................................................................... 17
Auto-stop Installation......................................................................................................................................................................18 - 19
Visual Wiring Diagram........................................................................................................................................................................... 20
Windlass Electrical Installation .......................................................................................................................................................21 - 22
Windlass Circuit Breaker ....................................................................................................................................................................... 23
Post-Installation Checklist ..................................................................................................................................................................... 24
Service and Support........................................................................................................................................................................... 25
Product Spare Parts and Additional Resources.............................................................................................................................. 25
Warranty Statement............................................................................................................................................................................ 25

3
2 916 82022
-
MAXI 31 & 32 & 34 & 40 & 43 & 44
MC_0317
For MAXI windlass systems
Sleipner MAXI windlasses are a generic term for Sleipner windlass with 1000 or 1500 W, 12 or 24V. Some of the models are suitable for mounting
stern, some on the bow and some both stern and bow. Sleipner MAXI is intended for boats larger than approx. 25 feet. These windlasses are true
free-fall windlasses, it means that the anchor falls out and down to the bottom immediately after the switch to “drop anchor” (down) has been
pressed. It is the anchor’s weight on the outside of the anchor bracket that determines how quickly it falls out. It is therefore important to avoid
unnecessary friction between the ropes and hull, rolls or rope guides.
The installer must read this document to ensure necessary familiarity with the product before installation.
Instructions in this document cannot be guaranteed to comply with all international and national regulations. It is the responsibility of the
installer to follow all applicable international and national regulations when installing Sleipner products.
The recommendations given in this document are guidelines ONLY, and Sleipner strongly recommends that advice is obtained from a person
familiar with the particular vessel and applicable regulations.
This document contains general installation instructions intended to support experienced installers. If you are not skilled in this type of work,
please contact professional installers for assistance.
If required by local regulation, electrical work must be done by a licensed professional.
Appropriate health and safety procedures must be followed during installation.
Faulty installation of Sleipner products will render all warranties given by Sleipner Motor AS.
MC_0038
Responsibility of the Installer
MC_0307
For Windlass systems
• Keep your distance to the windlass, the anchor line, anchor and anchor brackets during operation.
• While operating the anchor maintain observation of the rope or chain during handling.
• Ensure anyone using the windlass knows how to operate it.
• Be aware when the anchor are raised as it can bring unwanted debris up from the bottom, potentially damaging your boat. (NB: If the windlass is
straining as the anchor is raised, stop for a few seconds and let the boat gain up momentum before continuing the raise.)
• If the anchor is stuck, release some anchor line/chain and attach it to a cleat before using the boat to pull the anchor free. The windlass is not
designed for loads beyond the specifi ed pull capabilities.
• The anchor MUST ALWAYS be secured to the boat while under way. Use the security line or other means to prevent unintentional anchor drop.
• Children must not operate the windlass.
• Careless use can cause damage or injury!
• Keep the engine running during windlass operation to ensure good battery capacity.
• Sleipner Motor AS is not responsible for damage or injury caused by the use of our windlass systems.
• While dropping anchor, do not push the “UP” button until the anchor is resting at the seabed.
Never use a windlass close to somebody in the water, an unexpected drop of the anchor can cause serious injuries.
It is the owner/ captain/ other responsible parties full responsibility to assess the risk of any unexpected incidents on the vessel.
Failure to follow the considerations and precautions can cause serious injury, damage and will render all
warranties given by Sleipner Motor as VOID. MC_0411
MC_0440
General Installation Considerations and Precautions Guidelines

42 916 82022
-
MAXI 31 & 32 & 34 & 40 & 43 & 44
MG_0355
MAXI 31
MAXI 32
W
L
W
L
H
H
Windlass Measurements
Measurement
code Measurement description mm inch
H Total Height 396 15.6
W Total width 300 11.8
L Total length 200 7.9
Measurement
code Measurement description mm inch
H Total Height 386 15.2
W Total width 230 9.1
L Total length 255 10
MAXI 31
MAXI 32
MC_0326
MG_0356
H
W
L
MAXI 34-G/ 34-D
Windlass Measurements
Measurement
code Measurement description mm inch mm inch
H Total Height 283 11 283 11
W Total width 255 10 250 10
L Total length 370 14.6 250 9.8
MAXI 34-G MAXI 34-D
MC_0326

5
2 916 82022
-
MAXI 31 & 32 & 34 & 40 & 43 & 44
MG_0355
MAXI 31
MAXI 32
W
L
W
L
H
H
Windlass Measurements
Measurement
code Measurement description mm inch
H Total Height 396 15.6
W Total width 300 11.8
L Total length 200 7.9
Measurement
code Measurement description mm inch
H Total Height 386 15.2
W Total width 230 9.1
L Total length 255 10
MAXI 31
MAXI 32
MC_0326
MG_0356
H
W
L
MAXI 34-G/ 34-D
Windlass Measurements
Measurement
code Measurement description mm inch mm inch
H Total Height 283 11 283 11
W Total width 255 10 250 10
L Total length 370 14.6 250 9.8
MAXI 34-G MAXI 34-D
MC_0326

62 916 82022
-
MAXI 31 & 32 & 34 & 40 & 43 & 44
MG_0361
H
W
L
MAXI 43/ 44
Measurement
code Measurement description mm inch mm inch
H Total Height 393 15.5 393 15.5
W Total width 219 8.6 219 8.6
L Total length 238 9.4 238 9.4
MAXI 43 MAXI 44
Windlass Measurements MC_0326
Description MAXI
Available DC System (v) 12v & 24v
No-Load current (v)
Power Consumptions 10-200A during normal operation
Typical Boat Size (m * ft) >23ft
Pulling power (Electronically governed)
Rope windlasses:
1000 W, up to approx. 500 kg
1500 W, up to approx. 650 kg
Chain windlasses: up to approx. 850 kg
Pulling speed 20–25 m/min with a load of approx. 40 kg
Weight (kg * lbs) Aprox. 20 kg * 44.1 lbs
Minimum Battery Capacity 12V/100Ah
24V/75 Ah
Rope
Woven lead rope: dia. 16 mm. Breaking strain: 4000 kg
Woven lead rope: dia. 14 mm. Breaking strain: 3300 kg
Length:
50 m, weight, 21.7 kg
75 m, weight, 32.0 kg
100 m, weight, 43.0 kg
Chain
(Chain windlasses)
6.5 mm, short link Norwegian std. Breaking strain: 2300 kg
8 mm DIN 766 std. Breaking strain: 4000 kg
Auto Stop Yes
(NB: Only for rope windlass)
Anchor/ weight Sleipner / Bruce / Spade /10–30 kg
Windlass Specifi cations MC_0337

7
2 916 82022
-
MAXI 31 & 32 & 34 & 40 & 43 & 44
MG_0361
H
W
L
MAXI 43/ 44
Measurement
code Measurement description mm inch mm inch
H Total Height 393 15.5 393 15.5
W Total width 219 8.6 219 8.6
L Total length 238 9.4 238 9.4
MAXI 43 MAXI 44
Windlass Measurements MC_0326
Description MAXI
Available DC System (v) 12v & 24v
No-Load current (v)
Power Consumptions 10-200A during normal operation
Typical Boat Size (m * ft) >23ft
Pulling power (Electronically governed)
Rope windlasses:
1000 W, up to approx. 500 kg
1500 W, up to approx. 650 kg
Chain windlasses: up to approx. 850 kg
Pulling speed 20–25 m/min with a load of approx. 40 kg
Weight (kg * lbs) Aprox. 20 kg * 44.1 lbs
Minimum Battery Capacity 12V/100Ah
24V/75 Ah
Rope
Woven lead rope: dia. 16 mm. Breaking strain: 4000 kg
Woven lead rope: dia. 14 mm. Breaking strain: 3300 kg
Length:
50 m, weight, 21.7 kg
75 m, weight, 32.0 kg
100 m, weight, 43.0 kg
Chain
(Chain windlasses)
6.5 mm, short link Norwegian std. Breaking strain: 2300 kg
8 mm DIN 766 std. Breaking strain: 4000 kg
Auto Stop Yes
(NB: Only for rope windlass)
Anchor/ weight Sleipner / Bruce / Spade /10–30 kg
Windlass Specifi cations MC_0337

82 916 82022
-
MAXI 31 & 32 & 34 & 40 & 43 & 44
MG_0357
Anchor bracket
Safety line Auto Stop
RopeHull conduit
Placing the parts
You must plan the placement of the following parts:
General
The windlass should be positioned as high as possible to allow maximum space for the rope that will be stored below the windlass. The height from the
bottom of the wall where the rope is stored to the bottom edge of the line wheel should be at least 50 cm, and the area should be at least 40 x 40 cm to
allow room for 50 m x 12 mm anchor rope. This will prevent the rope from bunching under the windlass and assure suffi cient friction between the line
wheel and the rope.
(NB: Remember to attach the end of the rope somewhere inside the boat.)
Anchor bracket
Fit the windlass so that the rope is wound up in line with the anchor bracket (see pictures 1 and 2) – a numerous diff erent models are available. The
anchor bracket is working as a guide for the rope when the anchor is on the seabed and as a “seating point” for the anchor once it has been raised.
Use of anchor bracket
The bracket for the rope must be installed with the rollers outside the platform.
Standard platform roller or hinged platform roller
If the windlass is tted low in relation to the bathing platform, so the angle between the bathing platform and the rope is too small ,and if you are using a
Bruce anchor, you should use an Side-Power Engbo hinged platform roller.
Hull conduit / Line guide
It will often be necessary to install a hull conduit with a roller that guides the rope with low friction through the hull.
Rope
Side-Power Engbo supplies original woven anchor rope with a lead core . It is supplied in various lengths and dimensions.
Safety line
Once the anchor is seated in the anchor bracket, it must be secured with the safety line supplied.
Auto Stop
Side-Power MAXI winches for anchor lines feature an advanced electronic auto stop switch that stops the windlass automatically, twice. The rst stop
comes just before the anchor reaches the anchor bracket. The windlass can then only be operated at low speed until it stops for the second time once
the anchor is seated correctly in its bracket – ready to be dropped next time.
IMPORTANT
• Make sure to have all necessary tools ready
• Unpack and organize all components
• Prepare and control the areas where all the diff erent parts can
be mounted.
• Follow the mounting instructions
• When winching the rope for the fi rst time after mounting, make
sure the rope is tight, so the rope is pulled inn correctly.
• Winch/motor
• Brackets for anchor and windlass
• Cables
• Switch panel
• Control-box
• Line guide
• Main switch/ miniature circuit breaker
Installation Preparation MC_0319
General
Position the windlass as high as possible so that there is plenty of space for the rope under it. The bottom edge of the line wheel should be at least 50
cm above the surface on which the rope (or chain) is to lie. This will leave room for 50 m of 16 mm woven Rope line anchor rope or approx. 30 m of
chain.
If the height is less than 50 cm, check that the rope (or chain) does not bunch up against the underside of the windlass. If this is the case, use a shorter
rope (or chain).
We recommend side position of the windlass. Avoid any confl ict between the anchor and the side wave that turns in directly behind the boat.
(NB: Remember to attach the end of the rope somewhere inside the boat.)
Placing the platform roller
Fit the anchor bracket with the rollers beyond the edge of the platform so that the anchor/rope clears the platform when the anchor is raised.
Line guide in the stern
Check that the opening in the hull for the rope is correct in relation to the direction of the rope. To prevent unnecessary wear, the rope should not touch
the edge of the opening either vertically or horizontally. The opening must be oval (from top to bottom) to accommodate the friction in the rope roller
when the windlass is used.
Line guide
If it is diffi cult to lead the rope directly from the line wheel to the anchor roller, it is a good idea to use a hull conduit/line guide with rollers, for instance
39-76000 or the simple 39-79000 to lead the rope through the hull.
The line guide may be installed with studs as shown in picture.
Installation Preparation MC_0319

9
2 916 82022
-
MAXI 31 & 32 & 34 & 40 & 43 & 44
MG_0357
Anchor bracket
Safety line Auto Stop
RopeHull conduit
Placing the parts
You must plan the placement of the following parts:
General
The windlass should be positioned as high as possible to allow maximum space for the rope that will be stored below the windlass. The height from the
bottom of the wall where the rope is stored to the bottom edge of the line wheel should be at least 50 cm, and the area should be at least 40 x 40 cm to
allow room for 50 m x 12 mm anchor rope. This will prevent the rope from bunching under the windlass and assure suffi cient friction between the line
wheel and the rope.
(NB: Remember to attach the end of the rope somewhere inside the boat.)
Anchor bracket
Fit the windlass so that the rope is wound up in line with the anchor bracket (see pictures 1 and 2) – a numerous diff erent models are available. The
anchor bracket is working as a guide for the rope when the anchor is on the seabed and as a “seating point” for the anchor once it has been raised.
Use of anchor bracket
The bracket for the rope must be installed with the rollers outside the platform.
Standard platform roller or hinged platform roller
If the windlass is tted low in relation to the bathing platform, so the angle between the bathing platform and the rope is too small ,and if you are using a
Bruce anchor, you should use an Side-Power Engbo hinged platform roller.
Hull conduit / Line guide
It will often be necessary to install a hull conduit with a roller that guides the rope with low friction through the hull.
Rope
Side-Power Engbo supplies original woven anchor rope with a lead core . It is supplied in various lengths and dimensions.
Safety line
Once the anchor is seated in the anchor bracket, it must be secured with the safety line supplied.
Auto Stop
Side-Power MAXI winches for anchor lines feature an advanced electronic auto stop switch that stops the windlass automatically, twice. The rst stop
comes just before the anchor reaches the anchor bracket. The windlass can then only be operated at low speed until it stops for the second time once
the anchor is seated correctly in its bracket – ready to be dropped next time.
IMPORTANT
• Make sure to have all necessary tools ready
• Unpack and organize all components
• Prepare and control the areas where all the diff erent parts can
be mounted.
• Follow the mounting instructions
• When winching the rope for the fi rst time after mounting, make
sure the rope is tight, so the rope is pulled inn correctly.
• Winch/motor
• Brackets for anchor and windlass
• Cables
• Switch panel
• Control-box
• Line guide
• Main switch/ miniature circuit breaker
Installation Preparation MC_0319
General
Position the windlass as high as possible so that there is plenty of space for the rope under it. The bottom edge of the line wheel should be at least 50
cm above the surface on which the rope (or chain) is to lie. This will leave room for 50 m of 16 mm woven Rope line anchor rope or approx. 30 m of
chain.
If the height is less than 50 cm, check that the rope (or chain) does not bunch up against the underside of the windlass. If this is the case, use a shorter
rope (or chain).
We recommend side position of the windlass. Avoid any confl ict between the anchor and the side wave that turns in directly behind the boat.
(NB: Remember to attach the end of the rope somewhere inside the boat.)
Placing the platform roller
Fit the anchor bracket with the rollers beyond the edge of the platform so that the anchor/rope clears the platform when the anchor is raised.
Line guide in the stern
Check that the opening in the hull for the rope is correct in relation to the direction of the rope. To prevent unnecessary wear, the rope should not touch
the edge of the opening either vertically or horizontally. The opening must be oval (from top to bottom) to accommodate the friction in the rope roller
when the windlass is used.
Line guide
If it is diffi cult to lead the rope directly from the line wheel to the anchor roller, it is a good idea to use a hull conduit/line guide with rollers, for instance
39-76000 or the simple 39-79000 to lead the rope through the hull.
The line guide may be installed with studs as shown in picture.
Installation Preparation MC_0319
MG_0362
Roller platform
Guide line
Guide line

10 2 916 82022
-
MAXI 31 & 32 & 34 & 40 & 43 & 44
MG_0363
Standard platform roller, long
Hinged platform roller
Tilt bracket
Anchor davit
Anchor Brackets

11
2 916 82022
-
MAXI 31 & 32 & 34 & 40 & 43 & 44
MG_0363
Standard platform roller, long
Hinged platform roller
Tilt bracket
Anchor davit
Anchor Brackets
IMPORTANT
When pulling in the rope for the fi rst time, you must keep the rope tight, so the rope run correctly.
Fitting Maxi 31
The Maxi 31 is designed for tting outside on the stern or inside on the stern side of a vertical bulkhead. The Maxi 31 has the line wheel on the right-
hand side of the windlass, seen from behind.
(NB: Make sure to fi t the windlass correctly in relation to the direction of rotation of the line wheel.)
1. Position the windlass as high as possible on the stern. Draw around the windlass. Use the enclosed drilling template to mark the screw holes on
the supporting surface. Use bolts to attach the windlass. If necessary, reinforce the inside of the hull with a plate.
2. If the surface where the windlass is to be tted is not even so the entire windlass rests against the hull/supporting surface, the surface must be
evened out using an intermediate layer to prevent damage to the hull and/or the windlass when the xing bolts are tightened.
3. Drill a hole for the cables and run these through the hull. Use MS polymer similar to seal the hole for the cables.
4. Run the rope via the line wheel on the windlass, down through the rope/chain guide and under the line wheel. Use the windlass to wind it up.
(NB: We recommend using an adapted container made of plastic or other weather-resistant material beneath the windlass to ensure that the
rope is gathered up effi ciently.)
Windlass Installation MAXI 31 MC_0327
MG_0364

12 2 916 82022
-
MAXI 31 & 32 & 34 & 40 & 43 & 44
IMPORTANT
When pulling in the rope for the fi rst time, you must keep the rope tight, so the rope run correctly.
Fitting Maxi 32
The Maxi 32 is designed for tting outside on a rope box or outside/inside on a horizontal surface. The Maxi 32 has the line wheel on the right-hand side
of the windlass, seen from behind.
(NB: Make sure to fi t the windlass correctly in relation to the direction of rotation of the line wheel. (See sketch)
1. Remove the four 8 mm xing bolts from the bottom of the windlass.
2. Position the enclosed template correctly, so that the line wheel is on the correct side. Mark the position of the holes for the xing bolts, the hole for
the part of the winch that is to pass through the deck, and the opening for the rope.
3. Align the winch and the roller to each other.
4. Then use four of the enclosed bolts to secure the windlass rmly in position.
Windlass Installation MAXI 32 MC_0327
MG_0365

13
2 916 82022
-
MAXI 31 & 32 & 34 & 40 & 43 & 44
IMPORTANT
When pulling in the rope for the fi rst time, you must keep the rope tight, so the rope run correctly.
Maxi 32 box
1. Drill a hole for the cables and run these through the hull. Use Sikafl ex or similar to seal the hole for the cables.
2. Connect the cables according to the electrical connection diagram.
3. When tting the berglass box, the open end must be tted to the shape of the stern and xed in position using through-and-through bolts to
connect the angle bracket supplied directly to the hull. Adjust the brackets to the correct angle and x them internally, at the top and bottom of the
side panel of the box.
4. Run the rope via the line wheel on the windlass, down through the rope/chain guide and under the line wheel.
5. Use the windlass to wind it up.
(NB: Remember to secure the end of the rope/chain to the inside of the box. (Drill a hole through the bottom of the box and through the
platform, and then fi t the bracket supplied. Remember to drill holes in each of the lower stern corners for drainage purposes.)
Tilt bracket mounted on a box.
Tilt bracket 61-30006/61-30007
Fixed to the angled surface on the stern end of the box.
Windlass Installation MAXI 32 Box MC_0327
MG_0365
MG_0366

14 2 916 82022
-
MAXI 31 & 32 & 34 & 40 & 43 & 44
IMPORTANT
When pulling in the rope for the fi rst time, you must keep the rope tight, so the rope run correctly.
Fitting Maxi 34G
The Maxi 34-G is designed for tting vertically on a longitudinal bulkhead with the line wheel outside and the windlass itself inside. The Maxi 34-G is
available with the line wheel on the right or left-hand side of the windlass, as seen from the rear.
(NB: Make sure to fi t the windlass correctly in relation to the direction of rotation of the line wheel. (See sketch)
1. Place the enclosed template on the surface where the winch is to be tted – ideally as high as possible – and mark the drilling holes.
2. Alternatively, you can use the windlass xing plate as a template. If you choose to do so, remove the white plastic cover and remove the line wheel
and spring so that the xing plate is free of tted parts. Remove the six screws that hold the xing plate to the gear.
3. Place the xing plate on the surface where the windlass is to be tted and mark the screw holes, the centre hole for the gear, the hole for the auto
stop switch (on the lower stern side edge of the xing plate), and the run-through hole for the rope. The simplest way to position the run-through
hole for the rope is to drill the tting holes for the xing plate and then use a couple of screws to fasten this plate temporarily to the boat. Position
the plastic cover, make sure that the cover overlaps the hole by approx. 5 mm at the bottom, and then mark the lower edge of the cover on the
tting surface. Then make the holes with an appropriate drill and hole-cutter. Remember to round off the outside upper edge and the inside lower
fore edge of the run-through hole to prevent the rope from catching on sharp edges.
4. Then fasten the xing plate to the boat. Remember to draw the auto stop switch from the lower stern side hole of the xing plate before tting the
gear. To prevent the rope becoming entangled with the motor on the inside of the boat, t the gear so that the motor is pointing directly forward,
facing slightly up or slightly down.
5. Then t the anchor bracket and check that the anchor t correctly on the rollers.
6. Fit the sheaves and covers, the rope guard, the rope guide and the spring (pos 52, 54 and 58). Then t the auto stop switch in the hole in the rope
guard and adjust it so that the reciprocal part sticks approx. 1 mm out from the outside of the bracket, towards the rope.
7. Then pull the rope through the hole in the cover and run it between the line wheel and the rope guide.
8. Put the white plastic cover in position. Mark the run-through hole for the rope in the cover. Make an oval hole – approx. 40 mm vertical and 20 mm
horizontal – in the cover. (for instance, cut 2 holes in towards each other with a 20 mm hole-cutter. Then remove the material between the holes.)
Drawing - Maxi 34-G – line wheel, rope guide, rope guard and xing plate
(NB: The bolt (pos 17) that attaches the line wheel to the axle must be secured with contact adhesive (e.g. Locktite or similar). Recommended
torque for bolts, 20Nm.)
Windlass Installation MAXI 34-G MC_0327
MG_0367

15
2 916 82022
-
MAXI 31 & 32 & 34 & 40 & 43 & 44
IMPORTANT
When pulling in the rope for the fi rst time, you must keep the rope tight, so the rope run correctly.
Fitting Maxi 34-D
The Maxi 34-D is designed for horizontal installation on the fore or aft deck.
(NB: Make sure to fi t the windlass correctly in relation to the direction of rotation of the line wheel. (See sketch)
1. Start by locating the correct position for the windlass, so that the direction of the rope is in line with the anchor bracket. Then mark the centre of the
windlass.’
2. In most cases, it is easy to use the windlass xing plate as a template. Remove the white plastic cover and remove the line wheel, rope guides and
spring so that the xing plate is “clean”. Remove the six screws that hold the xing plate to the gear.
3. Place the xing plate on the boat and mark the screw holes, the centre hole for the gear, the hole for the auto stop switch (on the front port side
edge of the xing plate), and the run-through hole for the rope.
4. The easiest way to position the run-through hole for the rope is to drill the tting holes for the xing plate and then use a couple of screws to fasten
this plate temporarily to the boat. Put the plastic cover on and mark the forward edge of the cover on the contact surface. Use an appropriate
hole-cutter and make sure that the cover overlaps the outer edge of the hole by around 5 mm.
5. Then make the holes with an appropriate drill and hole-cutter. Remember to sand the upper aft edge and the lower fore edge of the run-through
hole for the rope, to prevent the rope from catching on sharp edges.
6. Then screw the xing plate rmly in place on the boat. Remember to draw the auto stop switch from the front port side hole of the xing plate
before screwing the gear rmly in place. To prevent the rope becoming entangled with the motor on the inside of the boat, t the gear so that the
motor is pointing directly forward, facing the port or starboard side.
7. Then t the anchor bracket and check that the anchor t correctly on the rollers.
8. Fit the sheaves and covers, the rope guard, the rope guide and the spring. Then t the auto stop switch in the hole in the rope guard and adjust it
so that the sensor face protrudes approx. 1 mm towards the rope.
9. Then pull the rope through the hole in the cover, run it between the line wheel and the rope guide and down below the deck. Finally, fasten the
cover in place.
Windlass Installation MAXI 34-D MC_0327
MG_0368

16 2 916 82022
-
MAXI 31 & 32 & 34 & 40 & 43 & 44
IMPORTANT
When pulling in the rope for the fi rst time, you must keep the rope tight, so the rope run correctly.
Fitting Maxi 40
The Maxi 40 is designed for tting inside on the stern or on the bow side of a vertical bulkhead. The Maxi 40 has the line wheel on the left-hand side of
the windlass, seen from behind.
(NB: Make sure to fi t the windlass correctly in relation to the direction of rotation of the line wheel. (See sketch)
The drilling template (only applies to the Maxi 40) is designed to lie on the outside of the hull when you mark the holes. For marking inside, you must
reverse the template so that the holes in the template match the windlass.
1. Make sure that the opening in the hull for the rope is positioned correctly in relation to the direction the rope takes out through the hull. To prevent
unnecessary wear, the rope should not touch the edge of the opening either vertically or horizontally. The opening should be oval (top to bottom) to
accommodate the vertical play in the rope when the windlass is used.
2. Position the template correctly, so that the line wheel is on the correct side. Mark the position of the opening for the rope and then drill the hole.
(NB: Make sure to position the windlass correctly in relation to the rope and anchor bracket so that the windlass line wheel and the roller
are in line.)
3. Once you have made the opening for the rope in the stern, you can install the windlass.
4. Use a clamp or similar to t the anchor bracket temporarily to the outside of the boat.
5. Run the anchor rope tightly between the external anchor bracket and the track of the windlass line wheel.
6. Hold the windlass in place inside the boat and adjust the position so that the rope is led correctly through the opening in the stern. Once you have
found the correct position, mark around the windlass xing plate before removing the windlass.
7. Place the drilling template so that it matches the mark you drew on the stern, and mark the holes for the xing bolts. Use a 9 mm bit to drill the
holes, and then t the windlass.(NB: If you are to use a rope conduit/line guide with guide rollers (68-00008), you can use the internal frame
of the conduit as the template for the opening.)
8. If necessary, use an intermediate panel between the windlass and the hull to adjust the windlass in relation to the direction of pull on the rope. After
nal adjustment of the windlass position, tighten the bolts.
9. Run the rope via the line wheel on the windlass, down through the rope/chain guide and under the line wheel. Use the windlass to wind it up.
Windlass Installation MAXI 40 MC_0327
IMPORTANT
When pulling in the rope for the fi rst time, you must keep the rope tight, so the rope run correctly.
Fitting Maxi 43/44
Maxi 43 is made to simplify the tting process. The bracket can be turned 360 degrees. It can be mounted hanging, standing or vertically at the
bulkhead. The rope guide can be turned separately to get maximum friction in the line wheel, and also get correct direction against the rope guide. If you
want the line wheel on the left side seen from stern, it is a Maxi 44.
(NB: Make sure that the windlass is mounted in the correct direction regarding the direction of rotation of the line wheel.)
It is important that the hole pattern in the hull is correctly positioned relative to the direction of the rope through the hull. To avoid unnecessary wear and
tear it should not touch the edges of the hole, either vertically or horizontally.
(NB: If the hull implementation with rollers is (39-76000) to be used, the bracket of the winch must be turned 180 degrees, use the hole
template.)
When holes for pin bolts and the rope are made, the windlass is ready for mounting.
If you use a rope guide without a roller (39-74000) or rope guide with one roller (39-75000), you must at rst mount the rope guide, then the rst half of
the mounting bracket and fasten it to the rope guide.
Lift/place now the windlass inside with the other half of the mounting bracket. Attach both parts with the included bolts, and just attach the bolts. The
windlass is now in place and ready for adjustments.
Adjust now the windlass to your wanted/correct angel and tighten the bolts to the mounting bracket. (20NM, 8mm Hex wrench). The windlass is now
mounted.
Make sure the direction of the windlass compared to the anchor bracket is correct. The line wheel and anchor roller must be aligned. When everything is
aligned fasten the anchor bracket temporarily with a clamp or similar.
Tighten the anchor rope between anchor bracket and in track of the line wheel of the winch. Then fasten the anchor bracket.
Run the rope in place through hull implementation/rope guide, around the line wheel and through the line guide, adjust then the rope with a minimum of
90 degrees around the line wheel. Then tighten the line wheel (6 NM) with a hex wrench (6mm). Then run the rope into the winch.
Standard box roller (65-00001)
Fixed to the angled surface on the stern end of the box.
Fit the box roller with the angled side of the bracket down.
Tilt bracket 61-30006/61-30007
Fixed to the angled surface on the stern end of the box.
Windlass Installation MAXI 43/44 MC_0327
MG_0369

17
2 916 82022
-
MAXI 31 & 32 & 34 & 40 & 43 & 44
IMPORTANT
When pulling in the rope for the fi rst time, you must keep the rope tight, so the rope run correctly.
Fitting Maxi 43/44
Maxi 43 is made to simplify the tting process. The bracket can be turned 360 degrees. It can be mounted hanging, standing or vertically at the
bulkhead. The rope guide can be turned separately to get maximum friction in the line wheel, and also get correct direction against the rope guide. If you
want the line wheel on the left side seen from stern, it is a Maxi 44.
(NB: Make sure that the windlass is mounted in the correct direction regarding the direction of rotation of the line wheel.)
It is important that the hole pattern in the hull is correctly positioned relative to the direction of the rope through the hull. To avoid unnecessary wear and
tear it should not touch the edges of the hole, either vertically or horizontally.
(NB: If the hull implementation with rollers is (39-76000) to be used, the bracket of the winch must be turned 180 degrees, use the hole
template.)
When holes for pin bolts and the rope are made, the windlass is ready for mounting.
If you use a rope guide without a roller (39-74000) or rope guide with one roller (39-75000), you must at rst mount the rope guide, then the rst half of
the mounting bracket and fasten it to the rope guide.
Lift/place now the windlass inside with the other half of the mounting bracket. Attach both parts with the included bolts, and just attach the bolts. The
windlass is now in place and ready for adjustments.
Adjust now the windlass to your wanted/correct angel and tighten the bolts to the mounting bracket. (20NM, 8mm Hex wrench). The windlass is now
mounted.
Make sure the direction of the windlass compared to the anchor bracket is correct. The line wheel and anchor roller must be aligned. When everything is
aligned fasten the anchor bracket temporarily with a clamp or similar.
Tighten the anchor rope between anchor bracket and in track of the line wheel of the winch. Then fasten the anchor bracket.
Run the rope in place through hull implementation/rope guide, around the line wheel and through the line guide, adjust then the rope with a minimum of
90 degrees around the line wheel. Then tighten the line wheel (6 NM) with a hex wrench (6mm). Then run the rope into the winch.
Standard box roller (65-00001)
Fixed to the angled surface on the stern end of the box.
Fit the box roller with the angled side of the bracket down.
Tilt bracket 61-30006/61-30007
Fixed to the angled surface on the stern end of the box.
Windlass Installation MAXI 43/44 MC_0327
MG_0369
MG_0370

18 2 916 82022
-
MAXI 31 & 32 & 34 & 40 & 43 & 44
Autostopp
All Side-Power Engbo Maxi windlasses feature an electronic auto stop function. An electronic auto stop switch is positioned below the windlass line
wheel and registers the brass wire indicators attached to the rope. When the rst brass wire indicator passes the sensor, the windlass will stop. If you
release the button on the control panel or remote control and then press it again, the windlass will continue to reel in the anchor at low speed until the
second brass wire indicator passes the sensor. The windlass will then stop again.
Adjusting the auto stop switch
• This feature is normally correctly adjusted on delivery. The fl at end should usually protrude approx. 1 mm from the holder towards the rope. If you
need to adjust it, loosen the bolt that holds the auto stop switch in place and adjust it to the required position. Then tighten the bolt again.
(NB: Make sure that the anchor line cannot snag on the inductive sensor.)
Auto-stop Installation MC_0333
MG_0374

19
2 916 82022
-
MAXI 31 & 32 & 34 & 40 & 43 & 44
Autostopp
All Side-Power Engbo Maxi windlasses feature an electronic auto stop function. An electronic auto stop switch is positioned below the windlass line
wheel and registers the brass wire indicators attached to the rope. When the rst brass wire indicator passes the sensor, the windlass will stop. If you
release the button on the control panel or remote control and then press it again, the windlass will continue to reel in the anchor at low speed until the
second brass wire indicator passes the sensor. The windlass will then stop again.
Adjusting the auto stop switch
• This feature is normally correctly adjusted on delivery. The fl at end should usually protrude approx. 1 mm from the holder towards the rope. If you
need to adjust it, loosen the bolt that holds the auto stop switch in place and adjust it to the required position. Then tighten the bolt again.
(NB: Make sure that the anchor line cannot snag on the inductive sensor.)
Auto-stop Installation MC_0333
Auto stop – fi tting the stop indicator/brass wire
1. An electronic auto stop switch is positioned below the rope guard. This switch triggers the auto stop function when the anchor has been raised. To
activate the switch, two brass wire indicators are tted to the rope to determine when the windlass is to stop. (Cut the enclosed brass wire in two).
2. To position the brass wire indicators in the correct places on the rope, raise the anchor until the thimble is approx. 30 cm below the anchor bracket
(raise the anchor slowly during the last stretch) and mark the rope right next to the auto stop switch.
3. Then carefully raise the anchor completely and t it in the bracket. Make a new mark on the rope by the sensor. Position the wire indicators by the
marks.
4. Use an appropriate tool to pierce a hole through the rope.
5. Push the brass wire through the rope and fold it lengthwise along the rope.
6. Wind the free end of the brass wire ve times around the rope and over the other end of the wire.
7. Wind the free ends together, cut the twist down to approx. 5 mm and bend it in under the wire wrap so it cannot snag on anything.
8. The outer diameter of the wire wrap should be almost the same as the outer diameter of the rope so that the inductive sensor can detect the brass
wire.
(NB: The brass wire indicators may become worn by the sheave – especially under heavy loads – and you must therefore check them regular-
ly. Replace damaged wire if necessary.)
Auto-stop Installation MC_0333
MG_0375
1 4 5 6
7
8

20 2 916 82022
-
MAXI 31 & 32 & 34 & 40 & 43 & 44
MG_0403
Control box
150800
B+ A1 A2 D1
D1 A2 A1 D2
D2 B-
cong
150810
B
AUX
Main circuit
breaker/fuse
BAT
A
+ DEF
Bery
-
C
Autostop Sensor
(Not applicable for chain) Motor
Maxi
To change motor direcon:
Change cables D1 and D2 on motor
Cable size A,B,C,D,E and F :
f total length
A+B+C+D+E+F <6m : 25mm2
A+B+C+D+E+F=6-16m : 35mm2
A+B+C+D+E+F>16m : 50mm2
(Altern. control panel) Control panel
or
Control panel
86-00002 86-08950 86-08955
Opt.
Sleipner
remote
receiver
4-lead
Sidepower
control cable
Connecn to control box
(without Sidepower control cable) :
white to terminal N
green to terminal OUT
brown to terminal V+
Connecn to control box :
Black to terminal V-
Blue to terminal N
Grey to terminal OUT
Red to terminal V+
brown
black
blue
Visual Wiring Diagram
Connecting the motor and battery cables on Maxi windlass
- Connect the four motor cables to the terminals masked A1/A2/D1/D2.
- Connect supply cable from battery negative to the terminal marked B-.
- Connect supply cable from breaker/fuse to the terminal marked B+. Connect beaker/fuse to battery main switch.
- Tighten all terminals properly, with a maximum torque of 5Nm. Over-tightening may damage the terminals.
- Leave breaker/fuse disconnected until the installation is completed.
IMPORTANT
If motor runs in the wrong direction, swap cable D1 and D2 on the control unit.
This manual suits for next models
7
Table of contents
Other Sleipner Boating Equipment manuals

Sleipner
Sleipner SXP35 PRO User manual

Sleipner
Sleipner SEP250 User manual

Sleipner
Sleipner MIDI 202 User manual

Sleipner
Sleipner SX35POD User manual

Sleipner
Sleipner Side-Power ESPE 600 User manual

Sleipner
Sleipner 86-08950 User manual

Sleipner
Sleipner SH1000 User manual

Sleipner
Sleipner SX35POD User manual
Popular Boating Equipment manuals by other brands

Zattini Group
Zattini Group bamar 12 Use and maintenance instruction manual

SureShade
SureShade Power Bimini Sport Arm Kit Installation and owner's manual

TIDELAND
TIDELAND SeaBeacon 2 installation manual

Selden
Selden Single Line Reef Instruction

Floe
Floe V-2000 Assembly instruction

Garelick
Garelick 74002 Assembly and installation instructions