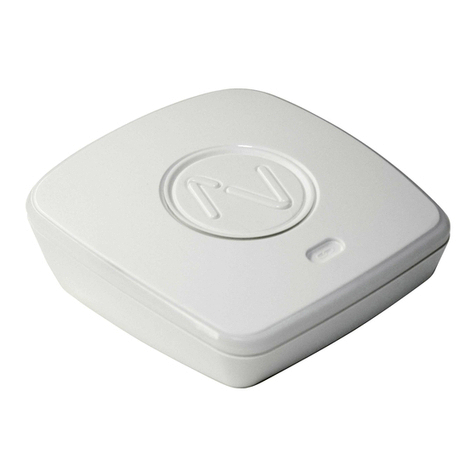
smart home LampLinc Plus 2000SLS User manual

LampLincTM
Intelligent lamp modules packed with features
For models:
#2000SLS LampLinc Plus
#2000SLS3 LampLinc Plus with ground pin
#2000SHL LampLinc PLC
#2000SHL3 LampLinc PLC with ground pin
LampLink Plus& PLC for web (Mar04).qxd 3/15/2004 9:58 AM Page 1

Congratulations
Congratulations on purchasing LampLinc, the most powerful lamp module available.
LampLinc is based on our popular SwitchLincTM wall switches and has many of the same
features.
Lamp modules are the easiest way to add sophisticated lighting control to your home. No
tools or electrical knowledge are needed. Just plug LampLinc into a wall receptacle and
plug the lamp into the bottom outlet of the lamp module; it's that simple.
LampLinc comes in three major models; PLC, Plus and 2-Way. The LampLinc 2-Way
has the ability to transmit its ON/OFF status when polled by a transmitter or if the device
being controlled (the load) is switched on manually. It also includes the ability to respond
to multiple signals or scenes. The LampLinc Plus includes only the scene ability, which
is ideal for users who don't need the LampLinc to respond to status signals. The afford-
able LampLinc PLC lacks the scene and two-way features, but still retains all the quality
that make the whole LampLinc family an outstanding performer. Each type is available
with a 2-pin plug and outlet for AC receptacles in North America or in a 3-pin configura-
tion, which includes the ground connection.
Key Features
• Use with any standard household lamp up to 400 watts
• Responds to 65 different X10/PLC (PowerLine Carrier) signals (Plus models only)
• 32 levels of dimming and 32 fading on & off rates
• No tools or hardwiring into the electrical system
• Pass-through receptacle on the front for other un-controlled electrical devices
• Green Status LED indicator shows powerline activity
• Codes are electronically set (no code wheels) and remembered even if unplugged!
• Two-year warranty
Smarthome automation products have been intelligently engineered to complement
the X10/PLC platform that all of our products are derived from, making it easier for
you, the customer, to make changes to your home as your lifestyle
changes.
SwitchLinc 2-Way Wall Switches
This is our top-of-the-line wall switch with a crisp, quality feel of true
rocker action. These setup and operate just like the ApplianceLinc
and LampLinc series. In fact, most of the setup commands are the
same for all three. Turn on a SwitchLinc 2-Way and the
ApplianceLincTM or LampLinc can come on at the same time.
KeypadLincTM In-Wall Controllers
Use these elegant in-wall controllers to send signals to all
your home automation products. They blend perfectly into
even the most upscale décor. When used with SwitchLinc and
LampLinc Plus modules, pressing one button can instantly
transform the lighting and mood of any room. The
KeypadLincs are programmed to communicate the special
scene setup and lock-in sequences, making setting up
scene lighting a snap.
2
LampLink Plus& PLC for web (Mar04).qxd 3/15/2004 9:58 AM Page 2

Caution!
Read and understand these instructions before installing.
This device is intended for installation in accordance with the National Electric Code
and local regulations in the United States, or the Canadian Electrical Code and local
regulations in Canada. To reduce the risk of overheating and possible damage to
other equipment, do not install this product to control a non-lighting load. Use
indoors only. Retain these instructions for future reference. Dimming an inductive
load (such as a fan) below the minimum voltage set by the manufacturer of the load
device could cause damage to the load device from overheating. If the manufacturer
of the load device does not recommend dimming, DO NOT use LampLinc’s Dimming
capabilities or use a non-dimming module. USER ASSUMES ALL RISKS ASSOCIATED
WITH DIMMING AN INDUCTIVE LOAD.
Quick Start Instructions DEFAULT
Setting the Primary Address 1. Press and hold the Set Button for A-1
five seconds
2. Send the X10/PLC signal from any
transmitter within 30 seconds
3. Send an “ON” to enable local control
OR
4. Send an “OFF” to disable local control
(see page 4 for more detailed instructions)
Setting the Fade-On/Off Rate 1. Turn on the lamp 2 Seconds
2. Adjust the dim level
(Brighter = faster dimming)
3. Double tap the Set Button
(press it TWICE quickly)
(see page 4 for more detailed instructions)
Setting the On Dim Level 1. Turn on the lamp 100%
2. Adjust the dim level to the desired level
3. Tap the Set Button ONCE
(see page 5 for more detailed instructions)
Factory Reset 1. Unplug the LampLinc for 10 seconds Resets to
2. Holding down the Set Button, plug in settings
the LampLinc above
3. Continue holding the Set Button for
three seconds then release
4. When the load comes on,
the LampLinc is reset
(see page 8 for more detailed instructions)
Installation
1. Turn off the lamp and unplug from the wall
2. Plug the LampLinc module into the receptacle; the Green
Status LED indicator will come on
3. Insert the lamp’s AC plug into the bottom outlet of the LampLinc
4. Turn the lamp’s switch back on; the light will come on XX
XX
3
See page 9 for
installation tips.
LampLink Plus& PLC for web (Mar04).qxd 3/15/2004 9:58 AM Page 3

Setting the Primary Address
Each LampLinc requires a primary PLC address to operate. It ships from the factory
with “A1” as the default address; it will also have this address after performing a fac-
tory reset. Any of the 256 PLC addresses can be programmed.
The LampLinc does not use flimsy code wheels or dials to set its primary address.
Instead, it will accept the first address it finds on the powerline once the programming
mode is started. Any PLC-compatible transmitter can be used to set the primary
address.
1. Press and hold the Set Button above the green
indicator on the right side of the module for 5 sec-
onds until the Green Status LED begins flashing
and the lamp goes to 100% brightness.
2. Within 30 seconds, transmit the desired primary
address (house code and unit code) from any
transmitter. When LampLinc receives the address,
the lamp's light will blink.
3. Set the Local Control Feature by sending an ON or
OFF Command (see page 9 for more details).
a) Sending an “ON” command immediately after
the house and unit code will activate the load
detect feature. (Recommended)
b) Sending an “OFF” command immediately after
the house and unit code will disable the load
detect feature (recommended for lamps with
compact fluorescent bulbs).
4. Once the LampLinc has received a valid address and either an “ON” or “OFF”,
the light controlled by the LampLinc will blink and the Green Status LED will
stop flashing.
Controlling the Lamp Remotely
The LampLinc responds to any of the 256 PLC/X10 addresses. The LampLinc will
respond to ON, OFF, ALL LIGHTS ON, ALL UNITS OFF, PRESET DIM, BRIGHT, and DIM
commands. The LampLinc can be controlled remotely from any compatible transmitter
by sending its base address (e.g., M6) and the command.
Setting the Fade-On/Off Rate (Optional)
The “Fade-On/Off” is the speed at which LampLinc brings
the brightness of the light up or down when the module is
turned on locally or receives a powerline carrier (PLC) ON or
OFF command to its primary address. The Fade-On/Off is
adjustable from .1 seconds to nine minutes. The factory
default is about three seconds. It may be changed at the
module or remotely. (See Advanced Primary Address
Programming for instructions on REMOTELY setting the
Fade-On/Off Rate.)
At the module, the Fade-On/Off: adjustable from .1 to nine seconds:
1. Turn on and adjust the lights brightness so that the brighter the light, the
faster the Fade-On/Off. Refer to the table for more details.
2. Tap the Set Button TWICE.
The light will blink to confirm the change.
4
Brightness
Level
90-100%
77-87%
65-74%
52-61%
39-48%
26-35%
13-23%
1-10%
0%
FadeRate
inSeconds
0.1
0.2
0.3
0.5
2.0
4.5
6.5
8.5
9.0
Tip:
If you have trouble com-
municating to the
LampLinc, there may be a
lot of signal activity on the
powerline. Unplug trans-
mitters that send signals
that might be intercepted
by the module during the
programming sequences.
RF transceivers, computer
controllers, and X10 ther-
mostats should be
unplugged to avoid inter-
ference.
LampLink Plus& PLC for web (Mar04).qxd 3/15/2004 9:58 AM Page 4

Setting the Default On-Level
The Default ON-Level is the brightness level that LampLinc will adjust the light when
the switched on locally or by a powerline carrier (PLC) ON-command. Each time the
LampLinc is turned on, the light will come to the same level. This is ideal for situa-
tions where the existing light bulb produces too much light. (See Advanced Primary
Address Programming for instructions on Remotely Setting the ON-level.)
Alternatively, LampLinc can be set to Resume Dim. When LampLinc receives an
“ON” command, it will come back on to the last dim level it was at before being
turned off.
One exception to this is when an “ALL LIGHTS ON” command is received. The
LampLinc will go to 100% brightness at its programmed fade-on rate.
Setting a fixed brightness level:
1. Adjust light’s brightness to the desired level by sending BRIGHT or DIM com-
mands.
2. Tap the Set Button ONCE. The light will blink to confirm the change.
Setting resume dim:
1. Turn the light off by sending an “OFF” command.
2. Tap the Set Button ONCE.
Advanced Primary Address Programming
The LampLinc's Fade-On/Off rate and Default On-Level can be remotely set using a
ControLinc Duo (Smarthome #4071), a Maxi-Controller (#4020) or an equivalent
transmitter capable of sending Housecode and Unit Code without ON or OFF. These
procedures and all the following ones will not work with a transmitter that sends the
address with a command. Transmitters in which one button is pressed to turn on or
off a load will not work.
Remotely Setting the Fade-On/Off Rate
This is the alternative method of adjusting the LampLinc's Fade-On/Off rate.
1. Transmit the “clear” sequence
2. Send the house/unit code for the lamp module followed by the PRESET DIM
from the table below. (Alternatively, send BRIGHT or DIM signals to change the
lamp's brightness to a comparable level.)
3. Send the following command sequence to lock-in the new Fade-On/Off rate
Thelamp’slightwillblinkindicatingthatithassetthenewFade-On/Off rate.5
Preset
Dim
Level
100%
97%
94%
90%
87%
84%
81%
77%
74%
71%
68%
Fade
Ratein
Seconds
0.1
0.2
0.3
0.5
2.0
4.5
6.5
8.5
19.0
21.5
23.5
Preset
Dim
Level
65%
61%
58%
55%
52%
48%
45%
42%
39%
35%
32%
Fade
Ratein
Seconds
26.0
28.0
30.0
32.0
34.0
38.5
43.0
47.0
60.0
90.0
120.0
Preset
Dim
Level
29%
26%
23%
19%
16%
13%
10%
6%
3%
0%
Fade
Ratein
Seconds
150.0
180.0
210.0
240.0
270.0
300.0
360.0
420.0
480.0
540.0
O16 N16 M16 P16 M16
O16 P16 N16 M16 O16
LampLink Plus& PLC for web (Mar04).qxd 3/15/2004 9:58 AM Page 5

Remotely setting the Default On-Level (Optional)
This is the alternative method of adjusting the LampLinc’s default on-level.
1. Transmit the “clear” sequence:
2. Send the house/unit code for the lamp module and adjust the
dim level or send preset dim level.
3. Send the following command to lock-in the new on-level.
Thelamp’slightwillblinkindicatingthatithassetthenewon-level.
Scene Address Programming (Plus models only)
The LampLinc Plus can be a member of up to 64 scenes. A scene address is a single
address (just like a primary address), and is set at the time scene membership is pro-
grammed. Using a single command to trigger a scene is much less complicated than
using an intelligent computer controller to initiate a macro that in turn sends dozens of
commands over the next few minutes to turn on multiple receivers and set brightness
levels (for dimming-enabled modules).
When an ON signal is transmitted to scene-enabled modules, all members pro-
grammed to that address will turn on to their independent ON-levels and at their inde-
pendent fade-on rates for that scene. Transmitting an OFF for a scene address will
turn off all modules that are members of that scene. Modules will react to dim and
bright commands after the scene address is sent, however, they will ignore All Light On
and All Units Off commands for the scene address' house code.
LampLinc Plus is compatible with these other scene-enabled Smarthome products:
• SwitchLinc 2-Way and Plus Dimmers • SwitchLinc RX Plus Dimmers
• KeypadLincTM with Integrated Dimmer • SwitchLinc 2-Way Switches
• ToggleLincTM 2-Way and Plus Dimmers • SwitchLinc Timer
• ApplianceLincTM 2-Way & Plus Modules • SwitchLinc Relay 2-Way
The scenes for all these modules can be setup simultaneously using the same pro-
gramming sequence. Signals sent by transmit-enabled Smarthome products, like
those above, will be received and understood by the LampLinc!
Transmitters that can set up scenes
Scenes can be programmed with a ControLinc, a Maxi-Controller or any transmitter
capable of sending Housecode and Unit Code address without an ON or OFF com-
mand. Transmitters in which one button is pressed to turn a load on or off WILL NOT
WORK. When using one of these equivalent transmitters, be careful when pressing the
buttons. Programming will be ignored if some commands are not sent in the proper
sequence. "Fat-Fingering" or accidentally pressing the same button twice may prevent
the programming from being accepted.
Programming Scene Membership and On-Levels:
1. Transmit the “clear” sequence:
2. Activate the module by turning it on and/or adjusting its brightness with a PLC
controller. (A scene can trigger a module to go off by setting the dim level to 0%.)
3. Send the following command sequence:
4. Transmit the desired scene address (house and unit code) to lock-in new scene.
The light(s) will blink indicating that it has set the new scene.
6
O16 N16 M16 P16 M16 Tip: Whenever the
CLEAR sequence is
sent, you will have
4 minutes to make
your adjustments.
O16 N16 M16 P16 M16
M16 N16 O16 P16
P16 N16 M16 O16 M16
LampLink Plus& PLC for web (Mar04).qxd 3/15/2004 9:58 AM Page 6

Removing a module from a Scene:
1. Transmit the “clear” sequence:
2. Using a controller, send the module’s primary address plus an ON or OFF.
3. Send the following command sequence:
4. Transmit the scene address (house and unit code) that is to be removed.
Thelamp’slightwillblinkindicatingthatthescenehasbeenremoved.
Programming Scene Fade-On/Off Rates (optional):
The Fade-On/Off rate of each in each scene is adjustable. If this setting is not
adjusted, the LampLinc will use the rate of the primary address for the scene. See
“Setting the Fade-On/Off Rate” for information on how to set the module’s primary
address Fade-On/Off rate.
1. Transmit the “clear” sequence:
2. Using a controller, send the module's primary address and adjust the dim level
corresponding to the Fade-On/Off Rate time you want using the table in the
“Remotely Setting the Fade-On/Off Rate” section, (brighter=faster).
3. Send the following command sequence:
4. Transmit the scene address (house and unit code).
Thelamp’slightwillblinkindicatingthatthenewFade-On/Off Rate has been set.
Other Options (All LampLinc models only)
Disable Programming
Once the LampLinc is set up, it can be programmed to lockout any changes. Any
changes made at the module (by pressing the Set Button) or remotely will be
ignored. Please note that all LampLinc and SwitchLinc that are plugged in or electri-
cally active will be locked out.
1. Send the following command sequence to disable the programming:
Thelamp’slightwillblink(ifitison)indicatingtheLampLincreceivedthecommand.
Re-Enable Programming (default is enabled)
1. Send the following command sequence to enable programming:
Thelamp’slightwillblink(ifitison)indicatingthattheLampLincreceivedthecommand.
TheLampLinccannowbeprogrammed again.
Other Features
Power Restore
In the event of a power loss, LampLinc will automatically return the lamp being con-
trolled to its last brightness level before the power was interrupted. If the LampLinc
is plugged into an outlet controlled by a wall switch, turning on the wall switch will
restore power to the module and it will come back on to its last state. 7
O16 N16 M16 P16 M16
O16 P16 M16 N16
O16 N16 M16 P16 M16
N16 O16 P16 M16
M16 O16 P16 N16 P16
N16 M16 O16 P16 P16
LampLink Plus& PLC for web (Mar04).qxd 3/15/2004 9:58 AM Page 7

Factory Reset (to default settings)
The factory reset procedure can be used to clear the LampLinc’s memory and
restore its factory default settings. This procedure will clear the unit of all scene
addresses and fade-on/off rates.
1. Unplug the LampLinc from the receptacle for about 10 seconds.
2. While holding down the set button on the lower right-hand side, plug it back in.
3. After plugging the module back in, continue to hold down the set button for
about 2 or 3 more seconds.
4. Release the set button, the Green Status LED will remain on and the load
(lights controlled by the LampLinc) will be off.
5. After 30 seconds, the lamp's light will come on to full brightness. This indicates
that the factory reset is complete. The module is now reset to all the default set-
tings, responds to primary address A-1, and is ready for programming or use.
LampLinc
Essential
2000SC
LampLinc
PLC
2000SHL
LampLinc
Plus
2000SLS
LampLinc
2-Way
2000STW
Regular
Lamp
Modules
Max
Watts 300 400 400 400 300
Scene
Lighting No No Yes - 64 Yes - 64 No
2-Way
Transmit No No No Yes No
Signal Collision
Avoidance N/A N/A N/A Yes N/A
Load
Monitoring No No No Yes No
Local
Control Yes Yes Yes Yes Yes
Local Control
easily disabled No Yes Yes Yes No
LED Status
Indicator No Yes Yes Yes No
Address
Electronically set Yes Yes Yes Yes No
Fades
on & off No Yes Yes Yes No
Responds to
PRESET Dim
Commands No Yes Yes Yes No
Ramp Rate
Adjustable No Yes Yes Yes No
Resume
Dim Yes Yes Yes Yes No
Low Signal
Absorption Yes Yes Yes No Yes
Warranty 2-Years 2-Years 2-Years 2-Years 1-Year
Lamp Module Comparison Chart
8
LampLink Plus& PLC for web (Mar04).qxd 3/15/2004 9:59 AM Page 8

Understanding the Local Control Feature
Local control allows a user to turn on a lamp without having to send a signal to the
LampLinc module. A lamp can be turned on and off manually by the switch on the
lamp and the LampLinc will respond to this. There are three possibilities:
The load control feature can be used safely with any incandescent or filament type
lamp. However, using the load detect feature with a lamp with a built in dimmer
(such a Torchier halogen), ballast transformer or other electric/electronic controls may
result in false triggering. For non-incandescent bulbs, it is recommended that the
load detect feature be turned off, (by sending an OFF during the setting of the pri-
mary address).
About LampLinc’s Certification
LampLinc has been thoroughly tested by ITS ETL SEMKO, a
nationally recognized independent third-party testing laboratory.
Products bearing North American ETL Listed mark signifies that
the product has been tested to and has met the requirements of
a widely recognized consensus of U.S. and Canadian product
safety standards, that the manufacturing site has been audited,
and that the manufacturer has agreed to a program of quarterly
factory follow-up inspections to verify continued conformance.
Installation Tips
Due to the size of LampLinc, it will block the bottom outlet of a duplex wall receptacle
if plugged into the top outlet. If possible, use the bottom outlet for the lamp module
so that the other outlet is accessible for other use. For convenience, a pass through
receptacle has been supplied on the lamp module so you don’t lose a receptacle.
If the LampLinc is plugged into a receptacle controlled by a wall switch, consider
leaving the switch on at all times. This will ensure that the LampLinc never loses
power and is always functioning. If the outlet is switched off, the LampLinc will turn
the light back on to the last dim level before power was switched off.
A new LampLinc or one that has been Factory Reset (see page 8) will be set to
address A-1. If other 2-way modules are set to A-1, The LampLinc may may come on
when the other unit is activated.
If the lamp being controlled by the LampLinc has a dimmer, turn that dimmer to full
on and allow the LampLinc to control the lamp’s brightness.
Never stack LampLinc and/or ApplianceLinc modules together. The internal heat
generated by the units when controlling a load may cause them to overheat or
catch fire.
9
Move the switch on the lamp to the “OFF” position
and then back to the “ON” position. The lamp will
turn on
Move the switch on the lamp to the “ON” position.
The lamp will turn on.
Move the switch on the lamp to the “OFF” position.
The lamp will turn off.
Turning on a lamp locally
when it was turned off
remotely
Turning on a lamp locally
when it was turned off locally
Turning off a lamp locally while
it’s turned on
LampLink Plus& PLC for web (Mar04).qxd 3/15/2004 9:59 AM Page 9

If these solutions have been tried, the manual has been reviewed, and you still cannot
resolve an issue you're having with the LampLinc, please call our Technical Support Dept.
at 949-221-9200 or e-mail tech@smarthome.com.
10
Possible Cause
LampLincwastriggeredbyascene
or legitimatePLCsignals.
TheFade-On/Off Rate maybeset
tooslow.
TheLocalControlfeaturemaybe
settooff(duringprimaryaddress
setting).
ItmaybeinProgram Disable
mode.Maynothavebeen“acti-
vated”duringthefour-minutewin-
dow.
OtherPLCmodulesareloading
downthesignal.
Themoduleispluggedintoa
powerstrip.
Movethetransmittertoanother
outlet.
Asurgeorexcessivenoiseonthe
powerlinemayhave glitchedit.
TheCLEAR,SET,or another com-
mandwassentinthewrongorder.
Thedimmingcomponentinside the
LampLinc‘chops’ upthesinewave
toreduce thevoltage.
Sometypeofbulbs, especiallycom-
pactfluorescentlampscanconfuse
theLampLinc.
Afluorescentbulbisinstalledin the
lampcontrolledbythe LampLinc.
Theuserisnot pressing“ON” or
“OFF”to settheLocalControlMode
aftersendingtheaddressduringpri-
maryaddress programming.
Thepolarizedprongsarenot com-
patiblewitholderACoutlets.
Thelampturned
onbyitself.
Thelightdoesnot
appeartoturnonoroff
whenasignalissent.
Thelightdoesnotcome
onwhenthelamp’s
switchismanuallyacti-
vated.
LampLincisnottaking
programmingof scenes,
fade-onrate,etc.
LampLincisnot
receivingsignals
fromtransmitters.
Themoduleislockedup.
Difficultysetting scenes
withamaxi-controller.
Theloadisbuzzingwhen
onordimmed.
Thelightdoesnot comeon
whenmanuallyswitched
onorwhenan “ON”signal
issent.
Whenthelight
isoff,occasionally
thebulbflashes.
Whensetting thePrimary
Address,thelamp’sbulb
continuesto flash after
sendingtheaddress.
TheLampLincdoesnot
fitinmyNorthAmerican
walloutlet.
Problem Solution
Checkscenemembershipandremoveanyunwantedscenes
fromLampLincorperformaFactoryResettoclearit.
Install anPLCSignalBlockerinthehometokeepPLCsignals
fromneighboringhomesfrominterfering.
Setanewfade-onrate.(Increasebrightness,presssetbuttontwice.)
Re-settheprimaryaddressbysendingthehouseandunitcodefol-
lowedbyan“ON”command.
Re-enableProgramModeorperformaFactoryReset.
Duringsceneprogramming,theLampLincmustbeturnedonwithin
fourminutesofreceivingtheClearsequence.
Installacoupler-repeateroraphasecoupler.
PLCsignalscan’ttravelthroughpowerfilters. Plugging theLampLinc
directlyintothewallworksbest.
LampLincneeds50mVofsignalstrengthforconsistentlyreliableopera-
tion. Also,theGreenStatusLEDwillblinkwhenthereisanyactivityonthe
powerline.
Unplugthemodulefora10secondsandre-install.
Iftheabovedoesn’twork,performaFactoryReset.
Don’tholddownthebuttonstoolong,itmaysendduplicatecodes.
Thebulbfilamentsarevibrating. Userough-servicebulbs,130-volt,or
appliancegrade bulbsto reducethenoise.
RunLampLincinthe“full-on”modeorswitch toa non-dimmingmodule.
SettheLocalControl featureto OFF. GointotheSetPrimaryAddress
mode(pressandholdtheSetButton),sendtheaddress,(e.g.,M8)andan
“OFF”command.
Thelocalcontrolsensevoltageischargingupcomponentsinsidethe
compactfluorescent bulb. Whenenoughelectricityisstored,itproduces
aflash. SettingtheLocalControloptiontoOFFwillfixthis. Also,some
brandsof CFL’sdon’tdothis.
AftersendingthePLCsignalforthePrimary Address,an“ON”command
needstobesenttoenablelocalcontrol. An“OFF” maybesent iflocal
controlis notpreferred.
TheLampLinc’sACprongsarepolarizedsothatitmayonlybeinserted
onewayintoareceptacle. Ifthehome’soutletsareover40yearsold,
replacingtheoutletwithamodernonewill allowtheLampLincandmany
othermoderndevicestobeusedsafely. DONOTdefeatthis safetyfea-
ture.
LampLink Plus& PLC for web (Mar04).qxd 3/15/2004 9:59 AM Page 10

How Powerline Signals Travel Around A Home
and How To Improve Reliability
Most homes in North America have two lines of 120 volts coming into the home from the utility
company. This split-single phase electricity is divided out at the home’s breaker box into the
circuits that feed light switches, plug-in outlets, and appliances. Half of the electricity outlets
and wall switches are fed by one of the 120-volt lines and the second 120-volt line feeds the
other half. The intermittent operation of PLC/X10 modules usually happens when the trans-
mitter is sending signals on one line and the receiver module is plugged into an outlet on the
other line. For the signals to get to the receiver, it must leave the home, travel to the utility
company transformer then come back in on the other AC line. By the time the signal gets back
to the home, travels through the electrical meter and circuit breaker box,
there may not be enough signal left to trigger the module.
The first order of business will be to install a coupler-repeater, also
known as amplifier. A coupler-repeater will ‘see’ the incoming signal, re-
generate it, and blast it out over both lines of the 120 volts. We recom-
mend that any home larger than 3000 square feet install a coupler-
repeater. In smaller homes, a passive phase coupler also known as a
signal bridge may give satisfactory results.
Once the signal has been amplified, it’s time to preserve it. Since PLC
signals go everywhere in the home, some electrical devices will have
more of an effect on the signal strength than other devices. PLC signals
are like water pressure in pipes, it actually goes everywhere it can, not
just to the receiving module. In the last 20 years, an explosion of elec-
trical devices has invaded our homes. Computers, video gear, and fancy high-end electronics
are more present than in years past. The more complicated the electrical power supply is in a
device, the more likely it is to absorb PLC signals. Engineers who design power supplies build
in traps to filter out and kill electrical noise. Unfortunately, the PLC signals looks like electrical
noise to these devices. The result is that a large percent of the transmitted signal is lost to
these devices leaving less for the receivers. The most common sources of signal loss are:
• Televisions • Computer systems
• Audio/Video gear • Computer UPS's and power strips
• Power supplies for laptops and cell phones
Testing for the problem is simple. If a device is suspected of causing sig-
nal absorption, unplug the device and then re-transmit the signal. It is
very important that the device is unplugged and not just turned off! If the
controlled product begins working after the appliance is unplugged, then
a filter will be needed on that device to keep PLC signals from being
absorbed and raise the signal strength of the entire home. Smarthome
has many filters that will fix the problem. An average home will need
between three and five filters. If you are in the business of installing
automation systems and not in the ‘call-back’ business, include some of
these in your bid as part of the standard package.
Smarthome’s BoosterLinc™can solve localized
problems
SignaLinc Repeater is ideal for improving the home
automation signal strength throughout all the outlets in a
home. But, as the PLC signals travel down a circuit and
away from the repeater, it will weaken by the same factors
listed above. Additionally, the signal will get weaker as it
passes installed PLC transmitters. Each PLC transmitter
contains a tuned circuit that when it's not sending signals
it's absorbing them! In addition to plug-in transmitters,
LampLinc™ 2-Way, SwitchLincs™ 2-Ways, ToggleLinc™ 2-
Ways, ApplianceLinc™ 2-Ways, KeypadLincs™, or any mod-
ule with 2-way abilities will load down the available signal.
With so many transmitters installed, the signal is loaded
down to a point where some modules will be unable to
receive a signal. Installing a multiple 2-way devices
on one branch circuit may necessitate the use of
local amplifier like Smarthome's BoosterLinc.11
#4827 BoosterLincTM
Plug-In Amplifier
#4826B
SignaLincTM
Repeater
#1626 FilterLincTM
Plug-In Filter
LampLink Plus& PLC for web (Mar04).qxd 3/15/2004 9:59 AM Page 11

Plug-in incandescent, fluorescent, inductive lighting devices
400 Watts
1 Base (Primary) Address of 256 possible
Up to 64 Scene Addresses (Plus only)
(Primary Address) 1 of 31 possible (3.2%-100%) or resume dim
(Scene Address) 1 of 32 possible (0%-100%) (Plus only)
0.125 to 9 seconds if programmed locally
0.125 seconds to 9 minutes if programmed remotely
10 (with more than 6, a PLC amplified coupler-repeater
is highly recommended)
25 watts
10 mV
MOV rated for 150 Volts
Maximum 15 amps less the load controlled by the LampLinc module
120 Volts AC +/- 10%, 60 Hertz
32 to 122 degrees Fahrenheit
4”(h) x 2.5”(w) x 1.5”(d)
5 oz
Load Types:
Maximum Load:
Addresses:
On-Level:
Fade-On/Off Rate:
Maximum number of LampLincs
per circuit:
Minimum load:
Minimum PLC receive level:
Surge Protection:
Feed through outlet:
Input Power:
Operating Temperature:
Dimensions:
Weight:
SPECIFICATIONS
Limited Warranty
Seller warrants to the original consumer purchaser of this product that, for a period of two years from the date of
purchase, this product will be free from defects in material and workmanship and will perform in substantial
conformity to the description of the product in this Owner’s Manual. This warranty shall not apply to defects
or errors caused by misuse or neglect.
If the product is found to be defective in material or workmanship, or if the product does not perform as war-
ranted above during the warranty period, Seller will either repair it, replace it or refund the purchase price,
at its option, upon receipt of the product at the address below, postage prepaid, with proof of the date of
purchase and an explanation of the defect or error. The repair, replacement, or refund that is provided for
above shall be the full extent of Seller's liability with respect to this product.
For repair or replacement during the warranty period, call Smarthome customer service to receive an RA# (return
authorization number), properly package the product (with the RA# clearly printed on the outside of the package)
and send the product, along with all other required materials, to:
Smarthome, Inc.
ATTN: Receiving Dept.
16542 Millikan Ave.
Irvine, CA 92606-5027
Limitations:
The above warranty is in lieu of and seller disclaims all other warranties, whether oral or written, express or
implied, including and warranty or merchantability or fitness for a particular purpose. Any implied warranty,
including any warranty of merchantability or fitness for a particular purpose, which may not be disclaimed or sup-
planted as provided above shall be limited to the one year period of the express warranty above. No other repre-
sentation or claim of any nature by any person shall, be binding upon seller or modify the terms of the above
warranty and disclaimer.
In no event shall seller be liable for special, incidental, consequential, or other damages resulting from the
possession or use of this product, including without limitation damage to property and, to the extent permit-
ted by law, personal injury, even if seller knew or should have known of the possibility of such damages.
Some states do not allow limitations on how long an implied warranty lasts and/or the exclusion or limitation
of damages, in which case the above limitations and/or exclusions may not apply to you. You may also have
other legal rights that may vary from state to state.
ControLinc, TesterLinc, SignaLinc, LampLinc, ToggleLinc, BoosterLinc, ApplianceLinc, KeypadLinc, FilterLinc,
ProbeLinc, SwitchLinc, TempLinc, IR Linc & SmarthomeLive are trademarked by Smarthome, Inc.
© Copyright 2004 Smarthome, 16542 Millikan Ave., Irvine, CA 92606-5027
800.SMART.HOME - 949.221.9200 - www.smarthome.com
rev 031504
LampLink Plus& PLC for web (Mar04).qxd 3/15/2004 9:59 AM Page 12
This manual suits for next models
3
Table of contents
