Smart Witness KP1 Datasheet
3G/WiFi Instant Video Transmission
Vehicle Accident Camera
KP1
KP1 Installation & Quick Start Guide
3G/WiFi Data Transfer via EMAIL

2
www.smartwitness.com/usa
Contents
1. Configuration Tool ............................................................................................................................ 3
1.1. Install ......................................................................................................................................... 3
1.2. Open Configuration Tool............................................................................................................ 6
1.3. Initialize SD Card ........................................................................................................................ 7
1.4. Settings Configuration................................................................................................................ 9
1.4.1. Device Tab......................................................................................................................... 10
1.4.2. Record Tab ........................................................................................................................ 11
1.4.3. Event Tab .......................................................................................................................... 12
1.4.4. Info Tab ............................................................................................................................. 13
1.4.5. Connectivity Tab ............................................................................................................... 14
1.4.6. Email Setup Tab................................................................................................................. 15
1.4.7. User Setup Tab.................................................................................................................. 17
1.5. Save settings ............................................................................................................................ 19
1.6. Second Card ............................................................................................................................. 20
2. KP1 Unit .......................................................................................................................................... 20
2.1. Hardware Installation............................................................................................................. 209
2.2. Inserting SD cards & USB dongle.............................................................................................. 22
2.3. Check Footage.......................................................................................................................... 22
2.3.1. Install Analysis Software ................................................................................................... 24
2.3.2. View Footage .................................................................................................................. 265
3. Complete ...................................................................................................................................... 276
4. Appendix....................................................................................................................................... 287
4.1. APNs....................................................................................................................................... 287
4.2. SMS Center Numbers............................................................................................................. 298
4.3. SMTP Email Settings............................................................................................................... 309
4.4. Email Commands/Requests to KP1……………………………………………………………………………………….33
3
www.smartwitness.com/usa
This guide will take you through the steps necessary to Initialize your SD card for use in the KP1 unit.
Please note that the settings displayed here are our basic recommended default settings and are to
be used as a guide. We recommend to read the full user manual for more in depth detail on each
setting so that you can customise the unit for your own needs.
This guide is correct at the time of print; it will be updated accordingly for future releases. Please
note that some options and features are subject to change and should only serve as a quick reference
guide. It is advised to check with your provider to confirm the correct settings.
1. Configuration Tool
The Configuration Tool is used to Initialize the SD card(s) and to edit the settings for the KP1 unit.
Please ensure that you are using the latest version of the software, this can be downloaded online
from http://www.smartwitness.com/usa/download-software.html
1.1. Install
Once downloaded you will then need to install the software. Please note that this is Windows only
software.
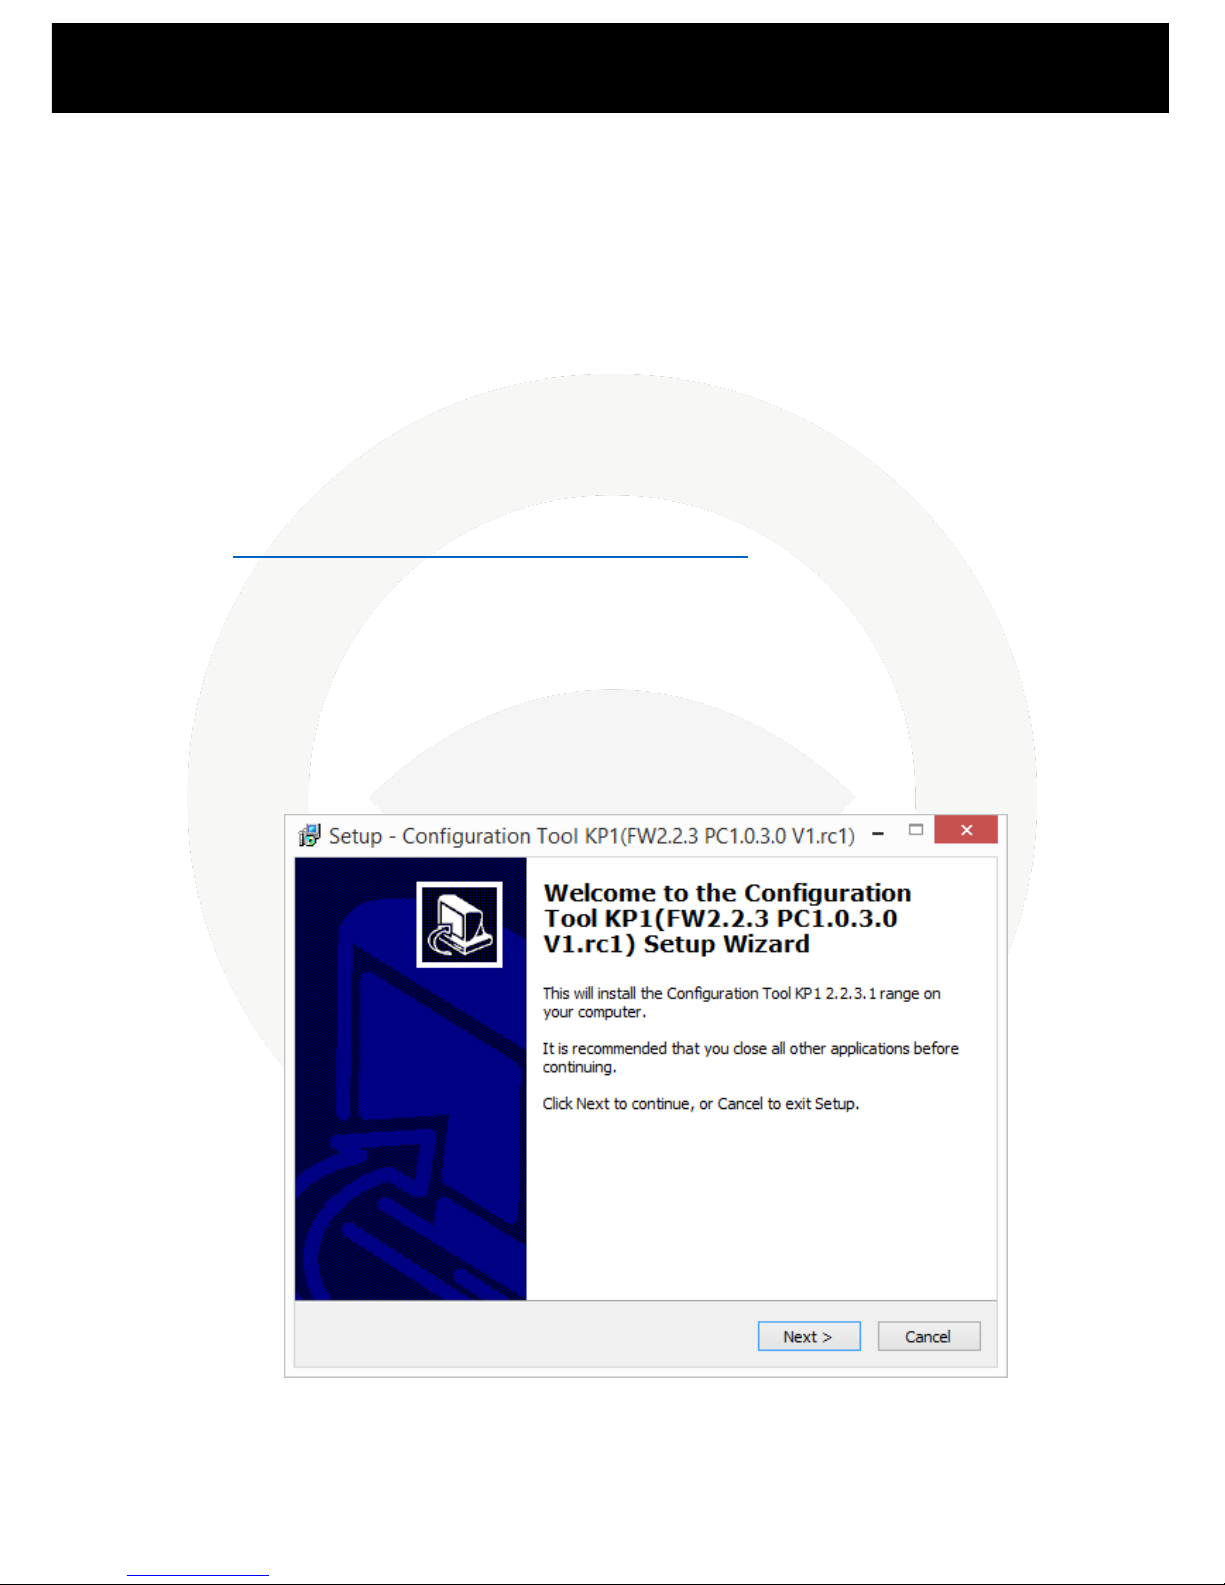
1. The downloaded file will come in a compressed ZIP file. To install you can simply open up the
ZIP file and then double click the setup.exe executable file within to start the install process.
2. The Setup Wizard will then begin, on the first window you can select Next.
4
www.smartwitness.com/usa
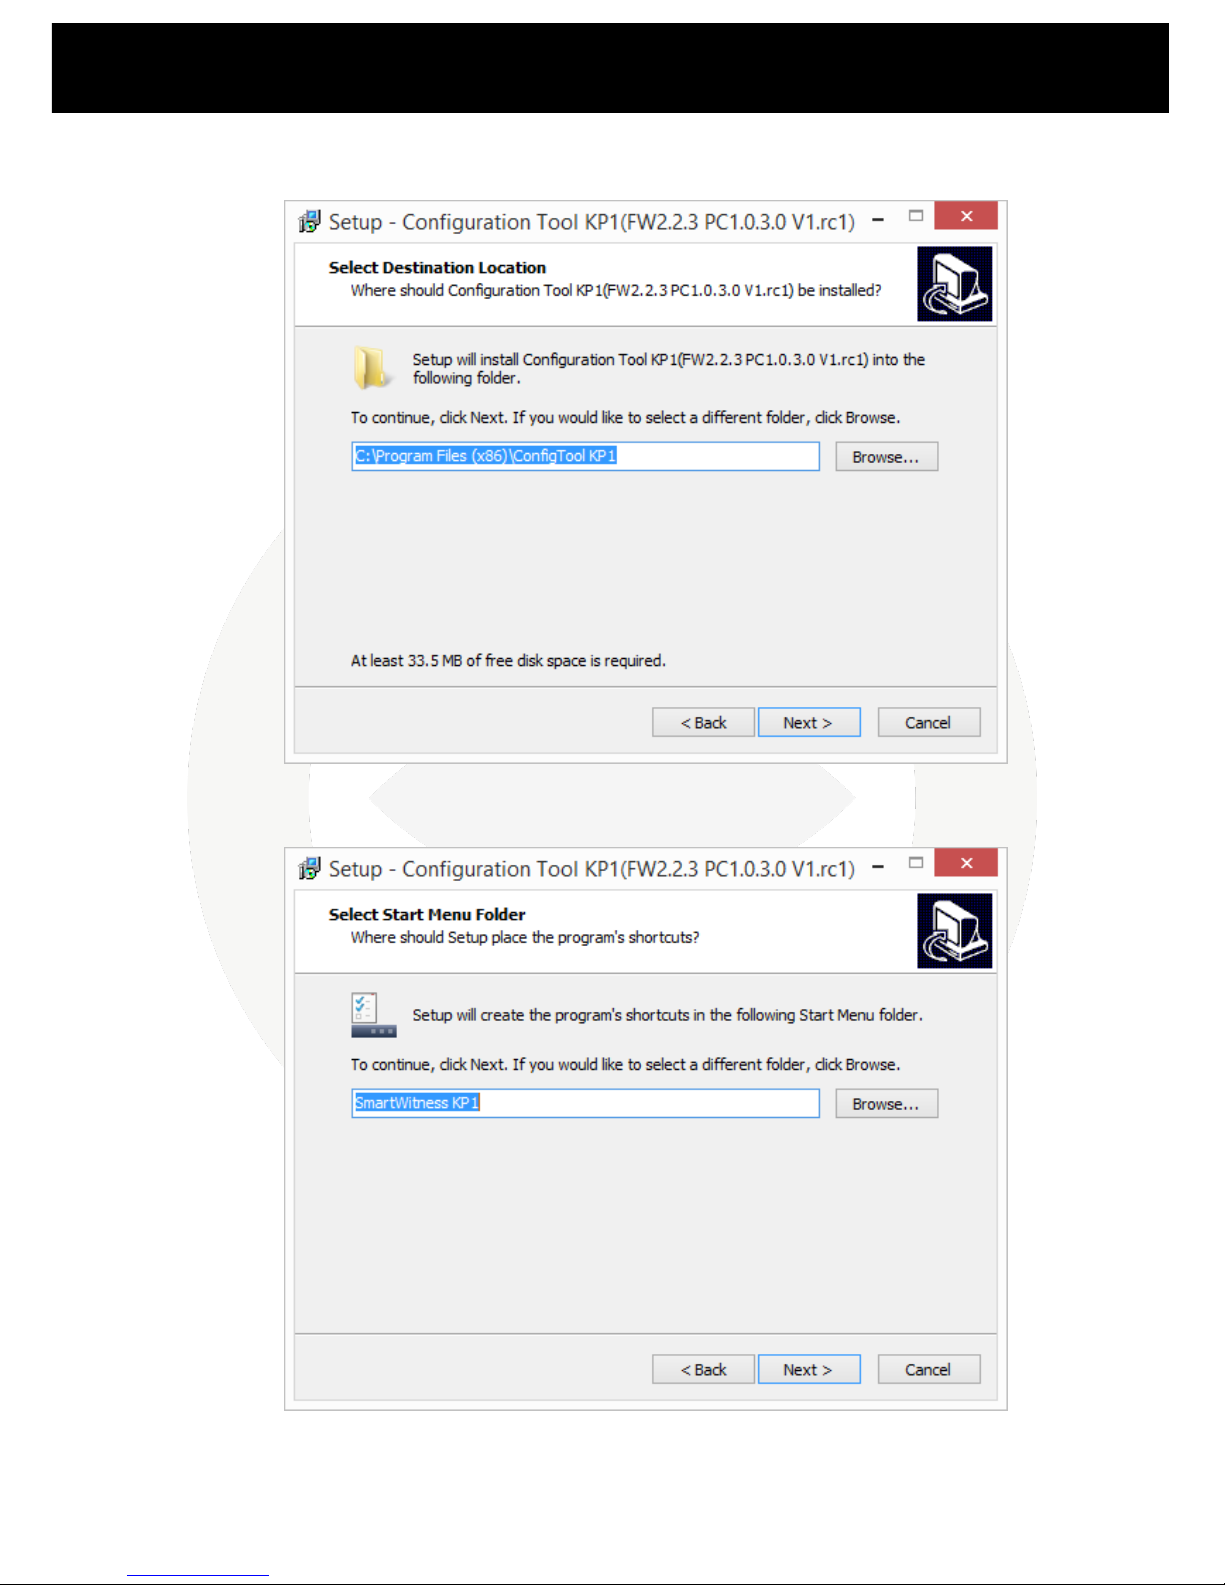
3. The next window will confirm the destination to install the software to. You can leave this as
it is and select Next.
4. The next window will ask to confirm what folder it will appear as in your Start Menu. You can
leave this as the default and select Next to proceed.
5
www.smartwitness.com/usa
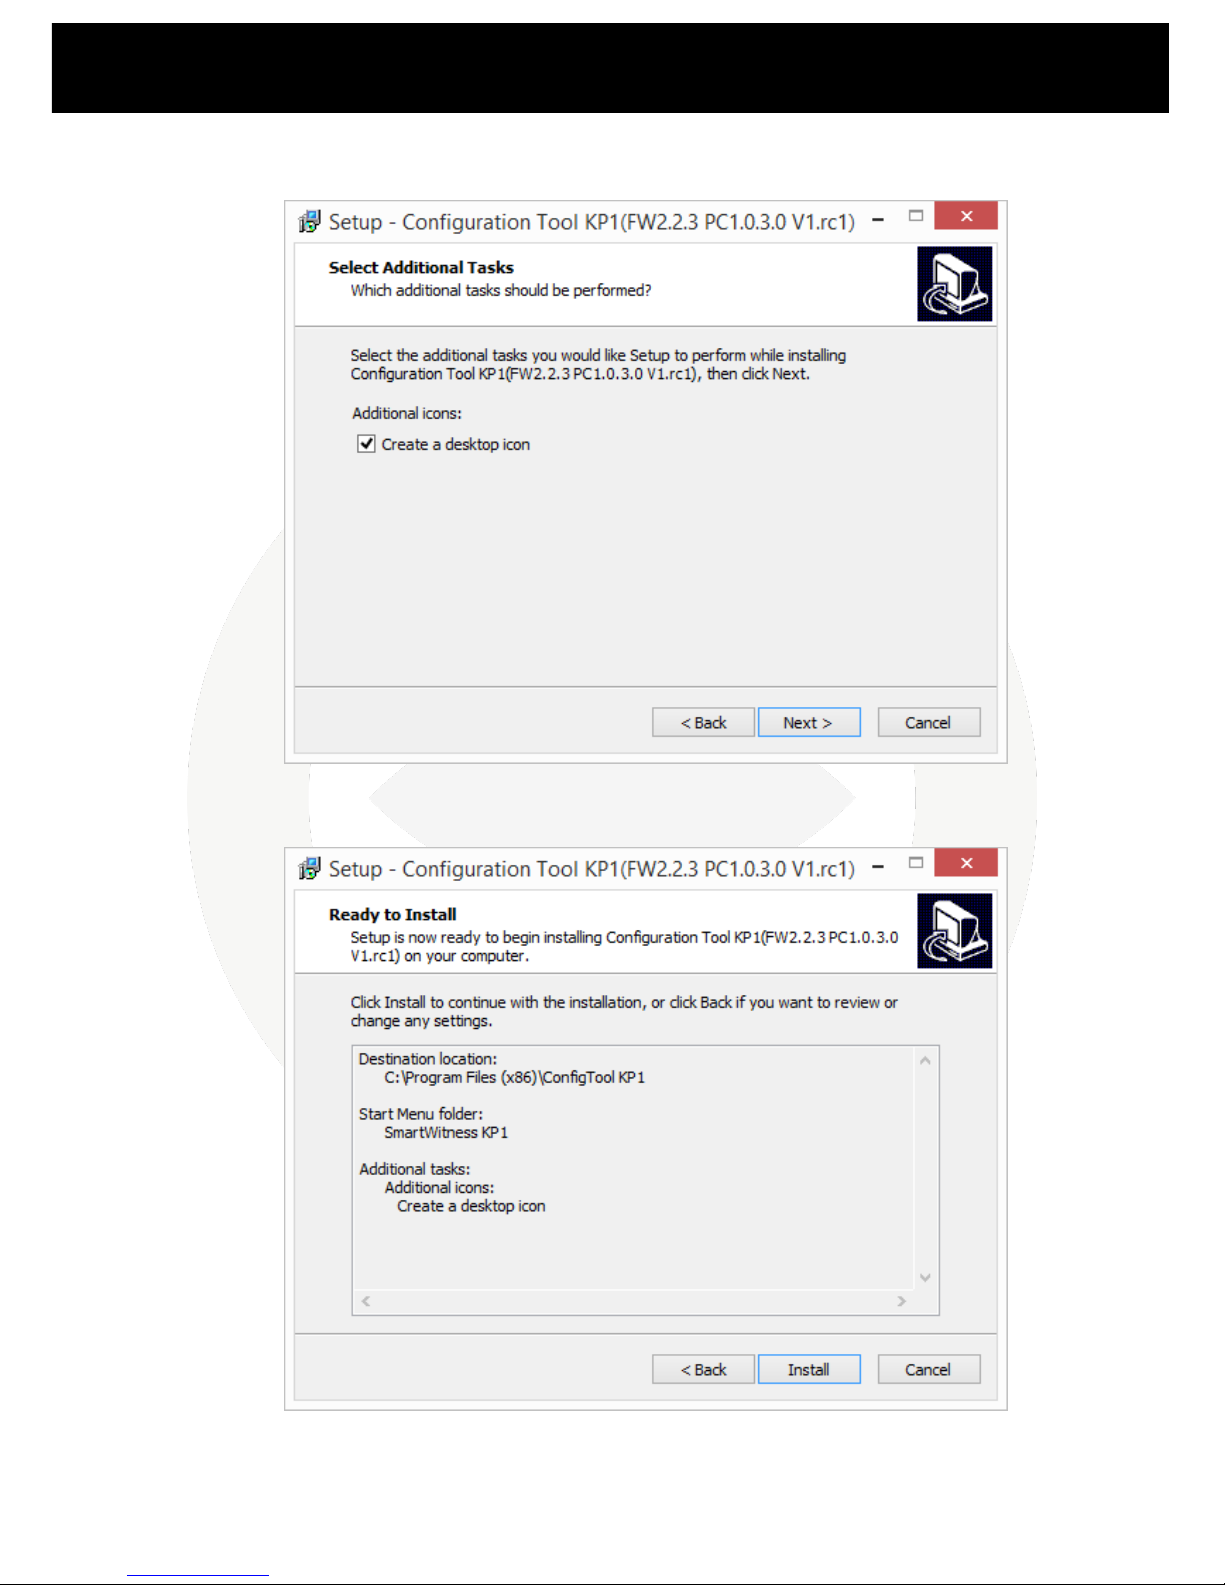
5. The next window will give you the option to create a desktop icon for the software. If you
would like to do this you can check the checkbox. You can click on Next to proceed.
6. The final window will confirm your settings. You can click on the Install button to finalise and
install the software.

6
www.smartwitness.com/usa
1.2. Open Configuration Tool
Now that you have installed the Configuration Tool you can open it, either from the Programs list in
your Start Menu or alternatively, if you created a desktop icon during the install process, you can run
the shortcut from your desktop.

7
www.smartwitness.com/usa
1.3. Initialize SD Card
The first step to preparing your SD card(s) for use is to initialize it. This will format the card and put
configuration files on that will allow the KP1 unit to use it and read information from it.
1. First, insert your SD card into your PC or Laptop. If you have an SD card reader in your
computer you can use this otherwise you will need a USB SD card reader.
2. Once done click the Initialize SD Card button in the bottom left hand corner of the
Configuration Tool.
3. You will then need to select the drive
for your SD card. Once selected press
the OK button
8
www.smartwitness.com/usa
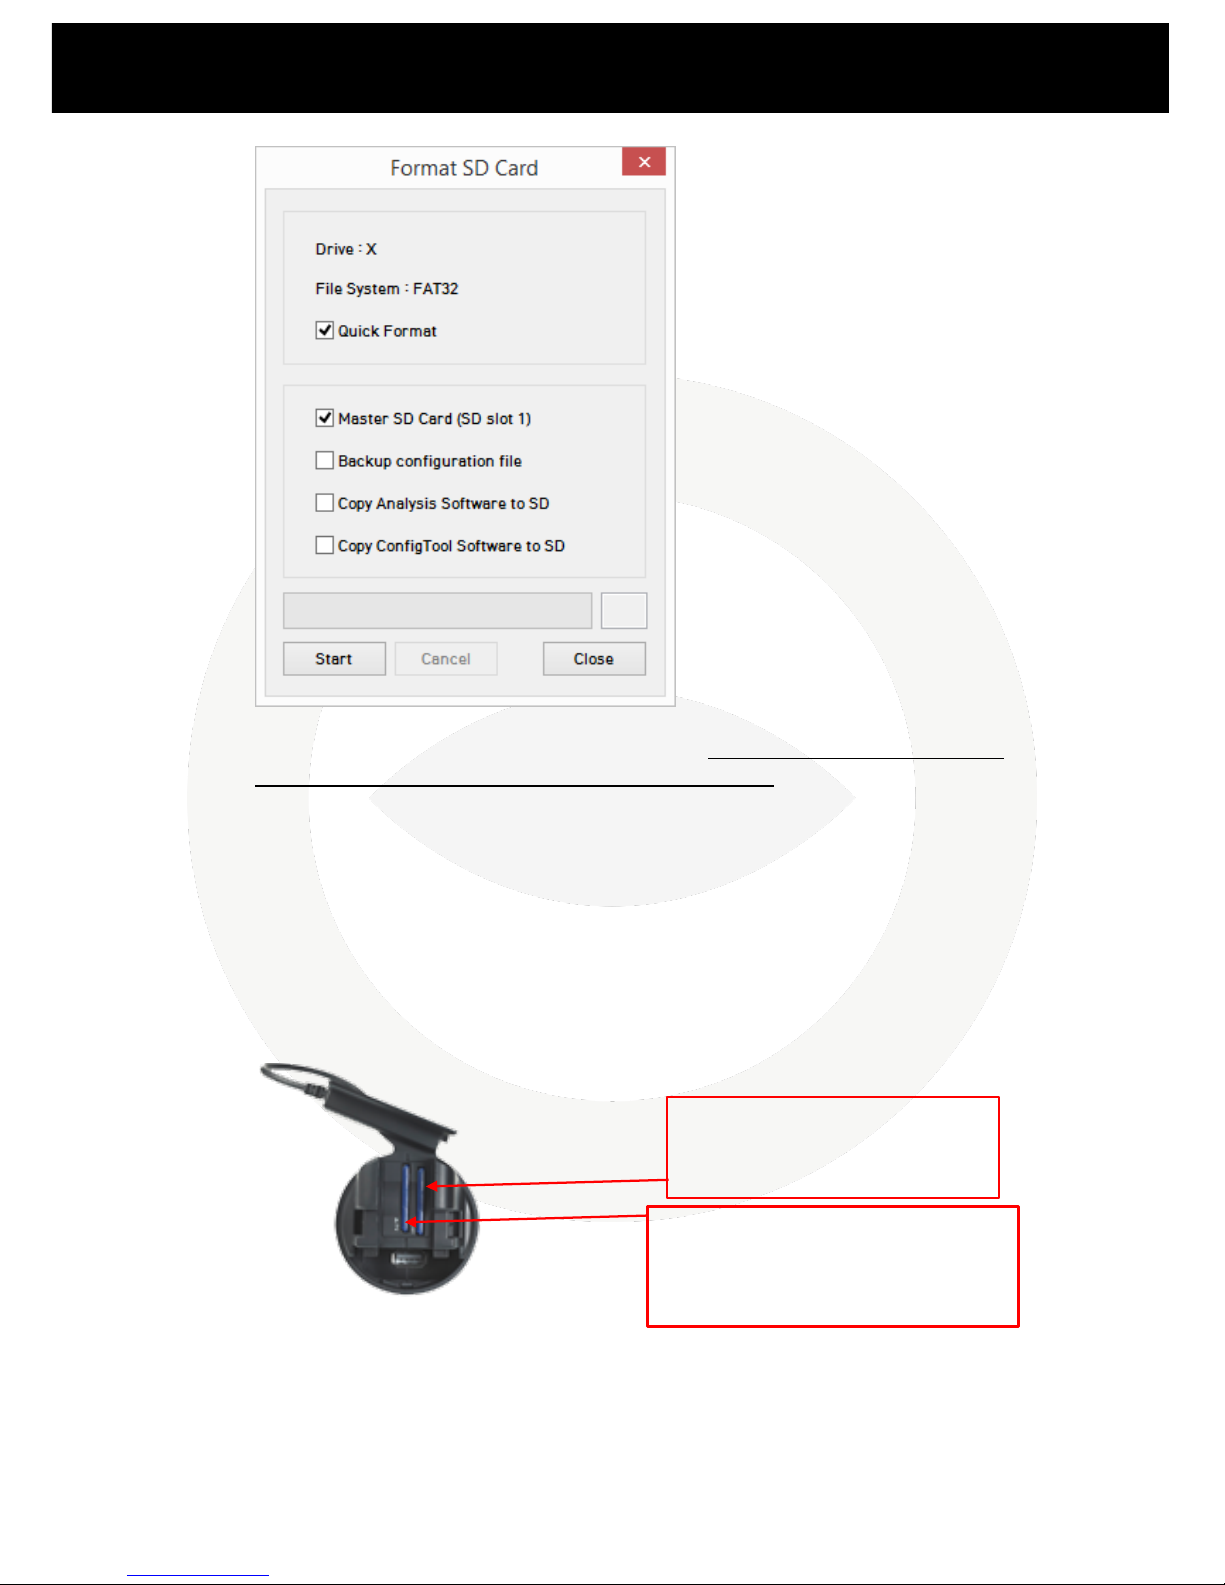
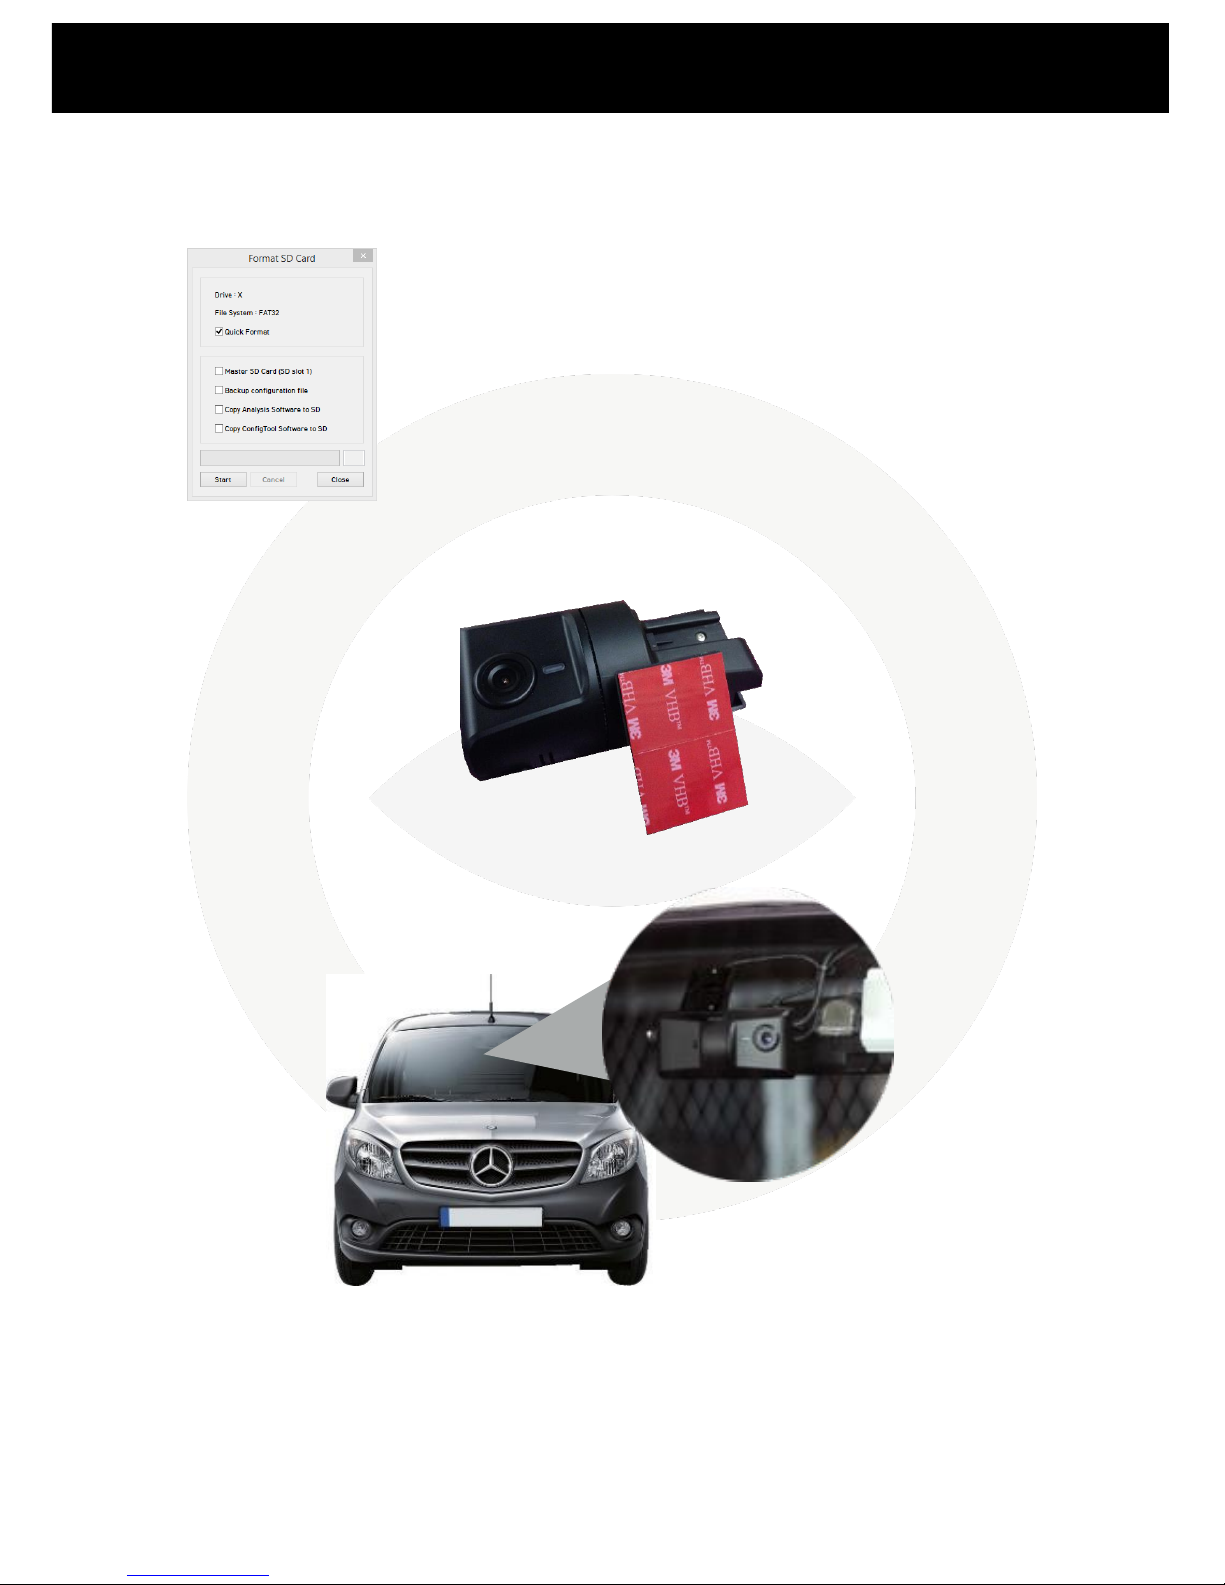
4. Once selected you will be given options to format the SD card. It is advisable to select Quick
Format. You will also need to select Master SD Card. If you are using a second SD card in
slot 2 of your unit, you should not check the “Master SD” box (this will be covered later on in
this guide).
You can also select to copy the installation files for the Analysis software and Configuration
Tool to the SD if you wish.
Once done click the Start button to begin the format.
5. With Quick Format selected the process should only take a few seconds. Once complete you
will receive a message to say that the card has been Initialized.
Please note: If formatting the card fails please check your Antivirus settings. If it will still not
format after this please check with your place of purchase or direct with SmartWitness.
SD Card 1 (REQUIRED): Must be
initialized with “Master SD Card”
checked and settings applied.
SD Card 2 (OPTIONAL): Must be
initialized with ONLY “Quick Format”
box checked. No settings need to be
applied.

9
www.smartwitness.com/usa
1.4. Settings Configuration
Now that the SD card has been initialized you can then start applying the settings to configure your
unit.
You can use the following settings as a basic set up for your unit, however, it is advised that you read
through the full breakdown of each of these settings in the User Manual to get the most from your
unit.
Please use the images on the next few pages to copy these settings from, additional information will
also be provided below these images to further advise you.
You can hover your mouse over this icon in the configuration tool
for more detailed description

10
www.smartwitness.com/usa
1.4.1. Device Tab
If you are using a second camera with your KP1 unit you will need to check the “2nd Camera” box to
enable this camera, please confirm if this is a PAL or NTSC camera (if you are in North America or
South America you will most likely have an NTSC camera).
If you are planning to record in “Event” mode or “Dual” mode, you can adjust the sensitivity levels of
the G-Sensors to record event video and send alerts specific to your needs (e.g. sharp braking, quick
acceleration, hard turning, impacts, etc). The X, Y, & Z values are depicted by micro G’s. (e.g. X value
of 1000 = 1 G of force). X= Front to Rear; Y= Left to Right; Z= Up & Down. Once you have completed
this guide it is advisable to go on a test drive with the unit in your vehicle to ensure that the
sensitivity level is not set too high or low.
11
www.smartwitness.com/usa
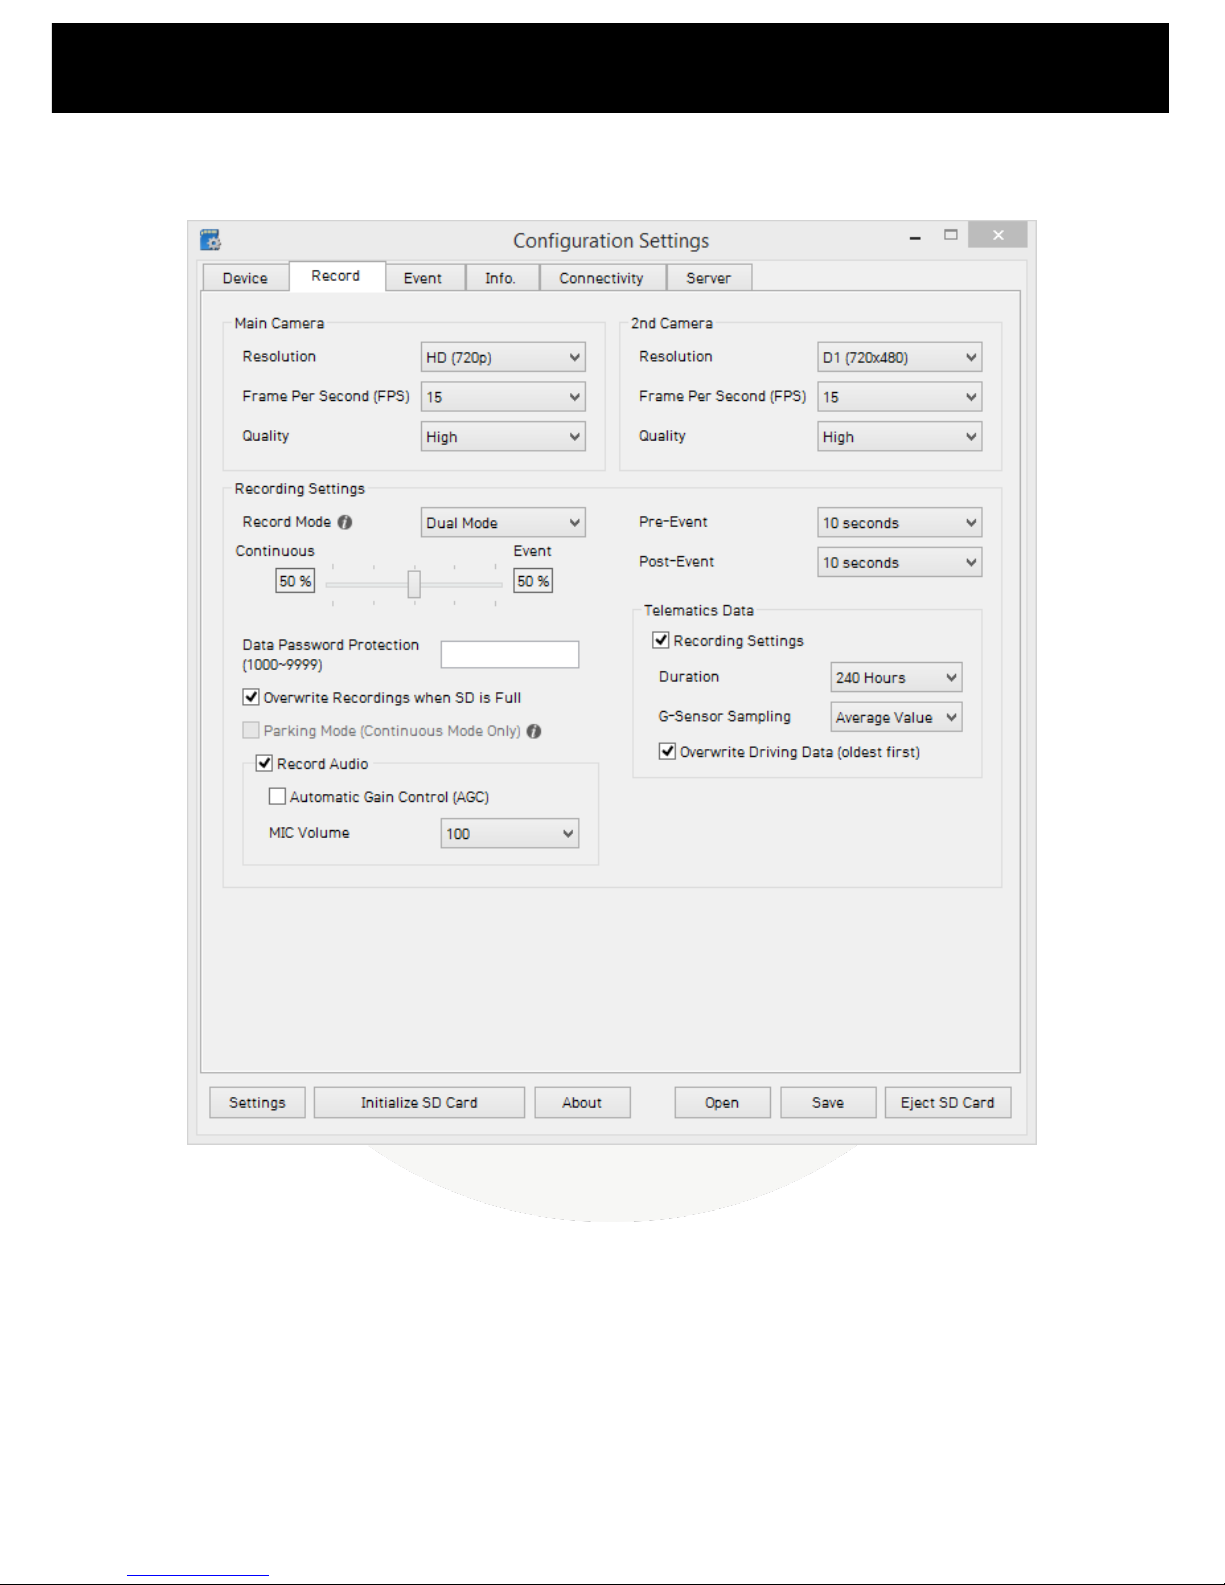
1.4.2. Record Tab
You can use the settings under the Record tab to alter how the unit records and at what quality.
Depending on the size of your SD card you may wish to use a slightly lower quality or frame rate to
increase the amount of footage you can fit onto your SD card. You can use the Resolution, FPS and
Quality settings to adjust this. Please see the User Manual for more information on these settings as
well as a recording time table to give you an idea of what recording times to expect from the
settings.
You have 3 options for the Recording Mode:
Continuous: Constant recording the whole time the unit is powered.
12
www.smartwitness.com/usa
Event: Only records when triggered, i.e. from a G-Sensor shock, Alarm, Overspeed or Panic
Button press.
Dual Mode: Constant recording at 1 FPS until an Event and then it will record at the full
frame rate. (when using 2 SD cards, SD card 1 will store continuous video at 1FPS. SD card 2
will store events at full frame rate)
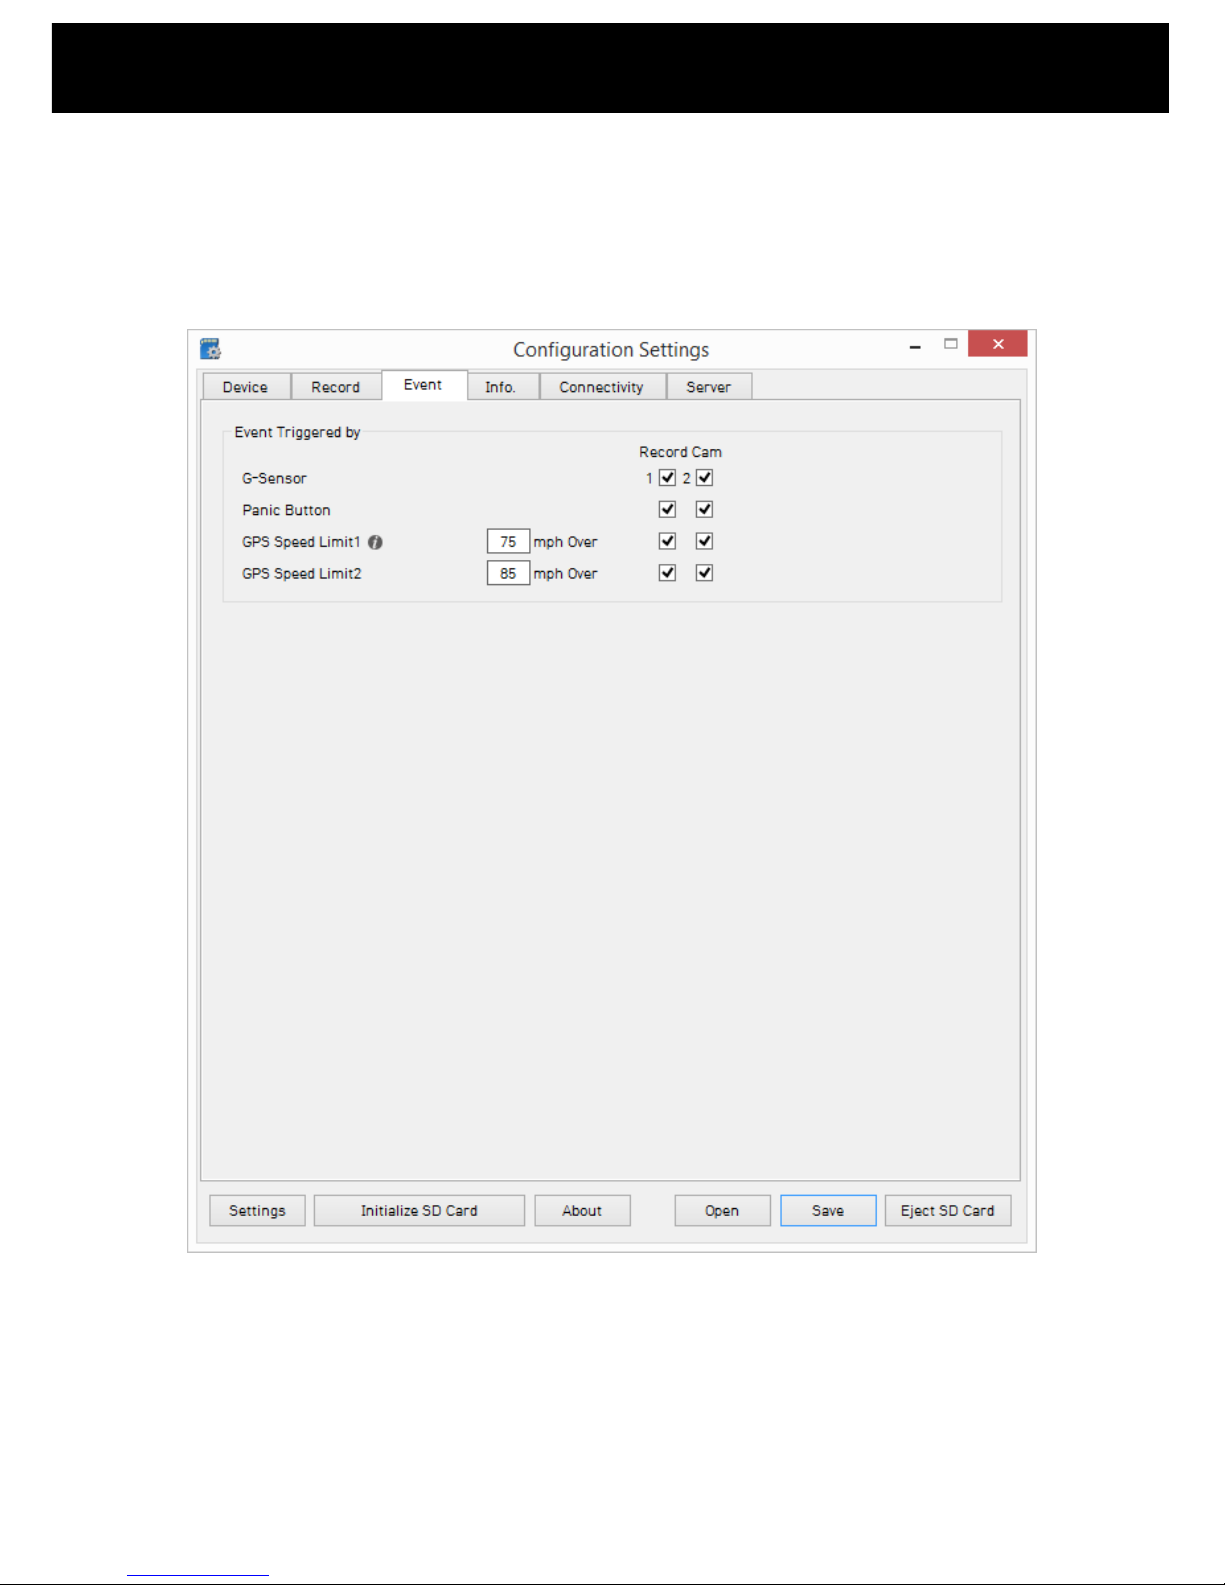
1.4.3. Event Tab
If you have selected Event recording you can use this page to select what events will trigger the unit
to record. The checkboxes under Record CAM represents the camera channels; the left hand box
being the main camera built into the unit and the right hand box being the second camera. If you
have enabled the second camera you can set this to record on an event if you wish.
NOTE: If you are using INT-1-S or INT-2 power accessory options, the event tab will reflect the
additional input/output triggers which are enabled when using INT-1-S or INT-2.
13
www.smartwitness.com/usa
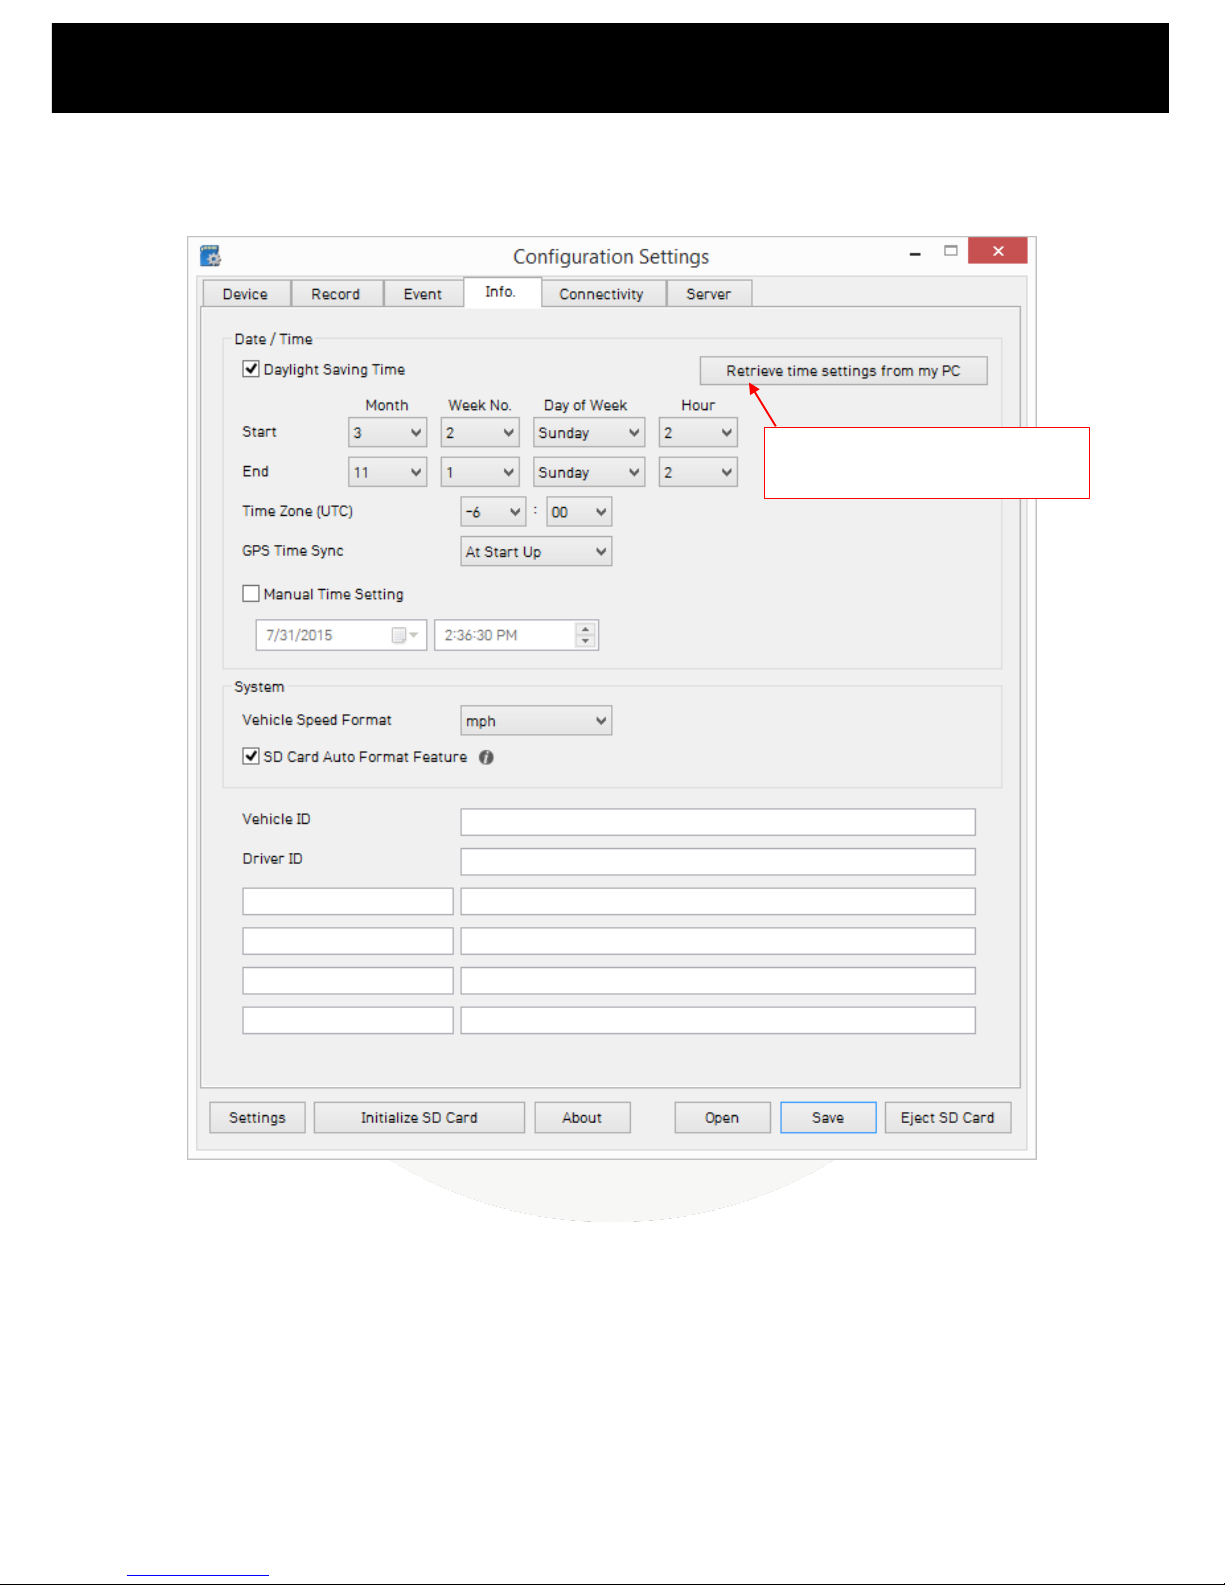
1.4.4. Info Tab
The information tab can be generally left at its default settings however you may wish to enter your
vehicle’s registration plate pr DOT# details into the Vehicle ID section.
If you are planning to use 3G or WiFi modem with the unit, then this step is mandatory.
There are also blank fields at the bottom of this page that you can use to fill in any additional
information that you wish to include with the record data, such as driver contact details or insurance
policy details.
Click here to automatically set the
Time Zone & DST from your PC.
14
www.smartwitness.com/usa
The following steps are only needed if you are using a 3G or WiFi USB modem with your KP1 unit
(please contact SmartWitness or your supplier for compatible USB modems). If you are not doing
this you can proceed to page 17, section 1.5. Save Settings.
Using a 3G USB dongle with a SIM card will allow you to receive email alerts from the unit based on
certain events or live connectivity to a remote server.
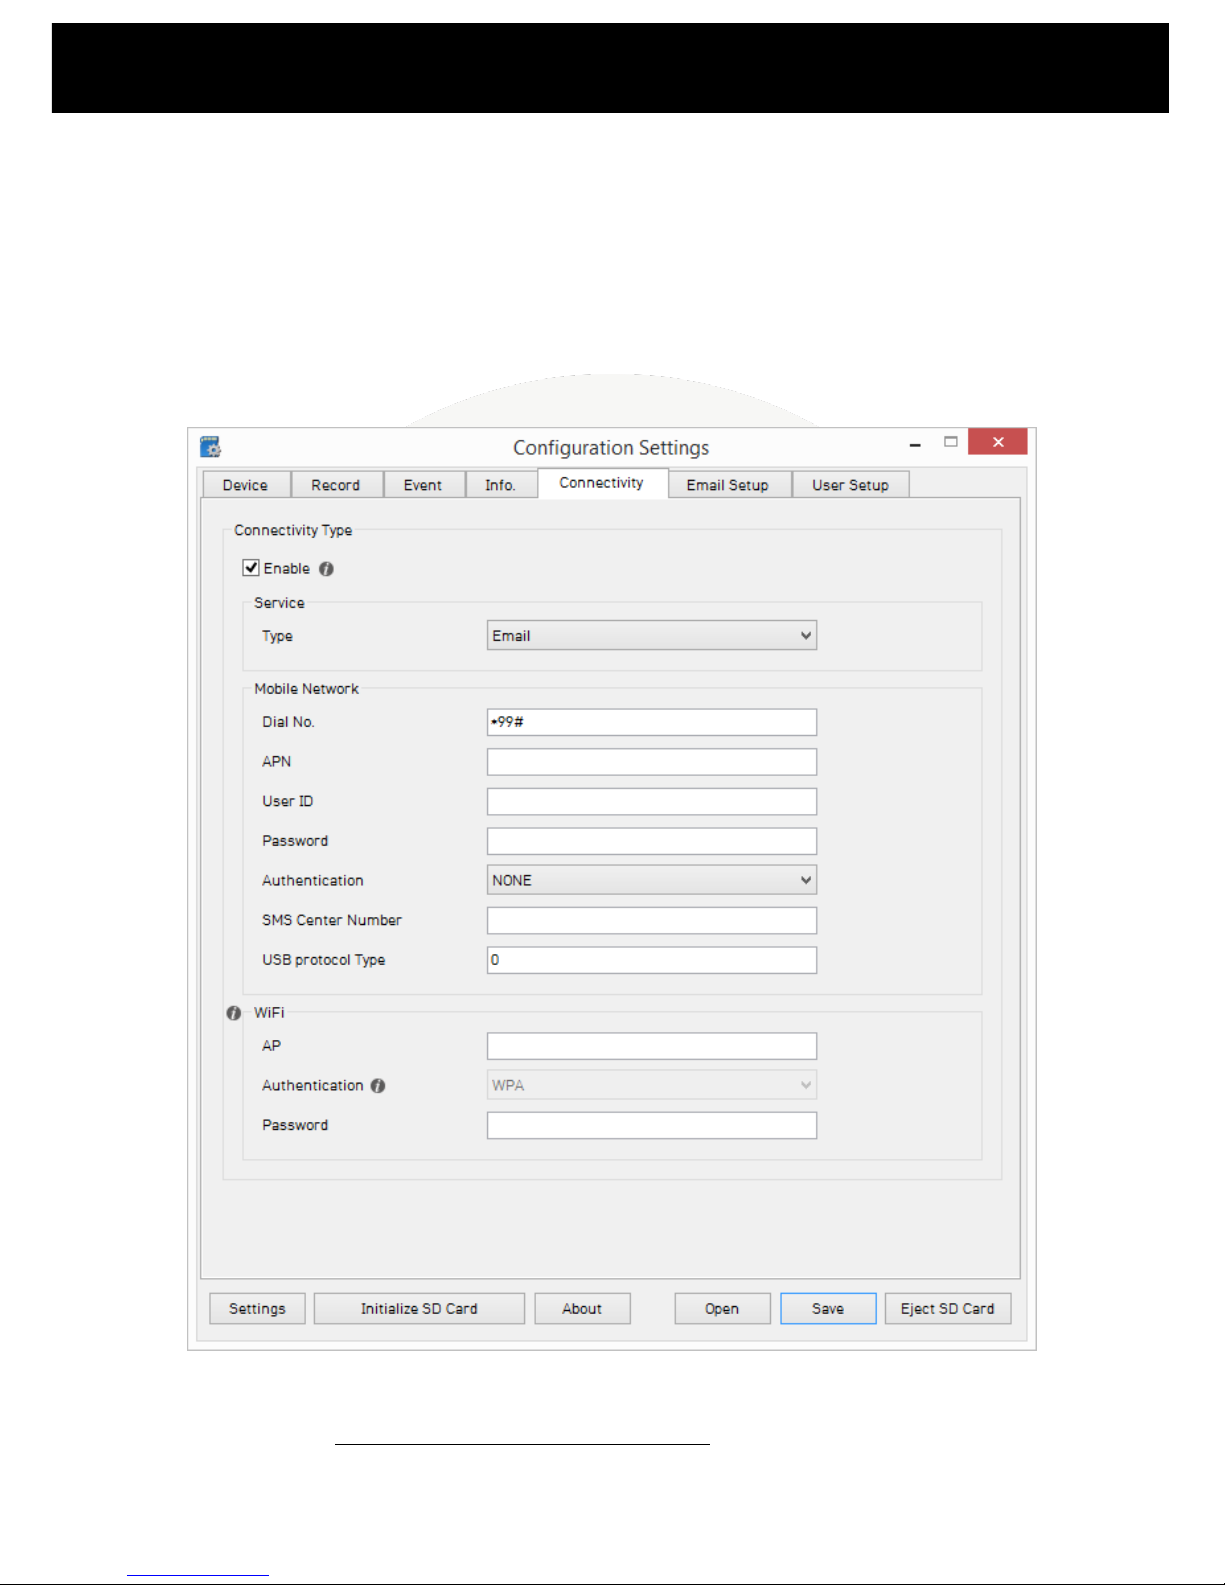
1.4.5. Connectivity Tab
The Connectivity page is used to configure the network settings for either 1) Your SIM card used with
a compatible 3G USB dongle or 2) Your Wi-Fi network or mobile hot-spot (Mi-Fi device) used with
WiFi USB dongle. You cannot use Wi-Fi and 3G simultaneously.
15
www.smartwitness.com/usa
You will need to contact your network provider to get the correct Mobile Network information.
Please also see the Appendix for a list of common APN details.
If you wish to receive SMS text messages from the unit you will also need to set the SMS Center
Number. Again, you will also need to contact your network provider for this but please also see the
Appendix for a list of common numbers.
When you set the Service Type as Email, you will see the “Email Setup” tab and “User Setup” tab
appear. If you do not have or want Wireless connectivity, simple uncheck the “Enable” box and the
settings will device to SD card storage only.
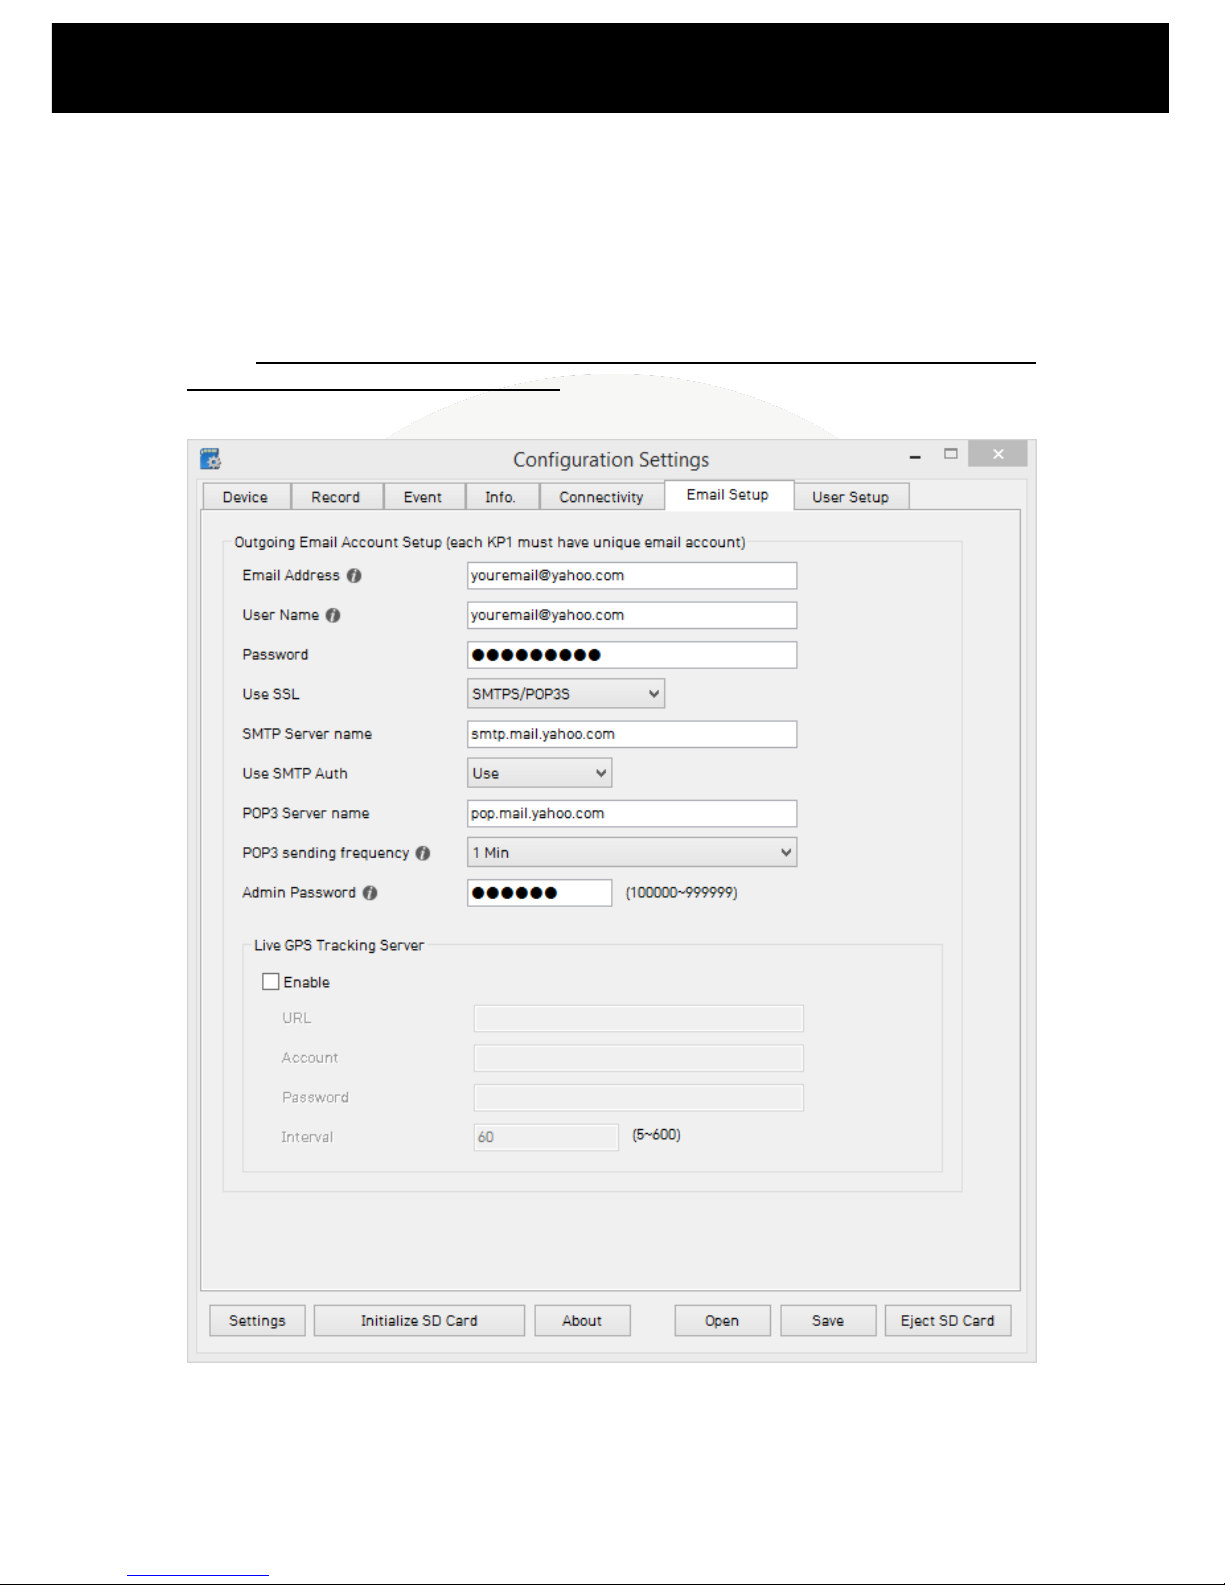
1.4.6. Email Setup Tab
The Email Setup page is used to provide details of an email account for the KP1 to send emails from.
16
www.smartwitness.com/usa
If you are using multiple KP1 units with 3G or Wi-Fi USB modems, then the “Email Address” field
must be unique for each unit. If you have the same email account on every unit then you will be
unable to request data from the unit (e.g. sending email from PC to the KP1 email account to
request original video footage), however you will still be able to receive alerts from the unit.
You can use your own email server or a public email account such as Yahoo.
If you are using a public email account you will need to find the SMTP server details for it, you can
find these on the internet but also please see the Appendix for the most common details.
You can enter an Admin Password for the unit on this page too. This is mandatory for using the
Request feature to request information or send a new configuration file. Please see the main User
Manual for more information on this. You can enter your own password of any number between
100000 and 999999, alternatively, if you are not using this feature you can leave it blank.
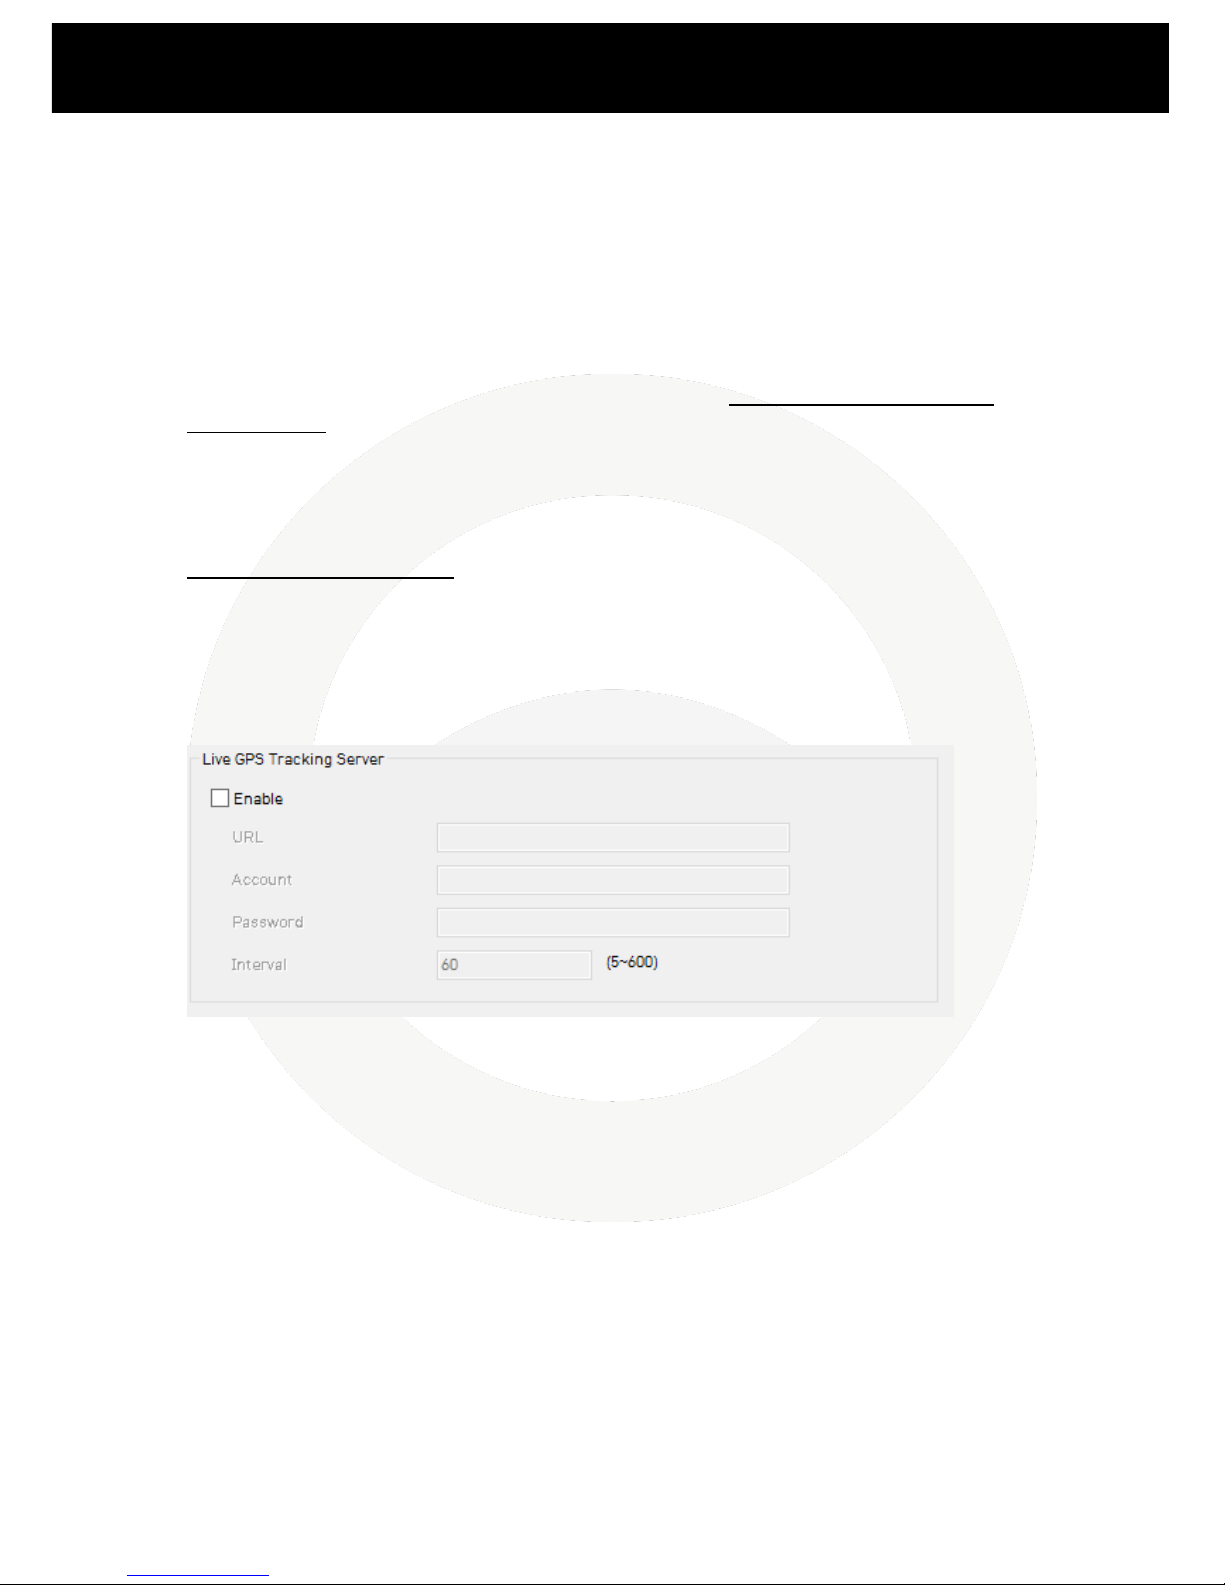
Live GPS Tracking Server
When enabled, this feature sends live GPS tracking information to the specified URL. Please ask your
telematics/tracking provider if you would like to enable this feature. SmartWitness does not provide
web access to viewing your live location using this feature.

17
www.smartwitness.com/usa
1.4.7. User Setup Tab
The user setup tab is used to define the users that will receive emails and/or SMS messages from
KP1
You can add up to 5 users, these can be selected using the User Profile drop down menu.
You can enter one of the users email address in the User Email text field. To add more emails you
can select a different User number from the Selected User drop down menu and then enter the new
email in the User Email text field again.
You also have the option to receive SMS text messages from the unit, you can use the Receiver SMS
text box to enter the mobile phone number for that user. Please note that this will need to start with
the country code (e.g. +1 for USA).
18
www.smartwitness.com/usa
If you wish to request video footage from the unit using the Request feature you will need to set a
user password. This can be any number between 1000 and 9999.
The User Permissions section controls what permissions the user has when using the Requests
feature. Please see the full User Manual for more information on this feature.
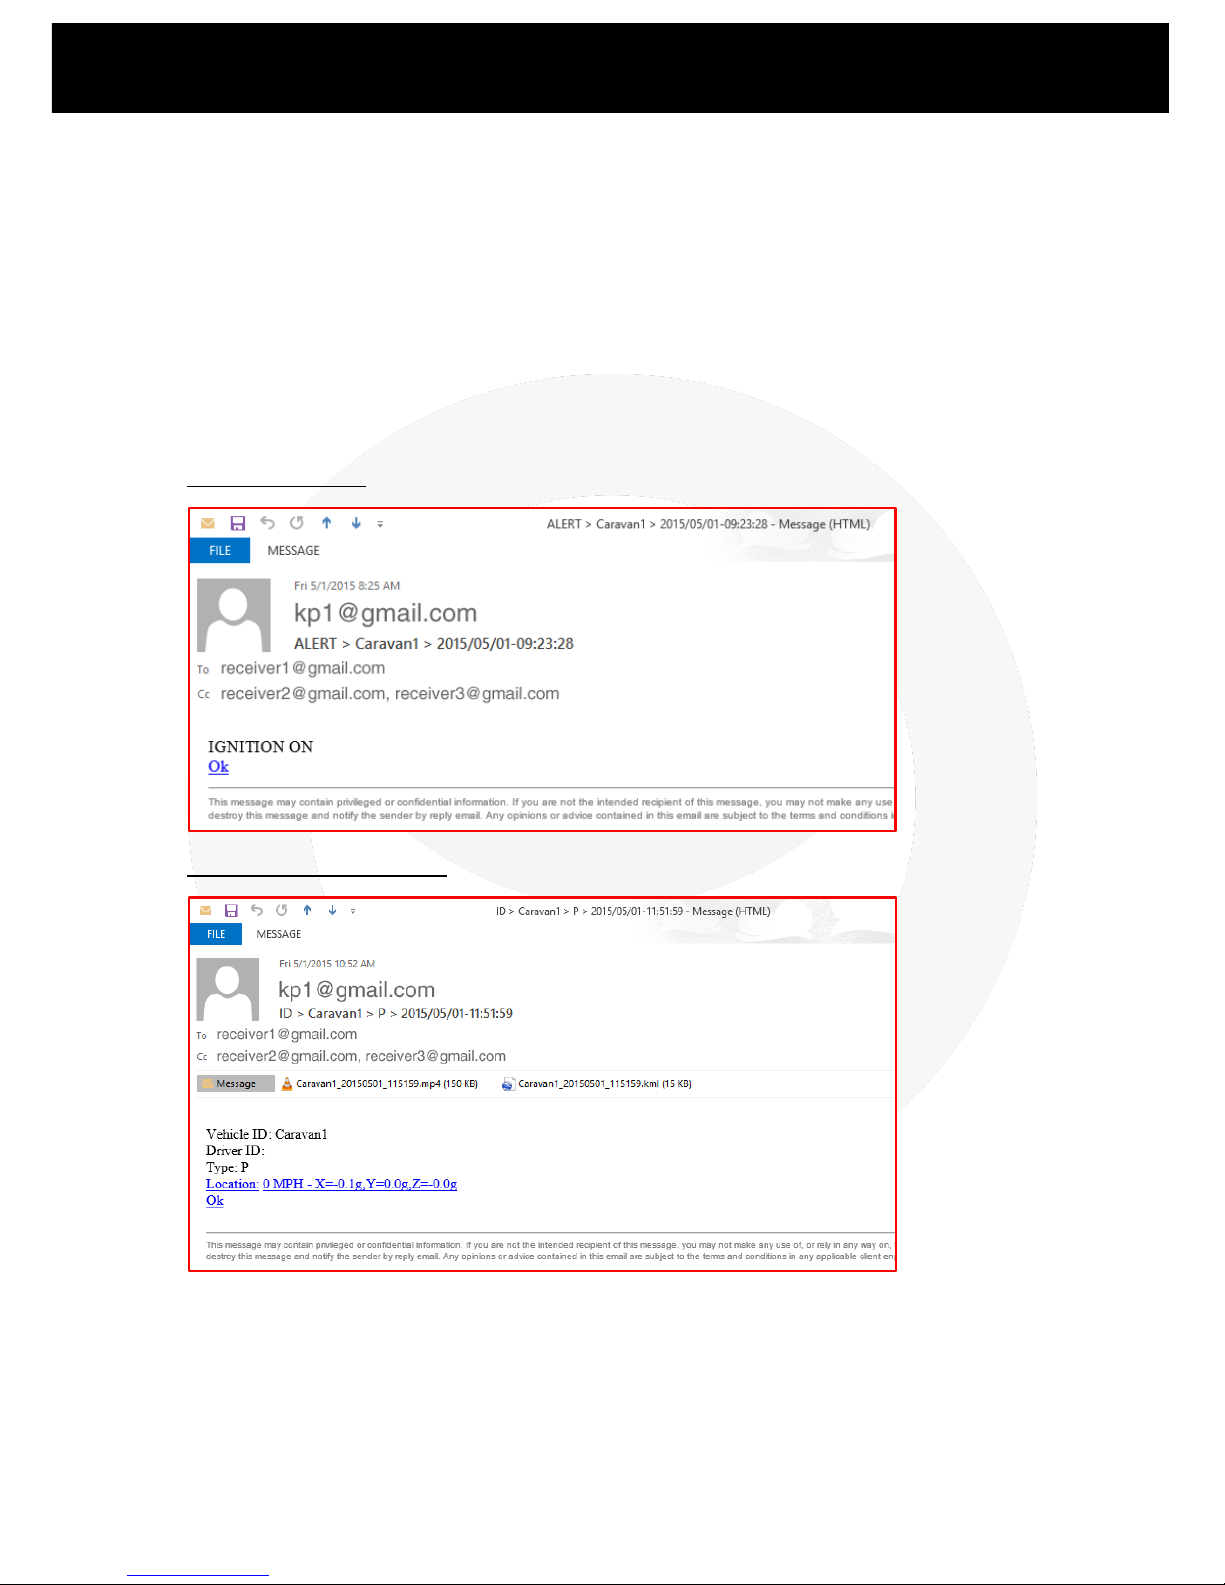
Finally, you can set what alerts you wish to receive from the unit from the Event Notify section. You
can use the checkboxes to set what type of alert you wish to receive from the unit and from what
event. “E-Mail Notification” will contain information such as a 10 second video clip from the road
facing camera, GPS location, Vehicle speed, and Vehicle ID. “E-Mail Alert” will be just a quick line of
text indicating what type of alert has been triggered (e.g. Excessive Speed). An SMS Alert will give
the same information as an E-Mail Alert.
Email Alert Example:
Email Notification Example:
19
www.smartwitness.com/usa
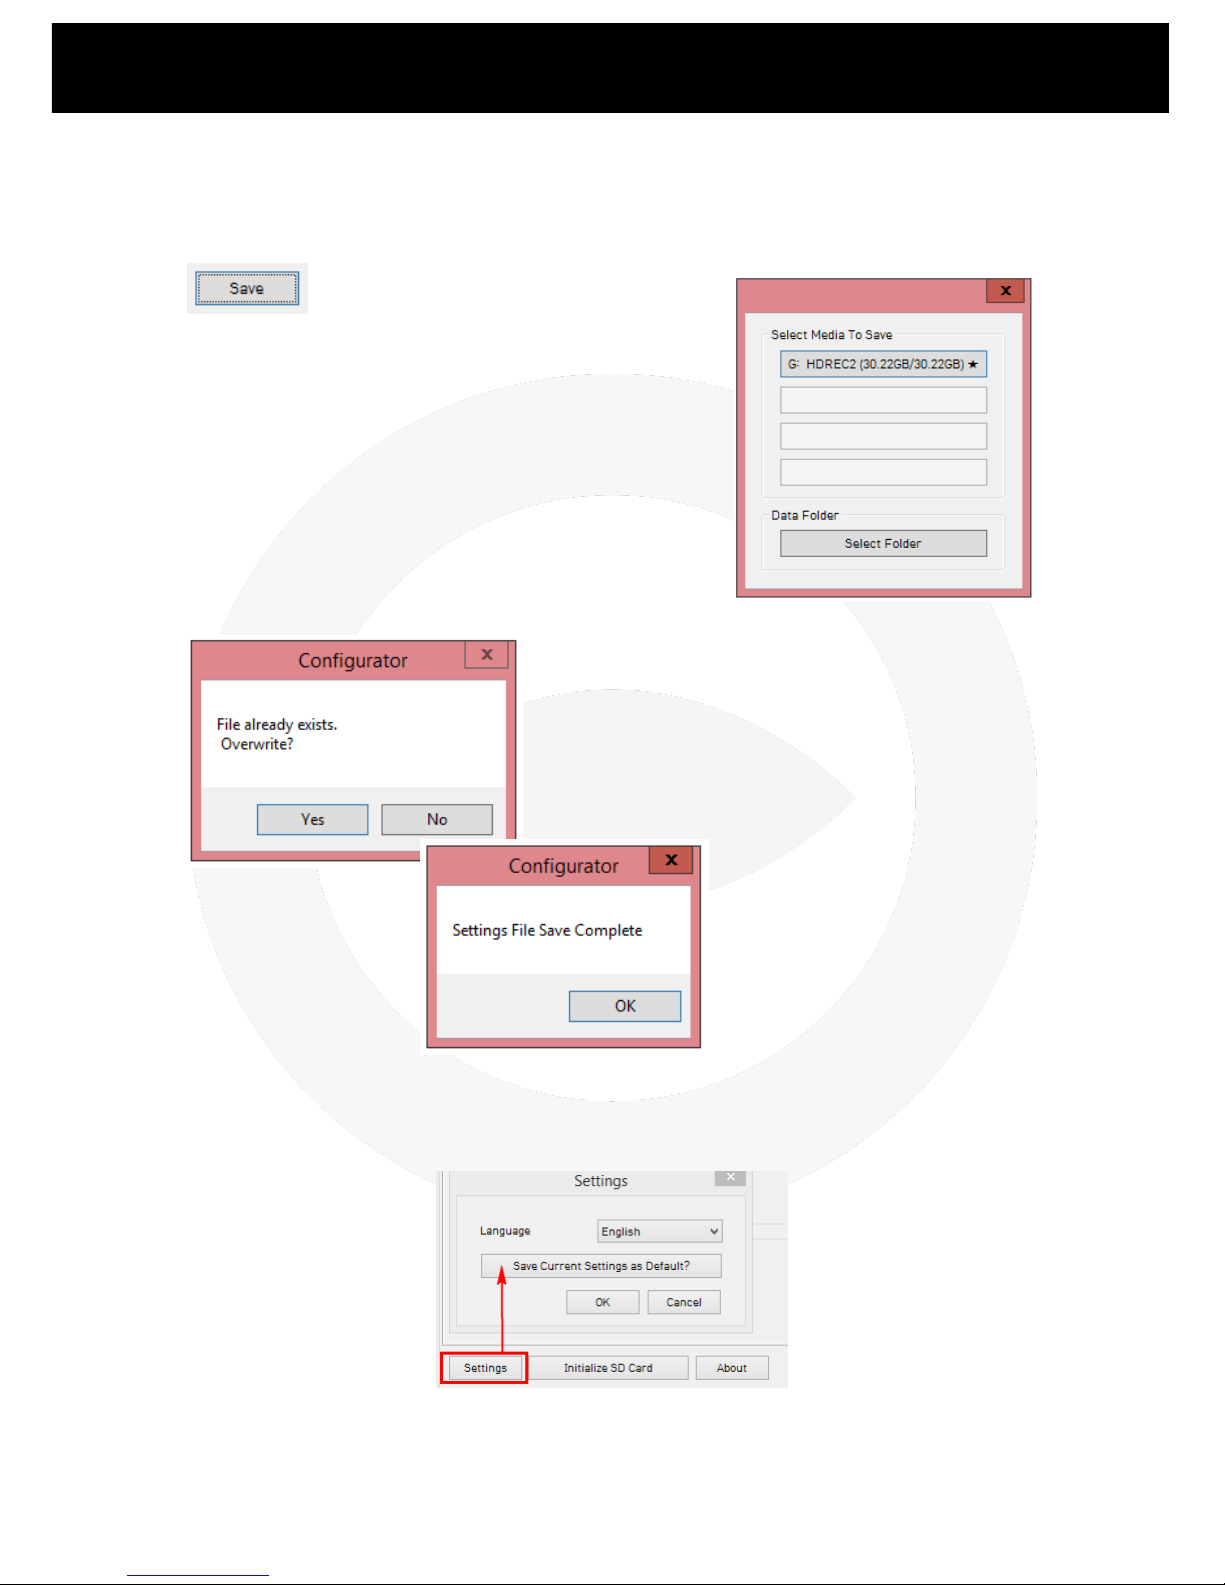
1.5. Save settings
Once you have configured the unit you can then save the settings to the SD card.
1. To do this first click the Save button at the bottom of the Configuration Tool.
2. You will then have the option to select the Media to Save to,
click on your SD card drive (it should be labelled as HDREC2).
3. Once selected it will prompt you to overwrite the
existing config file on the unit, you can click Yes to confirm
this.
4. After a few seconds you will receive a message showing
that the file has been saved to the SD card.
You can save your settings as the default settings for the Configuration Tool, so when you close and
reopen the software, your settings will always remain. To do so, click “Settings” in the bottom left
corner, Click “Save Current Settings as Default”, then when prompted click “Yes” to confirm.
20
www.smartwitness.com/usa
1.6. SD Card #2
If you are using a second card you will need to initialize it before proceeding with the next step. You
can follow the same steps on page 7, section 1.3 EXCEPT YOU MUST UNCHECK “MASTER SD CARD”
2. KP1 Unit
2.1. Hardware Installation
Apply both pieces of provided 3M adhesive to the mounting bracket and press firmly to adhere.
Clean the windshield with alcohol and make sure it is dry. Then remove the red 3M paper from the
adhesive and press firmly and hold on the windshield for about 20 seconds.
*NOTE: adhesive cures best went installed in moderate temperature environment. Not
recommended to install in cold weather.
Other manuals for KP1
2
Table of contents
Other Smart Witness Digital Camera manuals

Smart Witness
Smart Witness AP1 Instruction Manual

Smart Witness
Smart Witness KP1 User manual

Smart Witness
Smart Witness KP1S User manual

Smart Witness
Smart Witness AP1 User manual

Smart Witness
Smart Witness CP Series User manual

Smart Witness
Smart Witness AP1 Instruction Manual

Smart Witness
Smart Witness smart-i User manual


