SmarterHome Universal HD User manual
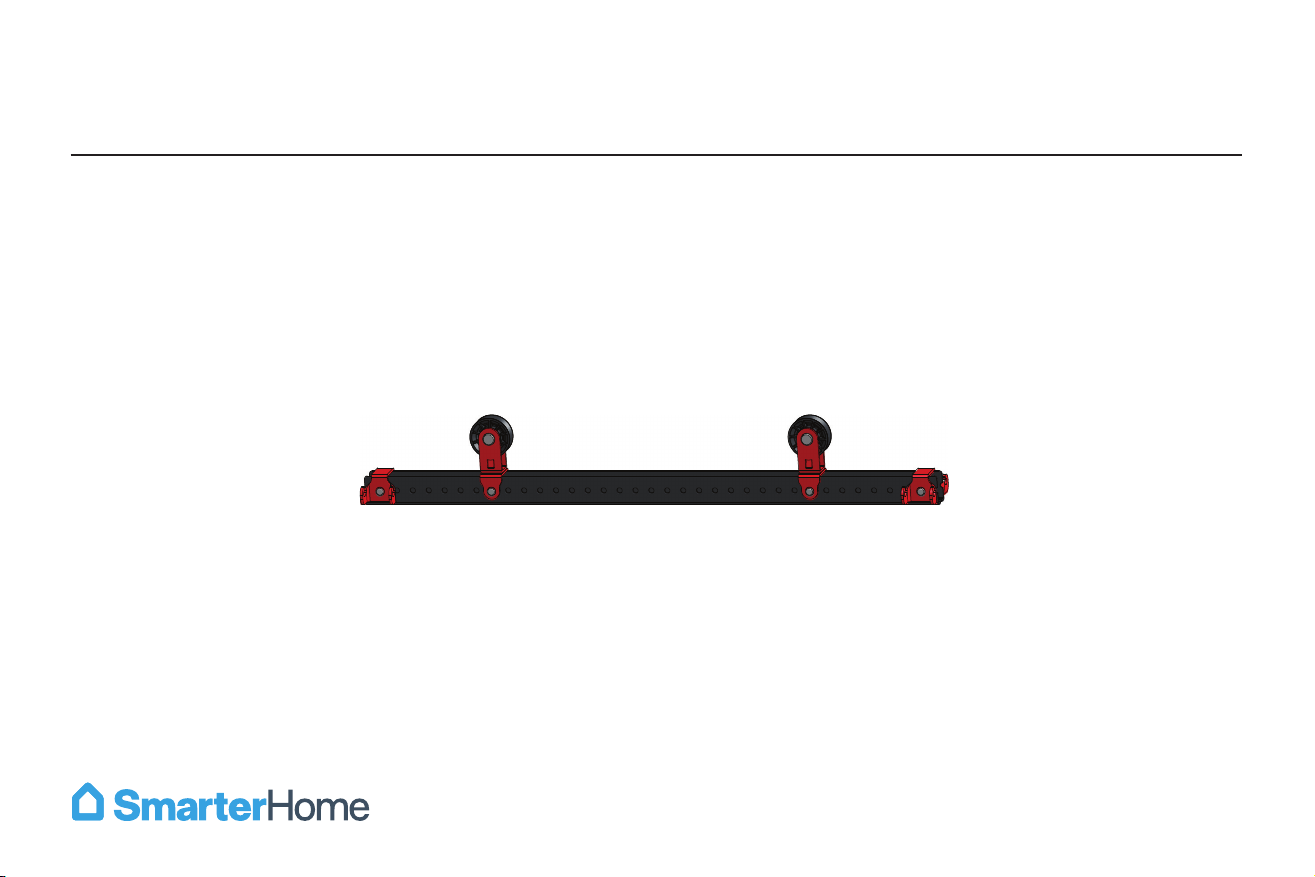
Universal HD
INSTALLATION MANUAL
K0032.01

Safety Overview . . . . . . . . . . . . . . . . . . . . . . . . . . . . . . . . . . . . . . . . . . . . . . . . . . . . . . . . . . . . . . . . . . . . . . . . . . . . . . . . . . . . . . . . . . . . . . . . . . . . . . . . . . . . . . . . . . . . . . . . . . . . . . . . . . . . . . . . . . . . . . . . . . . . . . . . . . 2
MyLifter Safety . . . . . . . . . . . . . . . . . . . . . . . . . . . . . . . . . . . . . . . . . . . . . . . . . . . . . . . . . . . . . . . . . . . . . . . . . . . . . . . . . . . . . . . . . . . . . . . . . . . . . . . . . . . . . . . . . . . . . . . . . . . . . . . . . . . . . . . . . . . . . . . . . . . . . . . . . . . . 3
What’s in the Box . . . . . . . . . . . . . . . . . . . . . . . . . . . . . . . . . . . . . . . . . . . . . . . . . . . . . . . . . . . . . . . . . . . . . . . . . . . . . . . . . . . . . . . . . . . . . . . . . . . . . . . . . . . . . . . . . . . . . . . . . . . . . . . . . . . . . . . . . . . . . . . . . . . . . . . . . 4
Universal HD Installation. . . . . . . . . . . . . . . . . . . . . . . . . . . . . . . . . . . . . . . . . . . . . . . . . . . . . . . . . . . . . . . . . . . . . . . . . . . . . . . . . . . . . . . . . . . . . . . . . . . . . . . . . . . . . . . . . . . . . . . . . . . . . . . . . . . . . . . . . . . . . . . 5
Step 1: Assemble Universal HD Frame . . . . . . . . . . . . . . . . . . . . . . . . . . . . . . . . . . . . . . . . . . . . . . . . . . . . . . . . . . . . . . . . . . . . . . . . . . . . . . . . . . . . . . . . . . . . . . . . . . . . . . . . . . . . . . . 5
Step 2: Install Smart Track . . . . . . . . . . . . . . . . . . . . . . . . . . . . . . . . . . . . . . . . . . . . . . . . . . . . . . . . . . . . . . . . . . . . . . . . . . . . . . . . . . . . . . . . . . . . . . . . . . . . . . . . . . . . . . . . . . . . . . . . . . . . . . . . 6
Step 3: Install MyLifter Hoists . . . . . . . . . . . . . . . . . . . . . . . . . . . . . . . . . . . . . . . . . . . . . . . . . . . . . . . . . . . . . . . . . . . . . . . . . . . . . . . . . . . . . . . . . . . . . . . . . . . . . . . . . . . . . . . . . . . . . . . . . . 10
Step 4: Install Power Adapters and Cable Management Clips. . . . . . . . . . . . . . . . . . . . . . . . . . . . . . . . . . . . . . . . . . . . . . . . . . . . . . . . . . . . . . . . . . . . . . . . . . . . . . 13
Step 5: Attach Universal HD Frame to MyLifters. . . . . . . . . . . . . . . . . . . . . . . . . . . . . . . . . . . . . . . . . . . . . . . . . . . . . . . . . . . . . . . . . . . . . . . . . . . . . . . . . . . . . . . . . . . . . . . . . 16
Table of Contents

1. This is a DO IT YOURSELF project. Read and follow the installation instructions carefully. Failure to follow instructions
could result in property damage, serious injury or death. If you have any questions or concerns about the quality of your
ceiling structure discontinue installation and consult a structural engineer.
2. Do not attempt to install any SmarterHome product or device without a basic understanding of these installation
instructions. If you are not confident locating and anchoring items to ceiling joists do not attempt this installation.
3. Do not exceed the stated weight limits. The weight limit is based on Smart Track and Universal HD rack being anchored to
a wood framed garage. This system is not compatible if your house in constructed using metal studs.
4. Load the Universal HD rack evenly.
Safety Overview
2
WARNING
Universal HD weight lifting capacity = 190 lbs
MyLifter Safety
3
When using the MyLifter and related storage accessories:
• Do NOT use the MyLifter to lift people or animals.
• Do NOT climb or hang on the storage rack.
• Do NOT lift items while hands or other body parts are near the MyLifter device,
lifting cables, storage accessories, etc.
• Do NOT stand under the MyLifter or any items that have been lifted by the MyLifter.
• Do NOT use the MyLifter to lift or lower items over people or animals.
• Do NOT exceed the lifting capacity of the MyLifters.
• Do NOT attempt to install/secure lifters to angled ceilings or walls. MyLifter units
are designed to be secured to flat ceilings only.
• Do NOT install in any manner other than as specified in instructions.
• Do NOT attempt to lift unbalanced loads. Always balance items/loads before lifting.
Inspect the MyLifter Cable(s)
• Inspect the MyLifter cable(s) often/before each use to ensure it is properly seated on the pulley wheel. If the cable is
tangled, damaged, or bent, stop using your MyLifter device immediately.
Avoid Electric Shock
• To avoid risk of electric shock and/or other potential injury DO NOT disassemble or open any SmarterHome device. All
SmarterHome products are designed for indoor use only. Failure to follow these safety instructions could result in
property damage, serious personal injury, or death.

What’s in the Box (Drawings below are not shown to scale)
4
Pulley (x2) Cotter Pins (x4) Clevis Pins (x4) Hook (x2)
10 Foot Lifting Strap (x2)
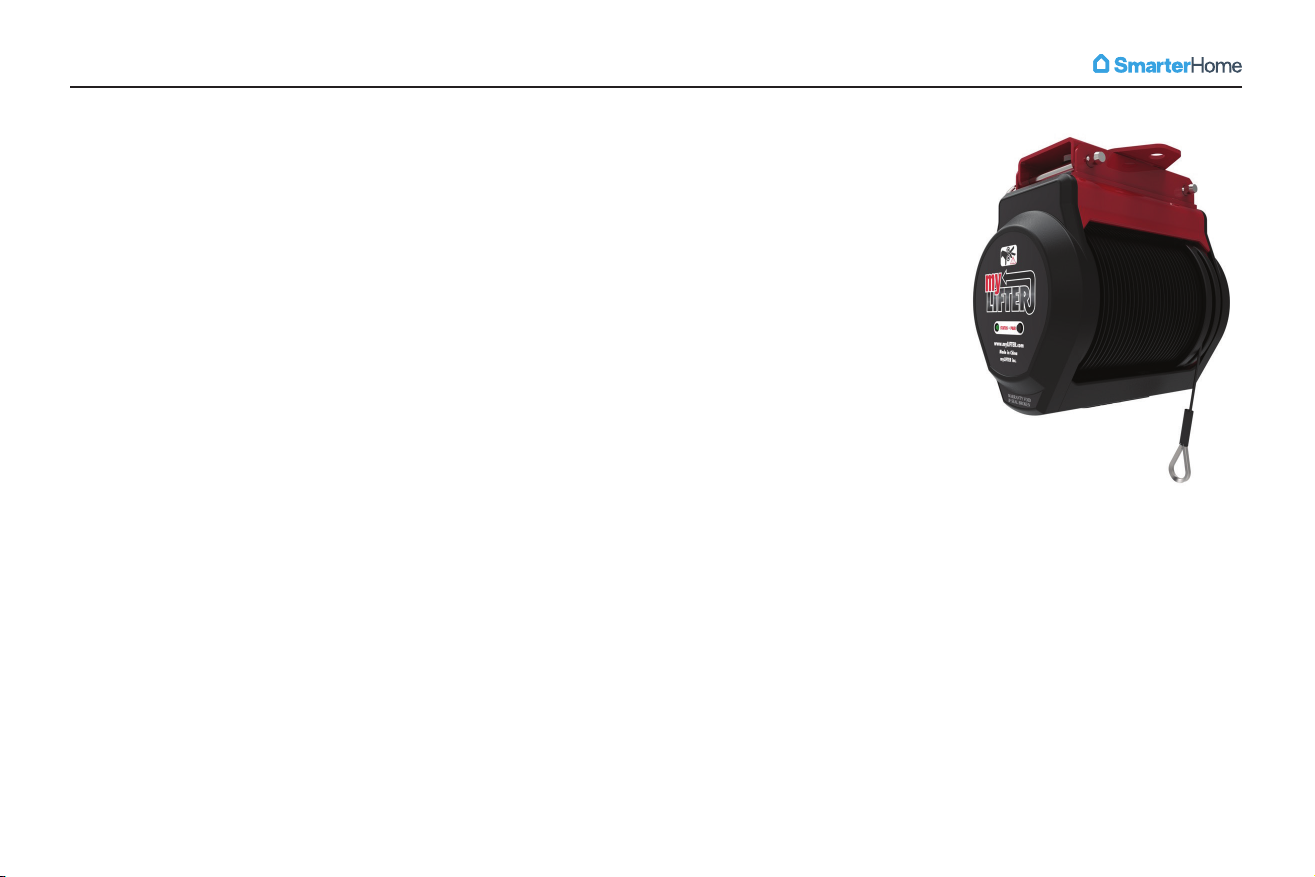
MyLifters (x2) Power Adapters (x2) Smart Track & Hardware (x2)
Modular Frame (x1)
Required Tools (not included)
• Drill
• Ratchet with ½” Socket
• Stud Finder
• Ladder
• Safety Glasses
• Pencil
• Tape Measure
5
Universal HD Installation | Assemble Universal HD Frame
NOTE
NOTE: Make sure the clevis pins are properly seated to ensure the cotter pins stay in place.
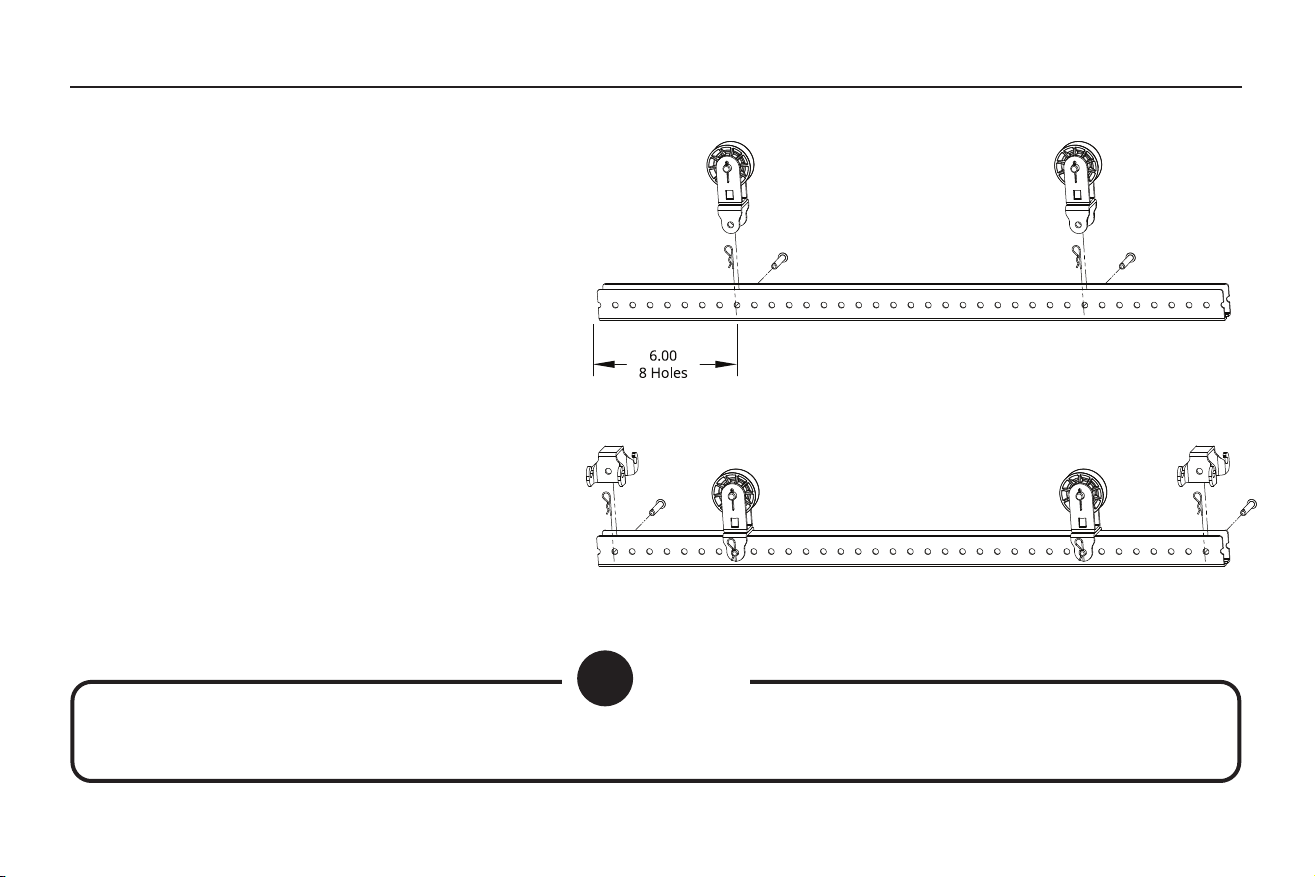
Step 1: Assemble Universal HD Frame
1. Locate the two pulley blocks and the
included cotter and clevis pins.
2. From either end of the frame, count eight
holes in from the end and place a pulley on
the frame and secure it with a cotter and
clevis pin. (fig 1.1)
3. Place the remaining pulley on the opposite
end of the frame by counting eight holes in
from the end of the frame and securing the
pulley in place using the cotter and clevis
pins.
4. Hooks can be placed wherever the are
needed. (fig 1.2)
5. The frame is now fully assembled. Set it
aside for now. In a bit we'll attach it to the
MyLifters. fig 1.2
fig 1.1

6
Universal HD Installation | Smart Track Installation Overview
Step 2: Install Smart Track
• Lag bolts used to secure Smart Track must be centered in ceiling joists.
• If you are not confident locating and anchoring items to ceiling joists do not
attempt this installation.
• Smart Track is designed to be installed with two lag bolts. Load must only be
applied between lag bolts.
• Smart Track is designed to be secured to flat garage ceilings. DO NOT mount
the Smart Track to walls or angled ceilings. Failure to follow instructions
could result in property damage, serious injury, or death.
• If you have any questions or concerns about the quality of your ceiling
structure discontinue installation and consult a structural engineer.
STOP:
Read Before
Continuing

7
Universal HD Installation | Install Smart Track
Step 2: Install Smart Track (cont.)
1. Determine where to install your Universal HD
rack. Be sure to take into consideration garage
doors, overhead lights etc. when choosing
your install location. Keep in mind you’ll also
need access to at least one power outlet to
power the MyLifters.
2. Determine where each Smart Track will need
to be installed. Note that joist direction will
determine how you install Smart Track. (fig 2.1)
3. Use a stud finder to find the ceiling joist that is
nearest to your desired installation location.
4. Mark the left edge of the joist. (fig 2.2)
5. Mark the right edge of the joist. (fig 2.3)
6. Mark the center of the joist. (fig 2.4)
fig 2.2 fig 2.3 fig 2.4
fig 2.1
JOIST DIRECTION
JOIST DIRECTION
Join
Smart Track*
*When spanning joists with multiple Smart Tracks,
use the included red bracket and corresponding
hardeware to join the Smart Track together. A lag
bolt should be used to secure Smart Track to each
ceiling joist the combined Smart Track spans.

8
Universal HD Installation | Install Smart Track
Step 2: Install Smart Track (cont.)
7. Place the Smart Track over the ceiling joist center mark you made and use a
pencil to mark where the lag bolts will be installed so you can drill the pilot
hole. Be sure the marking is along the center of the ceiling joist.
8. Using the included 6mm drill bit, drill the first vertical pilot hole at least three
inches into the center point of the ceiling joist mark that you made.
9. Use a rachet with a 1/2 inch socket to attach the Smart Track to the ceiling
using one of the included lag bolts and washers. Do not completely tighten
the lag bolt at this point. (fig 2.2) NOTE: If the lag bolt turns freely, your pilot
hole is likely not hitting the ceiling joist. If this is the case, find the center of
the stud and drill a new pilot hole.
CAUTION
Do NOT use an impact driver to insert the lag bolts into the stud. This could over tighten the screws causing them
to fail, which may result in property damage, serious personal injury, or death.
fig 2.2
9
Universal HD Installation | Install Smart Track
Step 2: Install Smart Track (cont.)
10. If not already done, repeat steps 4-6 to find the center of the joist where you
will secure the other end of the Smart Track.
11. Similar to the other end of Smart Track, place the Smart Track over the center
mark you've just made for the ceiling joist and use a pencil to mark where the
lag bolt should be installed. Be sure you are installing along the center of the
ceiling joist.
12. Use a rachet with a 1/2 inch socket to attach the Smart Track to the ceiling
using one of the included lag bolts and washers. (fig 2.3) NOTE: If the lag
bolt turns freely, your pilot hole is likely not hitting the ceiling joist. If this is
the case, find the center of the stud and drill a new pilot hole.
13. Tighten both lag bolts so the Smart Track is flush and secure against the
ceiling.
Do NOT use an impact driver to tighten the lag bolts into the stud. This
could over tighten the screws causing them to fail, which may result in
property damage, serious personal injury, or death.
14. Repeat steps 2-14 for each remaining Smart Track that needs to be installed.
CAUTION
Before moving to next step be sure that lag bolts for all Smart Track are tightened, flush and secure against the ceiling.
fig 2.3
10
Universal HD Installation | Install MyLifter Hoists
Step 3: Install MyLifter Hoists
1. Before installing the MyLifters onto the Smart Track, pair to each MyLifter
using the MyLifter app. This is important to ensure you can troubleshoot any
potential connection/pairing issues before installing them.
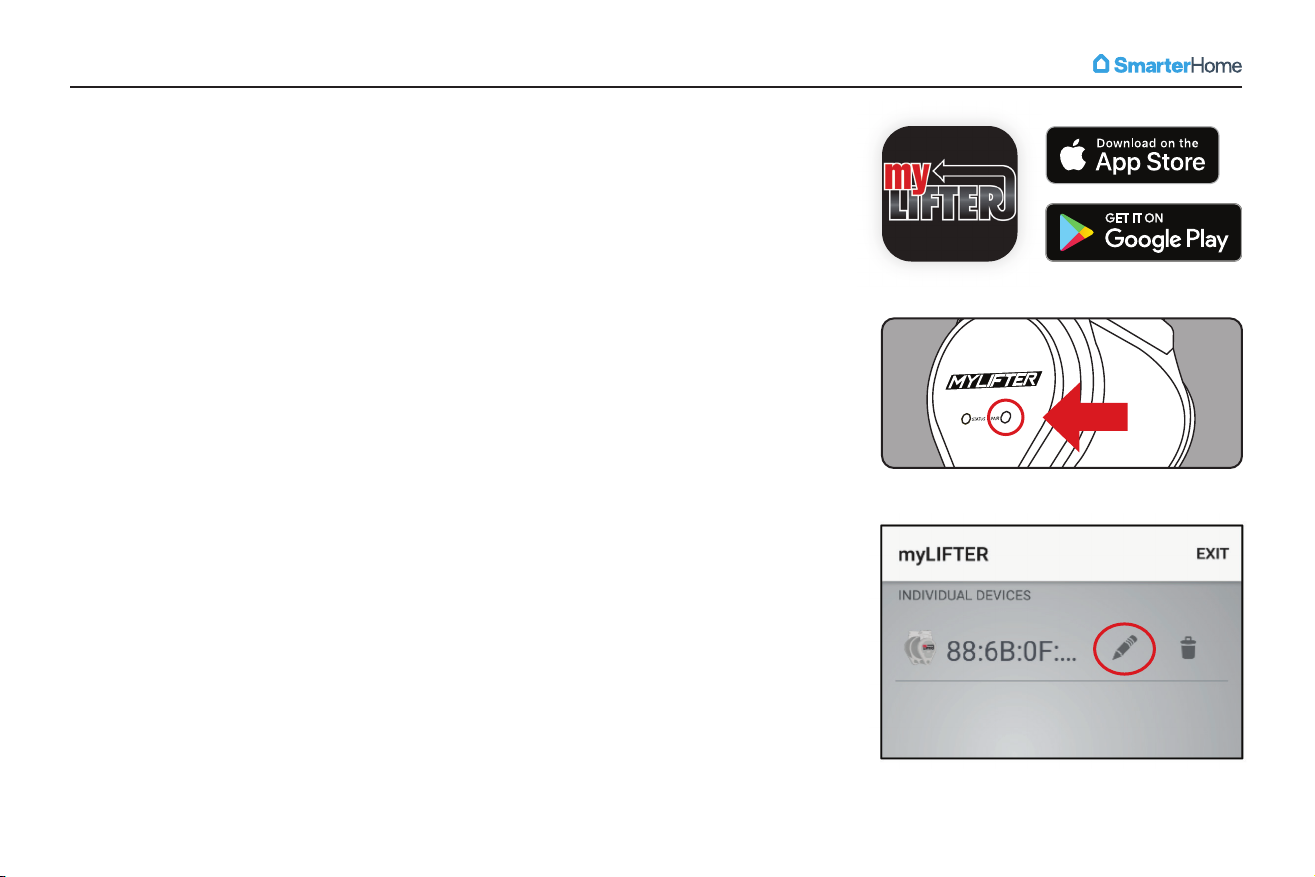
2. Download the MyLifter app from the App Store or Google Play (fig 3.1).
3. Open the app and tap “Add Devices” in the bottom right corner to open the
“Available Lifters” screen.
4. Firmly press the Pair button next to the Status light on the MyLifter. (fig 3.2)
5. When the Status light blinks green, the MyLifter is paired with the app. On
the “Available Lifters” screen, your newly paired MyLifter should be displayed
with its corresponding MAC address as the default name. You can edit the
MyLifter name by tapping “Edit” in the upper right corner. (fig 3.3)
6. Repeat steps 3-5 for all MyLifters that need to be paired.
fig 3.1
fig 3.2
fig 3.3

11
Universal HD Installation | Install MyLifter Hoists
Step 3: Install MyLifter Hoists (cont.)
7. On the home page, click “Create Group” in the bottom left corner.
Choose “Locked Group”.
8. On the “Select Devices” screen, select the MyLifters you just paired to
so they are included in the group and give the group a name, such as
'Universal HD' in the "Name the Group" section. (fig 3.4 and 3.5)
9. Tap “Create Group” at the bottom of the screen and then “Got It” when
the please confirm dialog opens. The “Device Control” screen will open.
10. To level each MyLifter in the group, click each MyLifter one-by-one
(they’re listed at the bottom of the “Device Control” screen) and adjust
the cable length so each MyLifter has the same amount of cable
visible/extending from the cable guide. NOTE: You may have to make
additional adjustments once you’ve attached the Universal HD.
11. Once you’ve leveled each MyLifter, tap “Set Group Level”.
fig 3.5fig 3.4
NOTE
To make further adjustments at a future time, tap the “Help” button
and select “Level Group”. Then tap on the MyLifter you’d like to adjust
and make the necessary adjustments.
8. On the “Select Devices” screen, select the MyLifters you just paired to
9. Tap “Create Group” at the bottom of the screen and then “Got It” when
the please confirm dialog opens. The “Device Control” screen will open.
fig 3.5
fig 3.4

12
Universal HD Installation | Install MyLifter Hoists
Step 3: Install MyLifter Hoists (cont.)
12. Now that you’ve paired to each MyLifter and created a group, the MyLifters
can be installed on the Smart Track.
13. Each MyLifter must be placed on the Smart Track between two lag bolts to
ensure proper support.
14. Distance between the MyLifters on the Smart Track should match the 15”
distance between the two pulleys on the Universal HD frame. This is key to
proper MyLifter operation and ensures the cables will be as vertical as
possible. Failure to follow this guideline can damage the MyLifter. (fig 3.6)
15. To install MyLifters on the Smart Track, align the holes on the MyLifter frame
with the holes on the Smart Track. NOTE: All MyLifters should be installed
with the DC power input end of the MyLifter facing in the same direction.
This is imperative to ensure proper operation of the MyLifter(s). (fig 3.6)
16. Insert the two included quick-release pins through the holes in the MyLifter
frame and the Smart Track. Make sure the pins go all the way through both
sides of the MyLifter frame and Smart Track. Repeat this for each MyLifter
that you are installing.
NOTE
NOTE: Each MyLifter must be installed between two lag bolts and in the same orientation.
fig 3.6
15”
15”
Ensure the DC Power Input is facing
the same direction on all MyLifters.

13
Universal HD Installation | Install Power Adapters and Cable Management Clips
Step 4: Install Power Adapters and Cable Management Clips
1. For each MyLifter you’ve installed on the Smart Track, determine where the
Power Adapter should be installed. The preferred location, if possible, is
adjacent to the MyLifter.
2. Confirm the power cord attached to the Power Adapter will reach a power
outlet and the DC cable will reach from the Power Adapter to the MyLifter.
NOTE: Each Power Adapter is equipped with our patented power
passthrough technology so you can power multiple MyLifters from one power
outlet.
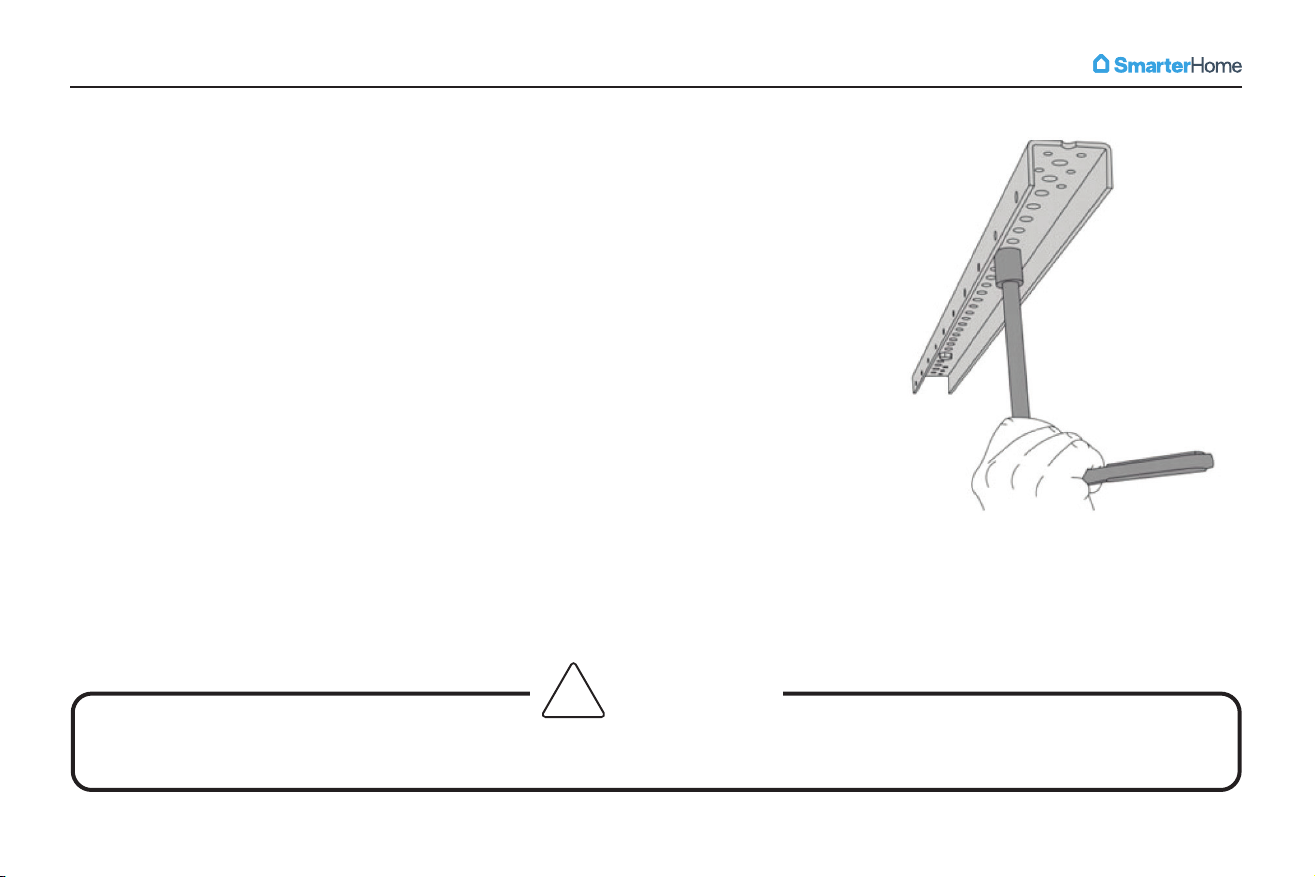
3. Clip the universal mounting bracket, included with the Power Adapter, onto
the Smart Track making sure the plastic nubs snap into place.(fig 4.1)
4. Align the plastic pins on the universal mounting bracket with the holes on the
back of the Power Adapter. Press the Power Adapter onto the pins and slide
to lock it into place. (fig 4.2)
fig 4.1
fig 4.2

Universal HD Installation | Install Power Adapters and Cable Management Clips
Step 4: Install Power Adapters and
Cable Management Clips (cont.)
5. To secure and organize the cables,
determine where to place the cable
management clips.
6. Peel the adhesive backing off a
cable management clip and place it
on the ceiling. Be sure to press
firmly to ensure it sticks. (fig 4.3)
7. Secure the cable management
clip with a screw, place all wires into
the clip, and securely close the clip.
(fig 4.4)
8. Repeat steps 5-7 for additional cable
management clips to secure and
organize cables.
9. You can also organize cables by
winding the excess cable around the
Power Adapter housing or placing
the cable in the channel of the Smart
Track. (fig 4.5)
10. Once you have organized the cables
you can install the gray Smart Track
cable covers. (fig 4.6)
fig 4.4fig 4.3
fig 4.6
fig 4.5
14
15
Universal HD Installation | Install Power Adapters and Cable Management Clips
Step 4: Install Power Adapters and Cable Management Clips (cont.)
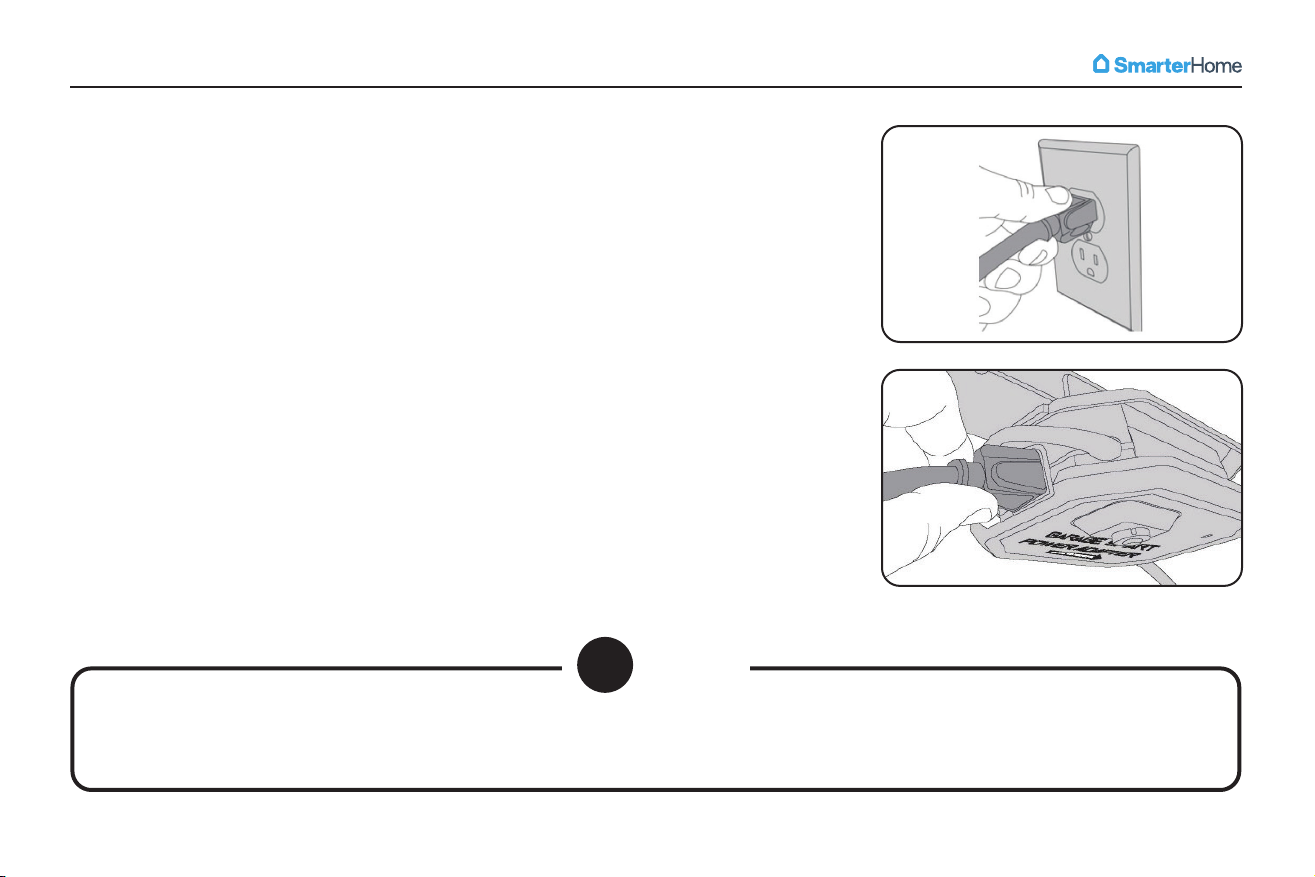
11. Once all Power Adapters have been installed, connect them to the closest
outlet (this may be a wall outlet or the power pass through on another Power
Adapter).
12. The LED on the Power Adapter will glow when powered on.
13. If you haven’t already, connect the DC cable from the Power Adapter to their
corresponding MyLifter.
NOTE
Additional Garage Smart products with AC connections can be powered by connecting
their AC cable to the AC outlet on the Power Adapter.

16
Universal HD Installation | Attach Universal HD to MyLifters
Step 5: Attach Universal HD Frame To MyLifters
1. On the “Device Control” screen, press and hold the Manual Lower arrow to let out enough cable to run through the
pulley block and back up to the Smart Track. (fig 5.1)
2. Run each cable through the pulley block and attach it to the Smart Track using the provided carabiners. Ensure cables
are not twisted. NOTE: The carabiner must be placed in the first hole next to the MyLifter on the end with the DC power
cable. (fig 5.2) Failure to do so can damage the MyLifter.
3. Make sure that the cables are as vertical as possible. Angled cables will damage the MyLifter. (fig 5.2)
4. On the ”Device Control” screen use Manual Lift to adjust the cables and take excessive slack out of the cables without
lifting the Universal HD off the floor. Now set the Smart Low point. (fig 5.1)
5. To make further adjustments and ensure your Universal HD is level, tap the “Help” button and select “Level Group”.
Then tap on the MyLifter you’d like to adjust and make the necessary adjustments.
fig 5.1
DB
A
A
C
C
E
E
A. SET HIGH AND LOW POINTS
Program Smart High and Smart Low
points for safety and convenience.
B. LOAD GAUGE
Indicates the percentage of weight
MyLifter is lifting relative to its
lifting capacity.
C. SMART LIFT AND SMART LOWER
Lift and lower your items to preset
Smart High and Smart Low with
one tap.
D. VARIABLE SPEED CONTROLLER
Press and hold to activate variable
speed slider to lift/lower ensuring
perfect placement of your items.
E. MANUAL LIFT OR LOWER BUTTONS
Press and hold these buttons to
manually lift or lower your items at
full speed.
fig 5.2

17
Universal HD Installation | Attach Universal HD to MyLifters
Step 5: Attach Universal HD To MyLifters (cont.)
6. To attach item(s) to the Universal frame, use the included D-ring lifting straps to secure the item(s) to the frame. Make
sure the item(s) are securely held in place by the straps and cannot slide out.
7. When loading (and during subsequent operation) be sure to arrange the item(s) so the weight is dispersed as evenly as
possible.
8. Your Universal is ready for use. Double check to make sure all D-rings are properly secured to the hooks before lifting.
9. The first time you raise the Universal to the ceiling be sure to set the Smart High point. (fig 5.1 on previous page) This
will keep you from running items into the ceiling. Keep in mind the high point may need to be adjusted if the height of
the items you are storing changes.
10. Review the safety instructions at the beginning of this manual to ensure safe operation of your Universal.
CAUTION
The Universal HD Lifter has a net weight lifting capacity of 190 pounds.
Attempting to lift more weight may cause property damage, serious personal injury, or death.
Table of contents
Other SmarterHome Lifting System manuals


Popular Lifting System manuals by other brands

Challenger Lifts
Challenger Lifts CL16 Series Installation, operation and maintenance manual

biodex
biodex 058-800 Unpacking Instructions and Assembly

Noblelift
Noblelift PTE15-C Instruction handbook

ATH-Heinl
ATH-Heinl ATH 4.35 user manual

stertil-KONI
stertil-KONI Freedomlift SK 2055 Installation and service manual

Audipack
Audipack PCL-M350 manual


OMCN
OMCN 112/A Instructions for use and maintenance / spare parts

HydroHoist
HydroHoist HarborHoist G1.5 owner's manual

Dolphin
Dolphin Poollift Neptune with Transporter Operating and Product Care Instructions

Audipack
Audipack FPL-90E Mounting instructions

Braviisol
Braviisol LUI S.I. 460 manual

morse
morse 515-N-110 Operator's manual