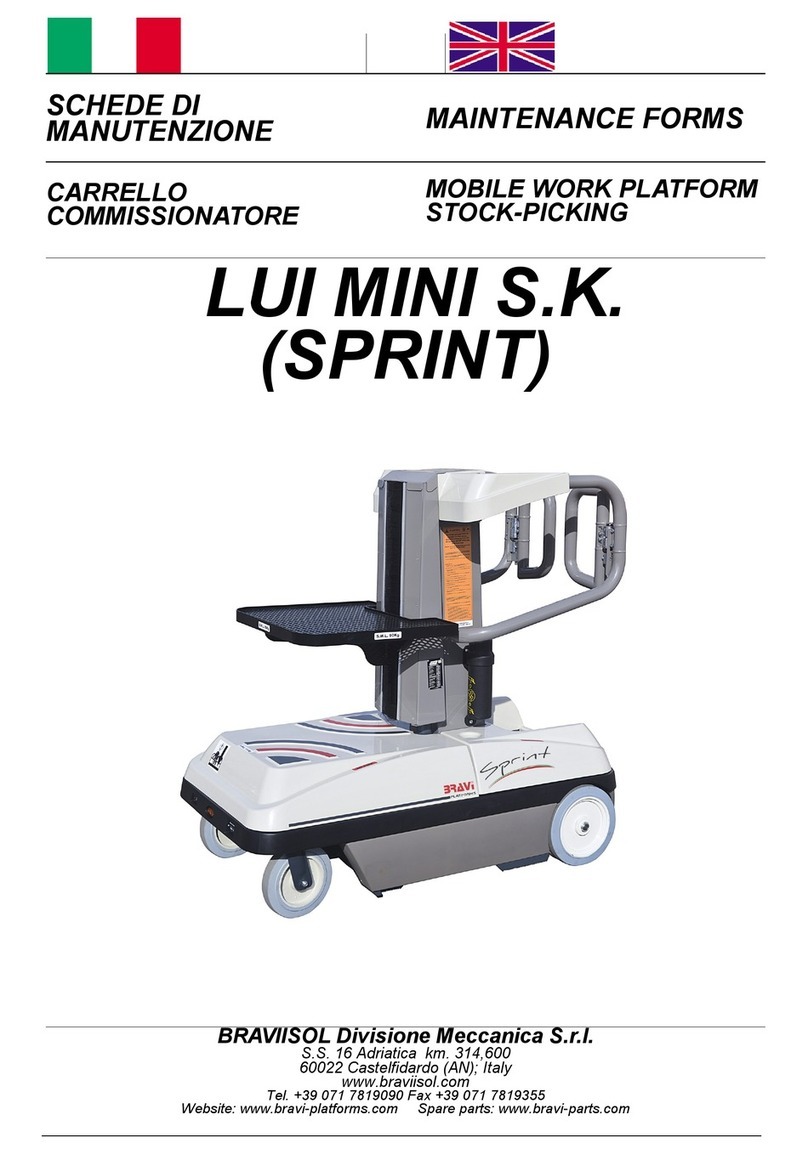
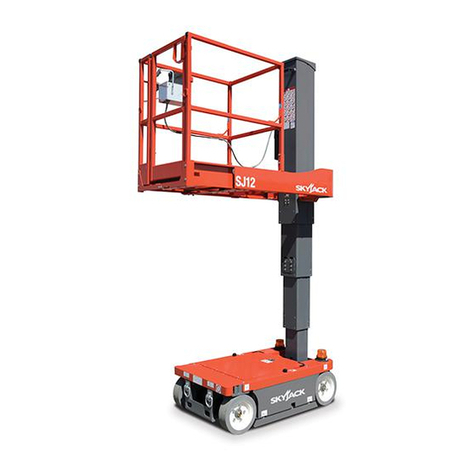
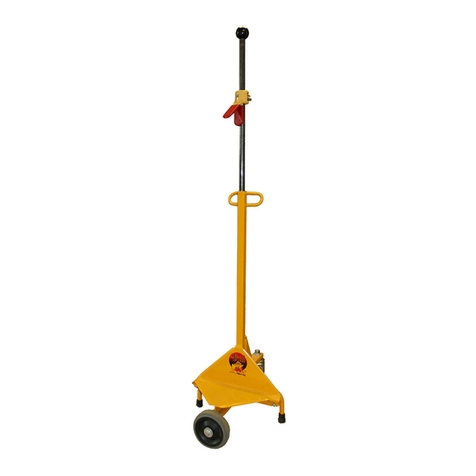
Braviisol LUI S.I. 460 User manual

S.S. 16 Adriatica km. 314,600
60022 Castelfidardo (AN)
Italia
Tel. +39 071 7819090 Fax +39 071 7819355
Website: www.bravi-platforms.com Spare parts:www.bravi-parts.com
12/2021

2
CONTENTS
CONTENUTO
’
’
PAG.
PAGE

3
-
Non iniziare interventi se
il cestello non è sostenuto
dall’asta di sicurezza;
o in caso di malfunzionamento
dell’asta di sicurezza;
da un altro sostegno alto
almeno 1 metro.
Assicurarsi di staccare la
spina dalla presa di corrente.
Con la leva di emergenza
abbassare il cestello fino a
circa 1 metro e 30 centimetri
Liberare l’asta di emergenza
e guidarla a battuta sul telaio
interno
La predisposizione alla
manutenzione è terminata.
-
Do not initiate interventions if the
basket is not supported by the
safety shaft. If the safety shaft is
not functioning properly,
use another support that is at
least 1 meter high.
Be sure to remove the charging
plug from the socket.
Use the emergency lever to lower
the basket to approximately 1 me-
ter 30 centimeters.
Release the emergency bar and
drive it inside the chassis
Once the basket does not lower
any more, the maintenance set up
is over.
A
B

4
-
Assicurarsi di staccare la
spina dalla presa di corrente.
Con l’ausilio di un mezzo di
sollevamento (se carrello a
forche le forche devono
essere lunghe minimo 80
centimetri);
sollevare il cestello.
Liberare l’asta di emergenza
e guidarla a battuta sul telaio
interno
La predisposizione quando
il carrello non si alza è
conclusa.
-
Be sure to remove the charging
plug from the socket.
Using a lifting device (if using a
forklift, the forks must be at least
80 centimeters long),
lift the basket
Release the emergency bar and
drive it inside the chassis
Maintenance set up is over.
A
B
A

5
Con il pannello comandi
(vedere manuale d’uso) o
consultando la scheda 1,
abbassare il cestello in una
posizione comoda di lavoro.
Prima di intervenire sulla
pulsantiera il manutentore
deve:
- Posizionare su “0”
l’interruttore a chiave
- Togliere la chiave di
accensione
- Conservare la chiave di
accensione in tasca.
Smonta il cofano anteriore
svitando le quattro viti M10 in
figura e conservalo per il
riassemblaggio.
Scollegare il cavo di
alimentazione.
Scollegare la pulsantiera dal
connettore del cestello
Using the command panel (see
user manual) or consulting Form
1, lower the basket to a comforta-
ble working position.
Before intervening on the top con-
trol box, the maintenance opera-
tor must:
- Position the
key switch to “0”
- Remove the key from the
ignition
- Place the ignition key
in a pocket
Completely unscrew the four M10
screws in figure, disassemble the
front cover and save it for reas-
sembly.
Unplug the power cord.
Disconnect the top control box
from the basket connector
2.2
2.1
2.4
2.5
2.3

6
Portarla a banco e togliere le
viti laterali. Con l’ausilio dello
schema elettrico e dei disegni
delle parti di ricambio (esplosi)
intervenire secondo necessità
Collegare la pulsantiera al
connettore del cestello
Gli interventi sulla pulsantiera
sono finiti. Ricollega la spina
di alimentazione.
Rimonta il cofano anteriore
con le apposite viti.
Bring it to the workbench and re-
move the side screws. Using an
electric diagram and exploded
views of the spare parts, inter-
vene as necessary.
Connect the top control box to the
basket connector
Interventions on the top control
box are finished. Plug the power
cord.
Screwing the related four screws
reassemble the front cover.
2.6
2.7
2.8
2.9

7
Qualora il cestello sia nella
posizione alta; con il pannello
comandi (vedere manuale
d’uso) o come descritto nella
scheda 1 abbassarlo
totalmente.
Consultare la scheda 2
(Pulsantiera) per estrarre la
pulsantiera.
Con una forbice da elettricisti,
tagliare le fascette di
cablaggio.
Scollegare il cavo spiralato
dal connettore comandi.
Svitare totalmente le quattro
viti M6 della copertura colonna
e conservarle per il
rimontaggio.
.
If the basket is in the high posi-
tion, use the command panel (see
user manual) or the procedure
described in Form 1 to lower it
completely.
Consult Form 2 to remove the
top control box.
Using electrician’s scissors,
remove the strips from the wiring.
Disconnect the spiral cable from
the command connector.
Completely unscrew the four M6
screws on the column cover and
save them for reassembly.
3.1
3.3
3.4
3.5

8
Svitare le quattro viti M16 in
figura per scollegare il cestello
dalla colonna.
Con l’ausilio di un mezzo di
sollevamento (se carrello a
forche le forche devono
essere lunghe minimo 80
centimetri);
con la massima cautela alzare
e togliere il cestello.
Consultare i disegni tecnici
(esplosi) e riparare il cestello
secondo necessità.
Una volta completata la
riparazione; riavvita le quattro
viti che fissano il cestello alla
colonna.
L’intervento sul cestello è
terminato. Rimontare il tutto
seguendo a ritroso (3.9- 3.1)
le operazioni fino a qui viste.
Unscrew the four M16 screws that
connect the basket to the column.
Using a lifting device (if using a
forklift, the forks must be at least
80 centimeters long),
with utmost caution lift and re-
move the basket.
Consult the technical exploded
drawings and repair the basket as
necessary.
Once repairs are completed,
screw the four screws that fix the
basket to the column.
The intervention on the basket is
finished. Reassemble following
the instructions in reverse de-
scribed in 3.9 to 3.1.
3.6
3.7
3.9

9
Munirsi di:
- dei robusti cavalletti per
sostenere il carrello
- una pompetta aspirazione
olio
- un contenitore di olio con
capacità minima di 10 litri
Comportarsi come descritto
nella scheda 3 per togliere
il cestello.
Togliere le otto viti M5 alla
base della colonna e
rimuovere le protezioni
colonna e conservare il tutto
per il riassemblaggio.
Togliere la vite centrale M10
del coperchio superiore del
telaio e rimuovere e
conservarlo per il
riassemblaggio.
Necessary items:
– robust stands for
supporting the basket
– an oil suction
pump
– an oil container with
10 liters minimum capacity
Proceed as described in Form 3
to remove the basket.
Remove the eight M5 screws at
the base of the column and re-
move the protections of the col-
umn and save them for reassem-
bly.
Remove the middle M10 screw at
the top of the upper cover of the
chassis and save it for reassem-
bly.
4.1
4.4
BC
4.2
4.3
4.4

10
Con un mezzo di
sollevamento (se carrello a
forche, le forche devono
essere lunghe minimo
80 centimetri) sollevare e
posizionare il carrello sui due
robusti cavalletti (A).
Posizionare il contenitore di
olio (C) sotto il cilindro.
Togliere il dado e conservalo
per il riassemblaggio.
Rimuovere le 8 viti sotto la
colonna e conservarli per il
riassemblaggio.
Usando la massima cautela
imbracare e sollevare la
colonna. Portarla a banco o
sostituirla e/o consultando i
disegni tecnici riparare la
colonna.
Rimontare il tutto seguendo a
ritroso (4.8– 4.1) le operazioni
fino a qui viste.
Terminare il tutto con lo
spurgo dell’impianto idraulico.
4
Using a lifting device (if using a
forklift, the forks must be at least
80 centimeters long), lift and posi-
tion the basket onto the two
stands (A).
Place the oil container (C)
under the cylinder.
Remove the nut of the oil tube
and save it for reassembly.
Remove the 8 screws at the bot-
tom of the column and save them
for reassembly.
With utmost caution brace and lift
the column. Bring it to the work-
bench or replace it and/or consult
the technical drawings to repair
the column. Reassemble follow-
ing the instructions in reverse
described in 4.8 to 4.1. The pro-
cedure is finished once the oil
bleed is operated.
4.5
4.6
4.7
4.8
4.9

11
Consultare e comportarsi
come descritto nella scheda 4
fino all’azione 4.9 colonna a
banco.
Togliere il collarino superiore
evidenziato in figura 5.2
svitando tutte le apposite viti.
Rimuovere la piastra, il perno
e le due molle a tazza che
avvolgono il cilindro e
conservarle per il
riassemblaggio.
Spingere il corpo colonna fino
a che le viti di fissaggio
piastra/tappo siano visibili.
Svitare le 4 viti e togliere la
piastra/tappo della colonna più
interna e l’anello Seeger.
Spingere il corpo colonna
interno fino a che le viti di
fissaggio piastra/tappo siano
visibili e svitare e rimuovere la
piastra/tappo e l’anello
Seeger.
Con cautela spingere il cilindro
fino a che esca dalla parte
opposta quel tanto sufficiente
per afferrarlo con le mani.
Follow the instructions provided in
Form 4 up to step 4.9 with the col-
umn on the workbench.
Remove the upper collar high-
lighted in the figure 5.2 unscrew-
ing the related screws.
Remove the plate, the pivot and
the two Belleville washers that
wrap the cylinder and keep them
for reassembly.
Push the column body until the
fixing plate/top screws are visible.
Completely unscrew the 4 screws
and remove the plate/top from the
inner column and the Seeger ring.
Push the intern column body until
the fixing plate/top screws are vis-
ible and remove the plate and the
Seeger ring from the column.
Using caution, push the cylinder
until it comes out of the opposite
end enough to be able to hold it in
your hands.
5.2
5.3
5.5
5.6
5.7

12
Sostituire il cilindro con uno
nuovo e inviare il cilindro
difettoso in Braviisol.
Per rimontare il cilindro e
la colonna eseguire a ritroso
le operazioni fino a qui viste
(5.8 - 5.1).
Per rimontare la colonna
sul carrello consultare
la scheda 4.
Gli interventi sul cilindro sono
terminati.
Procedere alla Scheda 6
per lo spurgo dell’impianto
idraulico
Replace the cylinder with a new
one and send the defective cylin-
der to Braviisol.
To reassemble the cylinder and
the column, follow the indications
described in points 5.8 to 5.1.
To reassemble the column
onto the machine, consult
Form 4.
Interventions on the cylinder are
finished.
Check the Form 6 for the hydrau-
lic system bleed.

13
’
Per lo spurgo dell’olio bisogna:
Munirsi di occhiali protettivi,
una piccola pompa di
aspirazione olio (B) e una
chiave a brugola da 5
Contemporaneamente
aspirare con la pompa l’olio,
e … allentare leggermente la
vite (situata sopra il cilindro)
fino a che non esce più aria
mista ad olio ma solo olio.
Quando esce solo olio lo
spurgo è completato.
Pulire l’eventuale fuoriuscita
dell’olio.
Non disperdere l’olio
nell’ambiente ma rivolgersi
alle agenzie specializzate.
Con il cestello abbassato,
mettere l’olio a livello (come
descritto sul manuale d’uso).
Sempre seguendo il manuale
d’uso:
- riavviare la macchina
- Alzare il cestello fino al limite
massimo
- Abbassare il cestello
- Rialzare il cestello di 2/3
centimetri
- Quindi rifare lo spurgo come
descritto al punto 6.1
Gli interventi sui motori/pompa
olio sono terminati.
To bleed the oil, it is necessary to:
Use a safety glasses, a small suc-
tion pump (B) and a number 5
Allen wrench.
Simultaneously suction with the
oil pump, and slightly loosen the
screws (located above the cylin-
der) until no more air comes out,
but only oil.
When only oil comes out, the
bleeding is complete.
Clean any oil spills.
Do not dispose of the oil in the
environment, but only through the
services of specialized waste dis-
posal companies.
With the basket lowered, fill the oil
to level (as described in the user
manual).
As indicated in the user manual:
- Restart the machine
- Raise the basket to its
maximum height
- Lower the basket
- Raise the basket again 2/3
centimeters
- Then repeat the oil bleeding
procedure as described in point
6.1.
Interventions on the hydraulic
system are finished.
6.3
6.1

14
If necessary, using the command
panel (see user manual) or con-
sulting Form 1 (1.1), use a lifting
device to lift the basket until it is
supported by the safety bar.
Before intervening the mainte-
nance operator must:
- Position the
key switch to “0”
- Remove the key from the
ignition
- Place the ignition key
in a pocket.
Completely unscrew the four M10
screws in figure, disassemble the
front cover and save it for reas-
sembly.
Unplug the power cord
Unhook and open the battery
drawer .
If the operation is only filling or
density control of liquids, raise the
plastic cover batteries, perform
the operation and close the bat-
tery drawer.
Se necessario, con il pannello
comandi (vedere manuale
d’uso) o consultando la
scheda 1 (1.1) con un mezzo
di sollevamento sollevare il
cestello fino a che è sostenuto
dalla barra di sicurezza.
Prima di intervenire il
manutentore deve:
- Posizionare su “0”
l’interruttore a chiave
- Togliere la chiave di
accensione
- Conservare la chiave di
accensione in tasca.
Smonta il cofano anteriore
svitando le quattro viti M10 in
figura e conservalo per il
riassemblaggio.
Scollegare il cavo di
alimentazione.
Sganciare ed aprire il cassetto
batteria.
Se l’operazione da fare è solo
il rabbocco o il controllo della
densità del liquido basta
alzare i coperchi delle batterie,
intervenire e richiudere il
cassetto batteria
7.2
7.5
7.4
7.3

15
Se le batterie devono essere
sostituite scollegare i morsetti
delle batterie difettose e
sostituitele.
Staccare i capi corda dai
terminali delle batterie da
sostituire.
Sostituire le batterie con
quelle nuove.
Se è il caso, pulire i capicorda
o se sono in cattive condizioni
sostituirli o ripararli.
Eseguire a ritroso le
operazioni fino a qui viste per
rimontare il tutto (7.9 - 7.1).
Non disperdere le batterie
nell’ambiente ma rivolgersi
alle agenzie specializzate.
Gli interventi alle batterie sono
terminati.
If the batteries are defective:
Unhook the ends of the cords
from the clamps of the batteries to
be replaced.
Replace the batteries with new
ones.
If it is necessary, clean the cord
ends, and replace or repair them
if they are in bad condition.
To reassemble, follow the instruc-
tions in reverse described in 7.9
to 7.1.
Do not dispose of the batteries in
the environment, but only through
the services of specialized waste
disposal companies.
The interventions on the batteries
are finished.
7.7
7.8

16
’
Non sono consentiti interventi
di riparazione all’interno
dell’unità di controllo.
Se ci sono anomalie all’unità
di controllo bisogna sostituirla
ed inviarla alla Braviisol.
I seguenti interventi possono
essere eseguiti solo da tecnici
elettrici specializzati.
Smonta il cofano anteriore
svitando le quattro viti M10 in
figura e conservalo per il
riassemblaggio.
Scollegare il cavo di
alimentazione.
Scollegare i cavi e svitare le
quattro viti M6 in figura che
fissano le schede elettroniche.
Sostituire ed installare la
nuova unità di controllo.
Consultando lo schema
elettrico ricollegare tutti i cavi.
Eseguire a ritroso le
operazioni fino a qui viste per
rimontare il tutto (8.4 - 8.1).
Repair interventions inside of the
control unit are not allowed.
If there are anomalies in the con-
trol unit, the unit must be re-
placed, and the defective unit
must be sent to Braviisol.
The following interventions can be
performed only by specialized
electric technicians.
Completely unscrew the four M10
screws in figure, disassemble the
front cover and save it for reas-
sembly.
Unplug the power cord
Unplug the cable and unscrew the
four M6 screws in figure of the
control unit. Install the new control
unit. Consulting the electric dia-
gram and connect all the cables.
To reassemble, follow the instruc-
tions in reverse described in 8.4
to 8.1.
8.2
8.3
8.4
V

17
Munirsi di cavalletti (A).
Prima di intervenire il
manutentore deve:
- Posizionare su “0”
l’interruttore a chiave
- Togliere la chiave di
accensione
- Conservare la chiave di
accensione in tasca.
Togliere il cofano posteriore
svitando le quattro viti M10 in
figura.
Se necessario, con il pannello
comandi (vedere manuale
d’uso) o consultando la
scheda 1 (1.1) portare il
cestello in condizione di
sicurezza e cioè sostenuto
dall’asta di sicurezza.
Con un mezzo di
sollevamento (se carrello a
forche, le forche devono
essere lunghe minimo
80 centimetri) sollevare e
posizionare il carrello sui due
robusti cavalletti (A).
Prepare two robust stands (A).
Before intervening the mainte-
nance operator must:
- Position the
key switch to “0”
- Remove the key from the
ignition
- Place the ignition key
in a pocket
Remove the rear cover unscrew-
ing the four M10 screws in figure.
If necessary, using the command
panel (see user manual) or con-
sulting Form 1 (1.1), bring the
basket to a safe position
supported by the safety shaft.
Using a lifting device (if using a
forklift, the forks must be at least
80 centimeters long), lift and posi-
tion the basket onto the two
stands (A).
9.1
9.2
9.4

18
Utilizzando una chiave a
bussola per ghiere filettate
rimuovere la ghiera
autobloccante esterna
Estrarre la ruota dall’albero di
trazione e sostituire con una
nuova
Se l’intervento è concluso
riavvitare una nuova ghiera
autobloccante con una coppia
di serraggio di 140 Nm
Using a ring nut wrench remove
the outside self locking ring nut
Remove the traction wheel and
install the new one
If the intervention is on the trac-
tion wheel use a new self locking
ring nut and tight it at 140 Nm
9.5.1

19
Utilizzando una bussola per
ghiere filettate rimuovere la
ghiera autobloccante interna
Utilizzando una chiave a
brugola per le viti del
cuscinetto, rimuovere i quattro
dadi e relative rondelle dal
riduttore
Prima di rimuovere il riduttore
scollegare i cavi del motore
dall’unità di controllo
Portare il riduttore a banco e
se necessario, cambiare il
riduttore con uno nuovo,
smontando anche il motore e
rimontare il tutto seguendo il
procedimento inverso .
Riavvitare una nuova ghiera
autobloccante con una coppia
di serraggio di 140 Nm
Using a ring nut wrench remove
the inside self locking ring nut
Using an Allen key for the load
bearing Allen screw, with remove
the four nuts and washers from
the gearbox
Before removing the gearbox
disconnect the motor cables from
the control unit
Bring the gearbox to the work
bench and if necessary, replace it
with a new one dismounting also
the motor and then reinstall all,
following the reverse procedure .
Use a new self locking ring nut
and tight it at 140 Nm
9.6.2
9.6.4
9.6.1
9.6.3

20
Liberare il motore dal riduttore.
Con la massima cautela per
non rovinare l’ingranaggio a
denti elicoidali, estrarre il
motore.
Portarsi a banco ed eseguire
gli interventi necessari.
Se l’intervento da fare deve
essere eseguito su altri
;
bisogna proseguire con lo
smontaggio.
- Togliere vite e rondella
- Con l’aiuto di un estrattore
togliere l’ingranaggio a denti
elicoidali.
- Con una pinza estrarre
la linguetta
- Con una mano togliere
la boccola di strisciamento
para-olio.
- Per rimontare (sul motore
nuovo) eseguire a ritroso
le operazioni fino a qui viste.
Remove the motor from the gear
box
Using maximum caution not to
ruin the helical gear, extract the
motor.
Go to the workbench and perform
the necessary interventions.
If the intervention must be per-
formed on other
, it is necessary
to disassemble it.
- Remove the screws and
washers.
- Using an extractor,
remove the helical gear.
- Using a pair of pliers, extract
the key.
- Using one hand, remove
the sliding bush oil retainer.
- To reassemble it ( on the new
motor) follow the instructions in
reverseup to this point.
8.7.2
9.7.1
9.7.2
Table of contents
Other Braviisol Lifting System manuals
Popular Lifting System manuals by other brands
Still
Still LiftRunner B frames Original instructions
Floe
Floe 3800 Assembly instructions
Aqua Creek
Aqua Creek Revolution Deep F-702RLNA-DD-04 manual
Acorn
Acorn Superglide 130 user manual
Lippert Components
Lippert Components Flex Guard Installation and owner's manual
morse
morse 515-N-120 Operator's manual
YATO
YATO YT-55670 manual
EAE
EAE EE-6501V2 Installation, operation, parts and service manual
HYVA
HYVA AMCO VEBA 810MF Original instructions
Nussbaum
Nussbaum SPL 3200 Operating Instruction and Documentation
Ravaglioli
Ravaglioli RAV505 IF manual
Cibes Lift
Cibes Lift A5000 Operating and maintenance instructions
