SmartVent Positive2 User manual

Distributed by Simx Limited
PO Box 14 347, Panmure, Auckland, NZ.
Specifications are subject to change without notice.
PUB1522 2004
Contact: 0800 140 150

User Manual
Your guide to a healthier home
HOME VENTILATION SYSTEMS

Warning
- This appliance is not intended for use by persons (including children) with
reduced physical, sensory or mental capabilities, or lack of experience and
knowledge, unless they have been given supervision or instruction concerning
use of the appliance by a person responsible for their safety.
- Children should be supervised to ensure that they do not play with the appliance.
- Isolate the mains supply before attempting to replace the system’s air filter.

3
SMARTVENT POSITIVE2 SYSTEM
Contents
Find Your Way Around Your Controller ...................................................... 4
How the System Works ........................................................................... 5
Quick Setup Guide .................................................................................. 6
Screens and Navigation
Standby Screen .................................................................................. 8
Home Screen ..................................................................................... 8
Home Screen Icons ............................................................................ 9
Settings............................................................................................. 11
Settings Map ..................................................................................... 12
Scheduler Navigation......................................................................... 14
Ventilation.......................................................................................... 15
Heat Transfer..................................................................................... 17
Tempering Heater .............................................................................. 20
Time-Date Setting ............................................................................. 23
Scheduler Time Setting .....................................................................24
Recycle ............................................................................................. 25
Advanced Settings ............................................................................ 26
Advanced Settings Detail................................................................... 27
Maintenance........................................................................................... 28
Troubleshooting...................................................................................... 29
Error Codes............................................................................................ 31
Glossary ................................................................................................. 32
Technical Specifications.......................................................................... 33

5
The SmartVent Positive2 System
SmartVent Positive2 is a positive pressure system which uses
air taken from the roof cavity to ventilate your home.
System Enhancements1)
Summer Feature
Adds outside air as second air source option so that your
system can provide continued quality ventilation in warmer
months and especially so when the roof cavity air temperature
exceeds that of the outside air.
Heat Transfer
Used to transfer any excess heat from your lounge to your
bedrooms.
Tempering Heaters
Designed for situations where supply air temperatures are too
cool.
When system enhancements are added, your system can offer greater options
in how it operates.
The options can override or influence one another as in the following examples.
Example: When the environment in your home meets your chosen heat transfer
condition the ventilation and tempering heater functions deactivate.
Example: When the system is ventilating and conditions are met for the heater
to turn on, the speed of the fan will be influenced by the heater function.
1) For more information about SmartVent system enhancements, contact 0800 140 150 or email [email protected]
How the System Works
Some features covered in this instruction manual are only available when
installed and activated. Contact SmartVent for more information if you are
interested in adding additional features to your system.
MENU

6
Quick Setup Guide
1 - Switch On
- Power on the system by pressing POWER .
2 - Set the Clock
- Hold down SETTINGS for 3 seconds until the time flashes.
- Use UP and DOWN to adjust the value and use SELECT to go
to the next parameter.
- Set up the Hour, Minutes, Day of Week, Year, Month then Date. Pressing
SELECT
after setting up Date will save your changes1).
- You can choose to set up the Scheduler Times2) at this point or press
HOME
to exit.
1) Refer to page 23 for more detailed instructions
2) This step is only available if a heat transfer kit or tempering heater is installed
Yellow highlight means
that icon is flashing
MENU

7
Quick Setup Guide (cont’d)
3 - Set Ventilation Mode and Temperature
- Press SETTINGS , then SELECT to enter Ventilation Mode settings.
- Press UP to switch between MAN (Manual)1) or AUTO (Automatic)2)
ventilation modes.
- Choose AUTO and press SELECT .
- Press UP and DOWN to change the desired indoor SET
Temperature3).
- Press SELECT to confirm and save settings.
1) Manual ventilation mode provides individual control of fan speed and air source (see page 16)
2) Auto ventilation mode allows the controller to decide the speed and air source control (see page 15)
3) Your preferred indoor air temperature
MENU

9
Home Screen Icons
System Fan Speed
Ventilation Mode (AUTO/MANUAL)
Air Source Indicator
Heat Transfer Indicator
Tempering Heater Indicator
Recycle Indicator
Home and Power
Settings
Up
Select
Down
SET (Set temperature is shown instead
of the fresh air temperature)
Fresh Air Temperature
Current Room Temperature
Key Lock On
Rental Mode On
COMs (flashes when communicating
with ceiling controller)
ALERT (Error code will appear at the
time slot)
Time (24 hour clock - up to four
scheduled per day)
Scheduler Period and Day
(up to four scheduled per day)
MENUMENU

10
Home Screen Icons (cont’d)
Boost Mode
- From the Home Screen hold down SELECT for 3 seconds and the
system’s fan will boost to Max speed.
- In BOOST mode the time segments will become a count down to the end of
BOOST mode.
- A quick tap of SELECT from the Home Screen will exit BOOST mode.
Key Lock
- Press UP and DOWN for 3 seconds to lock and unlock
ALERT
- Check ERROR CODES section on page 31
MENU

11
Settings
- For further control options, visit the Home Screen and press SETTINGS .
- You can navigate this menu by pressing UP ,DOWN and SELECT .
Note: HEAT TRANSFER and TEMPERING HEATER will not be visible if
these upgrades1) are not installed.
Button Functions in Setting Screens
Discard settings and go back to previous screen
Go back to previous parameter
Go to next parameter. Save changes when pressed on the final
parameter
Navigate settings and adjust parameter value
1) For more information about SmartVent system enhancements, contact 0800 140 150 or email [email protected]
MENUMENU

13
Save Changes
Adjust
Vent Parameters
1) Some settings are only available if the relevant kits are installed and advanced settings have been enabled.
1 From the Home Page press SETTINGS to go to mode settings selection.
2. Press UP or DOWN to choose the mode settings you want to change1).
3. Press SELECT to enter into the chosen mode settings.
4. Use UP and DOWN to change the settings.
5. Press SELECT again to move onto the next setting of the chosen mode1).
6. Press SELECT on final mode setting to save the changes and return to
the Home Page.
7. Press SETTINGS to go back to the previous setting.
8. Press HOME to discard changes and return to the Home Page.
MENU

14
Scheduler Navigation
- You can use the day scheduler with your heat transfer and
heater add-on kits.
- The scheduler has four time breaks shared across both heat transfer and
heater modes.
- Your set mode will start at the indicated period start time and end at the next
period start time.
- The 4th period start time will end at the first period start time on the next day.
- The time breaks are common to both heat transfer and tempering heater if
both system enhancements are installed1).
1st Period Indicator
1st Period Start Time
1st Period Mode
2nd Period Indicator
2nd Period Start Time
2nd Period Mode
Choose Scheduler Mode Choose Scheduler Modes
1) The HEAT TRANSFER function is prioritised over the HEATER function
(ie. HEAT TRANSFER will override HEATER functions if the scheduler
overlaps)
MENU

15
Ventilation
AUTO Mode
- Your SmartVent Positive2 system chooses where to draw air from and at what
speed depending on temperature.
- You select the set temperature you want it to be in the home (i.e. 22°C
(default)) and the system will work on the best air source to achieve your set
temperature1).
- For example, if you set your system to 22°C while the current house
temperature is 20.3°C, the control system measures the temperature of the
incoming air and alters the fan speed to suit. If the temperature of the
incoming air is 22°C or higher it will operate at a high speed to use the free
heat to try and increase the overall house temperature. If the incoming air is
lower than 22°C, the fan speed would decrease to reduce the cooling
effect
2).
1) Your system is not a heating or cooling device, this parameter is set to reduce nuisance over-
heating or over-cooling of your home.
2) Additional features are available when low temperatures are present. See RECYCLE mode, HEAT
TRANSFER and TEMPERING HEATER
MENU

17
Heat Transfer
When HEAT TRANSFER is ON, the fan speed will be low when the lounge
temperature exceeds chosen temperature, and it will gradually speed up as your
lounge gets warmer.
HEAT TRANSFER mode has priority over VENTILATION mode. To
ensure your home stays regularly ventilated, we recommend you use the timer
function to turn HEAT TRANSFER OFF during the day, the middle of the night
and early morning. We also recommend HEAT TRANSFER is set to ON in the
evening.
OFF Mode
When HEAT TRANSFER mode is OFF, the system will operate in
VENTILATION mode.
HEAT
HEAT TRANSFER MODE
MENUMENU

19
Heat Transfer (cont’d)
SCHEDULER Mode
HEAT TRANSFER can be set to work to a schedule, use this function to
make the most of your HEAT TRANSFER feature. We recommend you use
the timer function to turn HEAT TRANSFER OFF during the day, the middle of
the night and early morning. We also recommend HEAT TRANSFER is set to
ON in the evening.
OFF Mode
HEAT TRANSFER is always OFF. System is in VENTILATION mode.
ON Mode
HEAT TRANSFER operates relative to the set temperature (ie. when the
heated room reaches the set temperature, heat transfer will commence1)).
See Scheduler Time Setting section for detail on how to set up the scheduler
times on Page 24.
1) The SmartVent Positive2 wall controller has a built-in thermostat. It must be located in the heat source room to be effective.
MENUMENU
Other manuals for Positive2
1
Table of contents
Other SmartVent Fan manuals
SmartVent
SmartVent positive+ User manual
SmartVent
SmartVent SYN1015AD User manual
SmartVent
SmartVent synergy3 SYN1015AD User manual
SmartVent
SmartVent SV02AD User manual
SmartVent
SmartVent Positive2 User manual
SmartVent
SmartVent Lite+ User manual
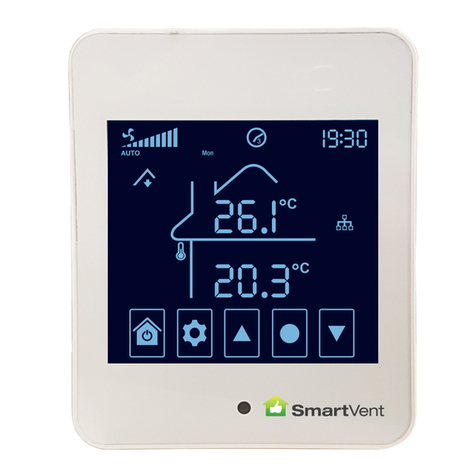
SmartVent
SmartVent POSITIVE Series User manual
SmartVent
SmartVent Synergy2 SYN190E2 User manual
Popular Fan manuals by other brands
Fanimation
Fanimation Kubix FP4420 Series Specification sheet

Carrier
Carrier Idrofan 42NL Installation, Operating and Maintenance Instruction
Daikin
Daikin BYCQ140E2P installation manual
Daikin
Daikin Sky Air Advance Series Installer's reference guide

Fakir
Fakir THYRA user manual
TJERNLUND
TJERNLUND IN-FORCER PAI-3 manual


