SmartVent SV02AD User manual

Your guide to a healthier home
HOME VENTILATION SYSTEMS
SV02AD
SV04AD
SV06AD
User Manual

Warning
- This appliance is not intended for use by persons (including children) with
reduced physical, sensory or mental capabilities, or lack of experience and
knowledge, unless they have been given supervision or instruction concerning
use of the appliance by a person responsible for their safety.
- Children should be supervised to ensure that they do not play with the appliance.
- Isolate the mains supply before attempting to replace the system’s air filter.

3
Contents
How the System Works ........................................................................... 4
App Control and WiFi Connect ................................................................. 5
Quick Setup Guide .................................................................................. 6
Screens and Navigation ........................................................................... 9
Standby Screen ................................................................................ 11
Home Screen ................................................................................... 11
Home Screen Icons .......................................................................... 12
Settings ............................................................................................ 14
Time-Date ......................................................................................... 15
Filter .................................................................................................. 16
General Settings................................................................................ 17
Settings Interface............................................................................... 19
Ventilation.......................................................................................... 20
Heat Transfer..................................................................................... 23
Tempering Heater .............................................................................. 26
Recycle ............................................................................................. 29
Maintenance........................................................................................... 30
Filters ................................................................................................ 30
Replace Sensor Battery..................................................................... 31
Troubleshooting...................................................................................... 32
Error Codes............................................................................................ 35
Glossary ................................................................................................. 36
Technical Specifications.......................................................................... 37
SMARTVENT
POSITIVE ADVANCE SYSTEM

4
How the System Works
Some features covered in this instruction manual are only available when
installed and activated. Consult your installer for more information if you are
interested in adding additional features to your system.
The SmartVent Positive Advance System
SmartVent Positive Advance is a positive pressure system which
uses air taken from the roof cavity to ventilate your home.
System Enhancements1)
Summer Feature
Adds outside air as second air source option so that your
system can provide continued quality ventilation in warmer
months and especially so when the roof cavity air temperature
exceeds that of the outside air.
Heat Transfer
Used to transfer any excess heat from your lounge to
your bedrooms.
Tempering Heaters
Designed for situations where supply air temperatures
are too cool.
When system enhancements are added, your system can offer greater options
in how it operates.
The options can override or influence one another as in the following examples.
Example: When the environment in your home meets your chosen heat transfer
condition the ventilation and tempering heater functions deactivate.
Example: When the system is ventilating and conditions are met for the heater
to turn on, the speed of the fan will be influenced by the heater function.
1) For more information about SmartVent system enhancements, contact 0800 140 150 or email enquir[email protected]

5
App Control and WiFi Connect
1. Install the Smart Life App.
Method 1: Download the Smart Life App
from the App Store mobile App Store.
Method 2: Scan the QR code to
download Smart Life App
2. Open Smart Life App, tap the +button to “Add Device”,
then tap the scan button on the top right corner.
3. Put system into Wi-Fi pairing mode by turning the Touch Screen
off and on 3 times (allow at least 2 second between button presses).
When prompted by the App to choose “Blink Quickly” or “Blink Slowly”
choose the corresponding one according to the flashing blue leaf icon
in the house.
Blink Quickly = 2 seconds on, 2 seconds off cycle
Blink Slowly = 4 seconds on, 2 seconds off cycle
Follow the prompt on the App to proceed. Once pairing is successful
the leaf icon will turn Green for 5 seconds before disappearing.
Pairing mode can be exited by either turning the touch screen off,
successful pairing, or waiting 3 minutes.
If pairing with Blink Quickly does not succeed try Blink Slowly by turning
the touch screen off and on 3 times again.

6
Quick Setup Guide
1 - Switch On
- Power on the system by pressing POWER .
2 - Unlock the Touch Screen
- Hold down LOCK for 5 seconds in the bottom left corner of the screen
to unlock .

7
Quick Setup Guide
3 - Set the Clock
- Press SETTINGS on the home screen.
- Select the TIME-DATE icon .
- Scroll and select the current date and time.
- Press SAVE to save your changes.
- Press HOME to return to the home screen.
DATE/TIME SETTINGS
TIME DATE
08 39 APR 201724
09 40 MAY 201825
10 41 JUN 201926

8
Your standard SmartVent Positive Advance ventilation system is now set up and
ready to operate.
For further instruction on how to set up Heat Transfer, go to page 23,
or for Tempering Heater set up, go to page 26.
If your system has a Summer Feature installed your SmartVent Positive Advance
controller will automatically select the best quality air from either the roof cavity,
or the outside.
Quick Setup Guide
4 - Set Ventilation Mode and Temperature
- Press SETTINGS on the home screen.
- Select the VENTILATION icon .
- Select AUTO ventilation mode.
- Press and scroll through the temperature options select your preferred
indoor temperature.
- Press the tick to confirm.
- Press SAVE to save your changes.
- Press HOME to return to the home screen.
VENTILATION HEAT TRANSFER HEATER
VENTILATION MODE
TEMP
MANTIMERAUTO
22°C 22
23
21

9
Screens and Navigation
STANDBY
SETTINGS
HOME
DATE/TIME FILTER GENERAL
VENTILATION HEAT TRANSFER HEATER
SETTINGS

10
1) For more information about SmartVent system enhancements, contact 0800 140 150 or email enquir[email protected]
TIME-DATE
DATE/TIME SETTINGS
TIME DATE
08 39 APR 201724
09 40 MAY 201825
10 41 JUN 201926
VENTILATION
HEAT TRANSFER1)
HEATER1)
USED
FILTER SETTINGS
RESET
55%F7 FILTER
FILTER
GENERAL SETTINGS ADVANCED SETTINGS
CONTACT SMARTVENT
0800 140 150
BRIGHTNESS
AUTO LOCK TIME
TSC V0.9.2
CCB HW V0
CCB FW V0
CCB M V0
AUTO SCREEN LOCK
Screens and Navigation

11
Standby Screen
When your SmartVent Positive Advance controller is first powered on, the
standby screen will be shown. Press the standby icon in the middle of the
screen to turn the system on.
Home Screen
If the screen is locked, press and hold the lock icon for 5 seconds in the
bottom left corner of the screen to unlock.

12
Home Screen Icons
Roof Cavity Temperature
Indoor Temperature
(showing condition of room selected - LOUNGE or BEDROOM)
Indoor Dew Point
(showing condition of room selected - LOUNGE or BEDROOM)
Good Poor
Outdoor Temperature
Room Selection
(tap to select and view either LOUNGE or BEDROOM conditions)
Lock Button
(tap and hold for 5 seconds to lock and unlock)
Ventilation Mode - AUTO
(tap to activate Auto Vent mode)
Ventilation Mode - TIMER
(tap to activate Timer Vent mode)
Ventilation Mode - MANUAL
(tap to activate Manual Vent mode)
Fan Speed
Low Medium High

13
Home Screen Icons
Booster
(tap to boost fan to highest speed for 20 minutes)
Air Source1)
(standard configuration) (Summer Feature required for this option)
Roof Cavity Outside
Heat Transfer1) / Recycle
(Heat Transfer required for this option)
Heat Transfer Heat Transfer Recycle
& Recycle
OFF ON ON
Filter Indicator2)
(check filter settings to see which filter needs to be changed)
Good Change
Operating System
Positive Pressure
Tempering Heater1)
(Tempering Heater required for this option)
ON OFF
Settings Navigation
Standby
1) For more information about SmartVent system enhancements, contact 0800 140 150 or email enquir[email protected]
2) Failing to replace filters when due or installing filters other than genuine SmartVent filter replacements will void the warranty
of your system

14
Settings
For further control options, visit the home screen and press the settings icon .
You can navigate this menu by pressing any of the menu icons.
Note: Heat transfer and Heater icons will not be visible if these upgrades1)
are not installed.
1) For more information about SmartVent system upgrades, contact 0800 140 150 or email enquir[email protected]
DATE/TIME FILTER GENERAL
VENTILATION HEAT TRANSFER HEATER
SETTINGS

15
Time-Date
1 Press SETTINGS on the home screen.
2 Select the TIME-DATE icon .
3 Scroll and select the current time and date.
4 Press SAVE to save your changes.
5 Press HOME to return to the home screen.
Note: Time needs to be manually changed when daylight saving begins
and ends.
DATE/TIME SETTINGS
TIME DATE
08 39 APR 201724
09 40 MAY 201825
10 41 JUN 201926

16
Filter
SmartVent Positive Advance systems are supplied with F7 filter(s). Not changing
filters on time can affect the reliability and life expectancy of the system.
Expected life of F71) filters: 12 Months
1 Turn your system OFF before removing used filters.
2 After replacing a filter, turn on your system and navigate to the FILTER
SETTINGS screen, press the F7 filter RESET icon, and press the Save icon
to reset the filter timer.
Caution: Always install a genuine SmartVent filter to protect your system.
SmartVent cannot guarantee the performance of non-genuine filters and how
they work with our system, therefore use of non-genuine filters voids your
system warranty. If it is not in a green box then it is not a genuine SmartVent
filter.
3 Press Save icon to save changes
USED
FILTER SETTINGS
RESET
55%F7 FILTER
1) See page 30 for other filter options

17
General Settings
SCREEN BRIGHTNESS
Adjust to your preferred level of brightness by sliding to the left or right
AUTO LOCK TIMER
Adjust your preferred timeout setting for your screen by sliding to the left or right
(adjustable from 30 seconds to 10 minutes)
AUTO SCREEN LOCK
Check this box to allow the screen to lock and enter a low power state when the
timeout setting is reached.
Note: When the box is unchecked, the screen will not lock automatically.
GENERAL SETTINGS ADVANCED SETTINGS
CONTACT SMARTVENT
0800 140 150
BRIGHTNESS
AUTO LOCK TIME
TSC V0.9.2
CCB HW V0
CCB FW V0
CCB M V0
AUTO SCREEN LOCK

18
General Settings
AUTO SCREEN OFF
This option is available when the AUTO SCREEN LOCK option is selected.
Check this box to allow the screen to turn black when AUTO SCREEN LOCK
conditions are reached.
GENERAL SETTINGS ADVANCED SETTINGS
CONTACT SMARTVENT
0800 140 150
BRIGHTNESS
AUTO LOCK TIME
TSC V0.9.2
CCB HW V0
CCB FW V0
CCB M V0
AUTO SCREEN LOCK
S1 HW V0
S2 HW V0
S3 HW V0
S4 HW V0
FW V0
FW V0
FW V0
FW V0
AUTO SCREEN OFF

19
VENTILATION HEAT TRANSFER HEATER
VENTILATION MODE
TEMP
MANTIMERAUTO
22°C 22
23
21
Settings Interface
Choose the operating mode
Select a field to modify
Scroll and select your desired option
Press the tick to confirm your selection or cross to cancel
Press return to previous screen icon to the settings screen or,
Press the home icon to return to the home screen
Press save icon to save changes
Note: The Save icon only appears when unsaved changes have been made.

20
VENTILATION HEAT TRANSFER HEATER
VENTILATION MODE
TEMP
MANTIMERAUTO
22°C 22
23
21
Ventilation
AUTO Mode
Your SmartVent Positive Advance system chooses where to draw air from
and at what speed depending on indoor dew point and temperature levels
– in that order.
Your lounge and bedroom moisture levels have the highest priorities in dictating
the fan speed, followed by temperature.
TEMP: This is your preferred indoor temperature.
Press Save icon to save changes
This manual suits for next models
2
Table of contents
Other SmartVent Fan manuals
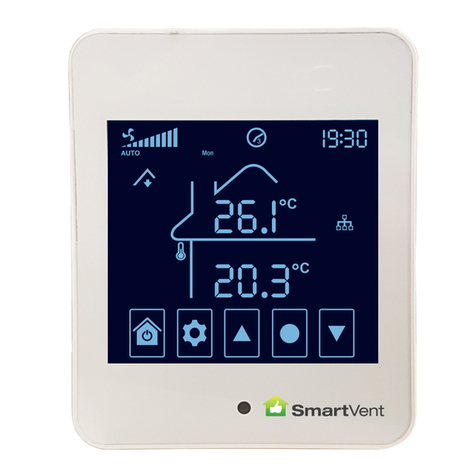
SmartVent
SmartVent POSITIVE Series User manual
SmartVent
SmartVent Positive2 User manual
SmartVent
SmartVent SYN1015AD User manual

SmartVent
SmartVent Positive2 User manual
SmartVent
SmartVent Lite+ User manual
SmartVent
SmartVent synergy3 SYN1015AD User manual
SmartVent
SmartVent Synergy2 SYN190E2 User manual
SmartVent
SmartVent positive+ User manual
Popular Fan manuals by other brands
Fanimation
Fanimation Kubix FP4420 Series Specification sheet

Carrier
Carrier Idrofan 42NL Installation, Operating and Maintenance Instruction
Daikin
Daikin BYCQ140E2P installation manual
Daikin
Daikin Sky Air Advance Series Installer's reference guide

Fakir
Fakir THYRA user manual
TJERNLUND
TJERNLUND IN-FORCER PAI-3 manual


