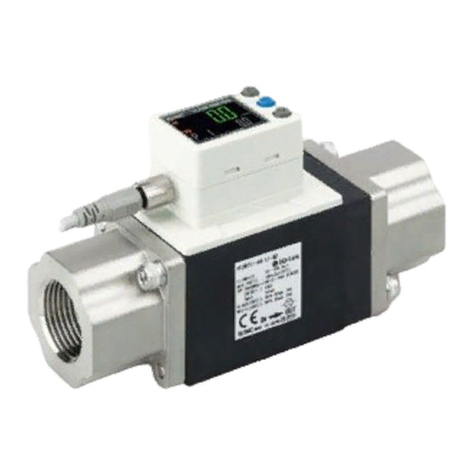
Di ital Flow Switch
Operation Manual
PF2A7 /PF2W7
Installation
•Never mount the product in a location that will be used as a foothold.
•The rotation angle of the monitor is 270o, in steps of 90o. Rotating the display
part with excessive force will damage the end stop.
Bracket
Piping port
(OUT side)
Piping port
(IN side)
Connector
Monitor part
Body
Lead wire and
connector
Item
Installin
•Install the product (with bracket) using the
M4 screws (4 pcs.) supplied.
•Bracket thickness is approximately 1.6 mm
(approximately 2 mm for PF2W711).
Pipin
•
Use the product within the specified operating pressure range and temperature range.
•Proof pressure is 1.0 MPa for air and 1.5 MPa for water.
•Connect the piping to the fittings.
•Mount the product so that the fluid direction is the same as the arrow indicated
on the product.
•Never mount the product for air upside down.
•The piping on the IN side must have a straight section of piping whose length
is 8 times the piping diameter or more.
•Avoid sudden changes in the piping size on the IN side of the product.
•
If the product for water is mounted vertically, let the liquid flow from bottom to top.
In case of the product for water trapped air bubbles can cause errors in
measurement accuracy.
(If the fluid detection path is always filled with liquid, there will be no problem.)
Flow direction
OUT sideIN side
Restrictor
D x 8 times
Port size D
Body
Description
Monitor part See below.
Piping port Connected to the fluid inlet at IN side and to the fluid outlet at OUT side.
Body The body of the product.
Bracket Bracket for mounting the product.
Connector Connector for electrical connections.
ead wire and connector ead wire to supply power and transmit output signals.
U P
DOWN
SET
OUT2OUT1
button (UP)
button (SET)
button (DOWN)
LED display
Indicator LED (OUT1) Indicator LED (OUT2)
Indicator LED (reference condition)
DOWN
SET
U P
Item
Monitor part
Description
Indicator ED (reference condition) Indicates the reference condition selected. ED is ON (Red) when normal
condition is selected. (Only the PF2A7 )
ED display Displays the flow value, setting mode, and error indication.
Indicator ED (OUT1)
Indicates the output status of OUT1. ED is ON (Green) when OUT1 is ON.
The ED flashes when an over current error occurs.
When the accumulated pulse output mode is selected, the indicator ED will turn OFF.
Indicator ED (OUT2)
Indicates the output status of OUT2. ED is ON (Red) when OUT2 is ON.
The ED flashes when an over current error occurs.
When the accumulated pulse output mode is selected, the indicator ED will turn OFF.
button (UP)
Selects the mode or increases the ON/OFF Set value.
button (SET)
Press this button to change to another mode and to set a value.
button (DOWN)
Selects the mode or decreases the ON/OFF Set value.
Connector pin numbers
(On the product)
1DC(+)
2OUT2
3 DC(
-
)
4OUT1
Thank you for purchasing an SMC PF2A7 /PF2W7 Series Digital Flow
Switch.
Please read this manual carefully before operating the product and make sure you
understand its capabilities and limitations.
Please keep this manual handy for future reference.
To obtain more detailed information about operatin this product, please
refer to the SMC website (URL http://www.smcwo rld. com) or contact SMC
directly.
Safety Instructions
These safety instructions are intended to prevent hazardous situations and/or
equipment damage.
These instructions indicate the level of potential hazard with the labels of
"Caution", "Warning" or "Danger". They are all important notes for safety and must
be followed in addition to International standards (ISO/IEC) and other safety
regulations.
CAUTION indicates a hazard with a low level of risk
which, if not avoided, could result in minor or
moderate injury.
Operator
This operation manual is intended for those who have knowledge of machinery
using pneumatic equipment, and have sufficient knowledge of assembly,
operation and maintenance of such equipment. Only those persons are
allowed to perform assembly, operation and maintenance.
Read and understand this operation manual carefully before assembling,
operating or providing maintenance to the product.
Caution:
Warnin :
Dan er:
WARNING indicates a hazard with a medium level of
risk which, if not avoided, could result in death or
serious injury.
DANGER indicates a hazard with a high level of risk
which, if not avoided, will result in death or serious
injury.
Safety Instructions
Do not disassemble, modify (includin chan in the printed circuit board) or repair.
An injury or failure can result.
Do not operate in an atmosphere containin flammable, explosive or corrosive as.
Fire or an explosion can result.
This product is not designed to be explosion proof.
Do not touch the pipin or its connected parts when the fluid is at hi h temperature.
It may lead to burnt.
Ensure the piping cools sufficiently before touching.
Do not use the product for flammable or hi hly permeable fluids.
A fire or explosion can result.
Do not use the product in a place where static electricity is a problem.
Otherwise it can cause failure or malfunction of the system.
If usin the product in an interlockin circuit:
•Provide a double interlockin system, for example a mechanical system
•Check the product re ularly for proper operation
Otherwise malfunction can result, causing an accident.
The followin instructions must be followed durin maintenance:
•Turn off the power supply
•Ensure the flow is shut off before performin maintenance
Otherwise an injury can result.
After maintenance is complete, perform appropriate functional inspections and leak tests.
Stop operation if the equipment does not function properly or there is a leakage of fluid.
When leakage occurs from parts other than the piping, the product might be faulty.
Disconnect the power supply and stop the fluid supply.
Do not apply fluid under leaking conditions.
Safety cannot be assured in the case of unexpected malfunction.
Do not touch the terminals and connectors while the power is on.
Otherwise electric shock, malfunction or damage to the product can result.
Do not operate the product outside of the specifications.
Do not use for flammable or harmful fluids.
Fire, malfunction, or damage to the product can result.
Verify the specifications before use.
Warnin
Caution
Maintenance
How to reset the product after a power cut or forcible de-ener izin
The setting of the product will be retained as it was before a power cut or
de-energizing.
The output condition is also basically recovered to that before a power cut or
de-energizing, but may change depending on the operating environment.
Therefore, check the safety of the whole installation before operating the product.
Summary of Product parts
Mountin and Installation
∗: This drawing is the model of PF2A710/750.
∗: This drawing is the model of PF2A710/750.
∗: This drawing is the model of PF2A710/750.
Refer to the product catalogue or SMC website (UR http://www.smcworld.com)
for more information about mounting hole dimensions.
End stop
position
End stop
position
0°
OUT sideIN side
180°
90°
270°
U P
DOWN
SET
Connectin the pipin
•Ensure that the metal piping attachments are tightened to the required torque
(refer to the table below).
•If the tightening torque is exceeded, the product can be broken. If the
tightening torque is insufficient, the fittings may become loose.
•When connecting piping to the product, a spanner should be used on the
metal piping attachment only. Using a spanner on other parts may damage
the product.
•Avoid any sealing tape from entering inside the piping.
•Ensure that there is no leakage from loose piping.
SETSET SET
SET
SET
SET
SET
U P
U P U P
SET
U P
Display instantaneous flow →← Display accumulated flow
2 sec.
SET
2 sec.
SET
SET
Accumulated
output mode
Accumulated pulse
output mode
Instantaneous
output mode
U P
UP
UP
U P
SET
SET
Output mode (OUT1)
Accumulated
output mode
Accumulated pulse
output mode
Instantaneous
output mode
U P
U PU P
Output mode (OUT2)
Unit selection function ∗1
L/min, L
U P
DOWN
Non-Reverse
output
Reverse
output
U P
SET
SET
Switch operation (OUT2)
Non-Reverse
output
Reverse
output
U P
Normal
condition
Standard
condition
標準状態Reference condition ∗2
2 sec. or longer
U P +
SET
Display
accumulated flow
CFM x 10-2,
CFM x 10-1, ft3x 10-1,
gal(US)/min, gal(US)
Display
instantaneous flow
U P
DOWN DOWN
3sec. or longer
Unlock Lock
SET
3 sec. or longer
SET
SET
SET
∗4
Input the Set value of
instantaneous output
(Auto-preset)
Input the Set value of
accumulated output
Input the Set value of
instantaneous output
Input of the Set point 1
(OUT1)
∗4
Input of the Set point 2
(OUT1)
Input of the Set point 3
(OUT2)
Input of the Set point 4
(OUT2)
Measurement of the
Set value (OUT1)
Set value
Input of the Set value for the
lower 3 digits (OUT1)
Input of the Set value for the
upper 3 digits (OUT1)
Input of the Set value for the
lower 3 digits (OUT2)
Input of the Set value for the
upper 3 digits (OUT2)
SET
SET
Measurement of the
Set value (OUT2)
U P
DOWN
UP
DOWN
U P
DOWN
U P
DOWN
U P
DOWN
UP
DOWN
U P
DOWN
U P
DOWN
Flow
Set value is calculated and set.
SET
SET
Flow
Set value is calculated and set.
SET
SET
Display instantaneous flow →← Display accumulated flow
Display accumulated flow
Accumulated value is reset
Display instantaneous flow
Display upper 3 digits
Indicator LED
U P
SET
SET
Switch operation (OUT1)
SET
UP
Unlock Lock
U P
Measurement mode (Instantaneous flow)
∗: Start the setting here to supply power under the default settings.
SET
Measurement mode (Accumulated flow)
DOWN
Press and
Accumulation stop Accumulation starts
or ∗3
∗4
Set value
Set value
Set value
or ∗3
∗4
Set value
or ∗3
∗4
Set value
Set value
Set value
Set value
Set value
or ∗3
∗4
or ∗3
∗4
or ∗3
∗4
or ∗3
∗4
or ∗3
∗4
Function selection mode
Initialize mode
SET
SET
SET
∗1: Operate only the product with unit selction function (Model indication: without M).
∗2: Operate only the PF2A7 series.
∗3: Depend on the setting of switch operation in initialize mode.
∗4: Displayed in turn.
∗: Accumulation starts and “
-
” flashes.
Key-lock function
Key-lock function
Display mode
List of outputs
Find the diagram of the output you require in the table below. Perform settings
following the Set value column on the right. Characters in ( ) are for OUT2.
Instantaneous flow
Switch output diagram Output mode Switch operation Set value
Instantaneous
output mode
()
Non-Reverse
output
()
Set point 2 Set point 1
()
Hysteresis mode ∗2
Set point 1 Set point 2
()
Window comparator mode
Set point 1 Set point 2
()
Window comparator mode
Reverse output
()
OFF
ON
Hysteresis
P_2
(P_4)
P_1
(P_3)
Instantaneous
flow
OFF
ON
Hysteresis ∗1Hysteresis ∗1
P_1
(P_3)
P_2
(P_4)
Instantaneous
flow
OFF
ON
Hysteresis
n_2
(n_4)
n_1
(n_3)
Instantaneous
flow
OFF
ON
Hysteresis ∗1Hysteresis ∗1
n_1
(n_3)
n_2
(n_4)
Instantaneous
flow
Set point 2 Set point 1
()
Hysteresis mode ∗2
Wirin
•Connections should only be made with the power supply turned off.
•Use separate routes for the product wiring and any power or high voltage
wiring. Otherwise, malfunction may result due to noise.
•Ensure that the FG terminal is connected to ground when using a commercially
available switch-mode power supply. When a switch-mode power supply is
connected to the product, switching noise will be superimposed and the
product specification can no longer be met. This can be prevented by inserting
a noise filter, such as a line noise filter and ferrite core, between the switch-
mode power supply and the product, or by using a series power supply instead
of a switch-mode power supply.
Connectin the wirin
•Align the lead wire connector with the connector key groove, and insert
vertically.
•Connection is complete when the knurled part is fully tightened. Check that
the connection is not loose.
Connector Pin numbers
When the lead wire with connector designated for the PF2A7/PF2W7 is used,
the wire colours will apply as shown in the diagram.
Power is supplied
Outline of settin
Pin number Content
2OUT2
3DC(
-
)
4 OUT1
The output will not operate for 3 seconds after supplying power.
The identification code of the product is displayed.
Measurement mode
The mode in which the flow is detected and displayed,
and the switch function is operating.
This is the basic operating mode;
and other modes should be selected for setting
changes and other function settings.
Initialize mode Function
selection mode Key-lock function
button
press for
2 sec.
1DC(+)
Colour
White
Blue
Black
Brown
Model Width across flats
of attachment
PF2A750
PF2A711
30 mmPF2A721
PF2A751
PF2A710 24 mm
Settin flow chart
Accumulated flow
Accumulated
output mode
()
Non-Reverse
output
()
Upper 3 digits ower 3 digits
+
(
+
)
Upper 3 digits ower 3 digits
+
(
+
)
Reverse output
()
OFF
ON Time
Time
Accumlated flow
1PH+1PL
(2PH+2PL)
OFF
ONTime
Time
Accumlated flow
1nH+1nL
(2nH+2nL)
Accumulated pulse
Accumulated
pulse output
mode
()
No Set value input
No Set value input
Reverse output
()
Flow has exceeded the upper
limit of the display flow range. Reduce the flow.
Error display Error type Troubleshooting method
Error indication
The switch output load current
is more than 80 mA (OUT1). Turn the power off and remove the
cause of the over current.
Then turn the power on again.
The switch output load current
is more than 80 mA (OUT2).
The display flow range of
accumulated flow has been
exceeded.
Accumulated
flow displayed
(flashing)
To reset, press and buttons
simultaneously for 2 seconds or longer.
Then set all data again.
∗: If the error cannot be reset after the above measures are taken, then please contact SMC.
The set data has been changed
unexpectedly.
To reset the accumulated flow value,
press and buttons
simultaneously for 2 seconds or longer.
Key-lock function
This function is used to prevent errors occurring due to unintentional changes of
the Set values.
Excessive
instantaneous flow
Error name
OUT1
over current error
OUT2
over current error
Excessive
accumulated flow
System error
Selection of display mode [
d_1
] Display instantaneous flow
Initialize mode
Item Default settings
Default settin s
The default settings are as follows.
If this condition is acceptable, then keep these settings.
Unit selection function ∗1[
U_1
] /min
Selection of output mode (OUT1) [
o10
] Instantaneous output mode
Selection of output mode (OUT2) [
o20
] Instantaneous output mode
Selection of switch operation (OUT1) [
1_n
] Reverse output
Selection of switch operation (OUT2) [
2_n
] Reverse output
Selection of reference condition ∗2[Anr] Standard condition
∗1: Operate only the product with unit selection function.
∗2: Operate only the PF2A7 series.
[F_1] Input the Set value of
instantaneous output
[n_1] Input of the Set point 1 (OUT1)
Function selection mode
Item ∗
Default settin s
The default settings are as follows.
If this condition is acceptable, then keep these settings.
[n_2] Input of the Set point 2 (OUT1)
[n_3] Input of the Set point 3 (OUT2)
[n_4] Input of the Set point 4 (OUT2)
[F_2] Input the Set value of
instantaneous output
(Auto-preset)
-
[F_3] Input the Set value of
accumulated output
[1n ] Input of the Set value for the lower 3 digits (OUT1)
[
1nH
] Input of the Set value for the upper 3 digits (OUT1)
∗: When Non-Reverse output is selected as the switching operation, n becomes P.
In measurement mode, press the button, to display [F_ ].
This [F_ ] indicates the mode for changing each functional setting.
∗: When OUT1 or OUT2 is assigned to be instantaneous output mode during initialize mode, [F_1] and [F_2] are
displayed.
When OUT1 or OUT2 is assigned to be accumulated output mode, [F_3] is displayed.
50% of max. rated flow
Default setting
50% of max. rated flow
50% of max. rated flow
50% of max. rated flow
-
[ 0]
[ 0]
[2n ] Input of the Set value for the lower 3 digits (OUT2)
[
2nH
] Input of the Set value for the upper 3 digits (OUT2)
[ 0]
[ 0]
Items below can be set.
•Display mode •Unit selection function ∗1
•Output mode (OUT1) •Output mode (OUT2)
•Switch operation (OUT1) •Switch operation (OUT2)
•Reference condition ∗2
PF2W720(T)
PF2W740(T)
30 mm
PF2W711
PF2W704(T)
34 mm
Rc(NPT)1/4
Rc(NPT)1/2
Rc(NPT)1/8
Nominal
thread size
Rc(NPT)3/8
Required
torque
12 to 14 Nm
22 to 24 Nm
28 to 30 Nm
7 to 9 Nm
Specifications / Outline with Dimensions
Refer to the product catalogue or SMC website (UR http://www.smcworld.com) for
more information about the product specifications and outline dimensions.
Note: Specifications are subject to change without prior notice and any obligation on the part of the manufacturer.
© 2011-2014 SMC Corporation All Rights Reserved
Akihabara UDX 15F, 4-14-1, Sotokanda, Chiyoda -ku, Tokyo 101-0021, JAPAN
Phone: +81 3-5207-8249 Fax: +81 3-5298-5362
URL http://www.smcworld.com
Troubleshootin
Non-Reverse
output
()
∗: This drawing is the model of PF2A710/750.
Refer to the SMC website (UR http://www.smcworld.com) for more information
about troubleshooting.
∗1: In window comparator mode, the hysteresis is fixed at 3 digits. When setting, allow 7 digits or more between Set
point 1 and Set point 2 (Set point 3 and Set point 4).
∗2: When Set point 1 = Set point 2 (Set point 3 = Set point 4), chattering may occur.
PF※※-OMN0008-B
