24 25
If the DOMESTIC APPLIANCES are to be INSTALLED IN 60 CM HIGH RECESSES:
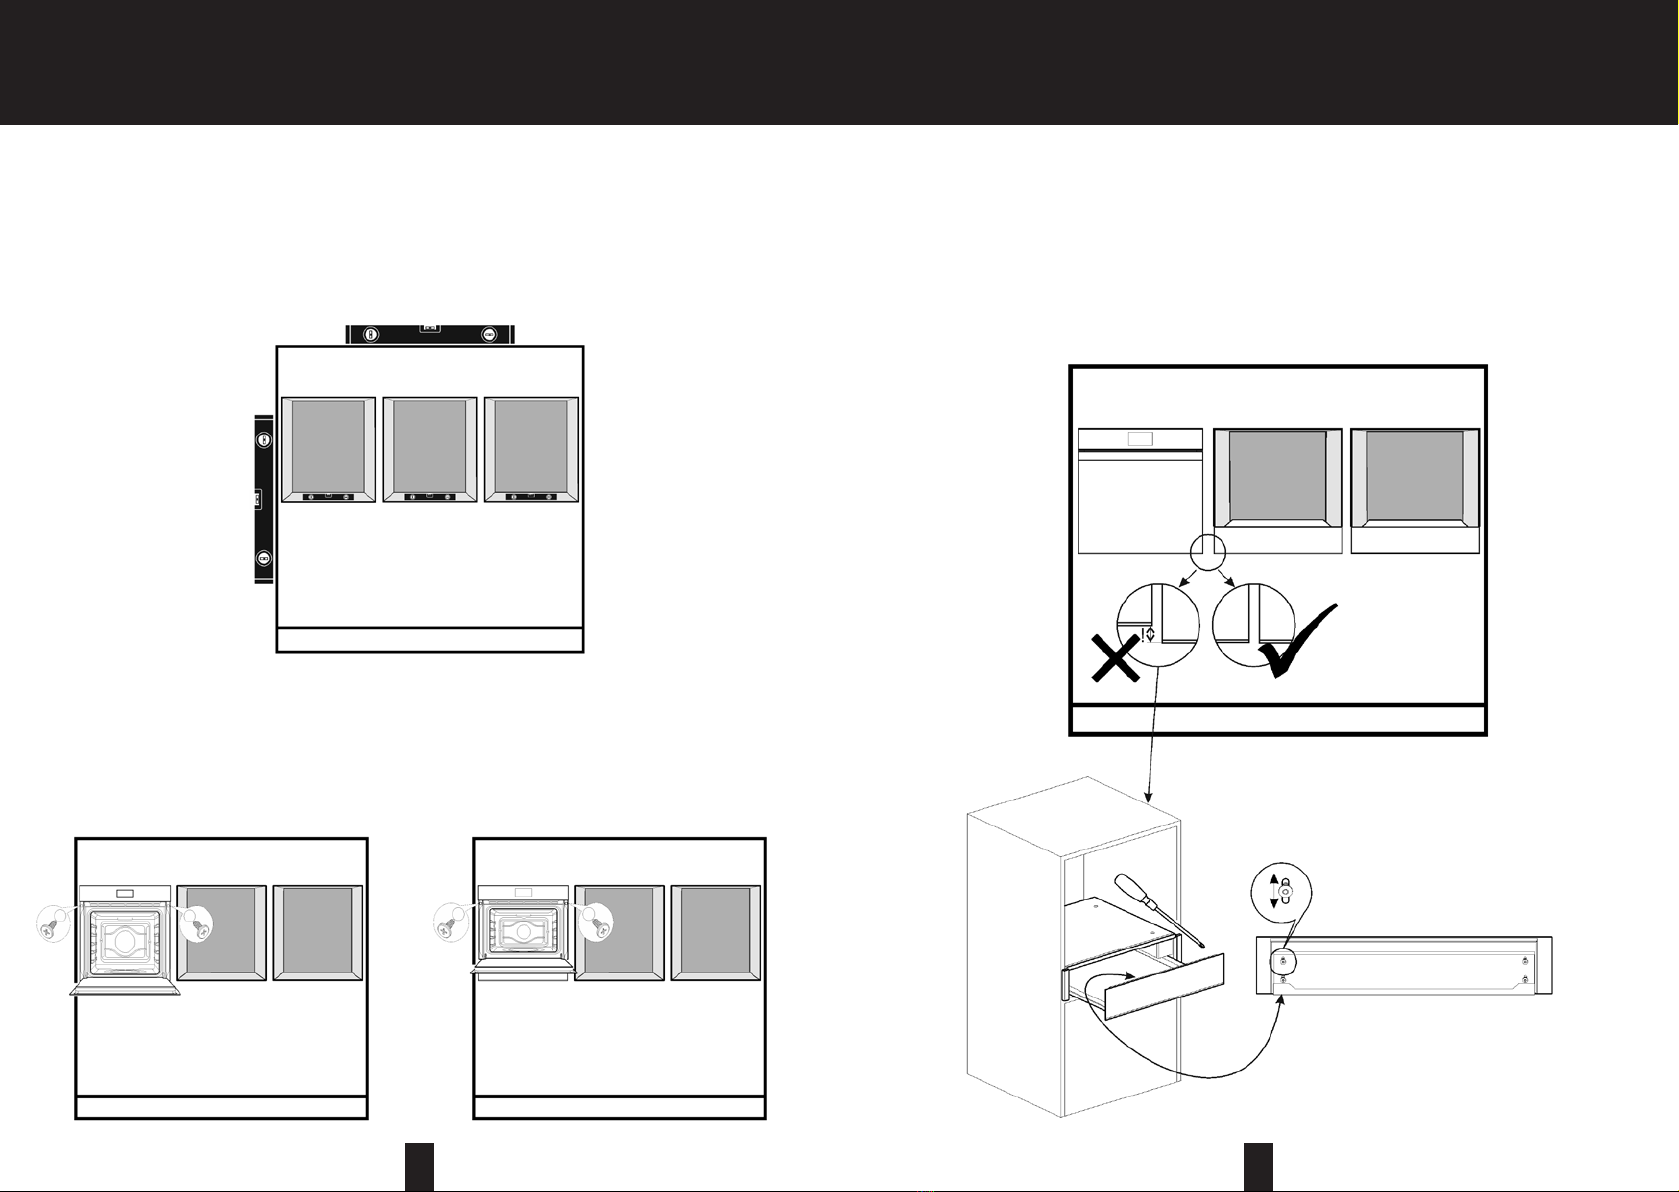
1. Make sure that the unit is squared and level the support bases. (Fig. 1)
2. Make sure that the individual shelves are perfectly horizontal. (Fig. 1)
3. If there is a 60 cm oven in the composition, this should be the rst product to
be inserted, centred and fastened to the unit. (Fig. 2).
4. If there is not a 60 cm oven in the composition, but there is a 45 cm oven
plus a drawer, these should be the rst products to be inserted, centred and
fastened to the unit (Fig. 3).
INSTALLATION - Products in 60 cm high recesses
Fig. 2
Fig. 1
Fig. 3
IMPORTANT
IMPORTANT:
-Insert all the drawers into remaining recesses, level them and align the
lower trims with the lower trim of the 60 cm oven (Fig.4).
-The height of the front glass of the drawer can be regulated by adjusting
the screws (Torx insert screws) inside the drawer (loosen the screws, adjust the
height and retighten the screws). (Fig. 4)
Fig. 4