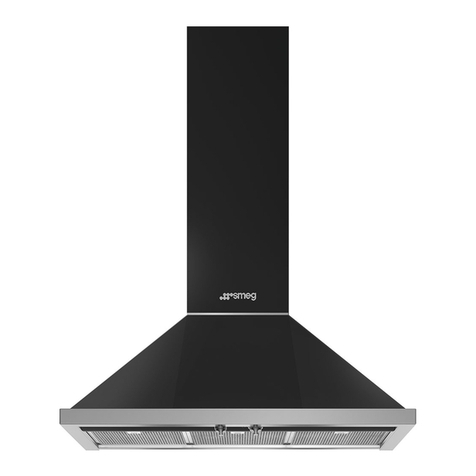
Smeg KD61X2 User manual

Libretto di Istruzioni
Instructions Manual
Manuel d’Instructions
Bedienungsanleitung
Gebruiksaanwijzing
Manual de instrucciones
Manual de Instruções
Руководство по эксплуатации
Brugsvejledning
Bruksanvisning
KD61X2 - KD91X2 - KDC61X2 - KDC91X2

2
2
INDICE
CONSIGLI E SUGGERIMENTI.............................................................................................................................................. 4
AVVERTENZE - COMPONENTI ........................................................................................................................................... 5
INSTALLAZIONE ................................................................................................................................................................... 6
USO - MANUTENZIONE ....................................................................................................................................................... 7
INDEX
RECOMMENDATIONS AND SUGGESTIONS ..................................................................................................................... 8
WARNINGS - COMPONENTS .............................................................................................................................................. 9
INSTALLATION.................................................................................................................................................................... 10
USE - MAINTENANCE ........................................................................................................................................................ 11
SOMMAIRE
CONSEILS ET SUGGESTIONS.......................................................................................................................................... 12
ATTENTION - COMPOSANTS............................................................................................................................................ 13
INSTALLATION.................................................................................................................................................................... 14
UTILISATION - ENTRETIEN ............................................................................................................................................... 15
INHALTSVERZEICHNIS
EMPFEHLUNGEN UND HINWEISE ................................................................................................................................... 16
HINWEIS - KOMPONENTEN .............................................................................................................................................. 17
MONTAGE ........................................................................................................................................................................... 18
BEDIENUNG - WARTUNG................................................................................................................................................. 19
INHOUDSOPGAVE
ADVIEZEN EN SUGGESTIES............................................................................................................................................. 20
AANWIJZINGEN - ONDERDELEN...................................................................................................................................... 21
INSTALLATIE....................................................................................................................................................................... 22
GEBRUIK - ONDERHOUD .................................................................................................................................................. 23
INDICE
CONSEJOS Y SUGERENCIAS........................................................................................................................................... 24
ADVERTENCIAS - COMPONENTES.................................................................................................................................. 25
INSTALACIÓN ..................................................................................................................................................................... 26
USO - MANTENIMIENTO.................................................................................................................................................... 27
ÍNDICE
CONSELHOS E SUGESTÕES............................................................................................................................................ 28
ADVERTÊNCIAS - COMPONENTES.................................................................................................................................. 29
INSTALAÇÃO....................................................................................................................................................................... 30
UTILIZAÇÃO - MANUTENÇÃO........................................................................................................................................... 31
IT
EN
FR
DE
NL
ES
PT

3
3
УКАЗАТЕЛЬ
СОВЕТЫ ИРЕКОМЕНДАЦИИ .......................................................................................................................................... 32
ПРАВИЛА ТЕХНИКИ БЕЗОПАСНОСТИ - ПРИНАДЛЕЖНОСТИ ................................................................................... 33
УСТАНОВКА........................................................................................................................................................................ 34
ЭКСПЛУАТАЦИЯ - ТЕХНИЧЕСКОЕ ОБСЛУЖИВАНИЕ ................................................................................................. 35
INDHOLD
RÅD OG ANVISNINGER ..................................................................................................................................................... 36
VIGTIGE ANVISNINGER - KOMPONENTER..................................................................................................................... 37
INSTALLATION.................................................................................................................................................................... 38
BRUG - VEDLIGEHOLDELSE............................................................................................................................................. 39
INNEHÅLL
REKOMMENDATIONER OCH TIPS................................................................................................................................... 40
VARNINGAR - KOMPONENTER ........................................................................................................................................ 41
INSTALLATION.................................................................................................................................................................... 42
ANVÄNDING - UNDERHÅLL............................................................................................................................................... 43
RU
DK
SE

EN 8
8
RECOMMENDATIONS AND SUGGESTIONS
The Instructions for Use apply to several versions of this appliance. Accordingly, you may find
descriptions of individual features that do not apply to your specific appliance.
INSTALLATION
• The manufacturer will not be held liable for any damages resulting from incorrect or improper
installation.
• The minimum safety distance between the cooker top and the extractor hood is 650 mm (some
models can be installed at a lower height, please refer to the paragraphs on working dimensions
and installation).
• Check that the mains voltage corresponds to that indicated on the rating plate fixed to the inside of
the hood.
• For Class I appliances, check that the domestic power supply guarantees adequate earthing.
Connect the extractor to the exhaust flue through a pipe of minimum diameter 120 mm. The route
of the flue must be as short as possible.
• Do not connect the extractor hood to exhaust ducts carrying combustion fumes (boilers, fireplaces,
etc.).
• If the extractor is used in conjunction with non-electrical appliances (e.g. gas burning appliances), a
sufficient degree of aeration must be guaranteed in the room in order to prevent the backflow of
exhaust gas. The kitchen must have an opening communicating directly with the open air in order
to guarantee the entry of clean air. When the cooker hood is used in conjunction with appliances
supplied with energy other than electric, the negative pressure in the room must not exceed 0,04
mbar to prevent fumes being drawn back into the room by the cooker hood.
• In the event of damage to the power cable, it must be replaced by the manufacturer or by the
technical service department, in order to prevent any risks.
• If the instructions for installation for the gas hob specify a greater distance specified above, this has
to be taken into account. Regulations concerning the discharge of air have to be fulfilled.
USE
• The extractor hood has been designed exclusively for domestic use to eliminate kitchen smells.
• Never use the hood for purposes other than for which it has been designed.
• Never leave high naked flames under the hood when it is in operation.
• Adjust the flame intensity to direct it onto the bottom of the pan only, making sure that it does not
engulf the sides.
• Deep fat fryers must be continuously monitored during use: overheated oil can burst into flames.
• Do not flambè under the range hood; risk of fire
• This appliance is not intended for use by persons (including children) with reduced physical, sen-
sory or mental capabilities, or lack of experience and knowledge, unless they have been given su-
pervision or instruction concerning use of the appliance by a person responsible for their safety.
• Children should be supervised to ensure that they do not play with the appliance.
• “ CAUTION: Accessible parts may become hot when used with cooking appliances.”.
MAINTENANCE
• Switch off or unplug the appliance from the mains supply before carrying out any maintenance
work.
• Clean and/or replace the Filters after the specified time period (Fire hazard).
• Clean the hood using a damp cloth and a neutral liquid detergent.
The symbol on the product or on its packaging indicates that this product may not be treated as household waste. Instead it shall be handed over to the
applicable collection point for the recycling of electrical and electronic equipment. By ensuring this product is disposed of correctly, you will help prevent potential negative
consequences for the environment and human health, which could otherwise be caused by inappropriate waste handling of this product. For more detailed information
about recycling of this product, please contact your local city office, your household waste disposal service or the shop where you purchased the product.
2°

EN 9
9
WARNINGS - COMPONENTS
WARNINGS
This appliance has been designed for use as either an EXTRACTION (ducting to the outside)
or RECIRCULATION (filtering) hood. The measurements contained on the drawings in this
booklet refer to two models of cooker hood. Therefore, it is essential that you refer to the cor-
rect drawing when taking measurements for installation.
- The minimum distance between the cooking surface and the metal grease filters on the
underside of the hood must be 650mm.
- This cooker hood must be installed in accordance with the installation instructions and
all requirements must be adhered to.
- If the room where the cooker hood is to be used contains a fuel burning appliance such
as a central heating boiler then its flue must be of the room sealed or balance flue type.
- If other types of flue or appliances are fitted ensure that there is an adequate supply of
air to the room.
- When the range hood and appliance supplied with energy other than electricity are
simultaneously in operation, the negative pressure in the room must not exceed 4 Pa
(4x10⁻⁵ bar).
- The ducting system for this appliance must not be connected to any ventilation system
which is being used for any other purpose.
- The ducting system for this appliance must not be connected to any existing ventilation
system which is being used for any other purpose.
- Do not leave naked flames or carry out flambè cooking under this cooker hood.
- This appliance is not intended for use by persons (including children) with reduced
physical, sensory or mental capabilities, or lack of experience and knowledge, unless
they have been given supervision or instruction concerning use of the appliance by a
person responsible for their safety.
- Children should be supervised to ensure that they do not play with the appliance
CONNECTING THE POWER CABLE TO THE MAINS POWER SUPPLY
Before installation, check that the mains voltage indicated on the rating plate inside the appli-
ance corresponds to the voltage available in your home. If the Hood is not fitted with a plug
have a licensed electrician, fit the power cable with a plug of a type approved for the load indi-
cated on the rating plate; when connecting directly to the mains, insert an omni polar circuit
breaker with a minimum contact aperture of 3mm and a size suitable for the load in question
between the appliance and the mains supply, making sure it is of a type that complies with cur-
rent regulations.
COMPONENTS
- 2 No Wall Brackets C
- 1 No 150-120mm Ducting Spigot G
- 1 No Air Outlet Connection H (Optional)
- 2 No Charcoal Filters L(Optional)

EN 1
10
INSTALLATION
The cooker hood must be installed centrally over a cooking appliance. The minimum distance
between the cooking surface and the metal grease filters on the underside of the hood must be
at least 650mm.
To install the hood proceed as follows:
1) Drill six 8mm diameter holes at X1-X2-J and insert the plastic rawl plugs supplied as illus-
trated in fig. 2 ensuring the brackets are fitted as shown in the blow up.
2) Secure the two brackets Cto the wall inserting two of the screws supplied through the two
holes on line X1-X2 as illustrated in fig. 2.
3) Slide the canopy down the wall to locate the key hole over the washer then secure the can-
opy to the wall by inserting two of the screws supplied through the two outer holes in the
rim of the canopy J1 and J2 as illustrated in fig. 3.
4) EXTRACTION OR RECIRCULATION INSTALLATION:
• EXTRACTION (DUCTED)
When installing the ducted version, connect the hood to the chimney using either a flexible or
rigid pipe ø 150 or 120 mm, the choice of which is left to the installer.
• To install a ø 120 mm air exhaust connection, insert the reducer flange 9on the hood body
outlet.
• Fix the pipe in position using sufficient pipe clamps (not supplied).
• Remove any activated charcoal filters.
• RECIRCULATION (FILTERED)
• When the hood is fitted in the recirculation mode the Air Outlet Connection Hshould be
fitted as illustrated in fig. 6.
• Fit the (optional) charcoal filters by repeating the following operation on each side of the
motor housing. Place the two key hole slots in the filter Land turn the filter clockwise to
lock the filter in position as illustrated in fig. 7.
WARNING: It is a possible fire hazard if the metal grease filters are not cleaned and the
charcoal filters replaced regularly.
Fitting The Chimney
5) FITTING THE CHIMNEY UPPER
To fit the upper chimney A, place the top edge of the chimney over the bracket Cas illus-
trated in fig. 8 and secure the chimney using two of the 2.9mm self tapping screws pro-
vided.
The distance Hin the height between the fixing holes X1 and X2 is determined by the
height of the upper chimney A.
6) FITTING THE CHIMNEY LOWER
To fit the lower chimney B, apply slight force to the two rear edges to increase the width
of the apperture, then sleeve the chimney Bover the chimney Aas illustrated in fig. 9.

EN 1
11
USE - MAINTENANCE
USE
The cooker hood functions are controlled by a series of slider or push button switches mounted
on the front of the hood and control the worktop lighting and fan motor speeds. This cooker
hood will not remove steam.
1)SLIDER SWITCHES
- A switch controls the worktop lighting - ON/OFF.
- A switch controls the fan speeds - OFF/ON-1-2-3.
- The red neon lamp illuminates when the motor is switched ON .
2)PUSH BUTTON SWITCHES
- A switch controls the worktop lighting - ON/OFF.
- A button switches the motor OFF/ON at the low speed setting.
- A button switches the motor to the medium speed setting.
- A button switches the motor to the high speed setting.
- The red neon lamp illuminates when the motor is switched ON.
3)SPEED SETTINGS
- 1/Low should be selected when simmering or when using only one pan.
- 2/Medium should be selected for cooking when using up to four pans.
- 3/High should be selected when frying or cooking food with a strong odour.
MAINTENANCE
N.B. Before carring out any kind of maintenance, cleaning or replacing lamps, disconnect the
hood from the mains supply.
1. Lighting
Comprises two (28W - 40W) bulbs. To replace the bulbs, proceed as follows (fig.10): Re-
move one of the pins at the sides of the lamp cover. Slide the glass towards the side from
which the pin has been removed until the opposite edge has been freed, then pull gently
downwards. Replace the bults and fit the glass again by repeating the above operations in
reverse order.
2. Filters
- The metal grease filter should be cleaned every two months or more frequently if the hood
is used consistently and can be cleaned in a dishwasher or by hand using a mild detergent
or liquid soap. When replacing, ensure that they are dry.
- The charcoal filter cannot be washed and should be replaced at least every 2 months or
more frequently if the hood is used consistently.
3. Cleaning
When cleaning the hood, it is recommended to use a damp cloth and mild liquid household
cleaner. Never use abrasive cleaning materials.
IMPORTANT: When using a gas hob in connection with the cooker hood never leave the
burners of the hob uncovered while the hood is in use or when the pans have been re-
moved. It is very important to follow all instructions for cleaning the hood and filters.
There could be a possible fire hazard if the filters are not replaced according to these in-
structions.
ATTENTION: The manufacturer declines all responsibility for any damage or injury
caused as a result of not following the instructions for installation, for maintenance and re-
placement times of filters indicated (in order to avoid a possible risk of fire when the filters
are saturated with grease).

X
X1
J
12
C
X2
H
J
12
750 min
1140 max
600
700
900
290
590 min
15
H
J
X1
A
B
275
180
==
X2 180
180
==
==
J
C
1
23
45
G

67
89
10
B
H
11
1
0
1
0
23
L
M
L
V1 V2 V3
S
0 - 1 MID MAX 0 - 1
T2
T1 L
T3
H
LL
M
This manual suits for next models
3
Table of contents
Other Smeg Ventilation Hood manuals
Popular Ventilation Hood manuals by other brands

Dustcontrol
Dustcontrol DC 50-W Translation of the original instructions

BOMANN
BOMANN DU 623.3 instruction manual

Faber
Faber MATRIX installation instructions

GE
GE Monogram ZV925SL Dimensions and installation information

Trade-wind
Trade-wind 7236 Installation instructions & use & care guide

AEG Electrolux
AEG Electrolux DD9996-B user manual

AVG
AVG AVF-306PS installation guide

Euro Appliances
Euro Appliances EIC90BGR Usage and care guide

Sirius Satellite Radio
Sirius Satellite Radio SILT-28 Series installation instructions

GUTMANN
GUTMANN EM 04 operating instructions

Pando
Pando GRUPO PRO Series installation manual

MICAN
MICAN 60250 operating instructions