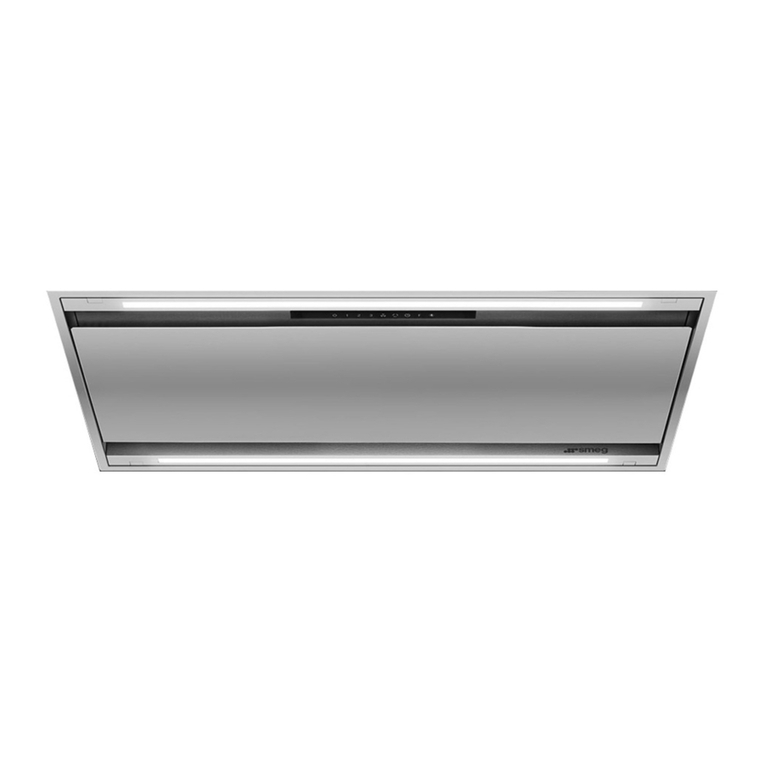
Smeg LIFTB900 User manual

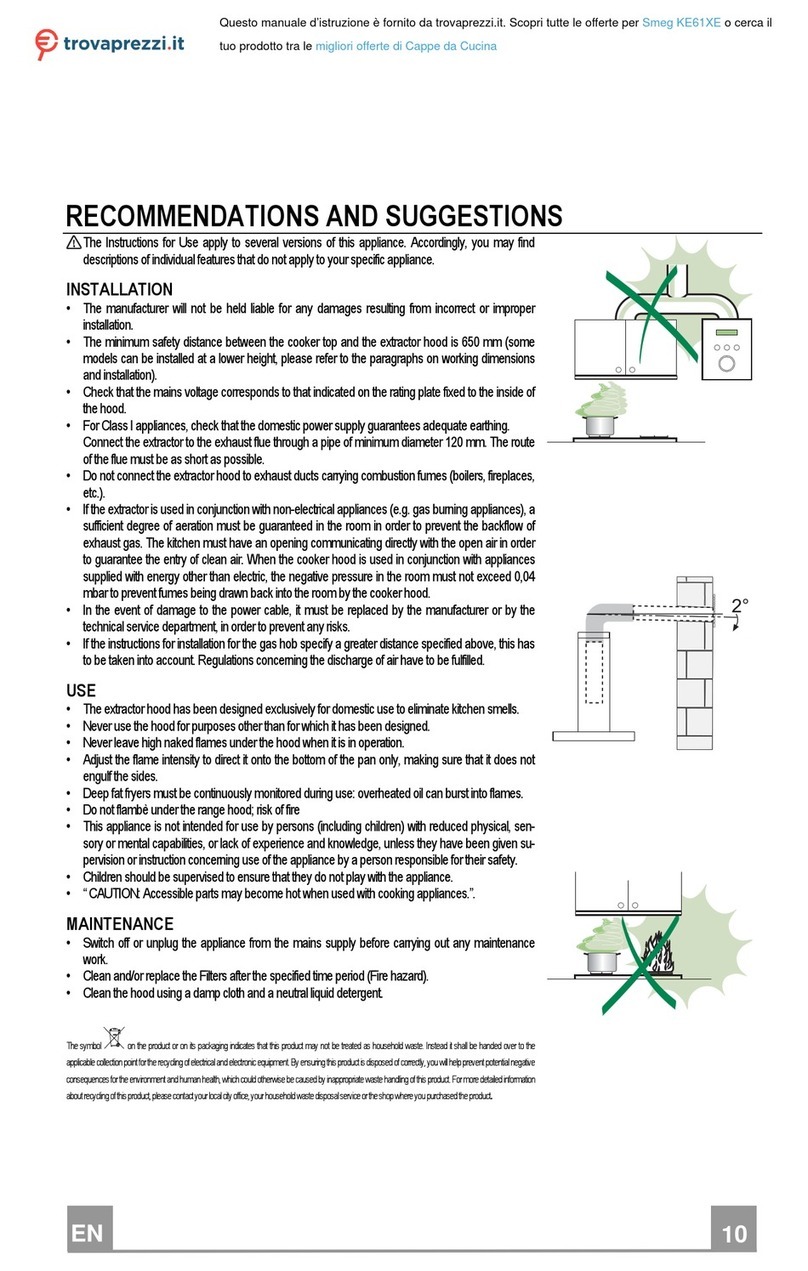
-Therangehoodmust belocated65cm above thecookingappliance
unless specified otherwise. May be reduced to 60cm to align with
the AGA code.
-"IMPORTANT" : "INSTALLATION HEIGHTS IN AUSTRALIA"
1) Where an Electric Cooktop is installed under this Rangehood THE
MINIMUMDISTANCEbetweenthe Topofthe Cooktop andtheunderside
of the Rangehood - MUST BE 60cm and the maximum 70 cm.
2) When this Rangehood is installed over a Gas fuelled Cooktop THE
MINIMUM DISTANCE between the Top of the Pot rests and the
underside of the Hood - MUST BE 65cm and the maximum 75 cm.
-FOR INSTALLATION OVER A GAS RANGE OR GAS COOKING
HOB A DIFFERENT SPECIFIC MINIMUM HEIGHT REQUIREMENT
MAY BE REQUIRED BY THE RELEVANT GAS AUTHORITIES.
-IF THE SUPPLY CORD IS DAMAGED, IT MUST BE REPLACED BY
THE MANUFACTURER OR ITS SERVICE AGENT OR A SIMILARY
QUALIFIED PERSON IN ORDER TO AVOID A HAZARD.
- THE APPLIANCE IS NOT INTENDED FOR USE BY YOUNG
CHILDREN OR INFIRM PERSONS WITHOUT SUPERVISION.
- YOUNG CHILDREN SHOULD BE SUPERVISED TO ENSURE THAT
THEY DO NOT PLAY WITH THE APPLIANCE.
-DO NOT USE THE RANGEHOOD LIGHTS AS A NIGHT LIGHT.
-MOST SMEG RANGE HOODS ARE FITTED WITH A METAL
WASHABLE GREASE FILTER. CLEANING CAN BE ATTENDED
BY HAND, OR PER DISHWASHER.
SHOULD YOUR MODEL BE FITTED WITH A FIBRE GREASE
FILTER, THIS CAN BE WASHED AND REUSED UNTIL AT WHICH
TIME IT SHOULD BE REPLACED.

SAFETY WARNINGS
RANGE HOODS
• THERE SHALL BE ADEQUATE VENTILATION OF THE ROOM WHEN THE RANGE
HOODISUSEDATTHESAMETIMEASAPPLIANCESBURNINGGASOROTHERFUELS.
(NOT APPLICABLE TO APPLIANCES THAT ONLY DISCHARGE THE AIR BACK INTO
THE ROOM)
• THERE IS A RISK OF FIRE IF CLEANING IS NOT CARRIED OUT IN ACCORDANCE
WITH THE INSTRUCTIONS.
• DO NOT FLAMBÉ UNDER THE RANGE HOOD.
• CAUTION: ACCESSIBLE PARTS MAY BECOME HOT WHEN USED WITH A COOKING
APPLIANCE.
•THE APPLIANCE ISNOT INTENDED FORUSE BY PERSONS(INCLUDING CHILDREN)
WITH REDUCED PHYSICAL, SENSORY OR MENTAL CAPABILITIES, OR LACK OF
EXPERIENCE AND KNOWLEDGE, UNLESS THEY HAVE BEEN GIVEN SUPERVISED
OR INSTRUCTION CONCERNING USE OF THE APPLIANCE BY A RESPONSIBLE
PERSON FOR THEIR SAFELY.
• YOUNG CHILDREN SHOULD BE SUPERVISED TO ENSURE THAT THEY DO NOT
PLAY WITH THE APPLIANCE.
• IF THE SUPPLY CORD IS DAMAGED, IT MUST BE REPLACED BY THE
MANUFACTURER OR ITS SERVICE AGENT OR A SIMILARLY QUALIFIED PERSON IN
ORDER TO AVOID A HAZARD.
FOR INSTALLATION INSTRUCTIONS:
• THE EXHAUST AIR MUST NOT BE DISCHARGED INTO A FLUE WHICH IS USED FOR
EXHAUSTING FUMES FROM OTHER APPLIANCES BURNING GAS OR OTHER FUELS.
(NOT APPLICABLE FOR APPLIANCES WHICH ONLY DISCHARGE AIR BACK INTO THE
ROOM)
•THEMINIMUMDISTANCEBETWEENTHE SUPPORTINGSURFACEFORTHE COOKING
VESSELS ON THE HOB AND THE LOWEST PART OF THE RANGE HOOD:
WHEN THE RANGE HOOD IS LOCATED ABOVE A GAS APPLIANCE, THIS DISTANCE
SHALL BE 65CM. IF THE INSTRUCTIONS FOR INSTALLATION FOR THE GAS HOB
SPECIFY A GREATER DISTANCE, THIS MUST BE TAKEN INTO ACCOUNT. (THE
DISTANCEOF65CMCAN BE REDUCED FOR NON COMBUSTIBLE PARTSOF RANGE
HOODS AND PARTS OPERATING AT SAFETY EXTRA LOW VOLTAGE PROVIDED
THESEPARTSDO NOT GIVEACCESSTOLIVEPARTS.DISTANCEMAY BE REDUCED
TO 60CM TO ALIGN WITH THE AGA CODE.
• REGULATIONS CONCERNING THE DISCHARGE OF AIR HAVE TO BE FULFILLED
04308297/1

2
ENGLISH (EN)
WARNING
The minimum distance between the hob surface
on which the pans stand and the lower part of the
hoodmustbe65cm,unlessotherwisespeciedin
the installation instructions. If the hob installation
instructions specify a greater distance, it must be
taken into account.
The air collected must not be conveyed into a duct
usedtoblowoffsmokesfromappliancesfedwithan
energyotherthanelectricity(centralheatingsystems,
thermosiphons,water-heaters,etc.).
Complywiththeofcialinstructionsprovidedbythe
competent authorities in merit when installing the
disposal duct. In addition, exhaust air should not
be discharged into a wall cavity, unless the cavity is
designed for that purpose.
The room must be well aerated in case a hood and
someotherheatequipmentfedwithanenergyother
thanelectricity(gas,oil,coalheaters,etc)operate
at the same time.
Infacttheintakehood,disposingofair,couldcreatea
vacuumintheroom.Thevacuumshouldnotexceed
0,04mbar.Thispreventsthegasexhaustedbythe
heat source from being intaken again. It is therefore
advisable to ensure the room contains air taps able
toensureasteadyowoffreshair.
Check the data label inside the appliance; if the
symbol ( ) is printed, read the following: this
appliance has such technical particulars that it
belongs to class II insulation, therefore it must
not be earthed.
Check the data label inside the appliance; if the
symbol ( ) is NOT printed, read the following:
ATTENTION: This appliance must be earthed.
When making the electrical connections, check
thatthecurrentsockethasagroundconnection.
When making the electrical connections, check that
the voltage values correspond to those indicated
on the data plate inside the appliance itself. In case
yourapplianceisnotfurnishedwithanonseparating
exiblecableandhasnoplug,orhasnotgotany
otherdeviceensuring omnipolar disconnectionfrom
the electricity main, with a contact opening distance
of at least 3 mm, such separating device ensuring
disconnectionfromthe main must beincludedin the
xedinstallation.Ifyourunitfeaturesapowerlead
and plug, position this so the plug is accessible.
Alwaysswitchofftheelectricitysupplybeforecarrying
out any cleaning or servicing operations on the
appliance.
USE
Avoid using materials which could cause spurts of
ame(ambées)neartheappliance.
Donotambéundertherangehood
When frying, take particular care to prevent oil
andgreasefromcatchingre.Alreadyusedoilis
especially dangerous in this respect. Do not use
uncovered electric grates.
Toavoidpossiblerisksofrealwayscomplywith
theindicatedinstructionswhencleaninganti-grease
ltersandwhenremovinggreasedepositsfromthe
appliance.
This appliance is not intended for use by persons
(includingchildren)withreducedphysical,sensory
or mental capabilities, or lack of experience and
knowledge,unlesstheyhavebeengivensupervision
or instruction concerning use of the appliance by a
person responsible for their safety. Children should
be supervised to ensure that they do not play with
the appliance.
Caution: accessible parts may become hot when
used with cooking appliances.
This kitchen hood is intended for installation in do-
mestic kitchens above cooktops, cooking devices
and similar kitchen equipment.
MAINTENANCE
Thorough servicing guarantees correct and long-
lasting operation.
Any fat deposits should be removed from the ap-
pliance periodically depending on amount of use
(atleastevery2months).Avoidusingabrasiveor
corrosive products. To clean painted appliances on
the outside, use a cloth dipped in lukewarm water
and neutral detergent.
To clean steel, copper or brass appliances on the
outside,itisalwaysbesttousespecicproducts,
followingtheinstructionsontheproductsthemselves.
To clean the inside of the appliance, use a cloth (or
brush)dippedindenaturedethylalcohol.
FRANCAIS (FR)
ATTENTION
La distance minimum entre la surface de support
des casseroles sur le plan de cuisson et la partie
inférieuredela hottedoitmesurer65 cm,saufsi
lesinstructionspourl’installationsontdifférentes.Si
lesinstructions pour l’installation du plande cuisson
indiquentunedistancesupérieure,cettedernièredoit
êtrerespectée.
L’airaspirénedoitpasêtrecanalisédansunconduit
quiestutilisépourévacuerlesfuméesproduitespar
desappareilsalimentéspardessourcesd’énergies
autres que l’énergie électrique (installations de
chauffagecentral,radiateurs,chauffe-eau,etc.).
Pourévacuerl’airquidoitêtreéliminérespectezles
prescriptions des autorités compétentes. De plus
l’airquidoitêtreévacuénedoitpasêtredéchargé
dansunecavitédumur,àmoinsquecettecavité
soitprévuepourcebut.
Prévoyezuneaérationdelapièceadéquatequand
unehotteetdesappareilsalimentésparuneénergie
autrequel’énergieélectrique(poêleàgaz,àhuile,
àcharbon etc.) sont utilisés en même temps. En
effet,enévacuantl’air,lahottepourraitcréerune
dépressiondanslapièce.Lapressionnégativede
lapiècenedoitpasdépasser0,04mbar,évitantainsi
que la source de chaleur provoque un appel des
gazquidoiventêtreévacués.Ilestdoncnécessaire

6
USO
Evitare l’uso di materiali che causano ammate
(ambè)nelleimmediatevicinanzedell’apparecchio.
Noncucinareal“ambè”sottolacappa
Nelcasodifritturefareparticolarmenteattenzioneal
pericolo di incendio che costituiscono olio e grassi.
Particolarmentepericolosoperlasuainammabilitàè
l’oliogiàusato.Nonusaregriglieelettrichescoperte.
Perevitareunpossibilerischiodiincendioattenersi
alleistruzioniindicateperlapuliziadeiltriantigrasso
elarimozione di eventuali depositidigrasso sull’ap-
parecchio.
Questoapparecchio non è inteso per usodi per-
sone(inclusibambini)conridottecapacitàsiche,
sensorialiomentali,oconinsufcienteesperienzae
conoscenza,amenocheessenonsianostatesorve-
gliate o istruite riguardo all’uso dell’apparecchiatura
da una persona responsabile per la loro sicurezza.
I bambini devono essere sorvegliati per assicurarsi
che non giochino con l’apparecchio.
Attenzione:partiaccessibilipossonodiventarecalde
quando usate con apparecchi di cottura.
Questa cappa da cucina è destinata ad essere
installatasopracucineperusodomestico,dispositivi
di cottura e apparecchi per cucine similari.
MANUTENZIONE
Un’accurata manutenzione garantisce un buon
funzionamento ed un buon rendimento nel tempo.
La rimozione di eventuali depositi di grasso dall’ap-
parecchio va effettuata periodicamente in rapporto
all’uso(almenoogni2mesi).Evitarel’usodiprodotti
contenentiabrasiviocorrosivi.Perlapuliziaesterna
diapparecchiverniciatiadoperareunpannoinumidito
con acqua tiepida e detersivo neutro; per la pulizia
esternadiapparecchiinacciaio,rameodottoneè
consigliato l’uso di prodotti specici, seguendo le
istruzioni indicate sul prodotto; per la pulizia interna
dell’apparecchiousareunpanno/pennelloimbevuto
di alcool etilico denaturato.
PORTUGUÊS (PT)
ADVERTENCIAS
A distância mínima entre a superfície de apoio das
panelas no plano de cozedura e a parte inferior
do exaustor deve ser 65 cm, a não ser que seja
especicadodeformadiferentenasinstruçõesde
instalação.Seasinstruçõesdeinstalaçãodoplano
decozedurareferemumadistânciamaior,estadeve
sertomadaemconsideração.
O ar recolhido não deve ser canalizado em um con-
dutousadoparaadescargadefumaçadeaparelhos
alimentadoscomenergiadiferentedaquelaelétrica
(instalaçãodeaquecimentocentralizado,radiadores,
aquecedoreselétricos,etc.).
Paraadescargadoarquedeveserevacuado,re-
speitarasprescriçõesdasautoridadescompetentes.
Alem disso o ar que tem de ser descarregado não
deveserexpulsadopelacavidadenomuroamenos
quetalcavidadenãosejapredispostacomessem.
Preverumaadequadaareaçãodolocalquandouma
coifaeaparelhosalimentadoscomenergiadiferente
daquelaelétrica(aquecedoragás.aóleo,acarvão,
etc...), forem usados contemporaneamente. Isso
porqueacoifaaspirante,evacuandooar,podecriar
umapressãonegativanolocal.Apressãonegativado
localnãodevesuperaros0,04mbar,evitandoassim
o redemoinho dos gases de descarga da fonte de
calor. É necessário, portanto, equipar o local com
presasdearquealimentemumuxoconstantede
ar fresco.
Controlarachapadascaracterísticastécnicasno
interiordoaparelho;seosímbolo ( )estiverim-
pressonachapa,seguirasinstruçõesseguintes:
Attenção:esteaparelhoapresentacaracterísticas
técnicas construtivas que o inclui na classe de
isolamento II e portanto não deve ser colegado
à terra.
Controlar a chapa das características técnicas
no interior do aparelho; se o símbolo ( ) NÃO
estiver impresso na chapa, seguir as instruções
seguintes: ATENÇÃO: Este aparelho deve ser
ligado à terra. Na operação de ligação eléctrica
é necessário assegurar-se de que a tomada de
corrente possui ligação à terra.
Naoperaçãodiligaçãoeléctricaénecessáriovericar
queos valores de tensão correspondam aos indica-
dos na placa colocada no interior do aparelho. Se o
seuaparelhonãoéequipadocomcabosexíveisnão
separáveis e com tomada ou com outro dispositivo
que garanta o desligamento de todos os polos de
rede, com uma distância de abertura dos contatos
depelomenos3mm,taisdispositivosdeseparação
darededevemserprevistosnainstalaçãoxa.Seo
seuaparelhopossuircabodealimentaçãoecha,
colocá-lodemodoafazercomqueachaque
acessível.
Antesdeprocederaqualqueroperaçãodelimpeza
oumanutençãoénecessáriodesligaroaparelhoda
correnteeléctrica.
USO
Evitar o uso de materiais que causam chamas
(ambè)nasimediatasproximidadesdoaparelho.
Nãocozinharamejadossoboexaustor
Nocasodefriturasprestarespecialatençãoaoperigo
deincendioconstituídosporóleosogorduras.Espe-
cialmenteperigosopelasuainamabilidadeéoóleo
jáusado.Nãousargrelhaselétricasdescobertas.
Para evitar um possível risco de incêndio, seguir
asinstruçõesindicadasparaalimpezadosltros
anti-gordurasearemoçãodeeventuaisdepósitos
de gordura do aparelho.
Este equipamento não deve ser utilizado por pes-
soas(inclusivecrianças)comcapacidadesfísicas,
sensoriaisoumentaisreduzidas,oucomexperiência
econhecimentosinsucientes,anãoserquesejam
acompanhadas/ ou tenham sido instruídas sobre o
uso do equipamento por uma pessoa responsável
pelasuasegurança.Ascriançasdevemservigiadas
para garantir que não brinquem com o aparelho.
Atenção: partes acessíveis podem car quentes
quando utilizadas com aparelhos de cozedura.
Esteexaustorparacozinhadestina-seaserinstalado
sobrefogõesparausodoméstico,dispositivosde
cozedura e aparelhos para cozinha semelhantes.
Italiano, 6
English, 9
Deutsch, 12
Français, 16
Español, 20
Português, 23
Nederlands, 27
Ðóññêèé, 30
Dansk, 34
Suomi, 37
Svenska, 40
ÅëëçíéêÜ, 43
Română, 46
Čeština, 49
Slovensky, 52
Istruzioni per l’uso
Instructions for use
Betriebsanleitung
Mode d’emploi
Instrucciones de uso
Instruções de uso
Gebruiksaanwijzingen
Ðóêîâîäñòâî ïî ýêñïëóàòàöèè
Brugsanvisning
Käyttöohjeet
Bruksanvisning
Ïäçãßåò ÷ñÞóçò
Instrucţiuni de utilizare
Návod k použití
Návod na používanie

2
!
2x
1x
ø 15cm
8x
3.9x9.5mm
12x
4.2x15mm 4x
2x
3.2x13mm 1x
*
Taglio Mobile
Cabinet cutting
Kabinett Schneiden
Cabinet de coupe
Gabinete de corte
Corte Mobile
Kabinet snijden
Кабинет резки
Skab skæring
Kaappi leikkaus
Skåp skärning
Κοπή κινητά
Tăiere mobile
Rezanie mobilným
Rezanje mobilne
279,5-139,5
270
267
358-363
735-740 292-297

3
1A 3
4
5
3.9 x 9.5 mm
4.2 x 15 mm
2
1B

4
6A
7A
6B
7B
8A
4.2 x 15 mm
7A
4.2 x 15 mm
7B

5
8B

9
EN
English
INSTALLATION MANUAL
!The appliance must be installed by a
qualied person in compliance with the
instructions provided.
!
Wear gloves when carrying out installation and
maintenance operations.
WARNING
!The air collected must not be conveyed into a duct
used to blow off smokes from appliances fed with an
energy other than electricity (central heating systems,
thermosiphons, water-heaters, etc.).
! Comply with the ofcial instructions provided by the
competent authorities in merit when installing the
disposal duct. In addition, exhaust air should not be
discharged into a wall cavity, unless the cavity is desi-
gned for that purpose.
! The room must be well aerated in case a hood and
some other heat equipment fed with an energy other
than electricity (gas, oil, coal heaters, etc) operate at
the same time.
!In fact the intake hood, disposing of air, could create a
vacuum in the room. The vacuum should not exceed
0,04mbar. This prevents the gas exhausted by the
heat source from being intaken again. It is therefore
advisable to ensure the room contains air taps able to
ensure a steady ow of fresh air.
!Check the data label inside the appliance; if the
symbol () is printed, read the following: this appliance
has such technical particulars that it belongs to class
II insulation, therefore it must not be earthed.
!Check the data label inside the appliance; if the
symbol () is NOT printed, read the following: ATTEN-
TION: This appliance must be earthed. When making
the electrical connections, check that the current
socket has a ground connection.
!When making the electrical connections, check that
the voltage values correspond to those indicated
on the data plate inside the appliance itself. In case
your appliance is not furnished with a non separating
exible cable and has no plug, or has not got any
other device ensuring omnipolar disconnection from
the electricity main, with a contact opening distance
of at least 3 mm, such separating device ensuring
disconnection from the main must be included in the
xed installation. If your unit features a power lead
and plug, position this so the plug is accessible.
AIR VENT
(for ducting versions)
!Prepare the hole and the air vent duct (150 mm dia-
meter).
!Use a duct of the minimum indispensible length.
! Use a duct with as few elbows as possible (maximum
elbow angle: 90°).
!Avoid drastic changes in the duct cross-section.
! Use a duct with an as smooth as possible inside.
! The duct must be made of certied material.
!Do not connect the hood to smoke exhaust ducts
for the products of combustion (boilers, replaces,
stoves, etc).
! For the air vents comply with the provisions laid down
by the competent authorities.
In addition, the air must not be evacuated through a
hole in the wall unless specically intended for this
purpose.
!Fit air intakes in the room to prevent the hood from
creating a negative pressure in the room (which must
not exceed 0.04 mbar); if the hood is used at the
same time as non-electrical equipment (gas-, oil- and
charcoal-red stoves, etc.) the exhaust gas may be
sucked in by the heat source.
FILTERING OR DUCTING VERSION ?
The hood may be in ltering or in ducting version. Deci-
de from the outset which type is to be installed.
For better efciency, we recommend installing the hood
in the ducting version (if possible).
Ducting version
The hood puries the air and evacuates it to the outside
through an exhaust duct (diameter 150 mm).
Filtering version
The hood puries the air and recycles the clean air
back into the room.

10
EN
USER MANUAL
WARNING
! Always switch off the electricity supply before carrying
out any cleaning or servicing operations on the ap-
pliance.
! Avoid using materials which could cause spurts of
ame (ambées) near the appliance.
!When frying, take particular care to prevent oil and
grease from catching re. Already used oil is espe-
cially dangerous in this respect. Do not use uncove-
red electric grates.
! To avoid possible risks of re always comply with
the indicated instructions when cleaning anti-grease
lters and when removing grease deposits from the
appliance.
!This appliance is not intended for use by persons
(including children) with reduced physical, sensory
or mental capabilities, or lack of experience and
knowledge, unless they have been given supervision
or instruction concerning use of the appliance by a
person responsible for their safety. Children should
be supervised to ensure that they do not play with the
appliance.
! Caution: accessible parts may become hot when
used with cooking appliances.
!This kitchen hood is intended for installation in dome-
stic kitchens above cooktops, cooking devices and
similar kitchen equipment.
CONTROLS
P1 P2 P3 P4 P5 P6 P7
P1: Filter alarm reset
P2: LED on/off - holding the button down you can
change the LED intensity to High or Low
Note: LED activation is displayed by P2 only when
the lift panel is completely open.
P3: Motor on/off - 1st speed
P4: 2nd speed
P5: 3rd speed
P6: 4th speed
P7: Lift panel up/down (during opening the panel can
be stopped at the desired height by pressing the
button a second time).
5’ Timer function:
Holding the buttons P3, P4, P5 or P6 pressed down
(>2”) the 5’ Timer function is activated. When the time
has run out, the motor turns off and the lift closes. The
LEDs change from High to Low intensity. When the
function is active, the LED corresponding to the current
motor speed blinks.
Filter alarm display:
Grease lters: After 30h of motor operation, the LED of
the P1 button comes on for 30’’ every time the motor
turns off.
Charcoal lter: After 120h of motor operation, the LED
of the P1 button blinks for 30’’ every time the motor
turns off.
CONTROLS
P1 P P P P P
P1: Filter alarm reset
P2: Motor on/off - 1st speed
P3: 2nd speed
P4: 3rd speed
P5: 4th speed
P6: Lift panel up/down (during opening the panel can
be stopped at the desired height by pressing the
button a second time).
5’ Timer function:
Holding the buttons P2, P3, P4 or P5 pressed down
(>2”) the 5’ Timer function is activated. When the time
has run out, the motor turns off and the lift closes. The
LEDs change from High to Low intensity. When the
function is active, the LED corresponding to the current
motor speed blinks.
Filter alarm display:
Grease lters: After 30h of motor operation, the LED of
the P1 button comes on for 30’’ every time the motor
turns off.
Charcoal lter: After 120h of motor operation, the LED
of the P1 button blinks for 30’’ every time the motor
turns off.
CONTROLS
P1 P2 P3 P4 P5
L1 L2 L3 L4 L5
P1: Motor on/off - 1st speed
P2: 2nd speed
P3: 3rd speed
P4: 4th speed
P5: Lift panel up/down (during opening the panel can
be stopped at the desired height by pressing the
button a second time).
5’ Timer function:
When the motor is on, holding the keys P1-P4 pressed
down (depending on the speed set), the 5’ timer fun-
ction is activated. When this function is active, the LED
corresponding to the speed (L1-L4) blinks. When the
5’ have elapsed, the motor turns off and the carriage
closes.

11
EN
Filter alarm display:
After 30 hours of motor operation, the LEDs L1-L5
come on for 30’’ each time the motor is turned off.
After 120 hours of motor operation, the LEDs L1-L5
blink for 30’’ each time the motor is turned off.
To reset the alarm, press any one of the keys P1-P5 for
2” during alarm display.
!
ATTENTION
SAFETY SYSTEMS
In order to function correctly the product is equipped
with a series of safety devices which are also intended
to prevent any injury caused by inappropriate use.
In any case be very careful in using the product, above
all the parts in motion.
ALARM ON CONTROL (all models)
1. All LEDs ashing: this means that the telescopic trol-
ley is locked. Wait 30” and then press the UP/DOWN
button to release the trolley
2. UP/DOWN button LED ashing: this means that the
front panel of the lters is not closed properly. Reposi-
tion it correctly.
MAINTENANCE
! Before cleaning or maintenance cut the power.
Cleaning the hood
WHEN TO CLEAN IT: clean it at least every 2 months
to prevent the risk of re.
EXTERNAL CLEANING: use a cloth moistened in luke-
warm water and neutral detergent (for painted hoods);
use specic products for steel, copper or brass hoods.
INTERNAL CLEANING: use a cloth (or brush) soaked
in denatured ethyl alcohol.
WHAT NOT TO DO: do not use abrasive or corrosi-
ve products (e.g. metal sponges, brushes, too hard
brushes, very aggressive detergents, etc.)
Cleaning the grease lters
WHEN TO CLEAN IT: clean it at least every 2 months to
prevent the risk of re.
HOW TO REMOVE THE FILTERS: push the catch near
the handle towards the rear of the hood and pull the
lter downwards
HOW TO CLEAN THE FILTERS: hand wash or in the
dishwasher using a neutral detergent. If washing in the
dishwasher, possible discoloration of the lters does not
in any way compromise their functioning.
Replacing the charcoal lter (P)
(for ltering version only)
WHEN TO REPLACE IT: replace it at least every 6
months.
HOW TO REMOVE IT: position the charcoal lter inside
the hood and t the 2 lter clips (M).
MALFUNCTIONS
If something appears not to be working properly, do the
following simple checks before calling Technical Service:
• If the hood is not working:
Check that:
- The power has not been disconnected.
- A speed has been selected.
• If the hood performs inefciently:
Check that:
- The motor speed selected is sufcient for the amount
of smoke and vapours released.
- The kitchen is sufciently ventilated to allow air inta-
ke.
- The charcoal lter is not worn (hood in ltering ver-
sion).
• If the hood has turned off during normal functioning:
Check that:
- The power has not been disconnected.
- the omnipolar disconnection device has not tripped.
Components not provided with the product
Table of contents
Languages:
Other Smeg Ventilation Hood manuals

Smeg
Smeg KSET666XE Technical manual

Smeg
Smeg KSMI960X1 Technical manual

Smeg
Smeg K181X70 Installation guide

Smeg
Smeg KSED65X Technical manual

Smeg
Smeg KSIV960X1 Technical manual

Smeg
Smeg KSEG5X User manual

Smeg
Smeg KICV90BL User manual

Smeg
Smeg PASC650 User manual

Smeg
Smeg KESI120X Technical manual

Smeg
Smeg KIL52-1 User manual