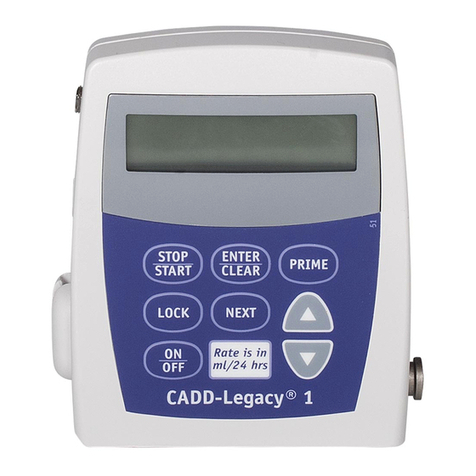
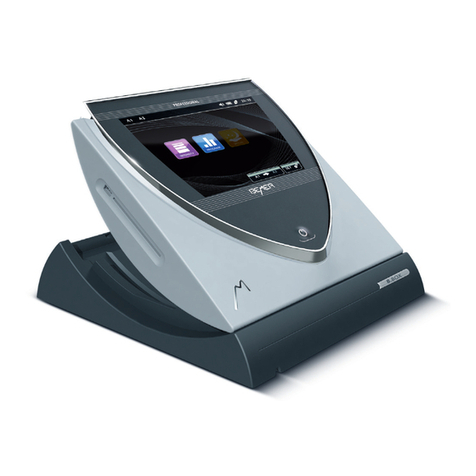
Smiths Medical CADD-Prizm VIP User manual

x
s
CADD-Prizm® VIP
Ambulatory Infusion Pump
Model 6100 and 6101
Patient Information
TPN Total Parenteral Nutrition
Delivery Mode a
40-3665-01G PIG, Prizm TPN,VIP.indd 1 6/14/2011 10:50:21 AM

Contents
Introduction ............................................................................................... 1
Warnings...................................................................................................... 2
Cautions....................................................................................................... 4
CADD-Prizm® Pump (Diagram) ........................................................... 5
Description of the Keys........................................................................... 6
Installing a New Battery......................................................................... 7
Using the Power Pack or AC Adapter................................................. 9
The Main Screen ..................................................................................... 11
Description of the Infusion Prole....................................................12
How to Use the HELP Key Å........................................................13
Stopping and Restarting the Pump ................................................. 15
Removing a Cassette.............................................................................16
Attaching a Cassette.............................................................................. 17
Priming the Tubing and Starting the Pump..................................20
Inserting the Tubing into the Air Detector....................................22
What if I drop or hit the pump?.........................................................23
Alarms and Messages............................................................................24
40-3665-01G PIG, Prizm TPN,VIP.indd 2 6/14/2011 10:50:21 AM

1
Introduction
Your doctor has recommended that you use the CADD‑Prizm®
pump as part of your treatment.
The CADD-Prizm® pump can be carried with you and is designed to
deliver medication into your body. Your physician will prescribe your
medication specically for you. Your prescription is programmed into
your pump by your clinician according to your physician’s specic
orders. This pump can be reprogrammed as your medication needs
change.
The pump can be programmed to deliver TPN (“total parenteral
nutrition”) solution or other uids at a constant rate. Delivery may
“taper up,” or gradually increase, at the beginning of delivery.
Delivery may also “taper down,” or gradually decrease, at the end of
delivery. The pump stores programmed information and historical
information that your clinician needs for your specic therapy.
Your clinician will instruct you on the proper use of this pump. This
guide is intended to supplement those instructions. Perform only
those procedures for which you have received training.
The following is a list of warnings and cautions that you should read
before operating the pump. It is important that you understand and
follow these warnings and cautions.
40-3665-01G PIG, Prizm TPN,VIP.indd 1 6/14/2011 10:50:21 AM

2
Failure to properly follow warnings, cautions, and instructions
could result in damage to the pump or death or serious injury.
Warnings
• Donotusethepumpinthepresenceofammableanestheticsor
explosive gasses.
• Ifthepumpisusedtodeliverlife-sustainingmedication,an
additional pump must be available.
• UseofasyringewiththeCADD® Administration Set may result
in UNDER-DELIVERY of medication. Syringe function can be
adversely aected by variations in plunger dimension and
lubricity, which can result in greater force required to move the
syringe plunger. A syringe plunger will lose lubrication as it ages
and, as a result, the amount of under-delivery will increase and
could, on occasion, be signicant.
You must regularly compare the volume remaining in the syringe
to the pump’s displayed values such as Reservoir Volume or Given
to determine if under-delivery is occurring and, if necessary,
contact your clinician.
• DonotuserechargeableNiCdornickelmetalhydride(NiMH)
batteries. Do not use carbon zinc (“heavy duty”) batteries. They do
not provide sucient power for the pump to operate properly.
• Alwayshavenewbatteriesavailableforreplacement.Ifpoweris
lost, non-delivery of drug will occur.
• Thereisnopumpalarmtoalertyouthatthebatteryhasnot
been properly installed or has become dislodged. An improperly
installed or dislodged battery could result in loss of power and
non-delivery of drug.
• Ifthepumpisdroppedorhit,thebatterydoormaybecome
broken or damaged. Do not use the pump if the battery door is
damaged because the battery will not be properly secured; this
may result in loss of power or non-delivery of drug.
40-3665-01G PIG, Prizm TPN,VIP.indd 2 6/14/2011 10:50:21 AM

3
• Priortostartinginfusion,inspecttheuidpathforkinks,aclosed
clamp, or other upstream obstructions, and remove all air to
prevent air embolism.
• Pergeneralrulesofsafepractice,alwaysclosethetubing
clamp before removing the cassette from the pump to prevent
unregulated gravity infusion.
• IfyouareusingaCADD® Administration Set or CADD™ Medication
Cassette Reservoir that does not have the ow stop feature
(reorder number does not start with 21-73xx): You must use
a CADD® Extension Set with Anti-Siphon Valve or a CADD®
Administration Set with either an integral or add on Anti-Siphon
Valve to protect against delivery inaccuracies and unregulated
gravity infusion that can result from an improperly attached
cassette.
• FordetailedinstructionsandwarningpertainingtoCADD™
CADD™ Medication Cassette Reservoirs or CADD® Administration
Sets, please refer to the instructions for use supplied with those
products.
• Attachthecassette(thepartoftheCADD™MedicationCassette
Reservoir or CADD® Administration Set that attaches to the pump)
properly. An improperly attached or detached cassette could
result in unregulated gravity infusion or a reux of blood.
• Donotprimetheuidpathwiththetubingconnectedtoyour
catheter. This could result in over-delivery of medication or air
embolism.
• Ensurethattheentireuidpathisfreeofallairbubblesbefore
connecting to your catheter to prevent air embolism.
• Ifthepumpisdroppedorhit,inspectthepumpfordamage.
Do not use a pump that is damaged or is not working properly.
Contact your clinician for further instructions.
40-3665-01G PIG, Prizm TPN,VIP.indd 3 6/14/2011 10:50:21 AM

4
Cautions
• Toavoiddamagingthepump’selectronics,donotoperatethe
pumpattemperaturesbelow+2˚C(36˚F)orabove40˚C(104˚F).
• Toavoiddamagingthepump’selectronics,donotstorethepump
attemperaturesbelow-20˚C(-4˚F)orabove60˚C(140˚F).Donot
store the pump with a CADD™ Medication Cassette Reservoir or
CADD® Administration Set attached.
• Toavoiddamagingthepump’selectronics,donotexposethe
pump to humidity levels below 10% or above 90% relative
humidity.
• Donotimmersethepumpincleaninguidsorwaterorallow
solution to soak into the pump, accumulate on the keypad, or
enter the battery compartment, Data In/Out jack, accessory jack,
or Air Detector Port area.
• Donotcleanthepumpwithacetone,otherplasticsolvents,or
abrasive cleaners.
• UseonlySmithsMedicalaccessoriesasusingotherbrandsmay
adversely aect the operation of the pump.
• Donotstorethepumpforprolongedperiodswiththebattery
installed.
• FailuretopushthePowerPackcordconnectororACAdapter
cord connector all the way forward may result in an intermittent
connection, and the connector may dislodge, causing a loss of
power and pump alarms.
• FrozenMedicationmustbethawedatroomtemperatureonly.Do
not heat the CADD™ Medication Cassette Reservoir in a microwave
oven as this may damage the medication, the CADD™ Medication
Cassette Reservoir, or cause leakage.
40-3665-01G PIG, Prizm TPN,VIP.indd 4 6/14/2011 10:50:21 AM

5
CADD‑Prizm® Pump (Diagram)
Display
Keypad
Power Jack
(forthePower Pack
or AC Adapter)
Data In/Out Jack
Air Detector
(Optional)
Amber Light Green Light
Cassette (the part of the CADD™ Medication Cassette Reservoir
or CADD®Administration Set that attaches to the pump)
Battery
Compartment
Green Light
Blinks every 3 seconds when the pump is running and delivering
uid.
Amber Light
Flashing: pump is stopped; or an alarm exists. Steady: pump is
inoperable, call clinician.
Display
Shows information and messages. After a short time, the display turns
itself o to save power. Press any key to turn the display back on.
40-3665-01G PIG, Prizm TPN,VIP.indd 5 6/14/2011 10:50:22 AM

6
Description of the Keys
⁄Starts and stops the pump and silences alarms.
ŒUsed by the clinician.
ÅThe “Help” Key — explains what you see on the display.
¤Used by the clinician.
„Advances you from one screen to the next and silences
some alarms.
ÍThis key is not used in the TPN Delivery mode.
‹Used by the clinician.
´Lets you answer yes to a question on the pump’s display.
ÎLets you answer no to a question on the pump’s display.
40-3665-01G PIG, Prizm TPN,VIP.indd 6 6/14/2011 10:50:22 AM

7
Installing a New Battery
A 9 volt (9V) battery may be used to power the pump. Even if you are
using a Power Pack or AC Adapter to power the pump, you must have
a 9V battery installed.
If 9-volt Battery Low or 9-volt Battery Depleted appears in the
display, or if Battery Low appears on the main screen, you should
change the battery.
Use a new 9V alkaline battery such as the DURACELL® Alkaline MN
1604 or the EVEREADY® ENERGIZER Alkaline #522 battery.
Dispose of used batteries in an environmentally safe manner, and
according to any regulations which may apply.
WARNINGS:
• DonotuserechargeableNiCdornickelmetalhydride(NiMH)
batteries. Do not use carbon zinc (“heavy duty”) batteries.
They do not provide sucient power for the pump to operate
properly, which could result in death or serious injury.
• Alwayshavenewbatteriesavailableforreplacement.If
power is lost, non‑delivery of drug will occur and, depending
on the drug being administered, could result in death or
serious injury.
• Thereisnopumpalarmtoalertyouthatthebatteryhas
not been properly installed or has become dislodged. An
improperly installed or dislodged battery could result in loss
of power and non‑delivery of drug and, depending on the
drug being administered, could result in death or serious
injury.
• Ifthepumpisdroppedorhit,thebatterydoormaybecome
brokenordamaged.DONOTUSEthepumpifithasbeen
damaged because the battery will not be properly secured;
this may result in loss of power, nondelivery of drug, and,
depending on the type of drug being administered, death or
serious injury.
40-3665-01G PIG, Prizm TPN,VIP.indd 7 6/14/2011 10:50:22 AM

8
To install a new battery:
1. Stop the pump by pressing
⁄.
2. When you see Stop the pump?,
press ´.
3. Press the button on the battery
door and slide the battery door
forward. Remove the used battery.
4. Match the +and –markings on the
new battery with the markings on
the pump. Insert the battery. The
pump will beep if the battery is
inserted correctly.
5. Replace the battery door.
The pump will power up
automatically.
6. Start the pump by pressing
⁄.
7. When you see Start the pump?,
press ´.
NOTE:
• Ifyouputthebatteryinbackwards,
thedisplaywillremainblank.
Reinsertthebattery,makingsureto
matchthe+and –markings.
Thepowerupsequencewillstart,
thepumpwillgothroughanelectronicself-test,andthepumpwill
beepattheendofthepowerupsequence.Allofthedisplayindicators,
thesoftwarerevisionlevel,andeachparameterwillappearbriey.
CAUTION:Donotstorethepumpforprolongedperiodsoftime
withthebatteryinstalled.Batteryleakagecoulddamagethe
pump.
2000-03-08 D. Zurn
«Prizm Match
Battery»
Press Battery
Door Button
2000-03-08 D. Zurn
«Prizm Open
Door w/Button»
Stop the Pump?
Press Y or N
Start the Pump?
Press Y or N
40-3665-01G PIG, Prizm TPN,VIP.indd 8 6/14/2011 10:50:23 AM

9
UsingthePowerPackorACAdapter
Depending on your delivery, your clinician may give you a
rechargeablePowerPackoranACAdaptertopoweryourpump.For
complete instructions, you should also read the Instructions for Use
that come with the Power Pack or AC Adapter.
The cord from the Power Pack or AC Adapter plugs directly into the
“Power” jack on the side of your pump.
NOTE:Agood9Vbatterymustalsobeinstalledinyourpumpasa
backup.Otherwise,youwon’tbeabletostartthepump.YourPowerPack
orACAdaptermayormaynothavetheconnectorshown.
1. Open the “Power” cover on
the side of your pump.
2. Line up the red mark on the
Power Pack cord connector
with the red mark on the
pump’s Power jack.
3. Push the connector forward
until it stops. Do not twist
or turn the connector. Pull
lightly on the cord directly
behind the ared part of the
connector to make sure it is
rmly attached.
CAUTION:Failuretopushtheconnectorallthewayforwardmay
result in an intermittent connection, and the connector may
dislodge, causing a loss of power.
Power Jack
Red Mark
40-3665-01G PIG, Prizm TPN,VIP.indd 9 6/14/2011 10:50:24 AM

10
NOTE:Ifnecessary,youcanrechargethePowerPackwhileitisstill
attachedtothepump.JustattachtheACAdapterconnectortothe
PowerPackinputjack.Or,ifyouwanttooperatethepumponACpower,
youcanattachtheACAdapterdirectlytothepump’sPowerjack.
AC
ADAPTER
POWERPACK
DetachingthePowerPack
1. Grasp the connector.
2. Pull the connector back using a straight, steady motion. DO NOT
twist or turn the connector.
40-3665-01G PIG, Prizm TPN,VIP.indd 10 6/14/2011 10:50:24 AM

11
TheMainScreen
The following screen is what you will see on the pump’s display
most of the time. It is called the Main Screen and shows the
following:
Battery Status *** TPN 6230X ***
Low Battery RUNNING ≥
Res Vol 3000.0 ml
Press NEXT to advance
Reminder that the „key lets
you look at the pump’s program
Status of Infusion Period.
Seethenextpage. If the
pump is stopped, this will
show STOPPED.
Status of
Reservoir
Volume
40-3665-01G PIG, Prizm TPN,VIP.indd 11 6/14/2011 10:50:24 AM

12
Description of the Infusion Profile
The illustration below shows what an infusion prole may look like.
You can tell where you are in your infusion prole by looking at the
main screen.
• Duringtaperup, the main screen shows RUNNING ¤
• Duringtheplateaurate, the main screen shows RUNNING ≥
• Duringtaperdown, the main screen shows RUNNING ™
• DuringKVO, the main screen shows RUNNING K
Before each infusion, the
infusion prole is reset
so delivery starts here
At the end of the
infusion prole, you’ll
hear 9 beeps. The KVO
rate starts automatically.
RUNNING K
(KVO)
RUNNING ¤
(Taper up)
RUNNING ≥
(Plateau)
RUNNING ™
(Taper down)
Your clinician may or may not have programmed a taper up or a
taper down. If there is no taper up, delivery will start at the plateau
rate. If there is no taper down, you will still hear 9 beeps at the end
of the infusion prole, but the rate will immediately drop from the
plateau rate to the KVO rate. Then when you stop the pump, it will
automatically reset to the beginning of the infusion prole.
40-3665-01G PIG, Prizm TPN,VIP.indd 12 6/14/2011 10:50:25 AM

13
HowtoUsetheHELPKeyÅ
If you have a question about a screen, press Åfor more
information. A description of the screen will appear.
Forexample,ifyouwantinformationabouttheReservoirVolume
screen, you can press Åand this screen will appear:
The symbol (?≥) in the lower right
corner means there are more help
screens. Press Åagain to see
the next help screen.
To page through all the help screens, press Årepeatedly. This
will take you through all the help screens, then back to the original
screen you had questions about.
To return to the original screen you had questions about, without
going through all the help screens, press „.
This is the
calculated amount of
fluid left in the
reservoir. ?≥
40-3665-01G PIG, Prizm TPN,VIP.indd 13 6/14/2011 10:50:25 AM

14
Starting the Pump
When you start the pump, it will review the program, and then begin
delivering medication. If the pump will not start, a message should
appear on the display. RefertotheMessagesandAlarmssectionon
page24.
WARNING: Prior to starting infusion, inspect the uid path for
kinks,aclosedclamp,orotherupstreamobstructions,and
remove all air bubbles to prevent air embolism. An undetected
upstream occlusion may result in under‑ or non‑delivery of drug
and, depending on the drug being administered, could result
in death or serious injury. Air embolism can result in death or
serious injury.
1. Press
⁄.
2. When Start the pump? appears,
press ´.
Starting pump… will appear. The
pump will automatically review
and display the preprogrammed
settings.
RUNNING will appear on the main
screen, the green light will blink,
and uid delivery will begin as
programmed by your clinician.
*** TPN 6230X ***
RUNNING ¤
Res Vol 3000.0 ml
Press NEXT to advance
Start the Pump?
Press Y or N
Starting pump...
40-3665-01G PIG, Prizm TPN,VIP.indd 14 6/14/2011 10:50:25 AM

15
Stopping and Restarting the Pump
Stopping the pump stops delivery of medication. Whenever the
pump is stopped, the amber light will blink.
• Ifyoustopthepumpduring the Infusion Prole, delivery will
stop, but will continue from the same point when you restart the
pump.
• Ifyoustopthepumpduring KVO delivery, the Infusion Prole and
the Reservoir Volume will automatically be reset. This means that
when you restart the pump, it will start from the beginning of the
Infusion Prole.
1. Press
⁄.
2. When Stop the Pump? appears,
press ´.
You will see two screens if you
stopped the pump during KVO
delivery:
STOPPED will appear on the main
screen, and the amber light will
blink.
Stop the Pump?
Press Y or N
*** TPN 6230X ***
STOPPED
Press NEXT to advance
Infusion Profile
has been reset
Reservoir Volume
3000.0 ml
<Resetting...>
40-3665-01G PIG, Prizm TPN,VIP.indd 15 6/14/2011 10:50:25 AM

16
Removing a Cassette
WARNING: Per general rules of safe practice, always close the
tubing clamp before removing the cassette from the pump to
prevent unregulated infusion, which could result in death or
serious injury.
To remove a cassette:
1. Press
⁄to stop the pump.
When Stop the pump? appears,
press ´.
2. Close all tubing clamps and
disconnect the tubing from your
access device as instructed by your
clinician.
3. Use a coin to unlatch the cassette.
Insert the coin into the slot and turn
clockwise until the latching button
pops out.
NOTE:Ifyoucannotturnthelatching
button,thecassettemaybelocked.
Contactyourclinician.
4. Remove the cassette from the
pump.
5. Discard the CADD™ Medication
Cassette Reservoir or CADD®
Administration Set as instructed
by your clinician.
Stop the Pump?
Press Y or N
2000-03-08 D. Zurn
«Prizm Remove Cass»
40-3665-01G PIG, Prizm TPN,VIP.indd 16 6/14/2011 10:50:26 AM

17
Attaching a Cassette
WARNING:
• IfyouareusingaCADD® Administration Set or CADD™
MedicationCassetteReservoirthatdoesnothavetheow
stop feature (reorder number does not start with 21‑73xx):
You must use a CADD® ExtensionSetwithAnti-SiphonValve
or a CADD® Administration Set with either an integral or add
onAnti-SiphonValvetoprotectagainstunregulatedgravity
infusion that can result from an improperly attached cassette.
Unregulatedgravityinfusioncanresultindeathorserious
injury.
• Fordetailedinstructionsandwarningspertainingto
theCADD™MedicationCassetteReservoirorCADD®
Administration Set, please refer to the instructions for use
supplied with those products.
CAUTION:Frozenmedicationmustbethawedatroom
temperatureonly.DonotheattheCADD™MedicationCassette
Reservoir in a microwave oven as this may damage the
medication,theCADD™MedicationCassetteReservoir,orcause
leakage.
Use aseptic technique as instructed by your clinician.
1. Clamp the tubing on the
new CADD™ Medication
Cassette Reservoir or CADD®
Administration Set. If required,
remove blue clip from ow
stop feature.
2000-03-08 D. Zurn
«Prizm Hinge Cass»
40-3665-01G PIG, Prizm TPN,VIP.indd 17 6/14/2011 10:50:27 AM

18
2. Insert the cassette hooks into
the hinge pins on the pump.
3. Place the pump upright on a
rm, at surface. Press down
so the cassette ts tightly
against the pump.
4. Insert a coin into the latching
button, push in, and turn
counterclockwise until the
mark on the latch lines up
with the solid dot.
WARNING: Attach the cassette (the part of the CADD™
MedicationCassetteReservoirorCADD® Administration Set
that attaches to the pump) properly. An improperly attached or
detached cassette could result in unregulated gravity infusion
of medication from the uid container or a reux of blood,
which could result in death or serious injury.
5. Gently twist and pull on the cassette
to make sure it is rmly attached.
6. A message will appear on the
display showing the type of
cassette you have latched. Press
„.
2000-03-08 D. Zurn
«Prism Attach CassTable»
2000-03-08 D. Zurn
«Prizm Twist Cass»
High Volume Admin
set latched
NEXT to continue
40-3665-01G PIG, Prizm TPN,VIP.indd 18 6/14/2011 10:50:27 AM
Other manuals for CADD-Prizm VIP
4
This manual suits for next models
2
Table of contents
Other Smiths Medical Personal Care Product manuals
