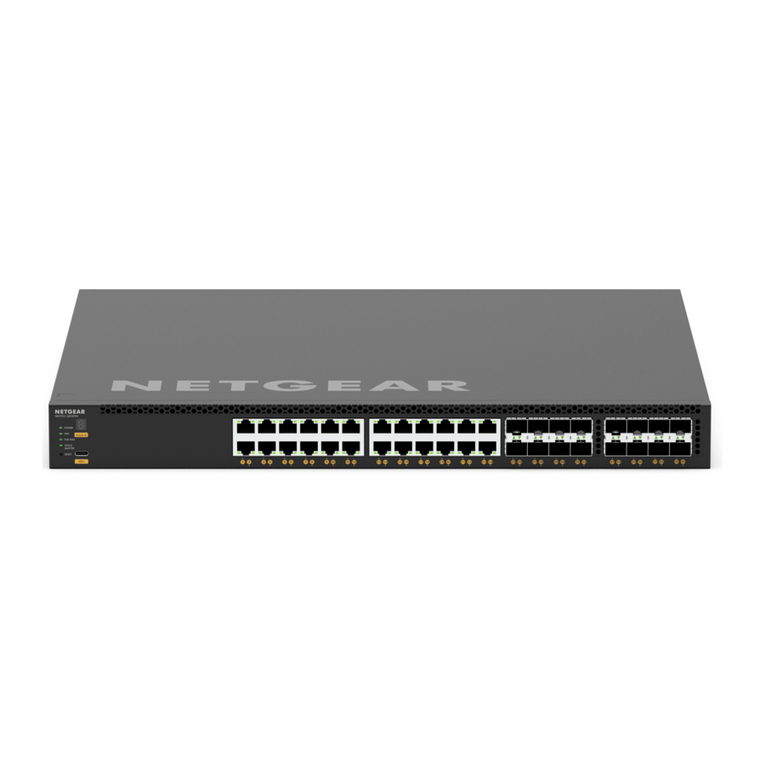
Snell MV-16 User manual

snellgroup.com
User Manual
MV-16 Multiviewer
Enables up to 16 channels of video to be
viewed on a single display device

MV-16 Multiviewer www.snellgroup.com
Issue 1 Rev 12 Page 2 © 2013 Snell Limited

MV-16 Multiviewer www.snellgroup.com Contents
Issue 1 Rev 12 Page 3 © 2013 Snell Limited
Contents
1. Introduction. . . . . . . . . . . . . . . . . . . . . . . . . . . . . . . . . . . . . . . . . . . . . . . . . . . . . . . . . 7
1.1 System Concept . . . . . . . . . . . . . . . . . . . . . . . . . . . . . . . . . . . . . . . . . . . . . . . . . . 7
1.2 Features and Benefits . . . . . . . . . . . . . . . . . . . . . . . . . . . . . . . . . . . . . . . . . . . . . . 8
1.2.1 Powerful Alarms . . . . . . . . . . . . . . . . . . . . . . . . . . . . . . . . . . . . . . . . . . . . 9
1.2.2 Captions and UMD. . . . . . . . . . . . . . . . . . . . . . . . . . . . . . . . . . . . . . . . . . 9
1.2.3 Using Bitmaps . . . . . . . . . . . . . . . . . . . . . . . . . . . . . . . . . . . . . . . . . . . . . 9
1.2.4 Keeping Time . . . . . . . . . . . . . . . . . . . . . . . . . . . . . . . . . . . . . . . . . . . . . . 9
1.2.5 Genlocking . . . . . . . . . . . . . . . . . . . . . . . . . . . . . . . . . . . . . . . . . . . . . . . 10
1.2.6 Using GPI Input/Output Connections . . . . . . . . . . . . . . . . . . . . . . . . . . . 10
1.2.7 Bargraph Scales. . . . . . . . . . . . . . . . . . . . . . . . . . . . . . . . . . . . . . . . . . . 10
2. Installation . . . . . . . . . . . . . . . . . . . . . . . . . . . . . . . . . . . . . . . . . . . . . . . . . . . . . . . . 11
2.1 Power and fuses . . . . . . . . . . . . . . . . . . . . . . . . . . . . . . . . . . . . . . . . . . . . . . . . . .11
2.2 Health and safety considerations . . . . . . . . . . . . . . . . . . . . . . . . . . . . . . . . . . . . .11
2.2.1 Disposal . . . . . . . . . . . . . . . . . . . . . . . . . . . . . . . . . . . . . . . . . . . . . . . . . .11
2.3 Connector I/O . . . . . . . . . . . . . . . . . . . . . . . . . . . . . . . . . . . . . . . . . . . . . . . . . . . 12
2.4 Input card configurations . . . . . . . . . . . . . . . . . . . . . . . . . . . . . . . . . . . . . . . . . . . 12
2.4.1 Video Inputs . . . . . . . . . . . . . . . . . . . . . . . . . . . . . . . . . . . . . . . . . . . . . . 13
2.4.2 Video Outputs. . . . . . . . . . . . . . . . . . . . . . . . . . . . . . . . . . . . . . . . . . . . . 13
2.4.3 Audio I/O . . . . . . . . . . . . . . . . . . . . . . . . . . . . . . . . . . . . . . . . . . . . . . . . 13
2.5 Serial port assignments. . . . . . . . . . . . . . . . . . . . . . . . . . . . . . . . . . . . . . . . . . . . 14
2.6 Audio I/O connector pin assignments . . . . . . . . . . . . . . . . . . . . . . . . . . . . . . . . . 15
3. Operation . . . . . . . . . . . . . . . . . . . . . . . . . . . . . . . . . . . . . . . . . . . . . . . . . . . . . . . . . 17
3.1 Local Operating Modes . . . . . . . . . . . . . . . . . . . . . . . . . . . . . . . . . . . . . . . . . . . . 17
3.1.1 Normal Mode . . . . . . . . . . . . . . . . . . . . . . . . . . . . . . . . . . . . . . . . . . . . . 17
3.1.2 Configuration Mode . . . . . . . . . . . . . . . . . . . . . . . . . . . . . . . . . . . . . . . . 18
3.2 Keyboard Operation . . . . . . . . . . . . . . . . . . . . . . . . . . . . . . . . . . . . . . . . . . . . . . 18
3.3 Using the Web Interface . . . . . . . . . . . . . . . . . . . . . . . . . . . . . . . . . . . . . . . . . . . 19
3.3.1 Object and Source Explorer . . . . . . . . . . . . . . . . . . . . . . . . . . . . . . . . . . 21
3.3.2 Navigating the User Interface. . . . . . . . . . . . . . . . . . . . . . . . . . . . . . . . . 21
3.4 Module Properties . . . . . . . . . . . . . . . . . . . . . . . . . . . . . . . . . . . . . . . . . . . . . . . . 23
3.4.1 Boards Tab . . . . . . . . . . . . . . . . . . . . . . . . . . . . . . . . . . . . . . . . . . . . . . . 23
3.4.2 Screen Tab . . . . . . . . . . . . . . . . . . . . . . . . . . . . . . . . . . . . . . . . . . . . . . . 24
3.4.3 Sources Tab . . . . . . . . . . . . . . . . . . . . . . . . . . . . . . . . . . . . . . . . . . . . . . 25
3.4.4 Audio Monitor Tab . . . . . . . . . . . . . . . . . . . . . . . . . . . . . . . . . . . . . . . . . 26
3.4.5 Audio Outputs Tab . . . . . . . . . . . . . . . . . . . . . . . . . . . . . . . . . . . . . . . . . 26
3.4.6 GPO Alarms Tab . . . . . . . . . . . . . . . . . . . . . . . . . . . . . . . . . . . . . . . . . . 27
3.4.7 Network tab . . . . . . . . . . . . . . . . . . . . . . . . . . . . . . . . . . . . . . . . . . . . . . 28
3.4.8 Protocols - Serial Ports Tab . . . . . . . . . . . . . . . . . . . . . . . . . . . . . . . . . . 29
3.5 Source Properties . . . . . . . . . . . . . . . . . . . . . . . . . . . . . . . . . . . . . . . . . . . . . . . . 31
3.5.1 Audio Tab . . . . . . . . . . . . . . . . . . . . . . . . . . . . . . . . . . . . . . . . . . . . . . . . 31
3.5.2 Alarm Tab . . . . . . . . . . . . . . . . . . . . . . . . . . . . . . . . . . . . . . . . . . . . . . . . 32
3.5.3 Audio Alarms . . . . . . . . . . . . . . . . . . . . . . . . . . . . . . . . . . . . . . . . . . . . . 33
3.5.4 Copy Tab . . . . . . . . . . . . . . . . . . . . . . . . . . . . . . . . . . . . . . . . . . . . . . . . 34
3.6 Set Time . . . . . . . . . . . . . . . . . . . . . . . . . . . . . . . . . . . . . . . . . . . . . . . . . . . . . . . 35
3.7 Layout Menu . . . . . . . . . . . . . . . . . . . . . . . . . . . . . . . . . . . . . . . . . . . . . . . . . . . . 36
3.7.1 Layout Properties . . . . . . . . . . . . . . . . . . . . . . . . . . . . . . . . . . . . . . . . . . 36
3.8 Group Menu . . . . . . . . . . . . . . . . . . . . . . . . . . . . . . . . . . . . . . . . . . . . . . . . . . . . 37
3.9 Objects Menu . . . . . . . . . . . . . . . . . . . . . . . . . . . . . . . . . . . . . . . . . . . . . . . . . . . 38
3.10 Grid Menu . . . . . . . . . . . . . . . . . . . . . . . . . . . . . . . . . . . . . . . . . . . . . . . . . . . . . 39
3.11 Help Menu . . . . . . . . . . . . . . . . . . . . . . . . . . . . . . . . . . . . . . . . . . . . . . . . . . . . . 39
3.11.1 About . . . . . . . . . . . . . . . . . . . . . . . . . . . . . . . . . . . . . . . . . . . . . . . . . . 39
3.12 Edit Object Window . . . . . . . . . . . . . . . . . . . . . . . . . . . . . . . . . . . . . . . . . . . . . . 40
3.12.1 Type Tab. . . . . . . . . . . . . . . . . . . . . . . . . . . . . . . . . . . . . . . . . . . . . . . . 40
3.12.2 Border tab . . . . . . . . . . . . . . . . . . . . . . . . . . . . . . . . . . . . . . . . . . . . . . 41
3.12.3 Parent Tab . . . . . . . . . . . . . . . . . . . . . . . . . . . . . . . . . . . . . . . . . . . . . . 42
3.12.4 UMD Tab . . . . . . . . . . . . . . . . . . . . . . . . . . . . . . . . . . . . . . . . . . . . . . . 43

MV-16 Multiviewer www.snellgroup.com Contents
Issue 1 Rev 12 Page 4 © 2013 Snell Limited
3.12.5 Properties Tab . . . . . . . . . . . . . . . . . . . . . . . . . . . . . . . . . . . . . . . . . . . 44
4. Connection to Other Equipment. . . . . . . . . . . . . . . . . . . . . . . . . . . . . . . . . . . . . . . 57
4.1 Interfaces. . . . . . . . . . . . . . . . . . . . . . . . . . . . . . . . . . . . . . . . . . . . . . . . . . . . . . . 57
4.1.1 D-sub 9 serial interface, RS232/RS422 . . . . . . . . . . . . . . . . . . . . . . . . . 57
4.1.2 GPI Input/Output Connector. . . . . . . . . . . . . . . . . . . . . . . . . . . . . . . . . . 58
4.1.3 Analog Audio in/out Connector D-sub 37 Female . . . . . . . . . . . . . . . . . 60
4.1.4 Analog Monitor Out Connector D-sub 25 Female . . . . . . . . . . . . . . . . . 61
4.2 Configuring the MV-16 for TSL UMD Protocol . . . . . . . . . . . . . . . . . . . . . . . . . . 62
4.3 Example for setting up a GPI input to use as a Tally. . . . . . . . . . . . . . . . . . . . . . 63
4.4 Example Interfacing with a Kahuna 360 or Kahuna 360 Compact . . . . . . . . . . . 65
4.4.1 Connect the Kahuna 360 Mainframe to the Multiviewer . . . . . . . . . . . . 65
4.4.2 Setup the Kahuna 360 Protocol . . . . . . . . . . . . . . . . . . . . . . . . . . . . . . . 67
4.4.3 Kahuna 360 Peripherals Setup . . . . . . . . . . . . . . . . . . . . . . . . . . . . . . . 68
4.4.4 Multiviewer Setup. . . . . . . . . . . . . . . . . . . . . . . . . . . . . . . . . . . . . . . . . . 69
4.5 Connecting the Multiviewer to a Nucleus or Nebula Controller . . . . . . . . . . . . . . 73
4.5.1 MV-16 Settings. . . . . . . . . . . . . . . . . . . . . . . . . . . . . . . . . . . . . . . . . . . . 74
4.5.2 MV-16 Wiring Connections to Nucleus/Nebula Controller . . . . . . . . . . . 74
4.5.3 Nucleus 2450 Settings . . . . . . . . . . . . . . . . . . . . . . . . . . . . . . . . . . . . . . 74
4.5.4 Nebula Settings . . . . . . . . . . . . . . . . . . . . . . . . . . . . . . . . . . . . . . . . . . . 74
5. Maintenance Tasks. . . . . . . . . . . . . . . . . . . . . . . . . . . . . . . . . . . . . . . . . . . . . . . . . . 75
5.1 Uploading Graphics Files . . . . . . . . . . . . . . . . . . . . . . . . . . . . . . . . . . . . . . . . . . 75
5.2 Multiviewer System Settings . . . . . . . . . . . . . . . . . . . . . . . . . . . . . . . . . . . . . . . . 75
5.2.1 Backing Up the Multiviewer . . . . . . . . . . . . . . . . . . . . . . . . . . . . . . . . . . 75
5.2.2 Restoring the Backup file to a Multiviewer . . . . . . . . . . . . . . . . . . . . . . . 76
6. Upgrading Firmware. . . . . . . . . . . . . . . . . . . . . . . . . . . . . . . . . . . . . . . . . . . . . . . . . 77
6.1 Updating the scalers . . . . . . . . . . . . . . . . . . . . . . . . . . . . . . . . . . . . . . . . . . . . . . 78
Appendix A. Hydra Open Protocol . . . . . . . . . . . . . . . . . . . . . . . . . . . . . . . . . . . . . . . 79
A.1 Introduction . . . . . . . . . . . . . . . . . . . . . . . . . . . . . . . . . . . . . . . . . . . . . . . . . . . . . 79
A.2 Formatting. . . . . . . . . . . . . . . . . . . . . . . . . . . . . . . . . . . . . . . . . . . . . . . . . . . . . . 79
A.3 Connections . . . . . . . . . . . . . . . . . . . . . . . . . . . . . . . . . . . . . . . . . . . . . . . . . . . . 79
A.4 Transactions . . . . . . . . . . . . . . . . . . . . . . . . . . . . . . . . . . . . . . . . . . . . . . . . . . . . 80
A.5 Commands . . . . . . . . . . . . . . . . . . . . . . . . . . . . . . . . . . . . . . . . . . . . . . . . . . . . . 80
A.5.1 Commands - Summary . . . . . . . . . . . . . . . . . . . . . . . . . . . . . . . . . . . . . 81
A.5.2 Object related commands . . . . . . . . . . . . . . . . . . . . . . . . . . . . . . . . . . . 81
A.5.3 Source related commands. . . . . . . . . . . . . . . . . . . . . . . . . . . . . . . . . . . 83
A.5.4 Module related commands . . . . . . . . . . . . . . . . . . . . . . . . . . . . . . . . . . 85
A.6 Parameter Values . . . . . . . . . . . . . . . . . . . . . . . . . . . . . . . . . . . . . . . . . . . . . . . . 85
A.6.1 Color Values . . . . . . . . . . . . . . . . . . . . . . . . . . . . . . . . . . . . . . . . . . . . . 85
Appendix B. Technical Appendix . . . . . . . . . . . . . . . . . . . . . . . . . . . . . . . . . . . . . . . . 87
B.1 Technical Data . . . . . . . . . . . . . . . . . . . . . . . . . . . . . . . . . . . . . . . . . . . . . . . . . . 87
Appendix C. Trouble Shooting . . . . . . . . . . . . . . . . . . . . . . . . . . . . . . . . . . . . . . . . . . 91
C.1 Problem solving . . . . . . . . . . . . . . . . . . . . . . . . . . . . . . . . . . . . . . . . . . . . . . . . . 91
C.1.1 Sample problems and their solutions . . . . . . . . . . . . . . . . . . . . . . . . . . 91

MV-16 Multiviewer www.snellgroup.com Information and Notices
Issue 1 Rev 12 Page 5 © 2013 Snell Limited
Information and Notices
Customer Support
Customers with a support contract should call their personalized number, which can be found
in their contract, and be ready to provide their contract number and details.
Copyright and Disclaimer
Copyright protection claimed includes all forms and matters of copyrightable material and
information now allowed by statutory or judicial law or hereinafter granted, including without
limitation, material generated from the software programs which are displayed on the screen
such as icons, screen display looks etc.
Information in this manual and software are subject to change without notice and does not
represent a commitment on the part of Snell Ltd. The software described in this manual is
furnished under a license agreement and may not be reproduced or copied in any manner
without prior agreement with Snell Ltd. or their authorized agents.
Reproduction or disassembly of embedded computer programs or algorithms prohibited.
No part of this publication may be transmitted or reproduced in any form or by any means,
electronic or mechanical, including photocopy, recording or any information storage and
retrieval system, without permission being granted, in writing, by the publishers or their
authorized agents.
Snell operates a policy of continuous improvement and development. Snell reserves the right
to make changes and improvements to any of the products described in this document
without prior notice.
United Kingdom (HQ)
+44 (0) 118 921 4214 (tel)
+44 (0) 118 921 4268 (fax)
customersupport@snellgroup.com
Regional Support Contacts
Snell USA
+1 818 556 2616 (tel)
+1 818 556 2626 (fax)
Snell Germany
+49 (0) 6122 98 43 0 (tel)
+49 (0) 6122 98 43 44 (fax)
Snell Spain
+34 91 446 23 07 (tel)
+34 91 446 17 74 (fax)
Snell France
+33 1 41 95 30 50 (tel)
+33 1 41 95 30 51 (fax)
Snell Asia Pacific
+852 2356 1660 (tel)
+852 2575 1690 (fax)
Snell India
+91 124 462 6000 (tel)
+91 124 437 5888 (fax)
Snell Russia
+7 499 248 3443 (tel)
+7 499 248 1104 (fax)
support.russia@snellgroup.com
Snell China
+86 10 6515 6158 (tel)
+86 10 6515 5659 (fax)
support.china@snellgroup.com

MV-16 Multiviewer www.snellgroup.com Information and Notices
Issue 1 Rev 12 Page 6 © 2013 Snell Limited

MV-16 Multiviewer www.snellgroup.com Introduction
Issue 1 Rev 12 Page 7 © 2013 Snell Limited
1. Introduction
The compact MV-16 multi-viewer enables up to 16 channels of video to be viewed on a single
display device. The inputs are auto-sensing composite, SDI, HD-SDI inputs. In addition there
are two DVI-I video inputs. Up to 3G 1080p is supported.
The MV-16 is designed to optimize monitoring flexibility within the multi-channel video
environment, whether used for video production, television broadcast or CCTV. It is supplied
as a 1U rack mounting frame. It is easily controlled from a PC web browser hosted by the
frame itself, either directly via an Ethernet cable or over a network.
1.1 System Concept
The modular architecture is designed for scalability. Each video input card handles four
channels. Up to four cards may be fitted to the frame, providing a total of 16 inputs.
Additionally, if external audio functionality is required, audio input or output cards may be
fitted. The diagram below shows the overall concept.
A scaler on each video card processes one of the possible inputs (CVBS, SDI/HD-SDI, DVI)
and scales it to the desired tile size for the selected position on the output. A mixer on each
video card combines all the video tiles and sends the resulting image to the next video card.
The final display output comprises all of the tiles in a single picture.
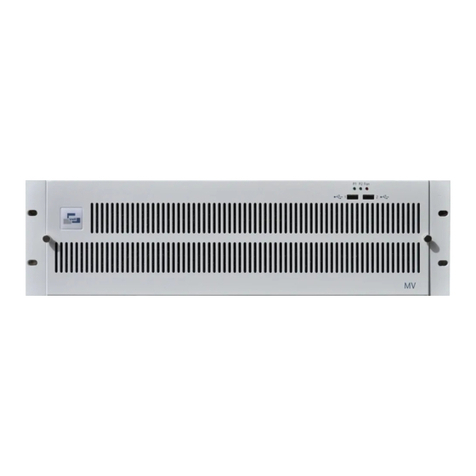
Fig 1. The MV-16 Multiviewer Front Panel.
Fig 2. The MV-16 System Concept.

MV-16 Multiviewer www.snellgroup.com Introduction
Issue 1 Rev 12 Page 8 © 2013 Snell Limited
Possible inputs are:
• Card MV-VIP1 - Composite, S-video, RGB, YUV, SDI, DVI-I
• Card MV-VIP2 - Composite, S-video, RGB, YUV, SDI, HD-SDI, 3G-SDI, DVI-I
Overlay of audio and graphics information is performed inside each scaler, which receives
control data from the main CPU in real-time for analog/AES/EBU/ channels, or from the video
card itself in the case of embedded SDI/HD-SDI audio.
To allow arbitrary layering of sources, each input board has information about all of the tile
positions, allowing each tile to be displayed as required and enabling picture overlay with
complex borders.
DVI-I inputs replace inputs on BNC 1 and 2. If DVI-I input 1 is enabled, any SDI input on
BNC 1 is replaced by the DVI-I input. Similarly, DVD-I input 2 will replace any SDI input on
BNC 2.
1.2 Features and Benefits
• Up to 16 auto-sensing monitored composite, SDI, HD-SDI S-Video, RGB and YUV
inputs and two DVI-I video inputs (up to 3G 1080p)
• DVI-I output up to 1080p60 (1920x1080) in 16:9
• Genlocked inputs for flicker-free and full frame operation
• Teletext (analog), subtitles, AFD, WSS, VITC (SDI/HD-SDI only) decoding &
monitoring
• Up to 256 channels of embedded audio may be displayed as industry standard
bar-graphs with a choice of scales/ballistics
• Using the appropriate optional input card up to 32 external analog or digital audio
channels (AES/EBU with SRC) can be displayed
• 4 pairs of assignable analog audio monitor outputs
• Outputs for up to 32 channels of demuxed audio; analog or AES/EBU
• Alarms for video, audio and metadata, with outputs to GPI outputs, LAN and/or SNMP
traps
• Assignable tallies
• Under Monitor Displays (UMD) entered via keyboard, LAN or serial cable, supporting
TSL and other protocols
• Clock display receiving time information via NTP network protocol or LTC
• 1 RU compact design, ideal for OB-vans and other space restricted installations
• Front panel control
• User-friendly set-up via system menu/browser software
• Standard internal dual redundant power supply fed from a single IEC input
Note:
If composite inputs are used on BNC 1 and 2, they may be routed inside the first video card
to channels 3 and/or 4.

MV-16 Multiviewer www.snellgroup.com Introduction
Issue 1 Rev 12 Page 9 © 2013 Snell Limited
1.2.1 Powerful Alarms
Alarms can be created for video sync loss, black (loss of luminance), freeze-frame,
embedded audio loss, external audio loss, over level, out of phase (of chosen pairs), teletext
loss, and closed caption loss. The colors used for on-screen alarms are as follows:
If carrier loss occurs, only that alarm will flash, unless audio loss had already been active for
the same channel.
The decoding of closed caption is available on each scaler, together with an associated
alarm. Analog teletext decoding is available in the scaler.
On-screen alarm indication can be a stationary or flashing colored tile border. External alarm
indication may be via the GPI I/O or the LAN/software application, e.g. NGM-164.
Optional triggering of SNMP traps for each alarm function or group are also supported.
Tiles have an optional color coded border to provide status indication, such as tally or alarms.
VITC loss is indicated by the burnt in VITC display flashing. Burnt in VITC is available from
SDI sources only.
1.2.2 Captions and UMD
Captions or Under Monitor Display (UMD) information can be generated manually from a
keyboard connected to a front panel USB-2 port or automatically from remote sources via the
LAN, using browser software operating on a remote PC, or via the RS232/422 port using TSL
or other protocols. Up to two lines of UMD text can be left, center, or right justified and may be
placed anywhere in the tile.
1.2.3 Using Bitmaps
There is storage capacity (about 200Mb) for bitmaps. These can be used as backgrounds, or
to display station idents, etc. The bitmaps must be in bmp or png file format and can be
uploaded to the frame via the LAN. Up to four bitmaps may be displayed at any one time.
1.2.4 Keeping Time
Clock/date display data can be derived from several sources; the system clock, NTP
synchronisation, LTC, or VITC from a chosen SDI input.
If there is no LTC present, the frame searches the network for an NTP Server in the nearby
region (pool.ntp.org). If a server is found, the time is taken from that.
In the absence of any clock, the system time is used. A battery on the CPU board insures that
time data is retained if the unit be powered down.
For each input is possible to display either the Ancillary Timecode or the DVITC from the
video source.
Alarm Color Position
Audio Loss Yellow Position (left or right indicates channel)
Audio Over Red Position (left or right indicates channel)
Anti-Phase Cyan Middle Alarm
Carrier Loss White Middle Alarm
Table 1. Alarms.
Note:
When LTC is present this source becomes the exclusive reference for clocks.
The input is balanced; to use an unbalanced LTC input, the signal must be properly
converted with a Balun in-line transformer. Grounding either of the LTC input pins will not
work.

MV-16 Multiviewer www.snellgroup.com Introduction
Issue 1 Rev 12 Page 10 © 2013 Snell Limited
LTC is applied to the frame through a BNC on the rear of the frame.
See section 3.6 for more information.
If VBI data is present on a video input and the video is an SDI source then the data can be
displayed on the relevant video tile (see sections 3.12.5.5 and 3.12.5.6 for setting details).
If multiple sources of timecode are present in a video source then the timecode selected for
display, in order of priority is; Ancillary VITC, Ancillary LTC and D-VITC.
1.2.5 Genlocking
Genlocking of the MV-16 is via SD color black or HD tri-level sync, or may be taken from a
chosen input on any input card.
1.2.6 Using GPI Input/Output Connections
Assignable GPI I/O with 16 inputs and 8 outputs for external alarm indication and tally
functions.
1.2.7 Bargraph Scales
The following audio scales are supported:
Colors used for the upper and lower ranges of each bar type can be customized to satisfy any
in-house monitoring style for each of the six scale types.
Note:
1. D-VITC is only available on SD sources as there is currently no standard for HD
sources. Ancillary Timecode is available on both SD and HD sources.
2. The Timecode is displayed in a fixed position near the bottom center of the tile
within the video.
3. The display will start to be cropped when the tile is 150 pixels or less wide.
Fig 3. Available meter scales.
Note:
Each bar type can have different range colors.

MV-16 Multiviewer www.snellgroup.com Installation
Issue 1 Rev 12 Page 11 © 2013 Snell Limited
2. Installation
The MV-16 1U frame may be installed in 19 inch bays with 426mm depth (~450mm including
connectors). Ventilation is produced in each frame with exhaust fans on the left hand side
(viewed from front) and intake grilles at the right. Frames should be installed into bays such
that airflow through these apertures is not impeded.
The front rack ears are intended to provide a means of retaining the unit in the rack.
2.1 Power and fuses
The mains voltage (240/100 Volts) will be auto detected provided it is in the range
90 - 264 V AC and 50/60 Hz. A 5 A fuse is fitted and a spare fuse should be located under the
pull-out flap.
The IEC power inlet is the mains disconnection device for this unit.
2.2 Health and safety considerations
The Installation and Maintenance of the MV-16 unit and any associated equipment must be
carried out by PERSONS SUITABLY QUALIFIED to work with equipment which may be
connected to the mains supply.
The unit MUST BE DISCONNECTED & ISOLATED FROM THE MAINS INPUT and from
other product outputs before undertaking maintenance.
ELECTRIC SHOCK HAZARDS exist if conductive instruments, neck chains or fingers etc. are
placed within the unit or in close proximity of the input/output terminals/connectors.
Incorrect installation can cause internal components to rupture and particles to be ejected
from the product.
TOXIC FUME HAZARDS exist if the unit is subjected to direct flames or excessive
temperature of above 100 Degrees Centigrade ambient.
The mounting and installation of the unit must be arranged by the user to comply with all
safety regulations by the indigenous authority.
2.2.1 Disposal
Do not incinerate as explosive and toxic fume hazards exist. Disposal must be by dismantling
the product to component level and disposing of each component by an approved method.
Fig 4. The 1U MV-16 frame showing main side to side ventilation.
Important:
To ensure adequate support the unit MUST also be supported at the rear of the frame.
Please ensure that ventilation is not impaired when selecting suitable supports.
For your own protection, observe the following safety precautions when installing,
operating and servicing your device:

MV-16 Multiviewer www.snellgroup.com Installation
Issue 1 Rev 12 Page 12 © 2013 Snell Limited
2.3 Connector I/O
The MV-16 uses coaxial BNCs for the video inputs, LTC and sync inputs. Micro cross
connectors are fitted for the two DVI-I inputs and one output. The GPI I/O connector is a high
density 26 way female 'D' connector. External audio connections (input or output) are via a
pair of female 37 way 'D' connectors, with audio monitoring outputs on a male 25 way 'D'
connector. The serial port comprises a 9 way female 'D' connector. A standard RJ45
connector is provided for LAN connection and a USB connector on the front panel is provided
for connecting a keyboard. (A pack of mating 'D' type connectors is supplied with the unit).
2.4 Input card configurations
The MV-16 may be fitted with up to four MV-VIP1 or MV-VIP2 video input cards, or any
combination of the two types. Additionally, an external analogue or digital audio I/O card may
be fitted to a dedicated card slot as an option.
MV-VIP1 video cards support the following standards:
• Composite video PAL/NTSC, CVBS - 1Vpp
• SDI - SMPTE 259M
• DVI-I - digital or analogue component, 1920 x 1080
• S-Video (Y/C)
• Component video RGB/YUV
The MV-VIP2 video card supports HD-SDI up to SMPTE 292M 3G, in addition to the
standards supported by the MV-VIP1 card.
The controller card is always fitted in the top left slot and the Analogue/Digital audio card is
always fitted in the bottom left slot. Video input cards are installed in the remaining slots as
shown Fig 7.
Fig 5. MV-16 1U frame rear connector Input/Output.
Fig 6. MV-16 1U frame with front panel removed.
Fig 7. MV-16 1U frame card slot positions.
Important:
The card retaining strip that is accessible behind the front panel of the unit must first be
re-moved before cards can be fitted or extracted. The I/O cards are not hot-swappable and
the multiviewer must be powered down when inserting and removing cards.

MV-16 Multiviewer www.snellgroup.com Installation
Issue 1 Rev 12 Page 13 © 2013 Snell Limited
2.4.1 Video Inputs
All inputs (except DVI-I) are assigned to the 16 x BNC input connectors at the rear of the unit.
Up to 16 inputs can be applied if the configured video format uses a single BNC (SDI,
HD-SDI, composite). For S-Video, two connectors are required, for RGB/YUV three
connectors are required.
There are two DVI-I input connectors, as this is the maximum number of DVI-I inputs
supported per frame. All input types are assigned within the unit's system menu.
Component inputs such as YUV or RGB require three connections per channel and only one
channel can be handled per input card. However, a further two channels can be fed via the
analogue pins of the two DVI input connectors (and suitably assigned in the unit's menu)
making a maximum total of six channels. Any unused BNCs can be used for other video
formats.
For Y/C, two connections per channel are required. Therefore two channels can be handled
per input card, giving eight channels per frame. Any unused BNCs can be used for other
video formats.
2.4.2 Video Outputs
The main DVI-I output supports resolutions up to HD 1080p60, 16:9 (1920 x 1080). Both
digital and analogue outputs are available on this connector. Images on the output screen can
be varied continuously in size and position, cropped or displayed in pre-configured screen
layouts on a chosen colored background.
The main output is also used to display the unit's system menu when screen configuration
and set-up options are selected. This is not necessary when using external control via the
LAN.
2.4.3 Audio I/O
Audio levels may be displayed using up to 16 bargraphs in each tile, either superimposed on
each video image or outside active video. Audio is derived from the incoming embedded
audio (when using SDI or HDSDI inputs), or from up to 32 channels from external analogue or
AES/EBU sources, for which the appropriate audio input card option must be installed.
Additionally, external audio may be monitored using level data from the Snell NGM-164 via
the LAN.
Note:
1. When external inputs are not required, an optional output card (32 channels
analogue or 16 AES/EBU pairs) may be employed to provide demuxed outputs
from embedded audio.
2. There is an 8 channel analogue audio monitor output, which may be assigned from
any input channel of any format, excluding incoming external audio level data.
3. The number of audio channels described always refers to individual channels, not
channel pairs. For example, eight monitor outputs relate to eight individual
analogue channels or 4 pairs AES/EBU channels.
4. All bargraph scales and ballistics conform to international standards and include
BBC PPM, DIN PPM, Nordic PPM, VU, extended VU, and AES/EBU digital.

MV-16 Multiviewer www.snellgroup.com Installation
Issue 1 Rev 12 Page 14 © 2013 Snell Limited
2.5 Serial port assignments
There is a single serial data port that can be configured for either RS232 or RS422 operation.
The mode of operation is set by means of jumpers (J13 and J14) on the CPU board. The pin
assignment of the connector is given in section 4.1.1.
Jumpers J1, J13 and J14 are located on the Controller (CPU) card. Access requires the
removal of the CPU card from the front of the unit with the power removed.
Fig 8. shows the CPU card jumpers and Table 2. shows the jumper settings.
Fig 8. MV-16 CPU card.
Jumper Position 1/2 Position 2/3
J1 (pair) used for debugging normal
J13 (pair) RS422 (set in conjunction with J14) RS232 (set in conjunction with J14)
J14 (single) RS422 (set in conjunction with J13) RS232 (set in conjunction with J13)
Table 2. MV-16 CPU Jumper settings.
Important:
Only pin 1 of each jumper is indicated on the PCB.
Other CPU card settings and controls are for factory use only.
Jumper J13
Jumper J14
Jumper J1

MV-16 Multiviewer www.snellgroup.com Installation
Issue 1 Rev 12 Page 15 © 2013 Snell Limited
2.6 Audio I/O connector pin assignments
AES/EBU inputs or outputs (depending on the card fitted) may be jumper selected per
channel to be either balanced or unbalanced. These are set from the jumpers on each digital
audio card.
The pin assignment of the connector is given in section 4.1.3.
Fig 9. MV-16 AES/EBU digital audio input card balanced/unbalanced settings.
Jumper Position Description
1/2 Balanced
2/3 Unbalanced
Table 3. Balanced/Unbalanced Jumper positions.
Channel Jumpers Channel Jumpers
1 J2, J3, J4 9 J44, J45, J46
2 J5, J6, J7 10 J47, J48, J49
3 J26, J27, J28 11 J8, J9, J10
4 J29, J30, J31 12 J11, J12, J13
5 J32, J33, J34 13 J14, J15, J16
6 J35, J36, J37 14 J17, J18, J19
7 J38, J39, J40 15 J20, J21, J22
8 J41, J42, J43 16 J23, J24, J25
Table 4. Jumper numbers for each channel.

MV-16 Multiviewer www.snellgroup.com Installation
Issue 1 Rev 12 Page 16 © 2013 Snell Limited

MV-16 Multiviewer www.snellgroup.com Operation
Issue 1 Rev 12 Page 17 © 2013 Snell Limited
3. Operation
The front panel user interface comprises a power switch, 6 buttons for configuring the unit, 10
illuminated pre-set configuration buttons, a USB-2 interface and LED indicators for status
reporting.
The P1 and P2 LED light green to indicate healthy power supplies. If the red F LED is lit after
the unit has booted, failure of one or more ventilation fans has been detected. Under normal
circumstances, the boot cycle takes about 70 seconds.
The MV-16 can be configured and controlled via the LAN, using browser software operating
on a remote PC.
3.1 Local Operating Modes
At the front panel, normal or 'locked' is the normal operating mode. A special configuration or
'menu' mode is provided to allow initial IP address configuration for LAN control via a browser.
The currently set IP address will appear to the top left of the display output during the boot
cycle.
3.1.1 Normal Mode
In normal use, the configuration menu will be locked to prevent inadvertent operation and
configuration menus are not available.
In this mode, the 10 illuminated pre-set configuration buttons are active. A currently displayed
configuration can be stored by holding down the desired pre-set button for more than 3
seconds.
Stored presets are recalled by briefly pressing the desired pre-set button, which will
illuminate.
Fig 10. The 1U MV-16 frame Front Panel.
Note:
Should the frame lose power, it will restore the last known configuration settings on reboot
and automatically reflect these in the browser.

MV-16 Multiviewer www.snellgroup.com Operation
Issue 1 Rev 12 Page 18 © 2013 Snell Limited
3.1.2 Configuration Mode
To enter configuration mode from normal mode (with the red Lock LED off) hold the Lock
button down for about three seconds. The configuration or 'menu' mode will be entered, an
on-screen menu will appear and the red Lock LED will illuminate. If the Lock button is
depressed again, any changed settings will be saved and the unit will return to normal.
The currently loaded firmware version will be indicated at the top of the on-screen menu.
The main 'menu' mode controls are as follows:
• Function keys (↑↓) scroll the menu cursor up and down to select the desired function.
• Select Parameter keys (←→) select settings to apply to the chosen parameter.
• Lock button exits 'menu' mode and saves settings.
3.1.2.1 Network settings
These settings only need to be manually entered if DHCP is not to be used. This would be
required for a network that uses fixed IP addresses and does not rely on a DHCP server to
allocate them automatically.
3.2 Keyboard Operation
Any HID compliant USB keyboard can be used for the entry and editing of UMD. The
keyboard is connected to the USB port on the front panel of the MV-16.
The Tab key activates the cursor on the topmost UMD. Successive Tab key operation moves
the cursor on to the next UMD in sequence. The Esc key deactivates the cursor.
←
→
Select submenu when menu name highlighted, or change Parameter
value within menu
↑↓Select item in menus and sub-menus
LOCK Press Lock to save changes and exit menu mode
Table 5. Main Menu controls.
System
Configuration Parameter(s)
Network Settings Set Manually (using settings below)/Use DHCP
IP Address Enter frame IP address byte at a time in the sub-menu
Netmask Enter Subnet Mask byte at a time in the sub-menu
Gateway If required, enter the Gateway address byte at a time in the sub menu
DNS Server 1 If required, enter the DNS server address byte at a time in the
sub-menu
DNS Server 2 If required, enter the DNS server address byte at a time in the
sub-menu
Table 6. MV-16 Network Settings.
Note:
The IP address must be unique on the network. Please see your system administrator if
these details are required.

MV-16 Multiviewer www.snellgroup.com Operation
Issue 1 Rev 12 Page 19 © 2013 Snell Limited
3.3 Using the Web Interface
The MV-16 Multi-viewer is controlled via a browser using web pages hosted by the frame
itself. Note that Java must first be installed on the PC or MAC that is to be used. This is
available as a free download from:
http://www.java.com/en/download/manual.jsp
To access the web interface, type the IP Address configured for the frame into a browser. The
Java application should launch immediately, but be aware that Windows security precautions
may block the file download.
The user interface (Fig 11.) is displayed.
The interface comprises three main areas:
• the Object and Source Explorer
• the Editor Workspace
• the Display Preview
Note:
The default IP address is 192.168.0.120.
Fig 11. Multiviewer User Interface.

MV-16 Multiviewer www.snellgroup.com Operation
Issue 1 Rev 12 Page 20 © 2013 Snell Limited
Tile objects can be one of six basic types:
The color of the tile as it appears in the Editor Workspace and Display Preview indicates the
currently set object type, as listed in Table 7.
Operation is designed to be simple and intuitive. For example, object type can be selected by
double clicking on a tile, selecting the Type tab from the Edit Object menu and choosing the
desired tile type. Video and audio tiles can be assigned sources by double clicking on a tile,
selecting the Properties tab from the Edit Object menu and selecting an available source.
Currently selected objects are highlighted with a blue border. Tiles can be moved and resized
using conventional mouse operations. Tile borders may appear incomplete to indicate where
they lie behind other objects.
Object Type Tile Color
None Grey
Video Blue
Audio Green
Text B r own
Logo Red
Clock -
Table 7. Object Colors
Fig 12. Object and Source Explorer.
Table of contents
Other Snell Switch manuals

