Table of contents
Introduction ......................................1
About the C620 SIP Wireless Conference
phone ...................................................... 1
Introduction ......................................2
Parts checklist............................................ 2
Getting started .................................3
Installing the base station....................... 3
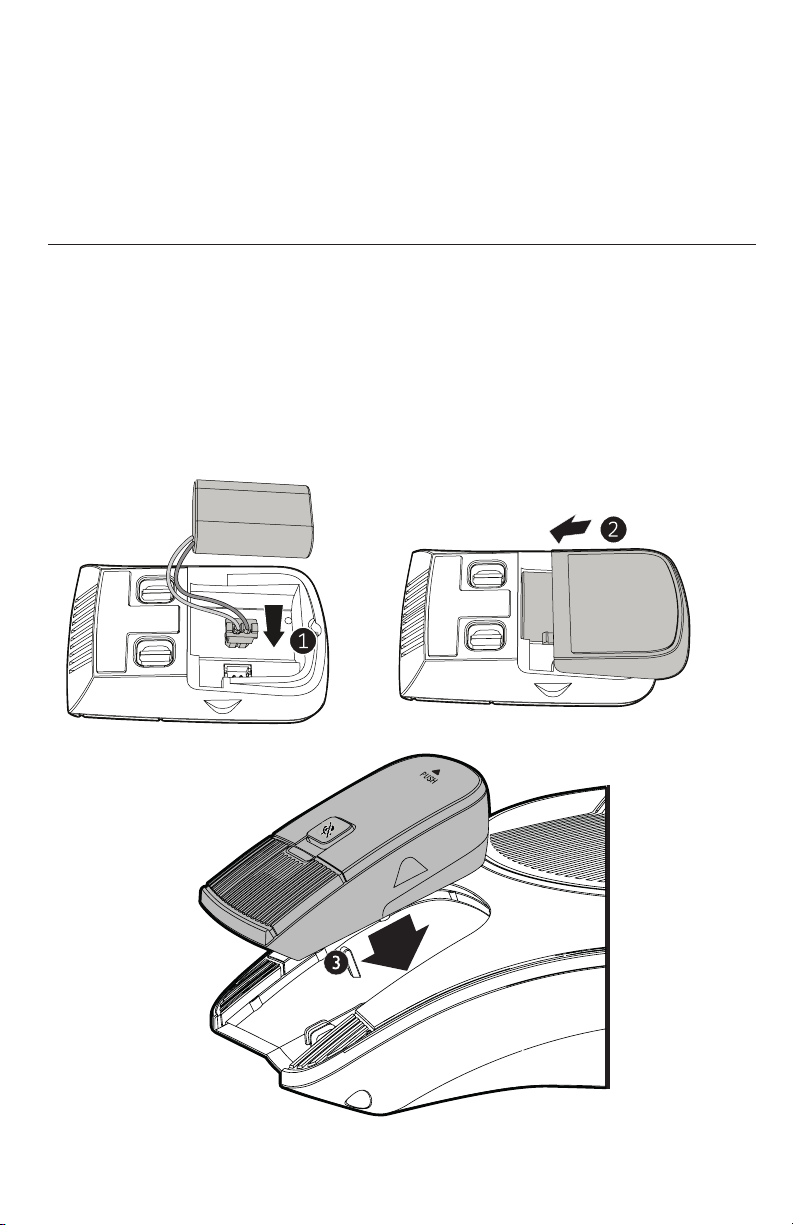
Installing the conference phone battery
3
Connecting power to the conference
phone ...................................................... 3
Installing the wireless mic battery ....... 4
Conference phone overview................... 5
Wireless mic overview............................. 7
Base unit overview (front)....................... 8
Status indicators on the conference
phone / wireless mics ........................ 9
Status indicators on the base station.. 11
Idle screen.................................................. 12
Idle mode screen icons........................... 12
Active call screen icons .......................... 12
Using the Main Menu ............................... 13
Main menu items...................................... 13
Input Modes ............................................... 14
Entering numerals, letters, and symbols
14
Conference phone operation ........16
Making calls............................................... 16
Using a wireless microphone during a
call .......................................................... 17
Ending the call........................................... 17
Answering a call....................................... 17
Call waiting................................................. 18
Missed calls ............................................... 18
Redialing a call.......................................... 19
Adjusting call volume.............................. 19
Muting active calls.................................... 19
Temporarily silencing the ringer.......... 20
Putting a call on hold............................... 20
Transferring calls..................................... 21
Making a conference call........................ 23
Setting up a network conference ......... 25
Retrieving messages............................... 25
Paging.......................................................... 27
Directory...........................................28
About the directory .................................. 28
Viewing a directory .................................. 28
Adding a directory entry......................... 29
Reviewing directory entries................... 30
Searching for a directory entry............. 30
Dialing a directory entry......................... 30
Editing a directory entry......................... 31
Deleting a directory entry....................... 31
Deleting all directory entries................. 32
Call History ......................................33
Call history ................................................. 33
Reviewing call history............................. 33
Dialing a call history entry ..................... 34
Saving a call history entry to the
directory................................................ 34
Deleting a call history entry................... 35
Deleting all call history entries............. 35
Speed dial ........................................36
Speed dial................................................... 36
Dialing a speed dial number.................. 36
Adding a speed dial entry....................... 36
Editing a speed dial entry....................... 36
ii