SnoreMender 4 User manual

Page 1/4 SnoreMender 4 Instructions
SnoreMender®4 Instructions
These instructions, and our FAQ, are available at
www.snoremenders.ca
The SnoreMender is intended to treat snoring in adults. It is
worn when sleeping and holds the lower jaw slightly forward
to open up the airway and reduce snoring.
When SnoreMender cannot be used
If you have dentures / missing teeth / implants / braces / bridgework / other weaknesses
in your front 8 upper or front 8 lower teeth you should check with your dentist, to make
sure they are strong enough to support the SnoreMender.
Unless advised by your dentist or doctor, the SnoreMender must not be used if you:
- have severe gum disease or bleeding gums
- have jaw pain or temporo-mandibular joint (TMJ) disorders such as a
clicking jaw, or locking jaw when you open your mouth
- have loose teeth / crowns / caps / fillings in the front 8 teeth of either jaw
- have a severe respiratory disorder
- have been diagnosed with central sleep apnea (a neurological condition)
- have allergies against ethylvinylacetate copolymer (a non-toxic thermoplastic
commonly used in oral devices, which contains no BPA or latex)
- are under 18 years old
Caution
Use of an anti-snoring mouthpiece, such as the SnoreMender, may cause:
- Gum irritation or dental soreness
- Tooth movement or changes in the dental occlusion or bite
- Pain or soreness of the jaw or facial muscles
- Obstruction of oral breathing
- Loosening and/or dislodging of dental fillings or crowns
- Excessive salivation
If you experience problems related to using your SnoreMender, please immediately

Page 2/4 SnoreMender 4 Instructions
Adjuster in position 3
How to use
TO USE: First set the SnoreMender strength by connecting
the adjuster. The SnoreMender can be set in 6 different
positions. 1 peg connected is the weakest position.
Positions 5 and 6 require modifying the strap (see later).
You should use the lowest strength that is effective.
HINT:Wet the adjuster to make it easy to fasten
We recommend starting with 3 of the pegs engaged and increasing / decreasing as
required for comfort and effectiveness.
Before going to sleep, fold the SnoreMender and place in the mouth.
HINT:The hinges may be too springy at first, which can make the SnoreMender rub the
gums or hold your mouth open wide at first. To solve: using gloves or tongs, hold the
hinges in a bowl of boiling water for 60 seconds with it folded closed, shake dry, squeeze
the hinges firmly together and hold in cold water for 60 seconds.
The SnoreMender works by moving the lower jaw slightly forwards which can be felt as a
forward pressure on the lower teeth, indicating correct use.
The SnoreMender should work immediately, but the jaw and teeth may ache for the first
few weeks, which is normal. This usually goes away within a few minutes of removing the
SnoreMender but teeth may feel sensitive for longer at first.
If the teeth or jaw continue to ache significantly, after the first 2 weeks of use, or for more
than 2 hours after use, please reduce the strength setting.
The key is to persevere - give yourself time to get used to it. Our staff includes long
time users of SnoreMenders –if you have any difficulties, please see our FAQ or email
Occasionally at night your SnoreMender may fall out. This is normal and should happen
less over time - if it keeps falling out, please try reducing the strength setting.
Sometimes the SnoreMender may cause excess saliva or a dry mouth - your mouth will
usually adjust within two to four weeks.
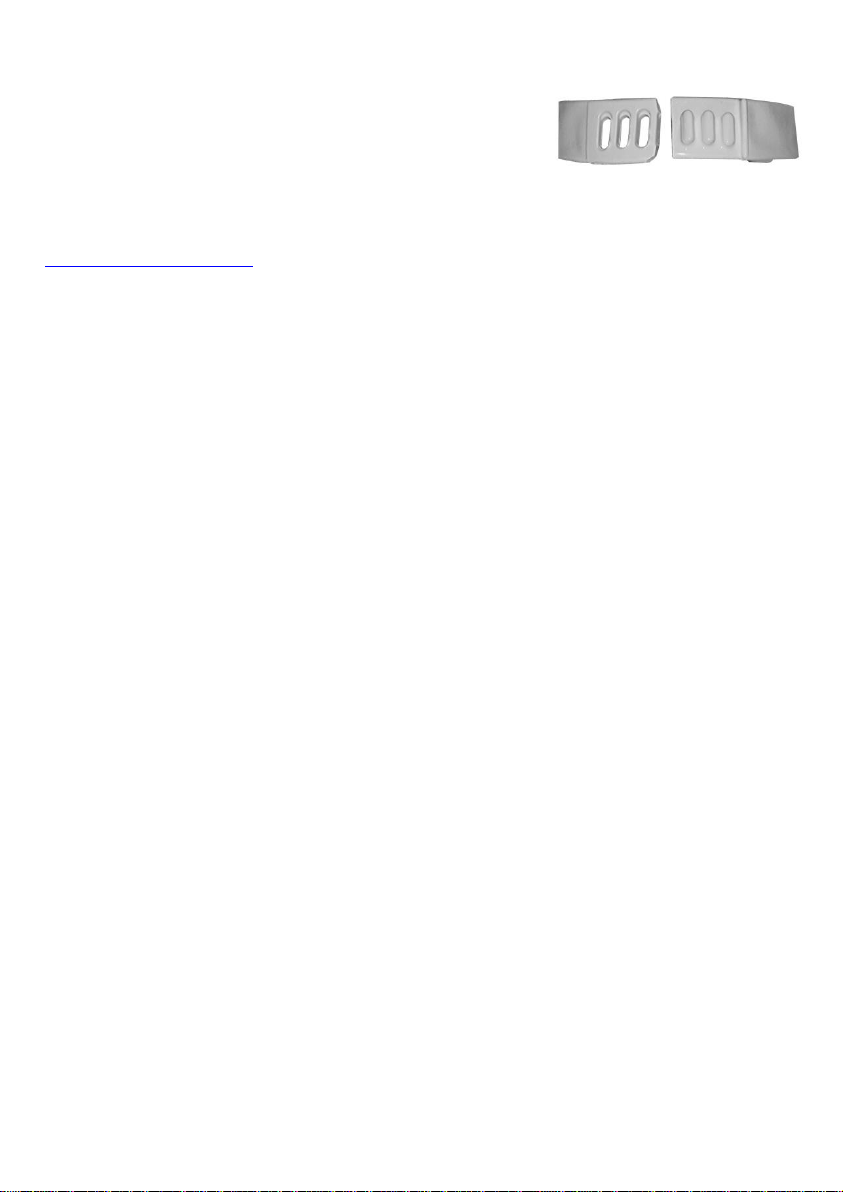
Fits behind Lower teeth
Fits over Upper teeth
Page 3/4 SnoreMender 4 Instructions
Adjuster trimmed for position 5
Additional strength settings if you are still snoring
If position 4 (all 4 pegs connected) is not stopping the
snoring, you can cut off either one or two of the pegs and
holes to use the 5th and 6th strength settings. Use sharp
scissors and cut the minimum possible (see diagram), and
connect all remaining pegs.
If the SnoreMender is still not stopping your snoring, please email us at
help@snoremenders.ca for advice.
Cleaning SnoreMender
Before every use, unfasten the connector and wash by hand in warm water, with soap.
Rinse well and re-fasten while still wet.
Do not use anything abrasive to clean the SnoreMender.
You can use mild sterilising fluids such as are used for dentures, if required.
If the SnoreMender is rubbing the gums or lips
This is usually because the hinges are too springy, forcing the edges into the gums. To
solve: using gloves, hold the hinges in a bowl of boiling water for 60 seconds with it
folded closed, shake dry, squeeze the hinges very firmly together and hold in cold water
for 60 seconds.
If it is still rubbing, for the upper part, you can trim the connector straps. You can use nail
scissors to trim a strip off the top edges. For the part with the pegs, you can trim right up
to the edges of the pegs. For the part with the holes in, you should not trim closer than
about 1mm (1/32 inch).
For the lower part you can use a nail file and file the edges down, or nail scissors to trim
them. You will need to press firmly with the file. It is best to do one half first, so you can
see how much you have filed. About 1 mm (1/32 inch) is usually enough.
You can smooth any rough edges by gently using a nail file.
Note that these adjustments do not invalidate the guarantee.
If the SnoreMender slips out of place
Sometimes the lower part of the SnoreMender may be too wide, so it will not fit inside the
lower teeth without squeezing it into place, and it will then sometimes 'pop off the teeth'.
In this case, the following adjustment should help:
1. Put some boiling water in a bowl.
2. Hold the lower front half of the device in the water for 90 seconds.

Page 4/4 SnoreMender 4 Instructions
3. Firmly squeeze the lower front part together firmly to make it narrower.
4. Hold in position and put in cold water for 60 seconds to cool.
If you make it too narrow, you can just put it back in the hot water for a few seconds and
it will return to the original shape.
Other fitting problems - general moulding
Sometimes the teeth may be misaligned, or there may be parts of the mouth that the
SnoreMender is rubbing. The following adjustment will make the SnoreMender fit better:
1. Put some boiling water in a bowl.
2. Put the whole device in the water for 60 seconds.
3. Shake dry, check it is not too hot then put the SnoreMender in the mouth
and bite down firmly, to force it into place.
4. Hold in position for 90 seconds while it cools.
Overactive gag reflex - acclimatisation
The following steps should help while you acclimatise:
- Warm it slightly in warm water before wearing.
- Hold it in place with your fingers, so your body knows you are in control of it.
- Start a few seconds at a time and build up your ability to not gag.
Replacing your SnoreMender
Eventually your SnoreMender will need replacing - typical lifetimes are between 9 and 18
months. If you notice it becoming less effective, please visit www.snoremenders.ca to
purchase a replacement.
Table of contents
Other SnoreMender Personal Care Product manuals


