Solar Stik 24VDC HyPR 3000 Installation instructions

|1April 2021 |Solar Stik®, Inc. PRELIMINARY DRAFT
System Setup Operation and Maintenance Manual for the SFAB HPS
Operator and Maintenance Manual
for the Security Force Assistance
Brigade (SFAB) Hybrid Power System
Version 1.0
Updated:20210413
DISTRIBUTION STATEMENT A. Approved for public release; distribution is unlimited.

April 2021 |Solar Stik®, Inc.2 |
System Setup Operation and Maintenance Manual for the SFAB HPS
PRELIMINARY DRAFT
Contents
GENERAL INFORMATION, EQUIPMENT DESCRIPTION, AND THEORY OF OPERATION
Introduction to Hybrid Power Systems . . . . . . . . . . . . . . . . . . . . . . . . . . . . . . . . . . . . . . 6
The Hybrid Power System Flexible Open Architecture . . . . . . . . . . . . . . . . . . . . . . . . . . . . . .6
Theory of Operation . . . . . . . . . . . . . . . . . . . . . . . . . . . . . . . . . . . . . . . . . . . . . . . . . 7
Modes of Operation . . . . . . . . . . . . . . . . . . . . . . . . . . . . . . . . . . . . . . . . . . . . . . . . . 8
HyPR 3000 Internal Circuits . . . . . . . . . . . . . . . . . . . . . . . . . . . . . . . . . . . . . . . . . . . . 11
The Inter-Connect System . . . . . . . . . . . . . . . . . . . . . . . . . . . . . . . . . . . . . . . . . . . . 12
Energy Storage—The Foundation of a System . . . . . . . . . . . . . . . . . . . . . . . . . . . . . . . . . 13
Minimum Battery Capacity Required for Optimal System Operation . . . . . . . . . . . . . . . . . . . . . 13
Scaling Energy Storage Capacity . . . . . . . . . . . . . . . . . . . . . . . . . . . . . . . . . . . . . . . . 13
Scaling and Modifying a HyPR-based System . . . . . . . . . . . . . . . . . . . . . . . . . . . . . . . . . 13
Important Safety Information and Instructions . . . . . . . . . . . . . . . . . . . . . . . . . . . . . . . . . 14
Safety Information Labels . . . . . . . . . . . . . . . . . . . . . . . . . . . . . . . . . . . . . . . . . . . . 14
Fire Hazard . . . . . . . . . . . . . . . . . . . . . . . . . . . . . . . . . . . . . . . . . . . . . . . . . . . 15
Recommended Fire Extinguisher . . . . . . . . . . . . . . . . . . . . . . . . . . . . . . . . . . . . . . . . 15
Electric Shock Hazard. . . . . . . . . . . . . . . . . . . . . . . . . . . . . . . . . . . . . . . . . . . . . . 16
Environmental and Handling Precautions . . . . . . . . . . . . . . . . . . . . . . . . . . . . . . . . . . . . 17
Water . . . . . . . . . . . . . . . . . . . . . . . . . . . . . . . . . . . . . . . . . . . . . . . . . . . . . . 17
Impact . . . . . . . . . . . . . . . . . . . . . . . . . . . . . . . . . . . . . . . . . . . . . . . . . . . . . . 17
Dust/Foreign Object Intrusion . . . . . . . . . . . . . . . . . . . . . . . . . . . . . . . . . . . . . . . . . . 17
Heat . . . . . . . . . . . . . . . . . . . . . . . . . . . . . . . . . . . . . . . . . . . . . . . . . . . . . . . 17
EQUIPMENT DESCRIPTION
24VDC Li Expander Pak 1300 . . . . . . . . . . . . . . . . . . . . . . . . . . . . . . . . . . . . . . . . . . . 18
External Features . . . . . . . . . . . . . . . . . . . . . . . . . . . . . . . . . . . . . . . . . . . . . . . . 18
24VDC Linear Inter-Connect Cable . . . . . . . . . . . . . . . . . . . . . . . . . . . . . . . . . . . . . . . 18
Data Plate (D-Plate) . . . . . . . . . . . . . . . . . . . . . . . . . . . . . . . . . . . . . . . . . . . . . . . 19
24VDC HyPR 3000-120 . . . . . . . . . . . . . . . . . . . . . . . . . . . . . . . . . . . . . . . . . . . . . . . 20
AC Power Input Port . . . . . . . . . . . . . . . . . . . . . . . . . . . . . . . . . . . . . . . . . . . . . . 20
DC Power Input Ports - Solar and Scavenge . . . . . . . . . . . . . . . . . . . . . . . . . . . . . . . . . . 21
NATO Port - 24 VDC Input/Output Port . . . . . . . . . . . . . . . . . . . . . . . . . . . . . . . . . . . . . 21
Inter-Connect 24 VDC Input/Output Port . . . . . . . . . . . . . . . . . . . . . . . . . . . . . . . . . . . . 22
24VDC Expander Pak Only Port. . . . . . . . . . . . . . . . . . . . . . . . . . . . . . . . . . . . . . . . . 22
120 VAC Output Ports . . . . . . . . . . . . . . . . . . . . . . . . . . . . . . . . . . . . . . . . . . . . . . 23
Generator Communications Ports. . . . . . . . . . . . . . . . . . . . . . . . . . . . . . . . . . . . . . . . 23
Cooling Vents . . . . . . . . . . . . . . . . . . . . . . . . . . . . . . . . . . . . . . . . . . . . . . . . . . 24
Faceplate . . . . . . . . . . . . . . . . . . . . . . . . . . . . . . . . . . . . . . . . . . . . . . . . . . . . 25
HyPR 3000 Breaker Panel. . . . . . . . . . . . . . . . . . . . . . . . . . . . . . . . . . . . . . . . . . . . 27
HyPR 3000 Inverter Status . . . . . . . . . . . . . . . . . . . . . . . . . . . . . . . . . . . . . . . . . . . 27
HyPR 3000 AC Input Setting . . . . . . . . . . . . . . . . . . . . . . . . . . . . . . . . . . . . . . . . . . 27
Programmed System Operating Parameters . . . . . . . . . . . . . . . . . . . . . . . . . . . . . . . . . . 28
Automatic Generator Start/Stop (AGS) voltages . . . . . . . . . . . . . . . . . . . . . . . . . . . . . . . . 28
Battery low-voltage cut off (LVCO) . . . . . . . . . . . . . . . . . . . . . . . . . . . . . . . . . . . . . . . 28
System Connection Diagram and Inventory . . . . . . . . . . . . . . . . . . . . . . . . . . . . . . . . . . . 29
Components listing . . . . . . . . . . . . . . . . . . . . . . . . . . . . . . . . . . . . . . . . . . . . . . . . 30
Information Plate. . . . . . . . . . . . . . . . . . . . . . . . . . . . . . . . . . . . . . . . . . . . . . . . . . 31

|3April 2021 |Solar Stik®, Inc. PRELIMINARY DRAFT
System Setup Operation and Maintenance Manual for the SFAB HPS
OPERATOR INSTRUCTIONS
1. Identify Location for System Components . . . . . . . . . . . . . . . . . . . . . . . . . . . . . . . . . . 32
Component Shading . . . . . . . . . . . . . . . . . . . . . . . . . . . . . . . . . . . . . . . . . . . . . . 32
Minimize Potential for Water and Dust Intrusion . . . . . . . . . . . . . . . . . . . . . . . . . . . . . . . . 32
2. Connect System Components . . . . . . . . . . . . . . . . . . . . . . . . . . . . . . . . . . . . . . . . . 33
Connect Li Expander Pak 1300s to HyPR 3000. . . . . . . . . . . . . . . . . . . . . . . . . . . . . . . . . 33
Connect HyPR to AC Power Source . . . . . . . . . . . . . . . . . . . . . . . . . . . . . . . . . . . . . . 34
Connect HyPR to Grid power . . . . . . . . . . . . . . . . . . . . . . . . . . . . . . . . . . . . . . . . 34
Connecting Generators . . . . . . . . . . . . . . . . . . . . . . . . . . . . . . . . . . . . . . . . . . . . . 35
Connect HyPR 3000 to tandem 2 kW generators . . . . . . . . . . . . . . . . . . . . . . . . . . . . . 35
Optional: Connecting HyPR 3000 to a 3 kW TQG . . . . . . . . . . . . . . . . . . . . . . . . . . . . . 37
Connect AC Loads to HyPR 3000. . . . . . . . . . . . . . . . . . . . . . . . . . . . . . . . . . . . . . . . 38
Prepare 2 kW generator(s) for operation . . . . . . . . . . . . . . . . . . . . . . . . . . . . . . . . . . . . 38
Optional: Connect Solar power to HyPR 3000 . . . . . . . . . . . . . . . . . . . . . . . . . . . . . . . . . 39
Optional: Scavenge power from nonconventional DC power sources . . . . . . . . . . . . . . . . . . . . . 39
SYSTEM OPERATION
System Monitoring . . . . . . . . . . . . . . . . . . . . . . . . . . . . . . . . . . . . . . . . . . . . . . . 41
The Solar Charging Status LED (with solar arrays connected) . . . . . . . . . . . . . . . . . . . . . . . . . 41
State of Charge (SOC) Calculation . . . . . . . . . . . . . . . . . . . . . . . . . . . . . . . . . . . . . . . 42
Generator Status . . . . . . . . . . . . . . . . . . . . . . . . . . . . . . . . . . . . . . . . . . . . . . . . 42
Battery Status . . . . . . . . . . . . . . . . . . . . . . . . . . . . . . . . . . . . . . . . . . . . . . . . . . 42
DC Interface Menu Windows . . . . . . . . . . . . . . . . . . . . . . . . . . . . . . . . . . . . . . . . . . 43
TROUBLESHOOTING
Issues most likely to be encountered . . . . . . . . . . . . . . . . . . . . . . . . . . . . . . . . . . . . . . 47
PREVENTIVE MAINTENANCE CHECKS AND SERVICE (PMCS)
24VDC HyPR 3000 PMCS . . . . . . . . . . . . . . . . . . . . . . . . . . . . . . . . . . . . . . . . . . . . . 48
HyPR 3000 Air Intake Filter Maintenance* . . . . . . . . . . . . . . . . . . . . . . . . . . . . . . . . . . . 48
24VDC Li Expander Pak 1300 PMCS . . . . . . . . . . . . . . . . . . . . . . . . . . . . . . . . . . . . . . . 49
Expander Pak Storage. . . . . . . . . . . . . . . . . . . . . . . . . . . . . . . . . . . . . . . . . . . . . . . 50
How to Charge Expander Pak 1300s . . . . . . . . . . . . . . . . . . . . . . . . . . . . . . . . . . . . . . 51
Water Intrusion Remediation . . . . . . . . . . . . . . . . . . . . . . . . . . . . . . . . . . . . . . . . . . . 52
Transporting the HyPR 3000 . . . . . . . . . . . . . . . . . . . . . . . . . . . . . . . . . . . . . . . . . . . 52
TECHNICAL SPECIFICATIONS
24VDC Li Expander Pak 1300 . . . . . . . . . . . . . . . . . . . . . . . . . . . . . . . . . . . . . . . . . . . 53
24VDC HyPR 3000-120 . . . . . . . . . . . . . . . . . . . . . . . . . . . . . . . . . . . . . . . . . . . . . . . 54
ABOUT SOLAR STIK, INC.
Contact . . . . . . . . . . . . . . . . . . . . . . . . . . . . . . . . . . . . . . . . . . . . . . . . . . . . . . . 55

April 2021 |Solar Stik®, Inc.4 |
System Setup Operation and Maintenance Manual for the SFAB HPS
PRELIMINARY DRAFT
List of Tables
Table 1. Charge Status Indicator—LED Status............................................................................................................... 41
Table 2. HyPR 3000 Preventive Maintenance Checks and Services.............................................................................. 48
Table 3. 24VDC Li Expander Pak 1300 In-storage Preventive Maintenance Checks and Services............................... 49
List of Figures
Figure 1. 24 VDC HyPR 3000 connections....................................................................................................................... 7
Figure 2. Using the HyPR 3000 in Hybrid Model.............................................................................................................. 8
Figure 3. Using the HyPR 3000 in UPS Model ................................................................................................................. 8
Figure 4. Using HyPR in Power Conditioning Model........................................................................................................ 9
Figure 5. Using HyPR in Scavenge Model........................................................................................................................ 9
Figure 6. Using HyPR in Inverter Mode .......................................................................................................................... 10
Figure 7. Schematized view of HyPR 3000 internal circuitry.......................................................................................... 11
Figure 8. External features of the Expander Pak............................................................................................................ 18
Figure 9. 24VDC Linear Inter-Connect Cable plugs ....................................................................................................... 18
Figure 10. 24VDC Li Expander Pak 1300 D-Plate .......................................................................................................... 19
Figure 11. HyPR 3000 exterior features.......................................................................................................................... 20
Figure 12. HyPR 3000 Universal AC power input port ................................................................................................... 20
Figure 13. HyPR 3000 power input ports ....................................................................................................................... 21
Figure 14. HyPR 3000 NATO port................................................................................................................................... 21
Figure 15. HyPR 3000 24 VDC Inter-Connect input/output port.................................................................................... 22
Figure 16. HyPR 3000 Expander Pak only port.............................................................................................................. 22
Figure 17. HyPR 3000 120 VAC output ports................................................................................................................. 23
Figure 18. HyPR 3000 generator communications ports ............................................................................................... 23
Figure 19. HyPR 3000 cooling vents .............................................................................................................................. 24
Figure 20. 24 VDC HyPR 3000 Faceplate ...................................................................................................................... 25
Figure 21. HyPR 3000 breaker panel.............................................................................................................................. 27
Figure 22. HyPR Inverter/AC OUTPUT status LED ........................................................................................................ 27
Figure 23. AC Input Control dial ..................................................................................................................................... 27
Figure 24. HyPR 3000 I-Plate ......................................................................................................................................... 31
Figure 25. Minimize solar loading .................................................................................................................................. 32
Figure 26. Connecting ESMs to HyPR 3000 .................................................................................................................. 33
Figure 27. Connecting Inter-Connect Cable to Expander Pak ....................................................................................... 33
Figure 28. HyPR to AC power input options .................................................................................................................. 34
Figure 29. HyPR/generator power connections ............................................................................................................. 35
Figure 30. HyPR/generator comms connections ........................................................................................................... 36
Figure 31. Optional connection of 3 kW TQG to HyPR 3000 ......................................................................................... 37
Figure 32. Connecting AC loads to HyPR 3000 ............................................................................................................. 38
Figure 33. Prepping the 2 kW generator for operation................................................................................................... 38
Figure 35. Scavenge power from alternative DC sources .............................................................................................. 39
Figure 34. Connecting PV arrays to HyPR 3000 ............................................................................................................ 39
Figure 36. HyPR 3000 DC Interface ............................................................................................................................... 41
Figure 37. Cleaning/replacing HyPR 3000 air intake vent lter ...................................................................................... 48
Figure 38. Charging Expander Paks with HyPR 3000 .................................................................................................... 51
Figure 40. HyPR transport wheels and pull-handle........................................................................................................ 52
Figure 39. Drain plug screw located under the TECH PORT.......................................................................................... 52

|5April 2021 |Solar Stik®, Inc. PRELIMINARY DRAFT
System Setup Operation and Maintenance Manual for the SFAB HPS
Revision History
Section Page(s) Description Date
First released as a PRELIMINARY DRAFT March 2020

April 2021 |Solar Stik®, Inc.6 |
System Setup Operation and Maintenance Manual for the SFAB HPS
PRELIMINARY DRAFT
GENERAL INFORMATION, EQUIPMENT DESCRIPTION,
AND THEORY OF OPERATION
Introduction to Hybrid Power Systems
When a portable fuel-driven power generator is the primary source of power for an application, it
must operate continuously to provide electricity to the load, even if the power requirements of
connected loads are minimal or intermittent. Fuel energy is wasted in the production of electricity
because neither the generator nor the load(s) can fully use the fuel’s potential energy. This traditional
power model is a low-efciency system.
In the high-efciency, Hybrid Power System (HPS), a battery bank supports the load. The power
for the load is drawn from the batteries only as needed. Multiple sources of power generation can
be used simultaneously to support the battery and ensure uninterrupted power to the loads. The
battery becomes the foundation of the HPS and the architecture is opened to allow multiple
technologies to operate in concert.
Generator Load
Fuel
Low-efciency
Traditional Power System
High-efciency
HPS
PRO-Verter
Generator Load
Battery
Fuel
The Hybrid Power System Flexible Open Architecture
The System is comprised of modular components that integrate into a exible architecture that is
congured for an application’s specic mission requirements. If the application changes, the modular
System architecture can be modied or scaled to meet the new requirements.
Power Generation
Options
PRO-Verter
Battery
Generator Load
Fuel
HPS with Open Architecture
The introductory parts of this Manual describe Hybrid Power Systems (HPS) composed of Solar
Stik components. However, the Solar Stik architecture is modular and open allowing Operators to
integrate non-Solar Stik components as part of a HPS solution. Please contact Solar Stik Technical
Support for assistance in optimizing the integration of other components.

|7April 2021 |Solar Stik®, Inc. PRELIMINARY DRAFT
System Setup Operation and Maintenance Manual for the SFAB HPS
Theory of Operation
The System provides power surety for applications where Hybrid, UPS, Power Conditioning, or
scavenging functions are required.
Universal “rules” for operation:
• Total power INPUT to the HPS must be greater than the power OUTPUT of the HPS.
• The HyPR requires the presence of battery (bus) voltage to fully operate.
• Based on the application, the user must congure the system so that there is “balanced”
operation between each individual component and the internal functions in the HyPR.
The following diagram illustrates where to connect power sources, 24VDC Li Expander Pak 1300s
and loads to the HyPR. For normal operation, at least three (3) 24VDC Li Expander Pak 1300s must
be connected.
Figure 1. 24 VDC HyPR 3000 connections
90-250 VAC
battery charging
Energy
Storage
DC Power
Scavenging
120 VAC loads
24VDC HyPR 3000
Gen Comm
PV Array(s)
24 VDC INPUT/OUTPUT

April 2021 |Solar Stik®, Inc.8 |
System Setup Operation and Maintenance Manual for the SFAB HPS
PRELIMINARY DRAFT
Generator
Solar
Energy Storage
Loads
AC
9-36 VDC
Scavenge
Hybrid Mode–The hybrid mode allows the use of a smaller generator based on average, continuous
total loads over a 24-hour period, versus a larger generator that will support “peak” loads, which are
usually momentary or short in duration:
• AC power generation source (Ranger/Defender, TQG) with ESMs
• DC power generation source (PV, scavenging) with ESMs
• AC and DC power generation sources (combinations of the above) with ESMs
AC Power Processing Limits
3000 W AC Input from source(s)
2000 W AC Output for loads
Modes of Operation
UPS Mode–The HyPR 3000 is capable of operating as an Uninterruptible Power Supply/Source,
providing instantaneous emergency power to a load in the event that primary power source fails. In
this mode, the HyPR 3000 will to provide power to the load until it can be turned off safely or until
primary power is restored. In this mode, power duration is limited to that contained in the ESM’s
connected to the HyPR 3000.
• AC utility / grid power sources with ESMs
• ESMs do not cycle
Figure 2. Using the HyPR 3000 in Hybrid Model
Grid
Energy Storage
Loads
AC
AC Power Processing Limits
3000 W AC Input from source(s)
2000 W AC Output for loads
Figure 3. Using the HyPR 3000 in UPS Model
There are several operational modes in which the HyPR may be congured, if required.

|9April 2021 |Solar Stik®, Inc. PRELIMINARY DRAFT
System Setup Operation and Maintenance Manual for the SFAB HPS
Power Conditioning Mode–The HyPR 3000 has a power conditioning mode that stabilizes output
voltage and frequency from dirty AC power sources. The HyPR will convert AC power with voltage
ranging from 85-264 and frequencies between 47-63 Hz into clean, pure sine wave 120 VAC, 60 Hz
power providing protection for sensitive loads:
• HyPR with ESMs between AC power sources and AC and DC loads - eliminates overloading
of small expeditionary generators and increases the HyPR power output stability over longer
periods of time.
• HyPR without ESMs between AC power sources and AC and DC loads - eliminates AC power
source voltage and frequency uctuations that can cause problems with sensitive electronic
loads.
Grid
With or without
Energy Storage
Loads
AC
Generator
or
AC Power Processing Limit
1500W with ESMs
1000W without ESMs
Figure 4. Using HyPR in Power Conditioning Model
With or without
Energy Storage
Loads
AC
9-36 VDC
Scavenge
DC Scavenging Mode–The HyPR 3000 provides an energy scavenging tool to harvest power from
conventional and non-conventional 9 to 36-volt power sources not integral to the Solar Stik family of
products, such as a random batteries or a 12 VDC vehicle accessory outlet. The HyPR scavenging
circuit automatically converts any power source voltage between 9 and 36 VDC to 28.4 VDC
which is appropriate for charging ESMs and/or to support small 120 VAC or 24 VDC loads. It is not
necessary for a Solar Stik ESM to be connected to the HPS to take advantage of the Scavenging
circuit. If ESM’s are not connected, however, the HyPR can only support loads up to the amount of
power provided through the Scavenging circuit (Figure 1).
• Scavenging with ESMs connected to HyPR allows ESMs to be charged using external batteries
or vehicle DC systems.
• Scavenging without ESMs connected to HyPR allows small loads to be operated directly from a
connection to a 12 VDC vehicle accessory outlet.
AC Power Processing Limits
300 W with ESMs connected
150 W without ESMs connected
Figure 5. Using HyPR in Scavenge Model

April 2021 |Solar Stik®, Inc.10 |
System Setup Operation and Maintenance Manual for the SFAB HPS
PRELIMINARY DRAFT
• Renewable power generation is abundant and stable.
• Scavengable DC power resources are available.
• Connection to a vehicle NATO port is available.
Inverter Mode – The HyPR 3000 may be used in inverter mode when no AC power generation
sources are available. This allows the combined total input of DC sources (including ESMs) to be
dedicated to AC loads. This mode may be used when:
ESMs Scavenge
9-36 VDC
AC Power Limits
2000 W with ESMs connected
Solar
Vehicle / Other
Loads
AC
Figure 6. Using HyPR in Inverter Mode

|11April 2021 |Solar Stik®, Inc. PRELIMINARY DRAFT
System Setup Operation and Maintenance Manual for the SFAB HPS
Figure 7. Schematized view of HyPR 3000 internal circuitry
Solar/DC Input
AC Input
24 VDC bus/Inter-Connect System
9-36 VDC Scavenge
85-264 VAC,
50-60 Hz
24 VDC
Inter-Connect
Port
120 VAC
60 Hz
PV
Input
24 VDC
NATO port
The HyPR 3000 coordinates the support of 120 VAC and 24 VDC loads using power supplied from
AC and/or DC sources. An important concept to understand is that both AC and DC power sources
electrify the HyPR 3000 internal DC circuitry (DC bus) shown below as the red lines. This DC bus is
also called the Inter-Connect circuit. A schematized illustration of the DC bus and its relationship to
other internal components and circuits is shown below. The arrows indicate the ow of current in the
circuits.
solar
charge
controller
AC-
powered
DC charger
9-36
VDC
Expander
Paks
Inverter
DC buck/boost
charger
Breaker “location”
HyPR 3000 Internal Circuits
Direction of current ow
Meter/Shunt
Several HyPR 3000 connectors shown below provide options to extend the DC bus by connecting
another modular Solar Stik component to add functionality. This will become apparent when viewing
the System Connection Diagram.

April 2021 |Solar Stik®, Inc.12 |
System Setup Operation and Maintenance Manual for the SFAB HPS
PRELIMINARY DRAFT
The Inter-Connect System
A Solar Stik System is comprised of three (3) distinct types of technologies:
• Energy storage
• Power management
• Power generation
All of the individual components that operate in these categories utilize a unique connection
architecture known as the Inter-Connect Circuit.
The Inter-Connect Circuit is the connection framework of the System’s DC power network. It uses
a simple, polarized, locking connection that is common throughout the architecture. All power
management, energy storage, and power generation components are compatible with the Inter-
Connect Circuit.
Using a common, polarized connector allows rapid “Plug & Play” scaling of components, adaptation
of capabilities within the architecture, technology refreshment, and swapping of components when
conditions warrant. It also ensures that there is no unsafe way to make connections.
Circuit Breaker Protections
The Inter-Connect network is protected from overloads and short circuits through a network of circuit
breakers strategically placed throughout the circuit. It ensures the potential for a reverse polarity
connection within the circuit is minimized. If a problem occurs in a leg of the Inter-Connect Circuit,
the affected leg will disconnect from the primary network, leaving the other circuits functioning. If a
major failure occurs in the circuit, then the entire network will shut down for System and Operator
protection.
Operate with Voltage
The Inter-Connect Circuit communicates simple battery voltage to all components on the network,
allowing them to independently coordinate their respective functions. Battery voltage is used to
trigger actions such as Automatic Generator Start/Stop (AGS) function, power distribution timing,
and more. Therefore, the proper setup of the Inter-Connect Circuit is critical to properly communicate
voltage to all points in the System and to ensure all of the components operate together to provide
seamless power to the load.
Optimize with Data
Data collection for a System occurs through the Inter-Connect network. Power management devices
such as HyPR 3000 and PRO-Verters meter voltage, current and time through the circuit, providing
critical real-time data the operator can use to troubleshoot and verify System performance. Data
collection enables programming/architectural changes to optimize performance based on evolving
conditions.

|13April 2021 |Solar Stik®, Inc. PRELIMINARY DRAFT
System Setup Operation and Maintenance Manual for the SFAB HPS
Energy Storage—The Foundation of a System
Batteries in a Hybrid Power System are designed to “cycle”. A full cycle is dened as one complete
discharge and recharge over a specic period of time. All batteries have a cycle life and therefore
should be considered the “consumable” part of the System. The health of the battery can directly
affect the function of the System over time, so proper cycling and cell-health management practices
are strongly encouraged.
Minimum Battery Capacity Required for Optimal System Operation
Each 24VDC Li Expander Pak 1300 has a built-in 25 A circuit breaker that will trip at a value less
than the maximum rated current that the HyPR 3000 can supply to a load. For this reason, multiple
Li Expander Pak 1300s must be connected to a HyPR 3000 for a System to function at its full, rated
power.
Connecting an insufcient number of Expander Paks to a HyPR may result in a situation where the
batteries are charged or discharged too quickly. Charging / discharging ESMs too quickly may cause
the battery temperature to rise to a point that the battery management system (BMS) disconnects
the batteries from the whole system.
Scaling Energy Storage Capacity
Plug & Play architecture allows expansion or contraction of battery capacity when conditions
warrant.
Use Inter-Connect Cables to create a “bank” of Li ESMs. Note: Do not mix battery chemistries in a
System battery bank.
If a System needs to be downsized, due either to reductions in the load or simply to reallocate
energy storage resources to other locations, then Li ESMs can be removed from service in
accordance with reductions in runtime requirements.
Scaling and Modifying a HyPR-based System
When expanding or modifying the architecture, scaling and stacking may be used to provide
additional capabilities that may exceed the ability of any one component to handle.
Scaling
• Power generation and energy storage connected to the HyPR 3000 can be modied in
accordance with changes in load requirements. Additional generation sources should be selected
based on availability of resources, logistics, and the local environment.
• Additional energy storage modules can be of a different form factor but must be of the same
chemistry and voltage and have compatible charge and discharge current capabilities.
Stacking
• Capabilities including inverters, advanced power distribution and management modules can be
added (or removed).
Note: Scaling or modifying the System architecture should be done with all components in the
System completely inactive and OFF.

April 2021 |Solar Stik®, Inc.14 |
System Setup Operation and Maintenance Manual for the SFAB HPS
PRELIMINARY DRAFT
Important Safety Information and Instructions
This manual contains important instructions that must be followed during the setup and operation of
a the HyPR 3000. Read all instructions and information contained in this manual.
Important information regarding the safe setup and use of the HyPR 3000 is contained in this Manual.
DO NOT begin assembly or use of the HyPR 3000 without rst reading and understanding this
manual.
While the HyPR 3000 designed for indoor/outdoor operation, the DC Interface (control panels) must
not be exposed to rain, snow, moisture, or liquids. Close and latch and/or lock the cases when the
components are unattended.
Exercise caution when handling or operating the HyPR 3000. Live power may be present.
Safety Information Labels
Your safety and the safety of others is very important.
Many important safety messages have been provided in this manual and directly on the System
components. Always read and obey all safety messages.
This is the safety alert symbol. This symbol is an alert to potential hazards that can cause
death or injury. All safety messages will follow the safety alert symbol and the word
“DANGER”, “WARNING”, or “CAUTION”. These words are dened as:
DANGER Indicates a hazardous situation which, if not avoided, will result in death or
serious injury.
WARNING Indicates a hazardous situation which, if not avoided, could result in death or
serious injury.
CAUTION Indicates a hazardous situation which, if not avoided, could result in minor or
moderate injury.
All safety messages will describe what the potential hazard is, how to reduce the chance of injury,
and what can happen if the instructions are not followed.

|15April 2021 |Solar Stik®, Inc. PRELIMINARY DRAFT
System Setup Operation and Maintenance Manual for the SFAB HPS
Fire Hazard
Fire Types
Class A fire - Fires in ordinary combustibles such as wood, paper, cloth, trash, and plastics.
Class B fire - Fires in ammable liquids such as gasoline, petroleum, oil, and paint.
Class C fire - Fires involving energized electrical equipment such as motors, transformers, and
appliances. Remove the power source and the class C re becomes a class A or B re.
Recommended Fire Extinguisher
NSN 4210-00-288-7219 Fire Extinguisher, Carbon Dioxide, 10 lb
Carbon dioxide is a liqueed gas, which is highly effective ghting class B and C res. These
extinguishers are ideal for areas where contamination and/or cleanup are a concern, such as data
processing centers, labs, and telecommunication rooms.
Using the Fire Extinguisher
When using the extinguisher on a re, remember PASS:
Pull the pin.
Aim the nozzle or hose at the base of the re from a safe distance.
Squeeze the operating lever to discharge the re extinguishing agent.
Sweep the nozzle or hose from side to side until the re is out. Move forward or around the re as
the re diminishes.
Watch the area for reignition until the cause has been xed.
WARNING
Only CO2(carbon dioxide) re extinguishers should
be used with this equipment.

April 2021 |Solar Stik®, Inc.16 |
System Setup Operation and Maintenance Manual for the SFAB HPS
PRELIMINARY DRAFT
Electric Shock Hazard
WARNING
Standing water around the electrical equipment and/or intrusion of water into the System
components can increase the risk of electrical shock.
DON’T LET THIS BE YOU!
HIGH VOLTAGE: System components, PV
arrays, and generators may produce lethal
line voltages. Extreme care should be taken
to protect against electrocution. Always work
with another person in case an emergency
occurs. Disconnect power before performing
maintenance. Wear safety glasses whenever
working on any part of a system that requires
exposure to mechanical or direct electrical
contacts.
WARNING
The System is NOT GFCI protected.

|17April 2021 |Solar Stik®, Inc. PRELIMINARY DRAFT
System Setup Operation and Maintenance Manual for the SFAB HPS
Environmental and Handling Precautions
All Solar Stik components are ruggedized, yet there are a few things the operator can do to prevent
failures and prolong the operational life of the Solar Stik System.
Water
If outdoor operation is necessary, the lids
of all components should be closed and
latched. During operation, cases should be
placed upright, especially during inclement
weather. Lids should be open only to access
operator controls and closed at all other
times.
Impact
Equipment should not be dropped onto hard
surfaces at a height greater than one foot
when transporting or during operation.
Dust/Foreign Object Intrusion
Air intake lters should be cleaned once per
month, or more frequently when conditions
warrant. As a general rule, minimize exposure
to high levels of particulates and foreign
object debris by exercising common-sense
placement and protection during both
operation and storage.
Heat
Heat and solar loading reduces efciency and
life expectancy. Shade components (except
PV panels) to prevent the negative effects of
heat.

April 2021 |Solar Stik®, Inc.18 |
System Setup Operation and Maintenance Manual for the SFAB HPS
PRELIMINARY DRAFT
• Inter-Connect Port - Point of connection with the system 24 VDC bus, Inter-Connect network
• Stacking Locks- Provide stability and alignment for stacked Expander Paks
• Tech Port - Contact Solar Stik Technical Support for information.
Figure 8. External features of the Expander Pak
External Features
Inter-Connect Port Tech Port
Stacking
Locks (x4)
Top
Top Bottom
Stacking
Locks
24VDC Li Expander Pak 1300
Inter-Connect Cables for use with the Li Expander Pak 1300 have two types of plugs: linear and
angled. The linear plug connects to the Expander Pak 1300 to facilitate stacking.
24VDC Linear Inter-Connect Cable
Figure 9. 24VDC Linear Inter-Connect Cable plugs
Linear
Angled
EQUIPMENT DESCRIPTION

|19April 2021 |Solar Stik®, Inc. PRELIMINARY DRAFT
System Setup Operation and Maintenance Manual for the SFAB HPS
Data Plate (D-Plate)
Figure 10. 24VDC Li Expander Pak 1300 D-Plate

April 2021 |Solar Stik®, Inc.20 |
System Setup Operation and Maintenance Manual for the SFAB HPS
PRELIMINARY DRAFT
AC Power Input Port
Figure 11. HyPR 3000 exterior features
The HyPR 3000 is a power management component. The MAIN POWER switch is not a “kill all”
switch. This switch turns on or off the ow of energy from any ESMs connected to the HyPR.
24VDC HyPR 3000-120
Description Connector Voltage Amps
Input Connection HBL503SS 85-264 VAC 30
Power
Switch
Transport
wheels
Lid Latches
Figure 12. HyPR 3000 Universal AC power input port
Other manuals for 24VDC HyPR 3000
2
Table of contents
Other Solar Stik Power Supply manuals

Solar Stik
Solar Stik 24VDC HyPR 3000 Installation instructions

Solar Stik
Solar Stik PRO-VERTER 5000-220 AFF1 User manual

Solar Stik
Solar Stik PRO-VERTER 7000-120 User manual

Solar Stik
Solar Stik 24VDC PRO-VERTER 5000-220 AGS Installation manual

Solar Stik
Solar Stik PRO-VERTER 5000-240 User manual

Solar Stik
Solar Stik G-BOSS E LIGHT User manual

Solar Stik
Solar Stik USAF G-BOSS Manual instruction

Solar Stik
Solar Stik PRO-Verter S 2000 AGS Manual instruction
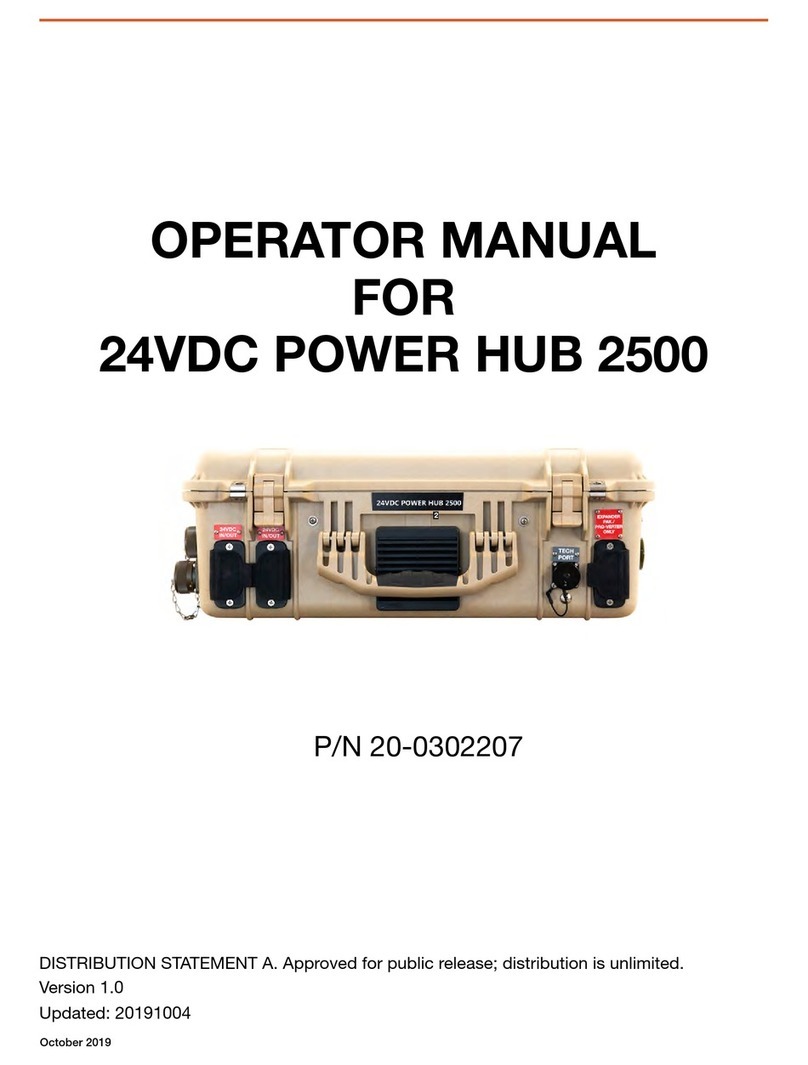
Solar Stik
Solar Stik 24VDC POWER HUB 2500 User manual

Solar Stik
Solar Stik 24VDC PRO-VERTER 5000-120 AGS User manual
