Soltech SATELIS PRO 50W User manual

01
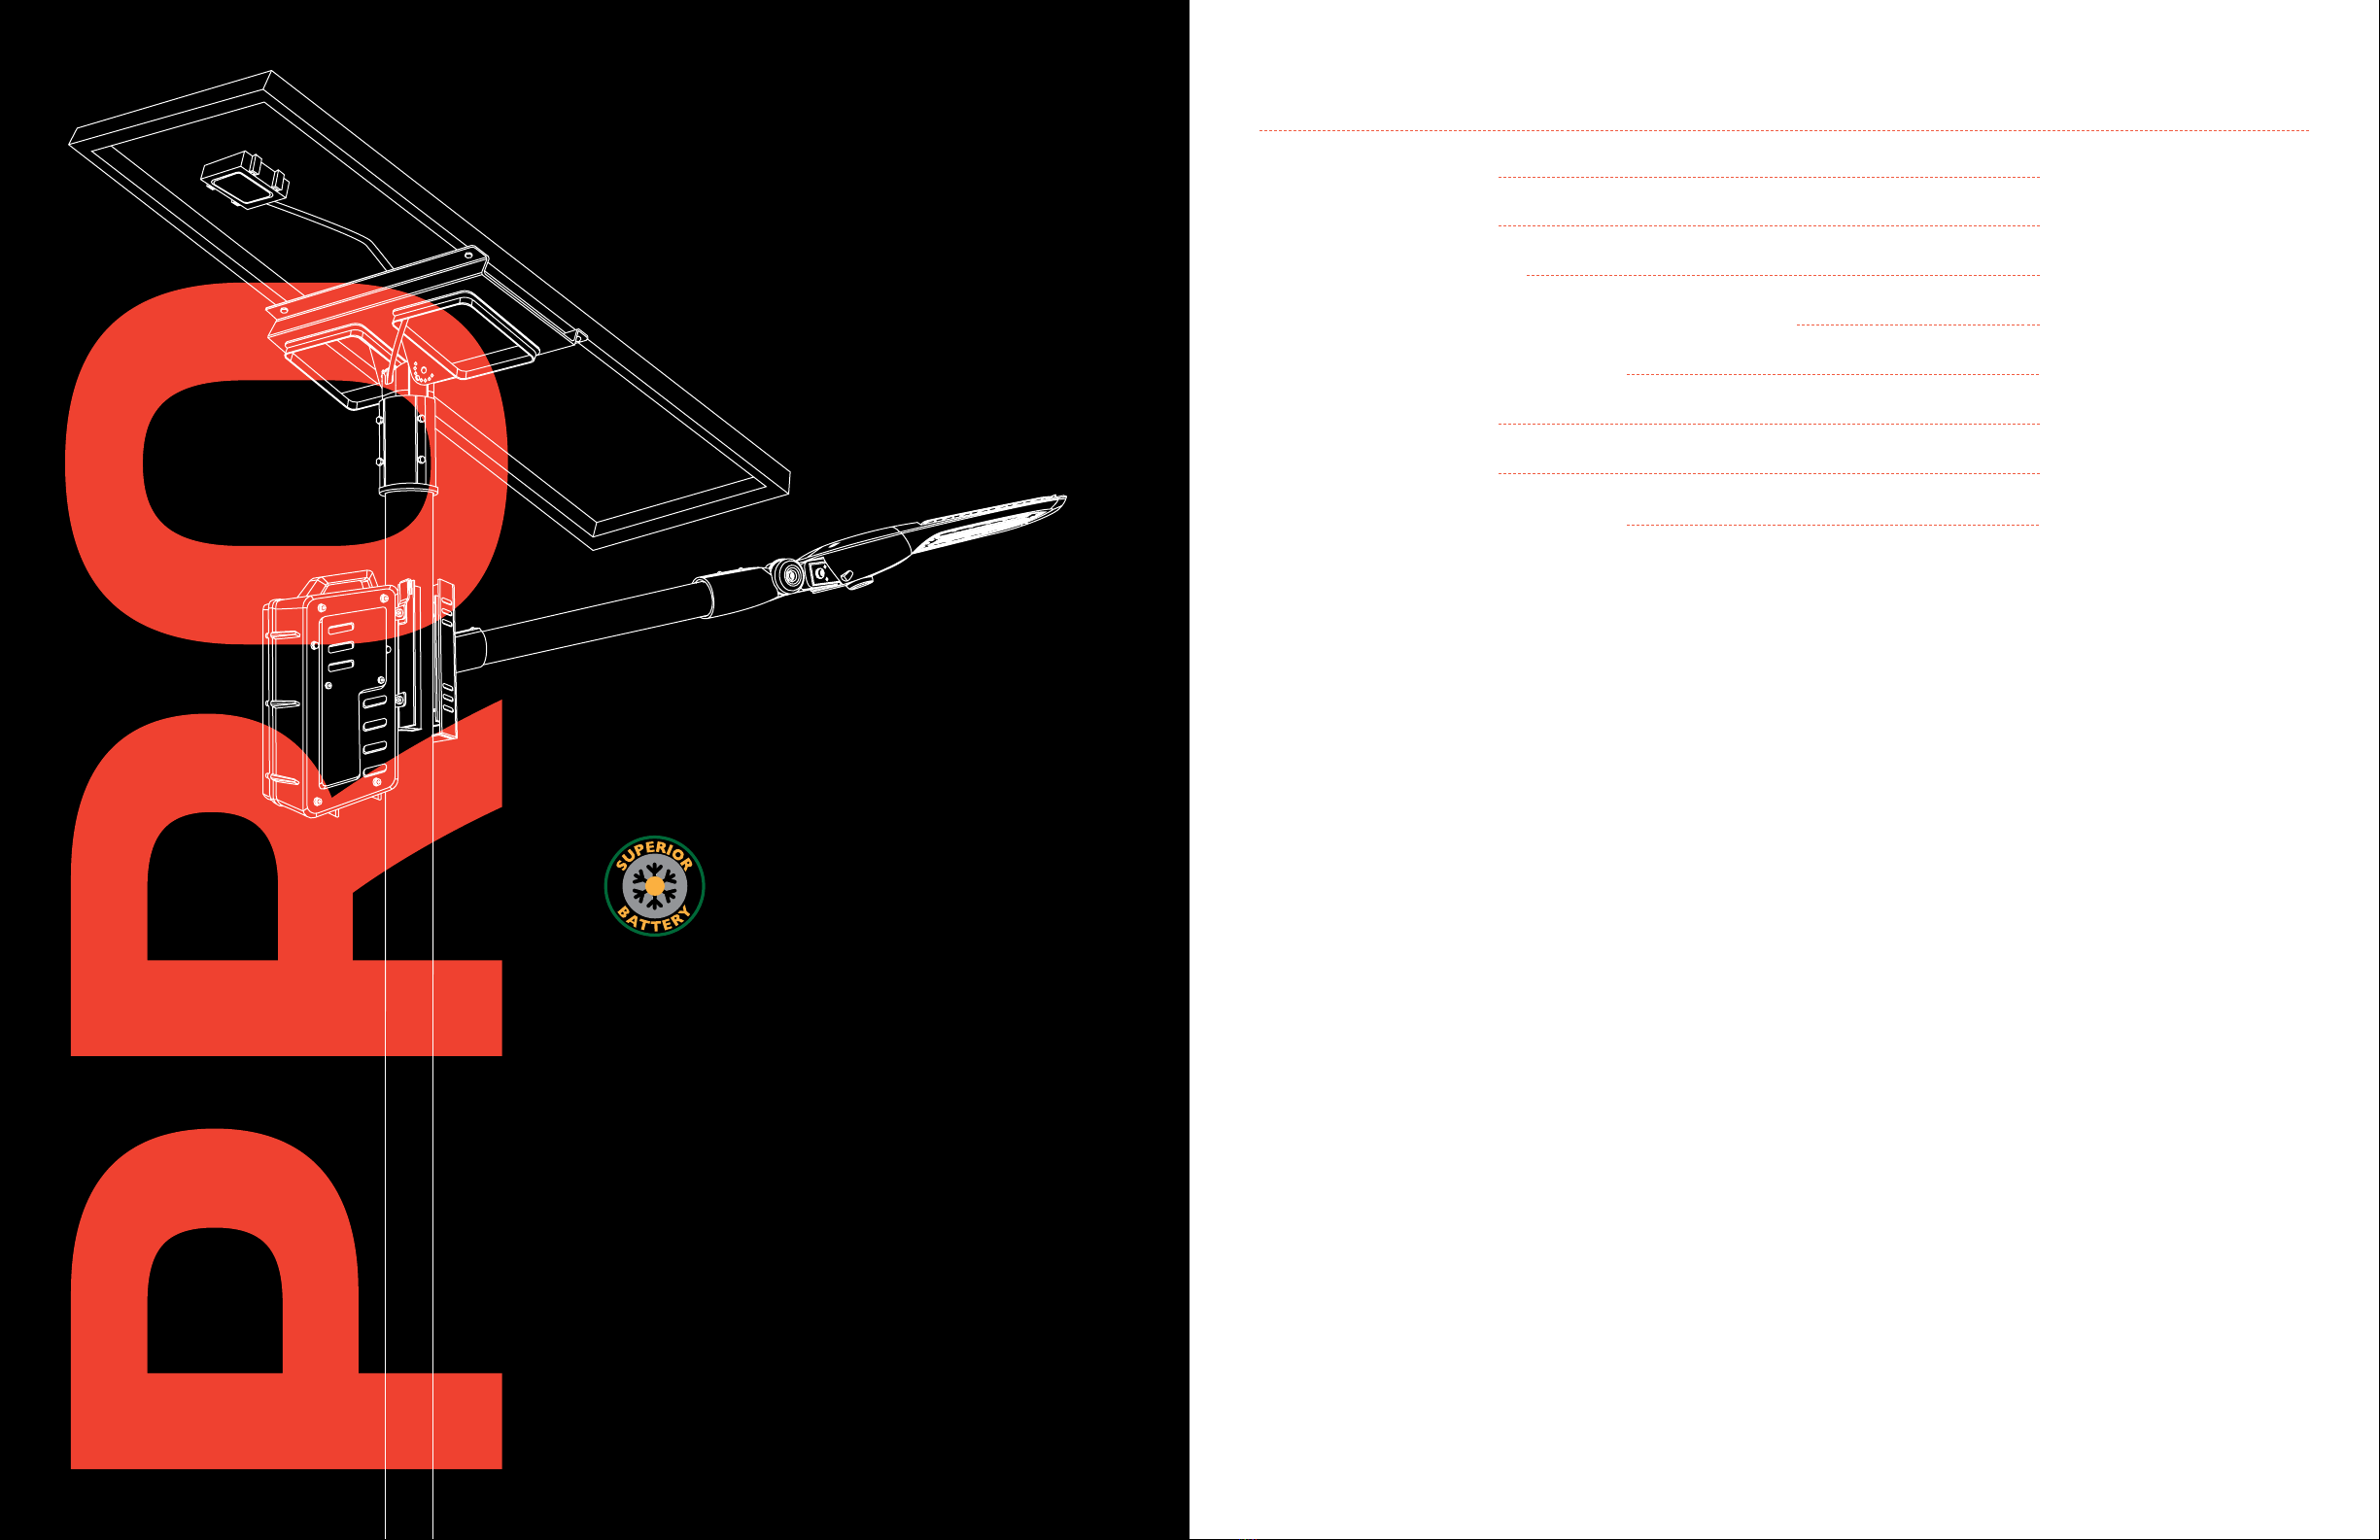
SATELIS
50W
Installation Manual
SOLTECH Designs and Manufactures
Advanced, Solar-Powered
LED Technology.
02 03
SATELIS PRO 50W
Contents
01 Check List
02 Introduction
03 Battery Notes
04 Installation and Wiring Compliance
05 Mounting Accessories
06 Installation
07 Panel Angle
08 Remote Control Guide
04
06
08
010
012
014
016
018

04 05
01 Check List
SATELIS PRO 50W
Solar Panel
Component Kit A
Component Kit D Component Kit E Component F Component G Component H
Component I Component J Component K Wire MComponent Kit B Component Kit C
Luminaire Battery Pack

06 07
02 Introduction
Thank you for purchasing SATELIS PRO solar-powered area light.
Outdoor solar lighting systems use solar cells which convert sunlight
into electricity. Electricity is stored in batteries for use at night.
SATELIS PRO solar lights are easy to install and virtually maintenance
free. Using them won’t increase your electric bill.
Important Considerations
In order to avoid deep discharge of the battery during storage, please
fully recharge your battery every 4 months. Please make sure that the
light is installed in an area with sufficient sunlight irradiance. A strict
minimum of 3.5 hours/day of sunshine on average is recommended.
Select the right operating mode according to local codes & regula-
tions, and the local sunshine conditions. Keep it away from shadows.
Self-cleaning occurs when the light fixture has a minimum angle of
15 degrees.
Please save these installation instructions. Read all of the instructions
carefully before attempting to carry out any installation or wiring.
Do not open or attempt to repair the product on your own, as it many
cause serious damage and would void the product warranty. Contact
your local distributor for any questions concerning the installation.
Range of the light module on the lighting fixture is 20–26 feet (6–8
meters). The ideal installation spacing is >16 feet (5 meters). When
installing two or more lighting fixtures on one pole, select desired
operating mode before installation. Interference can cause delay or
malfunction when using the remote control to change operating modes
after installation.
Range of the light module on the lighting fixture is 20–26 feet (6–8
meters). The ideal installation spacing is >16 feet(5 meters). When
installing two or more lighting fixtures on one pole, select desired
operating mode before installation. Interference can cause delay or
malfunction when using the remote control to change operating modes
after installation.
Precautions When Working With Solar Panels
When the solar panel is exposed to light, a voltage appears at the
output terminals of the solar panel turning it into a source of electricity.
To avoid a shock hazard, make sure the solar panel is covered with an
opaque (dark) covering such as paper or cloth, during the installation.
Do not make contact with the terminals when the panel is exposed to
sunlight or any other light source.
SATELIS PRO 50W 26.5 inches
SOLAR PANEL: 21.2 Lbs
SOLAR LAMP: 13.5 Lbs
BATTERY ASSEMBLY: 35.2 Lbs
MOUNTING FASTNER: 22 Lbs
1.3 inches
3.5 inches
11.0 inches
32.0 inches 9.5 inches 6.3 inches
49.0 inches
21.5 inches

08 09
1. Super Capacitor battery-powered SATELIS PRO lights are visibly
brighter than other outdoor solar lights, and their performance overall
is more reliable.
2. To charge the battery fully may take up to 12 hours.
3. The rechargeable battery can work continuously for 10 hours
at full power.
4. The output will be reduced to 40% when the battery is below 40% of
its capacity.
5. The battery will stop charging when the ambient temperature is below
-40°F or above 140°F.
Battery Status is indicated by the red/green indicator on the light
fixture as follows:
> Slow red light flashing (Every 2.5s) = Working
> Slow red flashing (Every 5s)= Open circurt
> Red light continuously on = Non-working
> Quick red flashing (Every 0.5s)= Charge fault
> Quick red flashing (Every 0.1s)= Over current or Short circuit
Storage
To avoid over discharge of the battery during storage, please
rechargethe lighting fixture every 4 months. Use the dedicated
charger to charge, and then reset the switch when done.
03 Battery Notes
(IAP) Intelligent Adaptive Program Battery Control Technology
In order to extend the off-grid autonomy of the SATELIS PRO 50W
under shade trees, heavy rain, and thick clouds, our controllers
now integrate an adaptive smart control feature to actively track
battery capacity and adjust light output accordingly. Before integrating
this feature, selecting a light output percentage on the remote would
yield an accurate percentage of max LED brightness. Activating the
IAP, the controller actively monitors the battery and regulates the
electrical current to the LEDs. The controller makes the light output of
a selected percentage on the remote relative to battery capacity rather
than max LED output. This smart-control feature can increase the fixture’s
off-grid performance by up to 40%
ATTENTION
Please contact SOLTECH for any battery questions. After connecting
the wires between solar panel and the light, SATELIS PRO 50W will
automatically turn on, and the indicator will begin flashing every 2.5
seconds. The light fixture will then turn on for 1 minute and then shut
off again. This means the fixture is switching from open circuit mode to
standard working mode. If you wish to shut off the light, you must first
cover the solar panel, then press the off button on the remote. You can
also just press the off button to turn off the light at night. When the
solar panel detects light, the fixture will activate and resume normal
operation, again.
Battery pack Disconnect wires
Disconnect wires
Battery Replacement
1. Loosen the screws of the
battery pack.
2. Disconnect the wire
connectors.
3. Take out the battery pack.
4. Replace with a new one,
connect the wire connectors.
5. Tighten the screws.
0102
03

010 011
04 Installation and Wiring Compliance
1. Installation and wiring must comply with the State and National
Electrical Codes.
2. The SATELIS PRO 50W model is intended for outdoor use
only and should not be installed in an unventilated area. it must be
installed in an environment within the operating temperatures
defined for the product.
3. The average sunshine in the installation area should be above
3.5 hours/day in order to ensure full function of the light fixture.
Avoid areas with shades.
4. Before installation, if applicable, ensure the light pole and its
foundation are solid enough to support the light fixture(s).
5. Before installation, ensure that the battery is fully charged. Install during
sunny days if possible.
6. Before installation, press the ON/OFF key in the remote control
and check whether it shows a red light on the indicator. Cover the
panel and check if the light module turns on normally within 1 minute.
After Installation
The light fixture will automatically turn on at night and turn off
during daylight.
Important Considerations
Orient the solar panel facing the equator
(e.g. facing south if in northern hemisphere).
Have a tilt angle of at least 15° to avoid dust accumulation
(0°=horizontal plane).

012 013
05 Mounting Accessories
Max 29.5 inches
Create 2 holes (diameter 0.5 inch) in the middle of pole, create 1 hole
(diameter 1.5 inch, 2.6 inch long) between the 2 holes.
If your round pole size is over 3.1 inches, or you need a square pole, please
contact the pole manufacturer for the tenon adapter.
SLIP FITTER POLE ASSEMBLY TENON ADAPTER
SOLAR PANEL SUPPORT BASE—CUTAWAY
Pole Size For Slip Fitter
1.8 inches
31.0 inches
Ø3.0 inches–Ø5.5 inches
Ø3.1 inches Ø3.1 inches
2.5 inches–5.0 inches
Ø1.5 inches Ø1.5 inches
Ø0.5 inch Ø0.5 inch
Max 29.5 inches
2.4 inches
Top of Pole—
Round
Top of Pole—
Square
Tenon Adapter—Round Tenon Adapter—Square
7.2 inches
Pole
3.1 inches
0.4 inch
8.2 inches 5.3 inches 7.1 inches
2.2 inches
3.1 inches
9.5 inches 9.5 inches
2.6 inches 2.6 inches
014 015
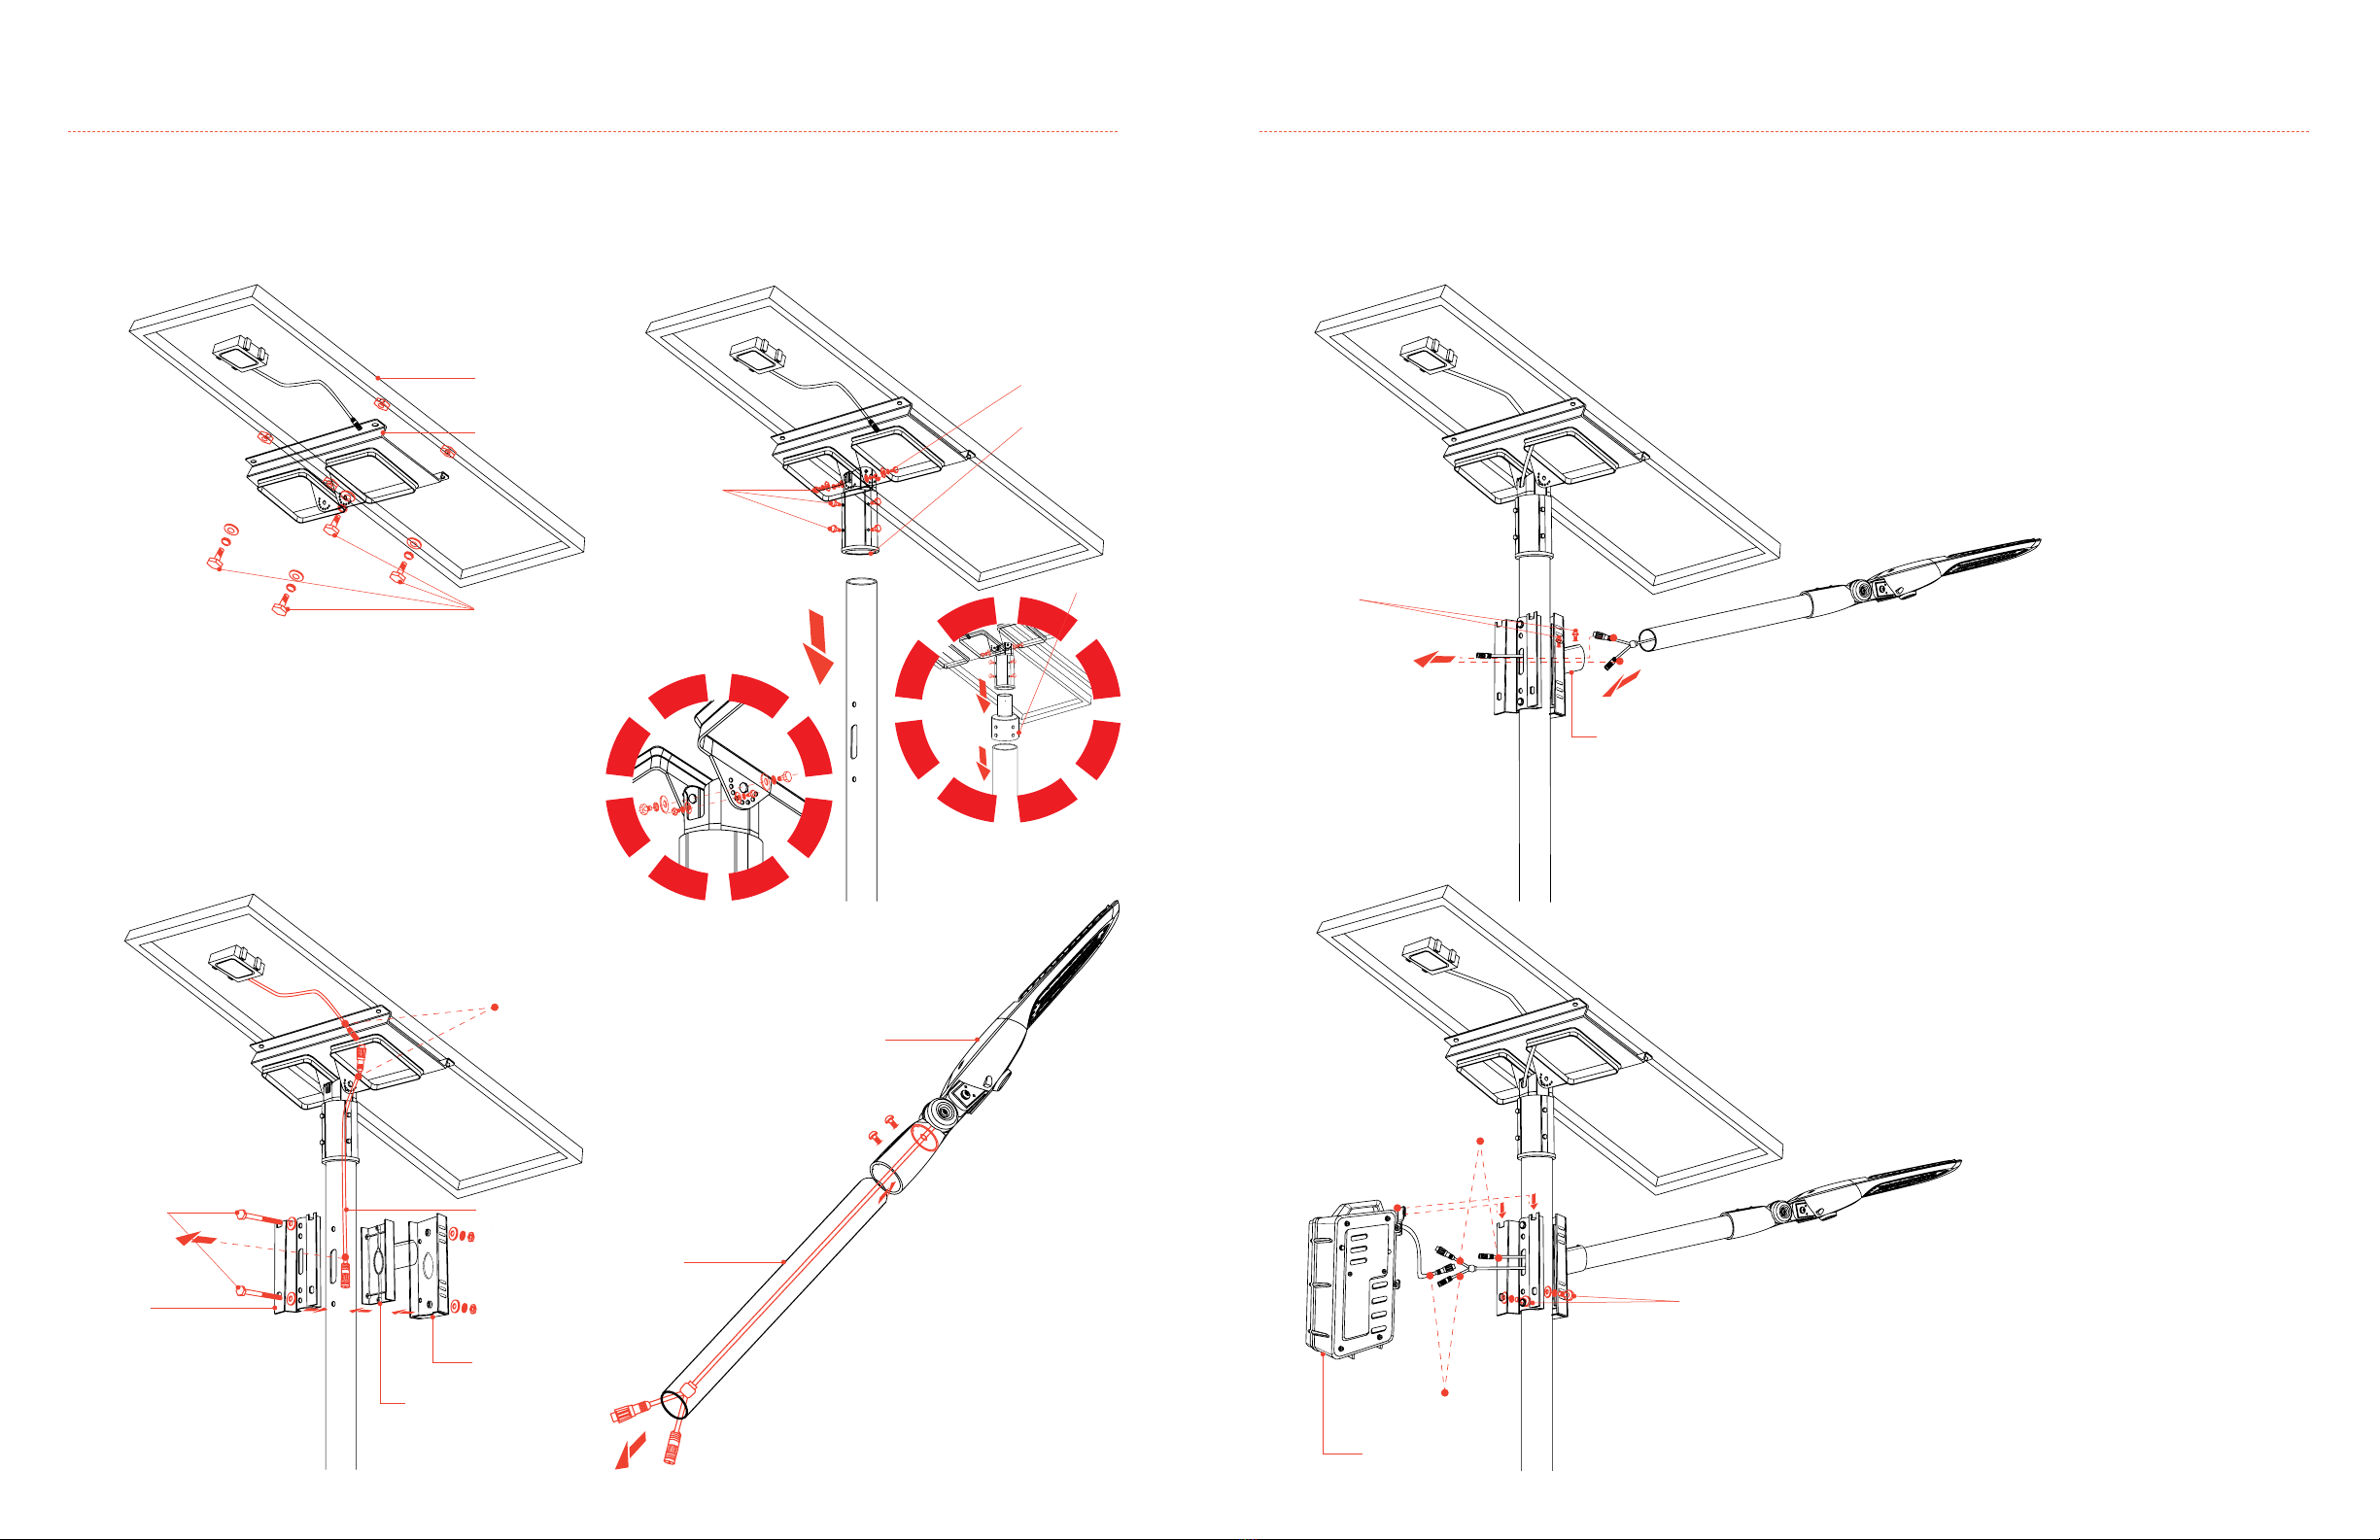
06 Installation
SATELIS PRO 50W
01 02
03 04
Solar Panel
Component K
Component Kit A
Component Kit B
Component Kit D
Component F
Component Kit C Wire M
Connect
Wire M comes
inside the pole
and comes out
from the hole.
The luminaire wire comes inside the
component J.
Component G
Component H
Component I
Luminaire
Component J
05
06
Component Kit E
Connect
Connect
The luminaire wire comes inside
the component H and comes out from
the hole.
If your round pole size is over 3.1
inches, or you need a square pole,
please contact the pole manufacturer
for the tenon adapter to connect
the component F.
Battery Pack
Component E
Component H
Tenon Adapter

016 017
Alaska
25° N
15°
30°
45°
60°
19° N
21° N
26° N
20° N
27° N
28° N
29° N
30° N
31° N
32° N
33° N
34° N
35° N
36° N
37° N
38° N
39° N
40° N
41° N
42° N
43° N
44° N
45° N
46° N
47° N
48° N
60° N
49° N
Washington
Oregon
California
Nevada
Arizona
Utah
New Mexico
Kansas
Colorado
Oklahoma
Texas
North Dakota
South Dakota
Nebraska
Idaho
Montana
Wyoming
61° N
62° N
63° N
64° N
65° N
70° N
66° N
67° N
68° N
69° N
Hawaii
Minnesota
The solar charge in a battery pack won’t last forever. The off–grid system
relies on stored solar energy for autonomy. Angling your solar panels
properly can boost the power intake of your solar lighting system. You
want to angle your solar panels at a tilt based on the area’s latitude.
Tip
You can increase the tilt 15° in the winter or decrease 15° in the summer.
In this way you can get the maximum sunlight to recharge the battrey.
Strong sunlight Normal sunlight Less sunlight
Key
The area will dictate the installation of the fixtures and will sometimes
prevent the lights from facing south. But that’s okay! Panels facing West
& East won’t get as much light as Southern facing panels, but will still
collect a good amount of sunlight. A North facing panel also works, but
it will take longer to charge than any other direction. This would mean
that the solar charge will be less optimal if installations are facing North.
0°
15°
15°
45°
60°
45°
Arkansas
Louisiana
Mississippi
Alabama Georgia
South
Carolina
North
Carolina
Virginia
West
Virginia
Kentucky
Illinois
Wisconsin
Iowa
Missouri
Michigan
Indiana
Ohio
Pennsylvania
New York Massachusetts
Rhode Island
Connecticut
New Jersey
Delaware
Maryland
Tennessee
Florida
World Wide Panel Angles
Best Facing Direction of Solar Panel
Best
Worst
OKOK
New Hampshire
Vermont Maine
30°
30°
07 Panel Angle

018 019
08 Remote Control Guide
1. On/Off 2. Connect/Test
4. 20%~80% Motion
Sensor Mode (Default)
6. Early Bird Mode
8. 70% Constant Mode
10. Timer Mode Disabled
12. Time Mode 8 Hours
3. 40%~100% Motion
Sensor Mode
5. Night Owl Mode
7. 100% Constant Mode
9. 40% Constant Mode
11. Timer Mode 4 Hours
1. On/Off
When off is selected, the light will stop working. The solar panel will not
charge the battery and the battery will not supply electricity to the light.
2. Connect/Test
Remote control device can be connected with any lighting fixture.
When all cables are connected and solar panel detectes sunlight, the fixture
will automatically turn on. To test, press the “Test” button once, the LED
light will turn on to indicate the fixture has been turned on. During the
day time, the indicator will slowly flashing red. That means the battery
is charging.
When using the remote for the first time, please remove the plastic
piece at the bottom to make the remote turn on.
16ft–33ft
The range of the remote control to the
indicator is 16ft (Day time) to 33ft (Night
time). Because the sunlight will impact
the signal of the remote control, we suggest
our users to setup the mode before they
install the light.
3. 40%~100% Motion Sensor Mode
Constant 40% brightness (turns on at dusk, turns off at dawn);
100% brightness turns on for 2 minutes when motion is detected.
4. 20%~80% Motion Sensor Mode (Default)
Constant 20% brightness (turns on at dusk, turns off at dawn);
80% brightness turns on for 2 minutes when motion is detected.
5. Night Owl Mode
Changes as natural light decreases/increases (turns on at dusk); 70%
brightness for 0.5 hour, 100% brightness for 3.5 hours, 70% brightness
for 1 hour, 50% brightness for 1 hour, 20% brightness for 5 hours
(turns off at Dawn).
6. Early Bird Mode
Changes as natural light decreases/increases with increased brightness
near dawn for early risers (turns on at dusk); 70% brightness for 0.5
hour, 100% brightness for 3.5 hours, 70% brightness for 1 hour, 50%
brightness for 1 hour, 20% brightness for 4 hours, 100% brightness
for 1 hour (turns off at Dawn).
Important
Dusk and dawn time may be diffrent in other locations and seasons.
The sensors of our products will follow the light patterns of where it is
installed. The time period shown in the chart above is just an example
to help you understand the different lighting modes only.
(IAP) Intelligent Adaptive Program Battery Control Technology
In order to extend the off-grid autonomy of the SATELIS PRO 50W
under shade trees, heavy rain, and thick clouds, our controllers
now integrate an adaptive smart control feature to actively track
battery capacity and adjust light output accordingly. Before integrating
this feature, selecting a light output percentage on the remote would
yield an accurate percentage of max LED brightness. Activating the
IAP, the controller actively monitors the battery and regulates the
electrical current to the LEDs. The controller makes the light output of
a selected percentage on the remote relative to battery capacity rather
than max LED output. This smart-control feature can increase the fixture’s
off-grid performance by up to 40%

020 021
08 Remote Control Guide
8. 70% Constant Mode
70% brightness from dusk to dawn.
9. 40% Constant Mode
40% brightness from dusk to dawn.
10. Timer Mode Disabled
Press this button to turn off Timer Mode; settings revert back to before
Timer Mode was last activated.
7. 100% Constant Mode
100% brightness from dusk to dawn.
11. Timer Mode 4 Hours
This is an additional mode which can work with any other modes.
For example: press this button at any time after you turn on 70%
Constant Mode. If the light turns on at 7pm at dusk, it will turn off at
11pm. It will repeat the same schedule hereafter until it is canceled
by pressing Timer Mode Disabled.
12. Time Mode 8 Hours
This is an additional mode which can work with any other modes.
For example: press this button at any time after you turn on 70%
Constant Mode. If the light turns on at 7pm at dusk, it will turn off at
3am. It will repeat the same schedule hereafter until it is canceled by
pressing Timer Mode Disabled.
Important
Dusk and dawn time can vary for different locations and seasons.
The sensors in our products will monitor the light levels where it is
installed. The time period shown in the chart above is just an example
to help you understand the different lighting modes.

022 023
SATELIS PRO products are covered by a 5 year limited
warranty. SOLTECH urban light warrants to the original
purchaser that this product is free from defects in materials
and workmanship for the period of 5 years from date of
purchase. To obtain warranty service please contact your local
distributor or sales rep for further instruction.
SOLTECH LLC reserves the right to update all
product data sheets at any time. Consult SOLTECH
marketing specialists for publication updates at
Copyright©2021–2022 SOLTECH LLC,
All Rights Reserved.
1460 Park Avenue.
Emeryville, CA 94608 USA
www.soltechlighting.com

024
SOLTECH Designs
and Manufactures
Advanced,
Solar-Powered
LED Technology.
Table of contents
Other Soltech Outdoor Light manuals

Soltech
Soltech BROADWAY 10W User manual

Soltech
Soltech STL-CLF150 Series User manual

Soltech
Soltech CEGONIA 8W User manual

Soltech
Soltech SunLike ECO-IAP 30W User manual

Soltech
Soltech CEGONIA PRO 30W User manual

Soltech
Soltech SATELIS STLSTD505SFGY30 User manual

Soltech
Soltech VIOS User manual

Soltech
Soltech SunLike 50W User manual


