Sona SonaSky Assembly instructions

SonaSky
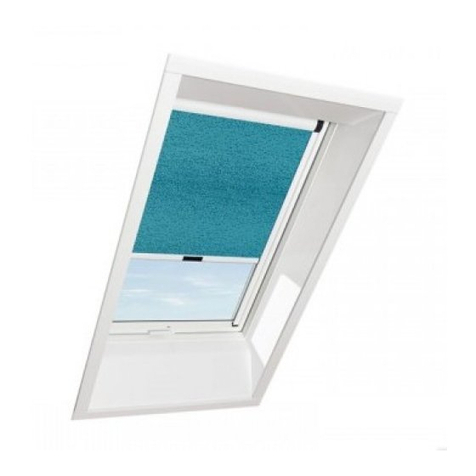
Motorised Skylight Blind
1
SonaSky Motorised Blind FITTING GUIDE
SONASHADES.COM

This product and all its components must be tted by a qualied professional.
Ensure the electrical power is turned off before tting this product.
The power supply intended for this product is 12v.
Ensure the product is securely fastened before releasing.
Do not install this product externally, in wet or high moisture environments.
Do not install this product with small children or pets around.
This product is not intended for use by children.
Keep the handset out of reach of children.
Never drop, knock, puncture or immerse the handset in liquids of any type.
SAFETY
INSTRUCTIONS
1
2
3
4
5
6
7
8
9
FITTING GUIDE
SONASHADES.COM 2
SonaSky Motorised Blind

STEP 1
1.1
1.2
1.3
Unpack all the contents out of the box and lay them carefully on a at surface.
Your box should contain:
• 1 x Motorised Blind
• A1
• A3
• B1
• B2
• 1 x Handset (Optional)
• 1 x Power Supply (Battery / Solar or Mains) (Optional)
Identify the rails marked ‘A1’ and ‘A3’. These rails are to be tted rst starting with
rail ‘A1’ then moving on to rail ‘A3’.
Rail ‘A1’ is classed as the motor rail, to which the motor side below ts to (the
motor side is where the fabric is stacked / motor is located). Decide which side
of the opening you would like the motor side to be positioned on and t rail ‘A1’
accordingly.
FITTING GUIDE
SONASHADES.COM 3
SonaSky Motorised Blind

1.4
1.5
1.6
1.7
Motor Side
If you have a perimeter trim already installed measure 10mm down from the bottom
of this trim and position rail ‘A1’. Make sure rail ‘A1’ is LEVEL and mark your drill
positions with a pen through the pre-drilled holes already visible on the rail.
Take away the trim and drill your holes required through the plasterboard ensuring
you DO NOT drill into the timber behind it.
Using the screws provided, screw the trim on securely. DO NOT over tighten the
screws as this may damage the plasterboard.
Repeat the above steps 1.4, 1.5 and 1.6 for rail ‘A3’.
A1
10mm
FITTING GUIDE
SONASHADES.COM 4
SonaSky Motorised Blind

STEP 2
2.1
2.3
2.2
2.5
2.4
Now locate the remaining side rails marked ‘B1’ and ‘B2’.
Rest rails ‘B1’ and ‘B2’ on the already tted rails ‘A1’ and ‘A3’ (see image below).
Secure the rail ‘B1’ rst. Depending on the length of rail ‘B1’ it should t nicely in-
between rails ‘A1’ and ‘A3’.
Secure rail ‘B1’ by rstly marking the drill positions with a pen through the pre-drilled
holes already visible on the rail. Take away the trim and drill your required holes
through the plasterboard ensuring you DO NOT drill into the timber behind it.
Using the screws provided, start at the middle of rail ‘B1’ and screw the trim on
securely so all ends are securely xed. DO NOT over tighten the screws as this may
damage the plasterboard.
B1 or B2 A1 or A3
FITTING GUIDE
SONASHADES.COM 5
SonaSky Motorised Blind

STEP 3
CLEANING CHECK – Once all the rails are now securely xed into place, before
tting the Blind it is important to clean any debris from the top of the rails so the
Blind can run smoothly. Not cleaning the rails may cause an obstruction which
could potentially cause damage to the Blind.
Clean Top of Rail
Clean Top of Rail
End Prole
Motor Side
3.1 Unwrap the Blind carefully and lay it out on a clean at surface. (See image below).
FITTING GUIDE
SONASHADES.COM 6
SonaSky Motorised Blind

ORIENTATION CHECK – On the motor side of the Blind, please ensure the metal
nylon tensioners are facing upwards towards the ceiling so the Blind is facing the
correct orientation (see image of a nylon tensioner below). The tensioners should
not be visible from ground level once the Blind is tted.
3.2 Fit the motor side of the Blind rst to rail ‘A1’.
Start at one end and clip the motor side of the
Blind into rail ‘A1’ as per the diagram and image
below. We recommend resting the Blind on the
side rails ‘B1’ and ‘B2’ whilst doing so. Begin
clipping at one end and make your safely way
across. Moderate force is required.
FITTING GUIDE
SONASHADES.COM 7
SonaSky Motorised Blind

3.3
3.4
Now move your ladders safely across to the opposite side of the lantern so you are facing
rail ‘A3’. Leave enough space so you are at arm’s length to clip in the end prole in.
Rest the prole on the side rails ‘B1’ and ‘B2’. The side requires considerable force to clip
in the end prole to the rail ‘A3’ brackets securely. It will seem short on length (80mm)
but this is normal. Start in the middle of the rail and work your way outwards to each end
making sure each time it clips into the bracket securely (see image below).
FITTING GUIDE
SONASHADES.COM 8
SonaSky Motorised Blind

FITTING CHECK – force the end prole into rail ‘A3’ brackets and push hard to click
into place. Work from the middle outwards, it will make a loud positive ‘clicking
noise’ as it secures into place.
3.5
3.6
3.7
The Blind will now be under the correct tension. Get a qualied electrician to
connect the power to the Blind. Once the power is active the Blind will jog once
(back and forth motion) and is now ready to be operated from the handset.
Calibrate the Blind by pressing the down arrow on the handset to fully close, then
the up arrow to full open. The ‘my’ button stops the Blind. This may need to be
done several times to calibrate.
The Blind is now ready for normal operation.
FITTING GUIDE
SONASHADES.COM 9
SonaSky Motorised Blind

STEP 4
WARNING – The battery pack must be mounted under the blind. This avoids
any excessive heat from direct sunlight interfering with the battery’s safety and
performance. Please see manufacturer’s instruction provided for further guidance
(see image below).
Fitting the optional Solar & Battery Pack.
4.1
4.2
4.3
4.4
4.5
Before installing the battery pack, use the black rubber gromets provided and place
into to the pre-drilled hole in the centre of the L-prole rail (see image below).
Thread the motor wire through the hole from the top of the blind.
Now connect the battery pack to the
Blind. Once connected the Blind will
jog once (back and forth motion)
and is now ready to be operated
from the handset.
Calibrate the Blind by pressing the
down arrow on the handset to fully
close, then the up arrow to full open.
The ‘my’ button stops the Blind. This
may need to be done several times
to calibrate.
The Blind is now ready for normal
operation.
OPTIONAL SOLAR PANEL – If using a
solar panel, pass the cable through the
top of the black grommet as the battery
will need to connect to the solar panel
directly. Join the solar panel connector
to the battery pack. The solar panel can
be tted to the glass with sticky pads or
left to rest on the Blind stack if secure
enough (as per the below image).
Battery Pack
Black rubber grommet
to be placed in hole here
FITTING GUIDE
SONASHADES.COM 10
SonaSky Motorised Blind

TROUBLESHOOTING
The Blind did not do an initial jog when powering up?
Mains Power: Check the power supply is live. If the power supply is live and the Blind
still did not jog (one forward and one backward motion) check the polarities for the
power supply match the polarities of the motor e.g black tracer wire on the motor
and power supply are negative polarity.
If this does not resolve the issue, there could be an issue with either the power
supply it self or even the motor.
Battery & Solar Power: Check the battery connector (and solar panel if applicable)
is correctly attached to the Blind connector. The solar panel must also be correctly
connected to the battery in order for it to charge.
1
2The Blind jogs but the Handset is not
working?
Does the Handset show an indication light? If
No please change the battery in the remote.
If Yes then the Handset will need repairing
see below:
To pair a new Handset:
1. Hold the reset button situated on the top
of the Blind frame rmly till the Motors
jogs once (circled in red in the image).
ATTENTION - Do not hold the reset
button on the motor for more than one
job (one forward andone backward
motion).
2. Pair the new Handset by pressing the red
programme button on the back of the
Handset immediately after. The Blind will
jog once as conrmation.
3. The Handset & Motor should now
be successfully paired.
Changing The Battery:
Please see instructions to the right, the
Handset requires CR2032 batteries.
FITTING GUIDE
SONASHADES.COM 11
SonaSky Motorised Blind

TROUBLESHOOTING
When the Blind is operating it is
making a scraping / juddering sound?
Check the Railing edges, they may
require cleaning off any debris, dust or
grit with a damp cloth / baby wipes.
The Blind is not opening / closing
straight?
Check the Railing edges, they may
require cleaning off any debris, dust or
grit with a damp cloth / baby wipes.
The Blind is not tting to Side A1
(motor side)?
The Blind is being tted facing the
wrong orientation. Please see further
details on Page 7 ofthis guide.
The Blind is not tting to Side A3
(static side)?
This side requires considerable force to
clip in the bracket securely. It will seem
short on the length (80mm) but this is
normal. Start in the middle and work
your way outwards making sure each
time it clips into the bracket securely.
The Screws, Brackets or Fixings are
missing from the package.
Please contact customer support to
re-order.
3 8
9
10
11
12
13
4
5
6
7
The Fabric of the Blind is damaged.
Please contact customer support.
The Handset is missing from the box.
Please contact customer support to
re-order.
The Blind is getting stuck in operation?
The frame has been installed incorrectly.
Measure both ends and the centre of
the frame, all measurements should be
equal - a maximum of 2mm tolerance is
allowed. Reduce the packers from either
side if this is an option, if not please
contact customer support.
One of the tension Cords has snapped?
Please contact customer support.
There is a burning smell / smoke coming
from the Motor side of the blind?
Turn off Power to the Blind immediately.
Ensure nothing is smouldering / has
caught re. Get a qualied electrician
to check cabling – the likely cause is
the supply to the blind is wrong (Motor
requires a 12v supply).
The Blind has fallen down?
The Blind was not clipped in securely
on Side A1 & Side A3 and needs re-
fastening. Please see Step 4 above for
more details.
FITTING GUIDE
SONASHADES.COM 12
SonaSky Motorised Blind

Furthermore, the installer must comply with standards and legislation in the country in
which the product is being installed, and inform their customers of the operating and
maintenance conditions of the product. They must give them this guide. Any use outside
the sphere of application dened by SONA is forbidden. Doing so will void the warranty
and release SONA of all its liability, as would a failure to comply with the instructions
given herein. Never begin installing without rst checking the compatibility of this
product with associated equipment and accessories.
Warning: Read the instruction guide to become familiar with the features of this product
(Blind & Fittings) before operating it. Failure to operate and t this product in a safe
and responsible manner could result in damage to the product, personal property and
cause serious injury. A qualied electrician / professional is needed for full installation.
Furthermore, the installer must comply with standards and legislation in the country
in which the product is being installed, and inform their customers of the operating
and maintenance conditions of the product. They must give them this guide. Any use
outside the sphere of application dened by SONA is forbidden. Doing so will void
the warranty and release SONA of all its liability, as would a failure to comply with the
instructions given herein. Never begin installing without rst checking the compatibility
of this product with associated equipment and accessories. This product is not intended
for use by children. Do not install it with small children or pets around. Do not use this
product externally or in wet / moist conditions. It should be used only indoors in a dry
suitable environment. Keep the Handset out of reach of children. Never drop, knock,
puncture or immerse the Handset in liquid. It is essential to read and follow all of the
instructions and warnings in this tting guide prior to assembly and setup or use, in
order to operate the product correctly and avoid damage or serious injury. The imagery
used are indicative of style only and are not contractually binding. The document and its
contents remain property of Copyright © 2021 SONA SHADES LTD.
SAFETY & LIABILITY
FITTING GUIDE
SONASHADES.COM 13
SonaSky Motorised Blind

SONASHADES.COM
CONTACT
T. 01772 302522
W. sonashades.com
Opening Hours
Mon - Fri 8.00am to 5.00pm
Address
Unit 496
Holly Place
Walton Summit Centre
Preston
PR5 8AX
Table of contents
Other Sona Window Blind manuals
Popular Window Blind manuals by other brands

rollease acmeda
rollease acmeda ZIPSCREEN installation manual

YewdaleDefiant
YewdaleDefiant VL31 Split Draw Manufacturing Instructions

Sundrape
Sundrape Star Elektra instructions

Victoria M
Victoria M Plissee nach mass Original instructions

Pella
Pella Rolscreen Installation, Operation and Care Instruction

Windoware
Windoware HONEYCOMB installation instructions