manuals.online logo
Brands
  1. Home
  2. •
  3. Brands
  4. •
  5. Sonance
  6. •
  7. Speakers
  8. •
  9. Sonance Symphony SSTR Series User manual

Sonance Symphony SSTR Series User manual

INTRODUCTION
Thank you for purchasing the Sonance® Symphony™ SSTR series speaker.
When properly installed, this product will provide you with years of enter-
tainment pleasure.
To obtain the full potential of your new speakers, please read all instruc-
tions before starting the installation.If you do not have the necessary skills
to install the speakers yourself,contact yourAuthorized Sonance Dealer for
installation options.
PARTS LIST
Each Sonance Symphony speaker includes the following items:
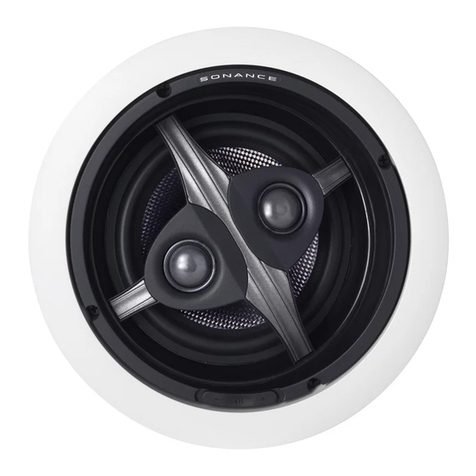
• (1) Sonance Symphony SSTR speaker
• (1) Paintable grille
• (1) Plastic paint plug to protect speaker during painting
• (1) Mounting cutout template (in packaging)
CUSTOM INSTALLATION
Your Sonance Symphony speakers will provide maximum performance
and entertainment value when custom installed by skilled professionals
with specialized tools and experience to design and install audio/video
and related systems. These professionals can assist you in the selection of
complementary components engineered to meet your needs and optimize
performance while satisfying the physical and aesthetic demands of your
home.
Custom installed systems can be configured to accommodate music repro-
duction throughout your home, security, telephone, and other home sys-
tems. Professional installers coordinate their efforts with architects, interi-
or designers, and electricians to ensure that these systems blend into your
home both functionally and aesthetically.
The increasingly sophisticated audio and video components now available
demand expert system design and installation to deliver full value. More
than ever, consumers rely on custom installers to help them explore the
myriad of home entertainment options now available, to explain the fea-
tures and functions of each and to assure compatibility of related compo-
nents.
Custom installation caters to the homeowner who eschews the complexity
and unsightliness of traditional audio and video systems, yet wants to
enjoy music throughout the home. In the capable hands of a custom
installer, Sonance products can make the most sophisticated audio/video
systems easy to use and practically invisible. The growing popularity of
home theaters speaks to a change in the way you look at audio and video
components.You probably see them as an integral part of an investment in
your home and lifestyle. The professional installer can assure that this
investment meets your expectations.
SPEAKER PLACEMENT
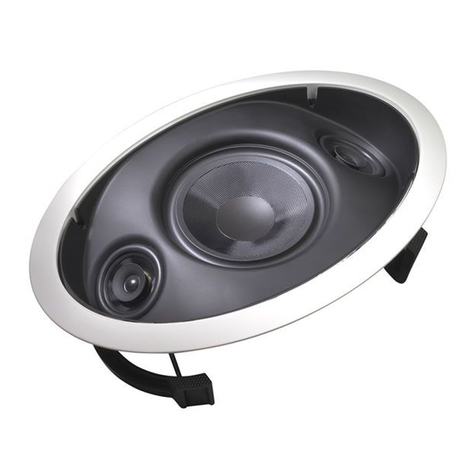
The Symphony SSTR series speakers combine the output of the right and
left channels of a receiver or amplifier, thus producing both stereo chan-
nels from just one speaker. They are ideal for use in hallways, bathrooms,
closets or any location where a stereo pair of speakers is impractical.
The location of the speakers should be determined by considering your
primary listening location as well as aesthetic values. If you have any addi-
tional questions about the installation please contact your authorized
Sonance dealer for advice.
WIRE GAUGE AND QUALITY
General Rule
The total wire resistance should be less than 10% of the speaker imped-
ance. If using an 8 ohm speaker, your total wire resistance should be no
more than 0.8.
Example
Using 200 feet of 18-gauge cable on a speaker will add approximately 2.59
(from the chart below) to the impedance of the speaker being used.If that
happens to be an 8 ohm speaker, the total impedance in that part of the
system is approximately 10.6 (8+2.59). While that may be acceptable to
some people, the resulting sound will be less dynamic than if better, larger
cable (smaller gauge numbers) is used.
The following chart shows the corresponding gauge and distances. From
the general rule, you should never run cable longer than 10% of the speak-
er impedance. For example, for 18-gauge wire the maximum recommend-
ed length for an 8 ohm speaker is 50 feet. The following table lists imped-
ance (typical in Sonance MediaLinQ® Bronze cable) for two-conductor
cable in 50-foot increments.
INSTALLATION INSTRUCTIONS
SONANCE SYMPHONY IN-CEILING
6.5" SINGLE STEREO SPEAKER
1
PN. 33-2021 1.01
PREPARING THE INSTALLATION LOCATION
Using Sonance Acoustic Enclosures
All Sonance speakers are designed to be relatively insensitive to large
changes in enclosure volume. This is why our speakers will sound fine
when installed in ceilings, where there may be a large crawl space or an
open attic behind the speaker.
In some installations, a separate wooden enclosure that fits in the ceiling
cavity (a back box) may be useful for optimizing performance or for
increasing sonic isolation. Sonance provides Acoustic Enclosures designed
specifically for the Symphony speakers. Call us directly or contact your
dealer for more information.
Using Sonafill
When it is not possible to use a backbox, good results can be achieved by
using Sonance Sonafill™.
Sonafill is an acoustical treatment for loudspeakers that virtually elimi-
nates the noise produced by resonating drywall and dramatically
improves mid-bass sound quality. It reduces room-to-room noise espe-
cially in multi-channel installations where many speakers are installed.
Sonafill provides an easier, faster alternative to Sonance Acoustic
Enclosures, making it ideal for retrofit installations.
The system consists of two pillows and four tiles with one-sided pressure-
sensitive adhesive. Installation is accomplished by first adhering the tiles
to the inside of the cavity, then stuffing the two pillows in place behind the
tiles (see Figure 1).
Insulating the Cavity
In addition to using Sonafill, speaker performance can be enhanced by
insulating the cavity with fiberglass insulation.
When installing speakers in a ceiling, it is best to lay a sheet of unfaced
fiberglass insulation over the back of the speaker.
To further improve sound quality, install insulation in each stud bay adja-
cent to the speaker’s location.
MOUNTING THE SPEAKERS
New Construction Installations
Your Symphony speakers feature an integral Roto-Lock™ mounting sys-
tem for mounting into ceilings.Since Symphony speakers feature the Roto-
Lock system, a separate bracket is not necessary.
If you are installing your Sonance speakers in new construction, the use of
a Sonance Symphony series staple template or flex bracket (not supplied)
will serve as a guide. The staple template and flex bracket provide a hole
pattern for the speaker. It is attached to the joists so the hole opening is in
the desired speaker location after the drywall is installed.
For new construction, run wire to desired location prior to drywall instal-
lation. Once the drywall is installed, simply follow the procedure outlined
in this guide.
Retrofit Installations
With the Roto-Lock system,the speaker can be installed directly into exist-
ing ceilings. Once the hole is cut and the cable strung, the speakers can be
installed and secured in a matter of seconds.
Once you have determined that the area is free of obstructions such as
pipes, conduit or heating and air returns, find the joists nearest your
speaker location.A good stud-finding tool is really essential.
Cutting the Hole
IMPORTANT: When using the Roto-Lock system for retrofit installations, the
speaker requires a hole size of 8-5/32". There must also be at least 5" depth
within the ceiling to house the speaker. Finally, there must be enough drywall
around the hole for the Roto-Lock feet to grab onto (at least 1" is needed).
A punch out template for cutting the hole is provided with speaker pack-
aging. Position the template where the speaker is to be located and pencil
an outline on the ceiling. In the center of the circle, cut a small hole with a
drywall saw. It is always best to start with a small hole just to make sure
there are no obstructions behind the wallboard. Cutting the wallboard at a
45-degree angle will allow you to make a fairly simple repair with drywall
patch if an obstruction is found (see Figure 2).This way, if repairs are nec-
essary, the cutout piece of wallboard will not fall through the hole. Instead,
it will be held flush with the wallboard by the 45-degree cut, and repairs
can be made easily.
After checking for obstructions, carefully cut the retrofit hole into the ceil-
ing at the location where the speaker is to be mounted, cutting at a 90-
degree angle to the surface (see Figure 3).
2
Acoustic Pillow
Damping Tiles
Acoustic Pillow
Damping Tiles
Figure 1. Installing Sonafill
ADJUSTING THE SPEAKERS
Setting the Mono/Stereo Jumper (623SSTR)
The 623SSTR is designed to operate in either mono-summing (stereo)
mode or mono mode. The default setting for the speaker is mono-sum-
ming mode, which blends both the left and right channels to provide stereo
sound. However, the jumper wire can be connected between the left and
right speaker terminals to provide a mono mode for surround sound
applications or for stereo applications where the higher frequency
response of two tweeters is desired.
Pivoting the Tweeters (623SSTR)
The unique pivoting tweeter can direct sound toward or away from the lis-
tening area. The pivoting tweeter may be angled by applying pressure on
the plate which surrounds the tweeter. If there is any question about how
the tweeter should be adjusted, consult your Authorized Sonance Dealer.
Here are some additional suggestions:
• Orient the tweeter toward the listening area when additional brightness
is desired.
• Orient the tweeter away from the listening area if the music or video
soundstage seems too narrow or restricted.
• Orient the tweeter away from the listening area if it sounds too bright.
WIRING AND INSTALLING THE SPEAKERS
After running the wire from your amplifier to the speakers connect the
wire to the speaker observing proper polarity (+) to (+) and (-) to (-).
The Roto-Lock clamps should lay in the full clockwise position so that all
clamps are tucked within the cutout border.Install the speaker by bringing
the outer edge flush with the ceiling. You will notice the four screw heads
in four corners on the front of the Symphony speaker.Use a screwdriver to
tighten these screws evenly. This will automatically rotate your Roto-Lock
clamps over the drywall surface and securely clamp your speaker flange to
the ceiling (see illustration below).When you notice resistance in the tight-
ening of all four screws, the speaker has been successfully sandwiched
between the drywall and the speaker flange. The Roto-Lock clamps pro-
vide a tight fit and prevent unwanted vibration. The flange is designed to
flex and conform to any small imperfections in the wall surface.The screws
should not be tightened so far that the flange bows out. If this occurs,back
off the tension on the screws a little. Finally, if painting is not required,
insert the grille into the speaker baffle.
Please Note: The Roto-Lock will clamp a maximum drywall thickness
1-1/4" (32 mm).
PAINTING THE SPEAKERS AND GRILLES
Speakers and grilles can be painted before installation, which will elimi-
nate the "paint scar" if the speaker needs to be removed for service.
Speakers may also be painted after the speaker is mounted into the ceiling,
but before the grilles have been attached. All speakers come from the fac-
tory fitted with a plastic "paint plug.” These must be used to protect the
drivers while the flange is being painted with the ceiling. Simply replace
the grilles with the paint plugs prior to painting.
The grilles may be lightly sprayed with thin paint (5 parts thinning agent
to 1 part paint), but be careful not to plug the holes. Too much paint will
adversely affect the sound of the speaker. Sonance suggests all grilles be
painted separately from the speakers.
3
Figure 2. Cutting the Test Hole
Figure 3. Cutting the Final Speaker Hole
Roto-Lock™Clamps
SPEAKER SPECIFICATIONS
621SSTR
Speaker Design: In-ceiling infinite baffle, Single Stereo
Te c h n o l og y
Tweeter: Two 3/4" (19 mm) cloth domes
Woofer: 6-1/2" (165 mm) black polypropylene cone,
dual voice coil, and rubber surround
Frequency Response: 55 Hz to 20 kHz ± 3 dB
Impedance (Minimum): 8 ohms nominal, 6 ohms minimum
Power Handling: 5 to 50 watts
Efficiency: 88 dB 1w/1m
Grilles: Metal
Speaker Dimensions (WxHxD): 9-3/4" x 5-1/4" (248 mm x 130 mm)
Cutout Dimensions (WxH): 8-5/32" (207 mm)
Weight 3.5 lbs (1.6 kg)
623SSTR
Speaker Design: In-ceiling infinite baffle, Single Stereo
Te c h n o l og y
Tweeter: Two 1" (25 mm) pivoting silk domes
Woofer: 6-1/2" (165 mm) black glass composite cone,
dual voice coil, and rubber surround
Frequency Response: 40 Hz to 20 kHz ± 3 dB
Impedance (Minimum): 6 ohms nominal, 4 ohms minimum
Power Handling: 5 to 100 watts
Efficiency: 89 dB 1w/1m
Adjustments: Mono/stereo jumper
Grilles: Metal
Speaker Dimensions (WxHxD): 9-3/4" x 5-1/4" (248 mm x 130 mm)
Cutout Dimensions (WxH): 8-5/32" (207 mm)
Weight 4.5 lbs (2.1 kg)
TECHNICAL ASSISTANCE AND SERVICE
The Technical Assistance Department at Sonance is available at (800) 582-
0772 or (949) 492-7777 to answer any questions concerning the operation
and installation of your speakers, between the hours of 9 AM and 5 PM
Pacific Time, Monday through Friday, except holidays.
In the event that your unit should need repair or service, you may return
the unit to your authorized dealer or use the following guidelines:
1) Be prepared to state the model number and or serial number, date of
purchase and dealer’s name and address when calling.
2) Contact Sonance directly at (800) 582-0772 or(949) 492-7777, or at
www.sonance.com
3) If you are returning the product directly to Sonance call us to obtain a
return authorization number before shipping. YOU MUST HAVE
PRIOR AUTHORIZATION TO RETURN YOUR UNIT!
4) The original packaging must be used. If the original packaging is not
available, replacements can be obtained from Sonance for a small fee.
5) Ship the product via United Parcel Service, Federal Express, or RPS.
Please do not use the U.S. Mail service.
6) Write the return authorization number on the outside of the box.
7) Ship to: Attn: Quality Assurance Department
Sonance
212 Ave Fabricante
San Clemente, CA 92672-7531
8) FREIGHT COLLECT SHIPMENTS WILL BE REFUSED!
WARRANTY COVERAGE (U.S. ONLY)
If, within five (5) years from the date shown on the bill of sale, the unit
fails,due to a defect in workmanship or material,Sonance will, at its option
and at no charge, repair or replace the components of such unit which
prove to be defective. For this warranty to be effective, the bill of sale must
show that the unit was purchased from an "Authorized Sonance Dealer"
and must list the price paid. This warranty shall apply exclusively to the
original purchaser and shall not apply to units purchased for industrial or
commercial use.
Furthermore, this warranty shall not apply if:
1) Damage to the unit was caused by accident, abuse, or misuse;
2) The unit was opened,modified,or repaired by unauthorized personnel;
or
3) The unit was not used as outlined in the operating instructions.
EXCLUSIONS AND LIMITATIONS
The warranty set forth above is in lieu of all other warranties, express or
implied, of merchantability, fitness for a particular purpose, or otherwise.
The warranty is limited to Sonance products registered herein and specif-
ically excludes any damage to loudspeakers and other allied or associated
equipment which may result for any reason from use with this product.
Sonance shall, in no event, be liable for incidental or consequential dam-
ages arising from any breach of this warranty or otherwise. This warranty
gives you specific legal rights, and you may have other rights which vary
from state to state.
Sonance • 212 Avenida Fabricante • San Clemente, CA 92672-7531, USA • (800) 582-7777 or (949) 492-7777 • FAX: (949) 361-5151 • Technical Support: (800) 582-0772
©2001 Sonance. Sonance Symphony, Roto-Loc and Sonafill are trademar s of Sonance.
This manual suits for next models

2

Other Sonance Speakers manuals

Sonance PS-C41RT User manual

Sonance

Sonance PS-C41RT User manual

Sonance Visual Performance Rectangle User manual

Sonance

Sonance Visual Performance Rectangle User manual

Sonance Silhouette I User manual

Sonance

Sonance Silhouette I User manual

Sonance D-series User manual

Sonance

Sonance D-series User manual

Sonance VP38R User manual

Sonance

Sonance VP38R User manual

Sonance IS4 C User manual

Sonance

Sonance IS4 C User manual

Sonance MARINER 54 User manual

Sonance

Sonance MARINER 54 User manual

Sonance SB46-55 User manual

Sonance

Sonance SB46-55 User manual

Sonance Cinema Series SUB 8-100 User manual

Sonance

Sonance Cinema Series SUB 8-100 User manual

Sonance PS-C43RT User manual

Sonance

Sonance PS-C43RT User manual

Sonance Visual Perfomance VP66 SST/SUR User manual

Sonance

Sonance Visual Perfomance VP66 SST/SUR User manual

Sonance С Series User manual

Sonance

Sonance С Series User manual

Sonance Ellipse 2.0 LCR User manual

Sonance

Sonance Ellipse 2.0 LCR User manual

Sonance Ellipse 1.0 LCR User manual

Sonance

Sonance Ellipse 1.0 LCR User manual

Sonance C201SQ User manual

Sonance

Sonance C201SQ User manual

Sonance Sonance Landscape Series LS48SAT User manual

Sonance

Sonance Sonance Landscape Series LS48SAT User manual

Sonance SONANCE ARCHITECTURAL SERIES AS38RS User manual

Sonance

Sonance SONANCE ARCHITECTURAL SERIES AS38RS User manual

Sonance LS87SAT User manual

Sonance

Sonance LS87SAT User manual

Sonance 625 User manual

Sonance

Sonance 625 User manual

Sonance Visual Performance VP45R User manual

Sonance

Sonance Visual Performance VP45R User manual

Sonance LCR & SUR Speaker User manual

Sonance

Sonance LCR & SUR Speaker User manual

Sonance VISUAL PERFORMANCE LCR.5S User manual

Sonance

Sonance VISUAL PERFORMANCE LCR.5S User manual

Sonance Symphony Extreme User manual

Sonance

Sonance Symphony Extreme User manual

Sonance MODERNO M6R SST SINGLE-STEREO TECHNOLOGY User manual

Sonance

Sonance MODERNO M6R SST SINGLE-STEREO TECHNOLOGY User manual

Popular Speakers manuals by other brands

Accessory Power GOgroove SideStream instruction manual

Accessory Power

Accessory Power GOgroove SideStream instruction manual

Philips SPA1210/05 Instructions for use

Philips

Philips SPA1210/05 Instructions for use

Technics SB-M500 Service manual

Technics

Technics SB-M500 Service manual

Celestion NTR Range NTR06-1705B Specifications

Celestion

Celestion NTR Range NTR06-1705B Specifications

Sealey LED100WS instructions

Sealey

Sealey LED100WS instructions

SUPERTOOTH DISCO TWIN user guide

SUPERTOOTH

SUPERTOOTH DISCO TWIN user guide

Philips SB3300 user manual

Philips

Philips SB3300 user manual

Funktion-one F1201 user guide

Funktion-one

Funktion-one F1201 user guide

Soundavo IC-640CF owner's manual

Soundavo

Soundavo IC-640CF owner's manual

Madison CENTER250-PLUS user manual

Madison

Madison CENTER250-PLUS user manual

Wae OutDoor BTP04 manual

Wae

Wae OutDoor BTP04 manual

DSPPA POE6463B quick start guide

DSPPA

DSPPA POE6463B quick start guide

Harman JBL BOOMBOX2 quick start guide

Harman

Harman JBL BOOMBOX2 quick start guide

Ltc Audio FREESOUND-SELFIE 10-5600 user manual

Ltc Audio

Ltc Audio FREESOUND-SELFIE 10-5600 user manual

Philips SPA3300 quick start guide

Philips

Philips SPA3300 quick start guide

Polk Audio CS175I instruction manual

Polk Audio

Polk Audio CS175I instruction manual

Ecler ARQISi SB6TiWH user manual

Ecler

Ecler ARQISi SB6TiWH user manual

RCF DU 60EN user manual

RCF

RCF DU 60EN user manual

manuals.online logo
manuals.online logoBrands
  • About & Mission
  • Contact us
  • Privacy Policy
  • Terms and Conditions

Copyright 2025 Manuals.Online. All Rights Reserved.