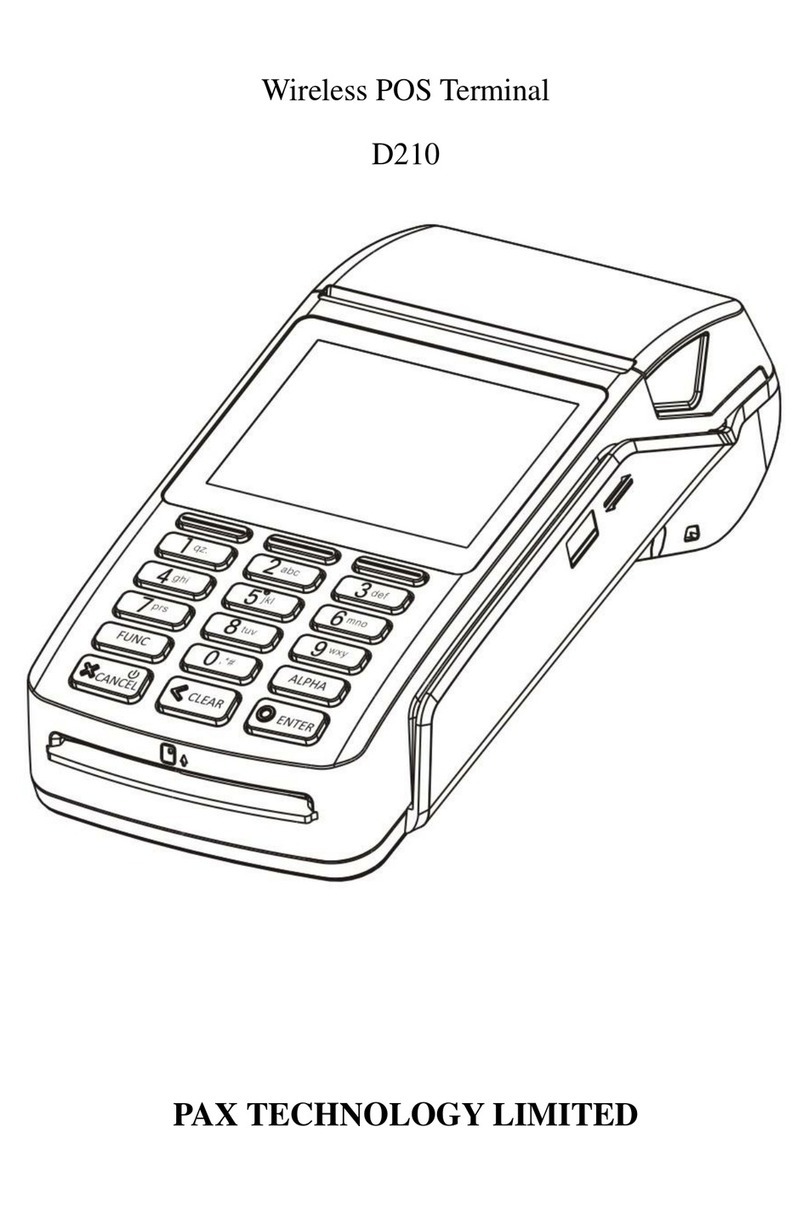
Sonera PAX S80 User manual

USER GUIDE
Payment terminal PAX S80

USER GUIDE
Payment terminal PAX S80

1. GETTING STARTED
1.1 Important ...............................................................................4
1.2 Terminal structure ...................................................................4
1.3 Connecting the terminal ..........................................................5
1.4 Testing the connection ............................................................6
2. DAILY USE
2.1.1 Changing the paper roll .............................................7
2.1.2 Keypad ....................................................................7
2.1.3 Using the menus .......................................................7
2.2 TRANSACTIONS .....................................................................8
2.2.1 Chip card transactions ..............................................8
2.2.2 Swipe card transaction ..............................................8
2.2.3 Void .........................................................................9
2.2.4 Manual entry ............................................................9
2.2.5 Receipt copy .......................................................... 10
2.2.6 Return ................................................................... 10
2.3 REPORTS AND BATCH SENDING ........................................... 11
2.3.1 Batch report ........................................................... 11
2.3.2 Monthly report ........................................................ 11
2.3.3 Batch sending ........................................................ 11
2.3.4 Blacklist ................................................................. 12
2.3.5 Report explanations ................................................ 13
2.4 AUTHORIZATION CODES ...................................................... 14
3. SETTINGS
3.1 Terminal settings ................................................................... 17
3.2 Printing the parameters ......................................................... 17
3.3 Batch time ............................................................................ 18
3.4 Cashier number .................................................................... 18
3.5 Fixed IP-address ................................................................... 18
3.6 Connection type ................................................................... 19
3.7 Language ............................................................................. 19
3.8 Changing the time and date ................................................... 19
3.9 Sound .................................................................................. 19
4. DOWNLOADS
4.1 Downloading the parameters ................................................. 20
4.2 Downloading the certificate ...................................................20
5. SPECIAL FUNCTIONS
5.1 Cash receipt ......................................................................... 21
5.2 Cash withdraw ......................................................................22
5.3 Extra / Tip ............................................................................. 23
5.4 VAT ......................................................................................24
5.5 Mandatory authorization ........................................................ 24
5.6 Preauthorization....................................................................24
5.7 Invoice .................................................................................25
5.8 Multi cashier ........................................................................ 25
6. ADDITIONAL FUNCTIONS
6.1 Version for multiple users ...................................................... 26
7. TROUBLESHOOTING
7.1 Notifications on the screen .................................................... 27
7.2 Notifications on the receipt .................................................... 27
7.3 Other errors .......................................................................... 28
7.4 Maintenance ........................................................................29
8. TECHNICAL DATA...................................................................... 30
9. USEFUL CONTACT INFORMATION ................................................31
TABLE OF CONTENTS:

1. GETTING STARTED 1. GETTING STARTED
1.1 Important
NB: If the user fails to adhere to these instructions and the
terminal is damaged, the warranty on the terminal does not apply!
•Use the terminal only in an earthed socket connected to a fuse.
•Protect the power cord and the modem. If damaged, they must no longer be used.
•The voltage of the power supply must not differ from the voltage specified for the
terminal.
•The terminal must be firmly placed on a table. It must not be placed in direct
sunlight, a hot temperature or in a moist or dusty place.
•The terminal is not waterproof.
•The terminal must be used only indoors.
•Do not insert any foreign objects in the reader slots or cable ports of the terminal.
This might seriously damage the terminal.
•If the terminal is damaged, please contact Sonera’s Technical Corporate Customer
Service. You must not repair the terminal yourself.
•Only use appropriate paper in the terminal to avoid paper jams and damage to the
printer.
•Never use thinner, trichloroethylene, or ketone-based solvents for cleaning the
terminal. These substances may damage the terminal’s plastic or rubber parts.
•Never spray cleaners or other solutions directly onto the screen or keypad.
Instead, use a cleaning cloth or the like.
1.2 Terminal structure
1.3 Connecting the terminal
•Place the terminal on a table.
•Plug the power cord into the power cord.
•Detach the cord shield from the bottom of the terminal.
•Plug the necessary cords/cables into the correct sockets at the back panel.
•Put the cord shield back in its place.
•Insert the SIM card into the device (NB: This is necessary only when you take a
replacement device into use.)
•Switch the terminal on by pressing the on/off button
Plug the Ethernet cable into the socket
labelled: LAN. Plug the power cord into
the socket labelled: POWER.
Put the black connecting piece provided with the power
cord and the cord shield in their places.
A SIM card is ready-installed in Sonera Payment
Terminals but not in the replacement devices. If you take
a replacement device into use, remove the SIM card from
the payment terminal and insert it into the replacement
device. Unscrew the cover on the bottom of the terminal.
Place the SIM card in the SIM card holder, which is
located crosswise in the terminal, and slide the locking
mechanism in place. Screw the cover back on.
NB: The SIM card must NOT be used in any other
devices than Sonera Payment Terminals.
4 5

1. GETTING STARTED
2.1.1 Changing the paper roll
The terminal uses thermal paper. Width of the paper
roll: 58 mm, diameter: 50 mm. You can order the
paper rolls from us. See contact information on
section 9.
•Press the paper cover release button to unlock
the cover of the paper compartment.
•Place the paper roll in the compartment. Make
sure that the paper feeds from the underside of
the roll towards the front of the device.
•Pull the end of the paper out of the compartment
beyond the tear bar and close the paper
compartment cover.
2.1.2 Keypad
2.1.3 Using the menus
To browse through the menus, use the arrow keys. To confirm your selections, press
Enter. To go back to the previous menu, press Cancel. To return to the start view,
press Cancel repeatedly. In the menus, make your selections using the keys F1 to F4.
When you go to the Batch menu or to the Parameters menu, the terminal says Press
Enter.
1.4 Testing the connection
When the terminal is been switched on for the first time, a text appears on the screen:
BLACKLIST MISSING
UPDATE THE BLACKLIST?
YES = ENTER / NO = CANCEL
Press the Enter-button. The terminal sets up a connection to the bank. The word
CONNECTING is displayed on the screen. If the connection is successfully set up,
the word CONNECTED appears on the screen. The terminal retrieves the payment
terminal information, AID and BIN tables, EMV keys and the blacklist from the bank.
The words SENDING and RECEIVING alternate on the screen, and consecutive
numbers are displayed.
After this, the terminal is ready for use.
NB! If you use the terminal via broadband and there are fixed
IP-addresses on the network, please look for more information on
page 19.
If the connection does NOT work, see section 6, TROUBLESHOOTING, for further
guidance.
You can also test the connection by pressing MENU and Enter. Then choose
SEND BATCH.
2. DAILY USE
76

2. DAILY USE2. DAILY USE
2.2 TRANSACTIONS
2.2.1 Chip card transactions
ENTER AMOUNT: Enter the amount in euros, including cents, and press Enter.
PLEASE INSERT OR SWIPE CARD: Insert the card in the chip card reader slot, the chip
facing up.
CREDIT / DEBIT: The customer selects the payment method.
ENTER PIN: The customer enters the PIN code and presses Enter.
(To skip the PIN code, just press Enter. This means that the merchant takes full
responsibility.)
The terminal prints the receipts. The first receipt is for the merchant, the second one is
for the customer.
If the transaction has been confirmed with a PIN code, the customer need not sign the
receipt. The terminal reminds the salesperson to check the identity of anyone whose
receipt total exceeds €50.00, depending on card type. Press Enter and check the
customer’s identity. On the receipt, write the last four digits of the customer’s identity
number and indicate how you checked the identity.
REMOVE CARD: Remove the card from the reader. Make sure that the card remains in
the reader slot for the entire transaction, or the operation is aborted.
2.2.2 Swipe card transaction
ENTER AMOUNT: Enter the amount in euros, including cents, and press Enter.
PLEASE INSERT OR SWIPE CARD: Swipe the card through the reader.
CREDIT / DEBIT: Select the payment method.
The terminal prints the receipts. The first receipt is for the merchant, the second one
is for the customer. Ask the customer to sign the receipt. The terminal reminds the
salesperson to check the identity of anyone whose receipt total exceeds €50.00,
depending on card type. Press Enter and check the customer’s identity. On the
receipt, write the last four digits of the customer’s identity number and indicate how
you checked the identity.
2.2.3 Void
NB: You can only void transactions that are still in the device
memory and has not been sent to the bank.
Press MENU F1 and select VOID.
ENTER RECEIPT NUMBER: The terminal shows the number of the latest receipt as
default. Press Enter to accept it, or enter another receipt number and press Enter.
PLEASE INSERT/SWIPE CARD: Insert the card in the reader or swipe the card.
The terminal prints the receipts. The first receipt is for the merchant, the second one is
for the customer. If necessary, ask the customer to sign the receipt.
TRANSACTION NOT FOUND: If you see this text, you have either entered the receipt
number incorrectly or the transaction is no longer in the terminal memory.
2.2.4 Manual entry
Press MENU F1 and select MANUAL ENTRY.
ENTER CARD NUMBER: Enter the card number and press Enter.
ENTER EXPIRY DATE MMYY: Enter the expiry date of the card and press Enter.
DEBIT / CREDIT: Select the payment method.
ENTER AMOUNT: Enter the amount in euros, including cents, and press Enter.
DIAL YES/NO: If you want the terminal to verify the transaction, select YES.
Manually entered transactions must always be verified. If you bypass the verification,
the terminal will ask you to enter a verification code. Call the verification centre, type
in the number they give you, and press Enter. You can also bypass this procedure by
entering 9999. In this case, the responsibility lies with your company.
The terminal prints the receipts. The first receipt is for the merchant, the second one
is for the customer. Ask the customer to sign the receipt. The terminal reminds the
salesperson to check the identity of anyone whose receipt total exceeds €50.00,
depending on card type. Press Enter and check the customer’s identity. On the
receipt, write the last four digits of the customer’s identity number and indicate how
you checked the identity.
NOT ALLOWED: The number of this card may not be entered manually.
8 9

2. DAILY USE2. DAILY USE
2.3 REPORTS AND BATCH SENDING
2.3.1 Batch report
Press MENU and Enter.
Select PRINT BATCH.
The terminal prints a report on the day’s transactions, classified by card type.
Please note that the terminal automatically clears this report when the batch has been
successfully sent to the bank.
2.3.2 Monthly report
The monthly report can also be used, for example, as a shift report. The terminal
keeps adding transactions to the report until it is reset. You must always print the
report before resetting it.
To print a monthly report:
Press MENU and Enter.
Select MONTHLY REPORT. Choose MONTHLY REPORT again.
The terminal prints a report itemized by card.
To reset the monthly report:
Press MENU and Enter.
Select MONTHLY REPORT. Select RESET REPORT.
The terminal resets the report.
2.3.3 Batch sending
The terminal sends the batch automatically provided that a transmission time has
been specified in its settings. The batch can also be sent manually if, for example, the
automatic sending fails.
NB: The automatic batch sending does not work if the terminal is
switched off.
Press MENU and Enter.
Choose SEND BATCH.
2.2.5 Receipt copy
Press MENU F1 and select PRINT COPY from the menu.
RECEIPT NUMBER: The terminal shows the number of the latest receipt as default.
Press Enter to accept it, or enter another receipt number and press Enter.
The terminal prints a copy of the receipt.
2.2.6 Return
The RETURN function can be used at any time. However, you want to cancel a
transaction made on the same day, use the VOID function (page 10) instead.
NB: The RETURN function is NOT permitted for bankcard
purchases.
Press MENU F1 and choose RETURN.
TOTAL: Enter the amount in euros, including cents, and press Enter.
PLEASE INSERT OR SWIPE CARD: Insert the card to the chip slot or swipe the card
from the magnetic card reader.
CREDIT / DEBIT: Select the payment method.
ENTER PIN AND PRESS ENTER: If the card is a chip card, the customer enters the
PIN code and presses Enter.
The terminal prints the receipts. The first receipt is for the merchant, the second one is
for the customer. If the transaction has been confirmed with a PIN code, the customer
need not sign the receipt.
The terminal reminds the salesperson to check the identity of anyone whose receipt
total exceeds €50.00, depending on card type. Press Enter and check the customer’s
identity. On the receipt, write the last four digits of the customer’s identity number and
indicate how you checked the identity.
10 11

2. DAILY USE2. DAILY USE
2.3.5 Report explanations
Example of a batch report and the items printed on it
Items on the report:
BATCH SENDING OK:
This text indicates that
the batch was sent
successfully.
MAKSUPAATE PALAUTE:
information of the
previous batch sending.
This only comes if it
has been formed at the
bank. It never comes
on weekends and bank
holidays or if the terminal
has not been in use.
AID TABLE, BIN TABLE
and EMV KEYS: The
terminal updates this
information, if it can be
retrieved from the bank.
KIELTOLUETTELO
(BLACKLIST): This is the
number of cards on the
blacklist.
The terminal prints a batch report and sets up a connection to the bank. Then the
terminal sends the batch and retrieves the AID and BIN tables, EMV keys, and the
blacklist.
If the batch was sent successfully, the following text is printed on the report:
BATCH SENDING OK. If there are no transactions on the terminal, the text will not be
printed.
2.3.4 Blacklist
The terminal updates the blacklist automatically when sending the batch. The blacklist
can also be updated manually, if it is not on the terminal.
Press FUNC and Enter.
Choose DOWNLOAD F3.
Choose BLACKLIST F3 and FULL/UPDATE.
FULL = the terminal retrieves the entire blacklist database
UPDATE = the terminal updates the blacklist database.
The terminal sets up a connection to the bank and updates the blacklist. The number
of blacklisted items will be printed on the receipt.
12 13

2. DAILY USE2. DAILY USE
2.4 AUTHORIZATION CODES
If the transaction is declined by the authorization centre, a response code indicating
why the transaction was declined will be printed on the receipt. Transactions are
declined on the basis of notifications given by the bank or Credit Card Company.
000 to 009 are codes of acceptance
000 Accepted
001 Check ID
002 Accepted for a partial amount
003 Accepted (VIP)
005 Accepted, account type defined by the card donor
006 Accepted for a partial amount, account type defined by the card do-
nor
007 Accepted, chip update
100–199 Declined, card removal not needed
100 Declined
101 Card is no longer valid
102 Suspected cards counterfeit
103 Cashier, call to recipient
104 Limited card
105 Cashier, call to the recipients’ security department
106 Exceeds PIN-code attempts
107 Cashier, call to the card donor
108 Cashier, check the card donors’ special terms, do a manual authori-
zation
109 False payment recipients’ identifier
110 False amount
111 False card number
112 PIN-code required
113 Commission not accepted
114 False account type
115 Required action not supported
116 Not accepted
117 False PIN
118 Unknown card
119 Transaction is not allowed for card holder
120 Transaction is not allowed for payment terminal
121 Exceeds withdrawals floor limit
122 Security violation
123 Exceeds withdrawals time limit (too often)
124 Crown violation
125 Card is not yet valid
126 False PIN block
127 False PIN length
128 False PIN key synchronization
129 Suspected abuse
200–299 Declined, card removal needed
200 Declined
201 Card expired
202 Suspected card counterfeit
203 Cashier, contact the recipient
204 Limited card
205 Cashier, contact recipients’ security department
206 Exceeds PIN-code attempts
207 Special situation
208 Extinct card
209 Stolen card
210 Suspected abuse
300 Successful
306 Unsuccessful
307 Unsuccessful, form fault
400 Declined. Accepted revocation of authorization, try again
14 15

3. SETTINGS2. DAILY USE
900–999 System error, authorization not successful
902 False transaction
903 Do the transaction again
904 Form fault, try again
905 Unable to route the transaction to recipient
906 Temporary usage brake in the card donors system
907 No connection to the card donor
908 Unable to route the message
909 System error
910 Unable to connect to the card donor
911 Unable to connect to the card donor
912 Card donor not available
913 Dual transaction sending
914 The original transaction can not be traced
915 Control error, card donors’ system temporarily unavailable
916 MAC-error
917 MAC-synchronization error
918 Data transfer keys not available
919 Encryption keys’ synchronization error
920 Security program error, try again
921 Security program error, no transaction
922 Unknown message number
923 Transaction is been processed
930 Payment terminal error, date error
1Z3 Unable to connect to authorization centre, try again
0Y1 Offline accepted, no authorization
0Y3 Offline accepted, unsuccessful
3.1 Terminal settings
The Settings menu items listed below are the ones that apply to the PAX S80 terminal.
Some of the settings are explained in greater detail further below (section number
given in brackets).
Press FUNC and Enter. Select SETTINGS.
BATCH TIME (3.3) Batch time of the terminal
CASHIER NUMBER (3.4) Cashier number of the terminal
TCP/IP PARAMETERS (3.5) DHCP / FIXED IP
CONNECTION TYPE (3.6) AUTO / LAN / GPRS
LANGUAGE FINNISH / SWEDISH / ENGLISH
EXTRA AMOUNT (5.3) Settings of the Extra/Tip function
CASH RECEIPT (5.1) YES / NO
POWER OPTIONS NOT IN USE
AUTH. MANDATORY (5.5) YES / NO
TIME SETTINGS (3.8) Time and date
VAT (5.4) YES / NO
PREAUTHORIZATION (5.6) YES / NO
MULTICASHIER VER (5.8) YES / NO
SOUND (5.9) ON / OFF
3.2 Printing the parameters
Press FUNC and Enter.
Select PRINT PARAMETERS F2.
Select PARAMETERS F2.
The terminal prints a list of parameters with the settings of the terminal.
You should keep the printed list for later use.
1716

3. SETTINGS3. SETTINGS
3.3 Batch time
The terminal will send the batch automatically if you set a certain time to its settings.
The terminal needs to be on during that time. We recommend that you set the time
after your closing time. You should avoid even hours.
If you do not want to use the automatic batch sending, set the time to be 9999. Note
that you need to send the batch by your self.
Go to the Edit-menu selection: BATCH TIME.
Enter here the batch time you want to use and press Enter. (E.g. 0315)
3.4 Cashier number
If you use more than one terminal, it is important to specify the terminals by using
different cashier numbers. The cashier number is printed on the receipts. Using the
cashier number it is possible to know by which terminal the transactions have been
made.
Go to the Edit-menu selection: CASHIER NUMBER.
Enter here the number you want to use and press Enter. The number has to be three
digits long e.g. 001.
3.5 Fixed IP-address
If the network you use has fixed IP-addresses you need to define them to the terminal
settings.
NB: Only when connecting via broadband.
Go to the Edit -menu selection: TCP/IP PRAMETERS and choose FIXED IP.
ACTIVE IP ADDRESS IP-address that the terminal uses
GATEWAY Gateway address
SUBNET MASK Subnet mask address
DNS1 Not needed (0.0.0.0)
DNS2 Not needed (0.0.0.0)
NB: You make the dot by pressing first 1 and then three times
ALPHA-button.
3.6 Connection type
Go to the Edit-menu selection: CONNECTION TYPE.
AUTO Terminal uses both broadband and GPRS connection
TCP/IP SSL Terminal uses broadband connection
GPRS SSL Terminal uses GPRS connection
3.7 Language
Go to the Edit-menu selection: CONNECTION TYPE.
Select the language you want to use Finnish, Swedish or English.
3.8 Changing the time and date
Go to the Edit-menu selection: TIME SETTINGS.
Choose ADJUST CLOCK.
Choose the item you want to change using the F keys and change it.
3.9 Sound
Go to the Edit-menu selection: SOUND.
Choose on or off to set the key sound on or off.
18 19

5. SPECIAL FUNCTIONS4. DOWNLOADS
4.1 Downloading the parameters
NB: You only need to download the parameters on the equipment
suppliers demand.
Press FUNC and Enter.
Select DOWNLOAD.
Select FROM LOADPOINT and PHONE.
The terminal starts to download the parameters. A dash line appears on the screen,
and as the download proceeds, it is replaced by stars. The terminal will print the text
“SUCCESSFUL PARAMETERS DOWNLOAD” on the receipt.
NB: After the parameters have been downloaded, you must set up
a connection to the bank with the terminal.
Press MENU and Enter.
Select SEND BATCH.
4.2 Downloading the certificate
NB: The certificate is already downloaded on to the terminal when
you receive it.
Press FUNC and Enter.
Choose DOWNLOAD.
Go to menu selection DOWNLOAD SERTIFICA.
The terminal downloads the certificate and prints out: “SUCCESSFUL CERTIFICATE
DOWNLOAD“.
5.1 Cash receipt
You can use the cash receipt when the customer pays with cash and you want to print
a receipt with the terminal. Cash receipts are also listed on the reports.
To activate the cash receipt, go to the Settings menu (page 18).
To make a cash receipt:
Press MENU F1.
Choose CASH RECEIPT.
Choose CASH RECEIPT SALE.
ENTER AMOUNT: Enter the amount in euros, including cents, and press Enter.
VAT %: Enter the VAT percentage and press Enter.
The terminal prints the receipts.
To void a cash receipt sale:
Press MENU F1.
Select CASH RECEIPT.
Select CASH RECEIPT VOID.
ENTER AMOUNT: Enter the amount in euros, including cents, and press Enter.
VAT %: Select the VAT percentage.
The terminal prints the receipts.
2120

5. SPECIAL FUNCTIONS
5.2 Cash withdraw
Cash withdraw is used when the customer wants to withdraw cash from your cash
register. You make a transaction with the terminal and give the customer cash.
Merchant gets 50 cents of the transaction.
E.G. The customer wants to withdraw €10,00. You make a transaction with sum €10,50
and give the customer €10,00.
NB: You are only allowed to withdraw cash with a bank card. To be
able to withdraw cash, you must conclude an agreement with your
bank.
Press MENU F1.
Select CASH WITHDRAW.
ENTER AMOUNT: Enter the amount in euros, including cents, and press Enter.
PLEASE INSERT OR SWIPE CARD: Insert the card in the reader or swipe the card.
VISA / BANK: Select BANK.
ENTER PIN AND PRESS ENTER: If the card is a chip card, the customer enters the PIN
code and presses Enter.
The terminal prints the receipts. The first receipt is for the merchant, the second one is
for the customer. If the transaction has been confirmed with a PIN code, the customer
need not sign the receipt.
The terminal reminds the salesperson to check the identity of anyone whose receipt
total exceeds €50.00, depending on card type. Press Enter and check the customer’s
identity. On the receipt, write the last four digits of the customer’s identity number and
indicate how you checked the identity.
5.3 Extra / Tip
Extra is used e.g. in restaurants so that the customer can leave a tip for the waiter.
The Extra function is activated in the Settings menu (page 18).
Options:
NO = Extra function not activated
ONLY BEFORE = The extra amount is given during the transaction.
ONLY AFTER = A line labelled Extra is printed on the receipt, and the extra amount is
entered separately in the terminal.
UNRESTRICTED = The terminal asks for Extra during the transaction, and an Extra line
is also printed on the receipt.
NB: If the customer pays with a chip card, Extra can only be given
during the transaction.
To enter extra in the terminal separately:
An amount has been written on the receipt on the Extra line. The amount must be
entered in the terminal separately during the same day.
Press MENU F1.
Select EXTRA AMOUNT.
ENTER RECEIPT NUMBER: The terminal shows the number of the latest receipt as
default. Press Enter to accept it, or enter another receipt number and press Enter.
EXTRA: Enter the amount and press Enter.
The terminal prints a receipt.
5. SPECIAL FUNCTIONS
22 23

5. SPECIAL FUNCTIONS5. SPECIAL FUNCTIONS
5.4 VAT
When you are making a transaction, the terminal asks you for the VAT rate. The vat
percentage is calculated on the receipt.
The VAT function is activated in the Settings menu (page 18).
5.5 Mandatory authorization
If mandatory authorization has been activated, the terminal verifies all transactions
automatically irrespective of the amount or card type.
Mandatory authorization is activated in the Settings menu (page 18)
5.6 Preauthorization
Preauthorization is a function that can be used to make sure the card is valid.
Preauthorization is activated in the Settings menu (page 18).
Press MENU F1.
Select PREAUTHORIZATION.
PLEASE INSERT OR SWIPE CARD: Insert the card in the reader or swipe the card.
VISA / BANK: Select BANK.
ENTER AMOUNT: The terminal suggests EUR 1. Press Enter.
ENTER PIN AND PRESS ENTER: If the card is a chip card, the customer enters the PIN
code and presses Enter.
The terminal contacts the authorization centre, makes a cover reservation, and
cancels it.
5.7 Invoice
The invoice works the same way as cash receipt. The only difference is that text
Invoice is printed on the receipt.
To issue an invoice:
Press MENU F1.
Select INVOICE.
Select INVOICE.
ENTER AMOUNT: Enter the amount in euros, including cents, and press Enter.
The terminal prints the receipts.
To void an invoice:
Press MENU F1.
Select INVOICE.
Select VOID INVOICE.
ENTER AMOUNT: Enter the amount in euros, including cents, and press Enter.
The terminal prints the receipts.
5.8 Multi cashier
When you use multi cashier the terminal asks for CASHIER NUMBER. You can enter
here any value from between 1–99. This is printed on the receipt. You can use the
multi cashier version for example in a restaurant to separate servers.
Multi cashier has to be activated from the SETTINGS menu (page 18).
24 25

7. TROUBLESHOOTING6. ADDITIONAL FUNCTIONS
6.1 Version for multiple users
Sonera Payment Terminal Service also includes a function for multiple users. This
function is useful when many entrepreneurs have to use the same payment terminal or
when payment transactions must be directed to different accounts.
To print the list of users:
Press FUNC.
Select PRINT PARAMETERS and MULTIPLE USERS.
The terminal prints a list of the terminal users. The list shows their user numbers,
receipt texts, and member shop numbers.
To make a payment transaction:
Enter amount: Enter the amount in euros, including cents, and press Enter. PLEASE
INSERT OR SWIPE CARD: Insert the card in the chip card reader or swipe the
magnetic stripe.
USER: Enter the user number and press Enter.
DEBIT / CREDIT: Select the payment method.
ENTER PIN AND PRESS ENTER: The customer enters the PIN code and presses
Enter.
The terminal prints the receipts. The first receipt is for the merchant, the second one is
for the customer.
If the transaction has been confirmed with a PIN code, the customer need not sign the
receipt. The terminal reminds the salesperson to check the identity of anyone whose
receipt total exceeds €50.00, depending on card type. Press Enter and check the
customer’s identity. On the receipt, write the last four digits of the customer’s identity
number and indicate how you checked the identity.
REMOVE CARD: Remove the card from the reader. Make sure that the card remains in
the reader slot for the entire transaction, or the operation is aborted.
Reports:
Reports are printed just like in the basic version, but the batch report is printed
separately for each user.
The monthly report is not available in the multiple-user version.
7.1 Notifications on the screen
BLACKLIST MISSING A blacklist is missing from the terminal. For
instructions on how to download the blacklist, see
section 2.3.4.
USE MAG CARD The terminal cannot read the chip. Use the
magnetic stripe.
USE CHIP The card has an EMV chip. Use the chip card
reader.
PIN LOCKED The pin code of the card in use has been locked.
It can be unlocked by contacting the card donor or
by using the card on an atm.
APPLICATION LOCKED The application on the card has been locked.
The card holder must contact the card donor.
“JÄSENLIIKENUMERO
PUUTTUU”
Card is not included in the terminals card selection.
It can not be used.
SERVICE NOT ALLOWED FOR
THIS CARD PRODUCT
Card is not included in the terminals card selection.
It can not be used.
7.2 Notifications on the receipt
CONNECTION ERROR The terminal is unable to connect. See section 7.3.
BATCH SENDING ERROR The terminal is unable to connect. See section 7.3.
“PYYTÄMÄÄNNE AINEISTOA EI
OLE”
Is printed on the “Maksupäätepalaute” -section.
The bank does not have information of the previous
batch sending ready. This is normal after weekend
or bank holiday.
“TAPAHTUMATIEDOSTO
PUUTTUU”
Is printed on the “Maksupäätepalaute” -section.
The bank does not have information of the previous
batch sending ready. This is normal after weekend
or bank holiday.
“ERROR FILE NOT EXISTENT” Is printed on the “Maksupäätepalaute” -section.
The bank does not have information of the previous
batch sending ready. This is normal after weekend
or bank holiday.
“OTA YHTEYS NEUVONTAAN” Is printed on the “Maksupäätepalaute” -section.
The request for the return report differs with the
bank. Please, contact your bank.
2726

7.3 Other errors
CONNECTION PROBLEM There is a problem with the connection. Switch
the terminal off and on and try again. If this does
not help, there may be a problem with the ADSL
modem. Switch the modem off and on and try
again. Check whether the Internet connection
is working. If the connection does not work,
contact your broadband service provider. There
may also be a problem with the SIM card or the
GPRS subscription. Contact Sonera’s Technical
Corporate Customer Service.
TERMINAL DOES NOT READ
CARDS
The reader may be stuck. Switch the terminal off
and on and try again. The reader may also be dirty.
Clean it and try again.
POWER IS OFF Check the cables and switch the terminal on by
pressing the power key.
7.4 Maintenance
NB: If you use the terminal via GPRS, take off the SIM card before
you send it to maintenance. The SIM card needs to be transferred
to the new terminal.
You must not repair the terminal yourself. If you suspect or know that the terminal is
broken or damaged, contact Sonera’s Technical Corporate Customer Service.
If Sonera’s Technical Corporate Customer Service asks you to take the device to a
repair shop, do as follows:
1. Send the batch to the bank, see 2.3.3 Batch sending.
2. Pack the terminal so that it is well protected during the transport.
3. Enclose a note explaining what the suspected fault is and whether there are any
payment transactions in the terminal memory, and also give your contact details.
4. You need not send any cables with the terminal unless you want them to be
checked as well.
5. Send the terminal to the repair shop by post. The postage is always paid by the
sender.
Sonera Payment Terminal equipment is maintained by Point Transaction Systems Oy.
Repair shop address:
Point Transaction Systems Oy /
Huolto
Vanha Nurmijärventie 62 D
01670 Vantaa
7. TROUBLESHOOTING 7. TROUBLESHOOTING
28 29

8. TECHNICAL DATA 9. USEFUL CONTACT INFORMATION
Processor: 32-bit, ARM9
Memory: 8MB FLASH, 16MB SDRAM
Display: 128x64 pixel LCD display with LED backlight
Keypad: 10 numerical keys with letters, 8 function keys, 4 display selection keys and 1
on/off key
Reader: Magnetic stripe, 3 tracks, 2-way. Chip cards EMV compatible.
SAM card slots: 3, ISO7816
Connections: Built-in Ethernet and GPRS as a standard feature
Printer: Thermal printer, speed: 20 lines/second.
Width of the paper roll: 58 mm, diameter: 50 mm
Dimensions: Length: 216 mm, Width: 95 mm, Height: 86 mm (including shield)
Weight: 525 g
Sonera Corporate Customer Service
(dial 2) 0200 18818
(Mon–Fri 8:00am–4:30pm)
Sonera’s Technical Customer Service 0206 90801
•technical problems (dial 2)
About Sonera Payment Terminal Service www.sonera.fi/maksupaate
Orders for accessories:
•on the web: www.sonera.fi/maksupaate/hallinta
or
•Point Transaction Systems 09 477 433 43
Authorization centres:
Bank cards 0100 3100
Luottokunta 09 696 4646
American Express 0800 114 646
Diners Club 0800 955 55
Banks:
Handelsbanken 010 444 2545
Nordea 0200 672 10
OP-Pohjola Group 0100 051 51
Sampo 0600 125 25
Savings Banks / Aktia /
Local Cooperative Banks 0100 4050
Ålandsbanken 020 429 2910
3130


Sonera Corporate Customer Service
0200 18818
(mobile call charge / local network charge)
Sonera’s Technical Customer Service
0206 90801 (dial 2)
Table of contents
